Medicinal Herb Garden Checklist for Beginners
Affiliate disclosure: This article may contain affiliate links. If you click through and buy through our internal review page, LivingWithGreens may earn a commission at no extra cost to you.
A medicinal-style herb garden can be a beautiful, practical way to learn about traditional plants, pollinator-friendly growing, seed starting, drying, and simple home apothecary skills. But if you are brand new, it is easy to overbuy supplies, start too many seeds, or forget small details like labels and harvest bags.
This medicinal herb garden checklist is designed for beginners who want an organized, low-stress start. It focuses on gardening, education, and plant familiarity only. It is not medical care, and herbs should not be used for medical claims or disease-related decisions.
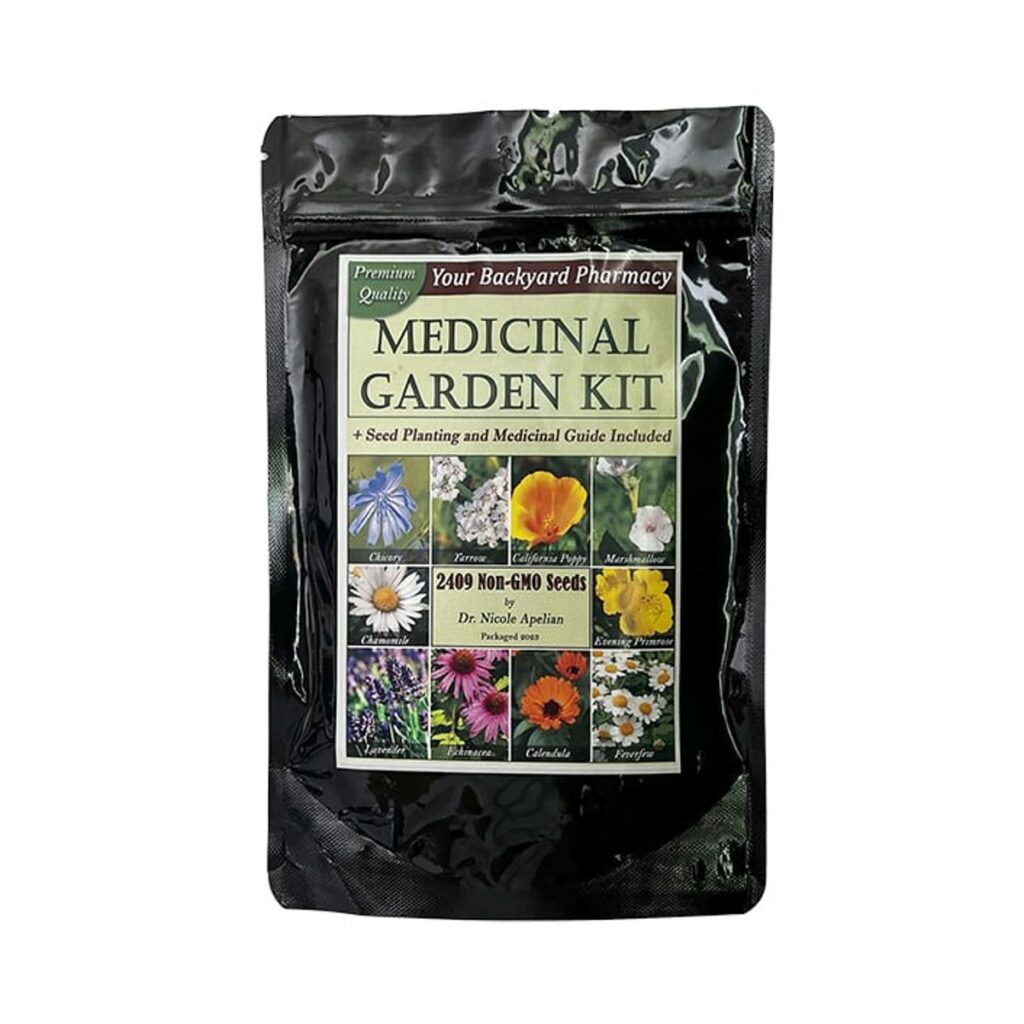
If you are comparing seed bundles and want a ready-made starting point, you can also Read the Medicinal Garden Kit Review before choosing what to plant.
Quick Beginner Checklist
Use this overview first, then read the sections below for details.
- Choose 6 to 10 beginner-friendly herbs instead of planting everything at once.
- Confirm your USDA growing zone and average last frost date.
- Pick a sunny spot with at least 6 hours of light for most herbs.
- Prepare containers, raised beds, or an in-ground bed with well-draining soil.
- Gather seed-starting trays, labels, a watering can, gloves, and pruning snips.
- Keep a garden notebook for planting dates, germination notes, and harvest records.
- Learn each herb’s basic growing preference before sowing seeds.
- Label every pot or row immediately.
- Harvest gently and dry herbs properly for educational crafts and storage.
- Add a safety note to your household: garden herbs are not a substitute for professional medical advice.
1. Choose Your Garden Goal
Before buying seeds, decide what kind of medicinal-style herb garden you want. “Medicinal” in this context means herbs traditionally associated with home gardens, folklore, teas, balms, aromatic bundles, and educational plant study. It does not mean the garden is a pharmacy or a replacement for a clinician.
Your goal might be:
- A tea herb corner with fragrant plants for learning and flavor.
- A pollinator patch with flowering herbs that attract bees and butterflies.
- A seed-saving garden focused on heirloom or non-GMO varieties.
- A family learning garden where children can observe plant life cycles.
- A preparedness-inspired garden for practicing useful growing skills.
Starting with a clear goal keeps the project manageable. For a first season, six to ten herbs are plenty.
2. Pick Beginner-Friendly Herbs
A useful medicinal herb garden checklist starts with plant selection. Look for herbs that are widely grown, well documented in gardening references, and suited to your climate.
Beginner-friendly options often include:
- Calendula for bright flowers and easy seed saving.
- Chamomile for small daisy-like blooms and garden charm.
- Lemon balm for fragrance and vigorous growth.
- Peppermint or spearmint, grown in containers because mint spreads quickly.
- Echinacea for pollinator-friendly flowers.
- Yarrow for a hardy perennial-style garden plant.
- Lavender in warm, well-drained, sunny locations.
- Sage, thyme, and oregano for culinary and traditional herb garden value.
Always check whether a plant is annual, biennial, or perennial in your zone. Some herbs need cold stratification, some germinate slowly, and some are easier from seedlings than seeds.
3. Know Your Growing Zone and Frost Dates
Your growing zone helps you understand winter hardiness. Your frost dates help you time seed starting and transplanting. Search for your USDA zone and your average last spring frost date before planting.
For beginners, this matters because seed packets often say things like “start indoors 6 to 8 weeks before last frost” or “direct sow after danger of frost has passed.” Without those dates, you may plant too early or too late.
Add these notes to your garden notebook:
- USDA growing zone.
- Average last spring frost.
- Average first fall frost.
- Main sun exposure in your garden.
- Soil type or container mix used.
4. Choose Containers, Raised Beds, or In-Ground Planting
You do not need a large yard to begin. Many herbs grow well in containers, especially if you choose the right pot size and drainage.
Containers
Containers are ideal for patios, balconies, renters, and spreaders like mint. Use pots with drainage holes, and avoid letting roots sit in water.
Raised Beds
Raised beds are helpful if your native soil is heavy clay, compacted, or full of weeds. They also make it easier to organize herbs by height and watering needs.
In-Ground Beds
In-ground beds can work beautifully if you have good sun and well-drained soil. Before planting, remove weeds and loosen the top layer of soil without overworking it.
5. Prepare Soil and Compost
Most herbs prefer soil that drains well. Too much rich, soggy soil can make some Mediterranean herbs unhappy. A balanced approach is best: quality potting mix for containers, compost for garden beds, and mulch where appropriate.
Checklist items:
- Organic potting mix for containers.
- Finished compost for raised or in-ground beds.
- Perlite, coarse sand, or grit for herbs that need extra drainage.
- Mulch for moisture stability and weed reduction.
- A simple soil test if you are planting in-ground.
Avoid using garden soil alone in pots because it can compact and drain poorly.
6. Gather Basic Herb Garden Supplies
You do not need a shed full of tools. Start simple and upgrade only when a need appears.
Essential supplies include:
- Seed trays or small starter pots.
- Plant labels and a waterproof marker.
- Seed-starting mix.
- Spray bottle or gentle watering can.
- Gardening gloves.
- Small trowel.
- Pruning snips or clean scissors.
- Harvest basket or paper bags.
- Drying rack, mesh screen, or bundled hanging area.
- Notebook or digital spreadsheet.
Labels are not optional. Many seedlings look similar at first, and unlabeled trays create confusion fast.
7. Create a Simple Planting Plan
Sketch your garden before you plant. Place taller herbs where they will not shade smaller plants. Keep aggressive spreaders in containers. Group plants with similar water and sun needs.
Your plan should include:
- Plant name.
- Location.
- Seed starting date.
- Direct sow or transplant date.
- Expected height and spacing.
- Harvest notes.
For example, mint may go in a separate pot near the kitchen door, while calendula and chamomile may share a sunny bed edge.
8. Start Seeds Carefully
Follow each seed packet rather than using one method for every herb. Some seeds need light to germinate, so they should barely be covered. Others need darkness, warmth, scarification, or a cold period.
Beginner seed-starting tips:
- Moisten seed-starting mix before sowing.
- Sow more than one seed per cell if germination is uncertain.
- Use labels immediately.
- Keep the mix damp, not soaked.
- Provide bright light after germination.
- Thin seedlings if they become crowded.
- Harden off indoor seedlings before transplanting outside.
A ready-made seed kit can reduce decision fatigue, but you still need to follow growing instructions for each herb.
9. Water and Maintain Without Overdoing It
New gardeners often overwater. Check soil moisture with your finger before watering. Containers dry faster than in-ground beds, and small seed trays dry faster than large pots.
Maintenance checklist:
- Check seedlings daily during germination.
- Water gently at soil level when possible.
- Remove weeds early.
- Pinch or prune herbs to encourage bushier growth when appropriate.
- Watch for pests and use garden-safe methods first.
- Keep notes on what thrives and what struggles.
Healthy gardening is mostly observation. A few minutes a day helps you catch problems early.
10. Harvest, Dry, and Store Thoughtfully
Harvesting is part of the learning process. Use clean scissors, harvest from healthy plants, and avoid taking too much at once. A common beginner rule is to take no more than one-third of a plant at a time, though specific herbs vary.
For drying:
- Harvest on a dry day after dew has evaporated.
- Remove damaged leaves.
- Bundle stems loosely or use a drying screen.
- Dry in a warm, shaded, well-ventilated area.
- Store fully dry herbs in labeled jars away from heat and light.
Label jars with plant name, harvest date, and garden location. This keeps your educational records clear.
Medical and Household Safety Notes
Herbs can interact with medications, allergies, pregnancy, breastfeeding, medical conditions, and surgeries. Some plants are not safe for children, pets, or certain individuals. Do not ingest or apply herbs for medical purposes without guidance from a qualified healthcare professional.
If you are growing with children, teach plant identification and the rule that no garden plant is eaten without adult approval.
Should You Use a Medicinal Garden Kit?
A kit can be helpful if you want curated seeds and a clearer starting point. It may save time compared with researching and buying every seed packet separately. However, a kit is still a gardening product, not a medical solution. You are responsible for learning your climate, planting requirements, and safe handling.
If you want to compare what is included and whether it fits a beginner herb garden, Read the Medicinal Garden Kit Review.
FAQ
What is the most important item on a medicinal herb garden checklist?
Labels are surprisingly important. Without labels, seedlings become difficult to identify, and your garden notes lose value. Good soil, drainage, sunlight, and safe plant research are also essential.
How many herbs should a beginner start with?
Six to ten herbs is a realistic first-season range. It gives you variety without creating too much watering, transplanting, harvesting, and drying work.
Can I grow a medicinal herb garden indoors?
Some herbs can grow indoors with strong light, proper drainage, and airflow. However, many herbs perform better outdoors in full sun. A sunny balcony or patio can be a good middle ground.
Are medicinal herbs safe to use at home?
Herbs are plants with active compounds and individual safety considerations. Grow them for gardening and education, and speak with a qualified healthcare professional before using herbs in relation to health conditions, medications, pregnancy, or children.
Do I need a kit to start?
No. You can buy seeds individually. A kit may be convenient if you want a curated selection and a simple starting point for an educational herb garden.
Final Thoughts
A beginner medicinal-style herb garden is less about having every famous plant and more about building practical skills: sowing, labeling, observing, harvesting, drying, and keeping good notes. Start small, choose herbs suited to your space, and treat the garden as an educational project.
With this medicinal herb garden checklist, you can avoid common beginner mistakes and create a garden that is organized, useful, and enjoyable throughout the season.