Category: Healthy Snacks

  • Savory Roasted Chickpeas: 5 Crunchy Flavors for an Easy Afternoon Snack

    Savory Roasted Chickpeas: 5 Crunchy Flavors for an Easy Afternoon Snack

    This article contains affiliate links. We may earn a commission if you buy through them, at no extra cost to you.

    Savory Roasted Chickpeas: 5 Crunchy Flavors for an Easy Afternoon Snack

    Meta description: A reliable roasted chickpeas recipe for the oven or air fryer, plus five seasoning blends: smoky BBQ, ranch, cinnamon sugar, curry, and salt and vinegar.

    A can of chickpeas can become a crunchy, inexpensive snack with very little effort. This roasted chickpeas recipe gives you one dependable method for the oven or air fryer, five seasoning blends, and tips for storing and re-crisping. If you want more ideas to round out your snack rotation, browse our [healthy snack ideas]([VERIFY: insert pillar article URL]).

    How to Make Roasted Chickpeas (Quick Answer)

    Drain and rinse canned chickpeas, then dry them thoroughly. Toss them with a little oil and salt and roast in a single layer until crisp, using either an oven or an air fryer. Season delicate or sugary blends after cooking so they don't burn.

    Note: Times and temperatures vary by appliance, so check early. Look for a deep golden color and a dry, hollow rattle when you shake the pan.

    Key Takeaways

    • Dry the chickpeas well. This matters more than any other step.
    • Use a single layer and only a light coat of oil.
    • Add sugary or fine herb seasonings after roasting.
    • Let the chickpeas cool completely before judging crispness.
    • Store them airtight and re-crisp briefly in the oven or air fryer.

    Ingredients and Equipment

    Ingredients (for one batch):

    • One 15-oz can chickpeas, drained and rinsed. Dried chickpeas that you've fully cooked and drained also work.
    • 1–2 tablespoons neutral oil, such as olive or avocado
    • About ½ teaspoon salt, adjusted to taste

    Equipment:

    Why Drying Chickpeas Matters

    Surface moisture turns to steam in the heat, and steam gives you chewy chickpeas instead of crisp ones. A dry surface also helps the oil and seasoning cling, so each chickpea browns evenly and tastes seasoned rather than patchy.

    How to Dry Them

    1. Rinse, shake, and pat. Rinse the chickpeas in a colander, shake off the water, then pat them dry with a towel. 2. Optional air-dry. Spread them on a towel for a while. As they dry, rub them gently to loosen any loose skins, then discard the skins. 3. Dry again before oiling. Give them one last pat right before you add oil, since they can pick up moisture while they sit.

    Step-by-Step Method

    Oven Method

    1. Preheat the oven to 400°F (a starting point, so adjust for your oven). 2. Dry the chickpeas thoroughly. 3. Toss them with oil and salt in a bowl. 4. Spread them in a single layer on a rimmed baking sheet. 5. Roast, shaking the pan partway through. Start checking around 20 minutes and keep going if needed. 6. Turn off the oven and let the chickpeas cool on the pan to finish crisping.

    Doneness cue: They should look deep golden, feel dry, and rattle on the pan. If they still feel soft in the center, return them to the oven for a few more minutes.

    Air-Fryer Method

    1. Prep the chickpeas the same way: rinse, dry well, then toss with oil and salt. 2. Cook in a single layer at 375–390°F. 3. Shake the basket often. Start checking after about 10 minutes. 4. If the basket is crowded, cook in batches. 5. Cool completely before tasting.

    Tips for Extra Crunch

    • Don't overcrowd the pan. Crowding traps steam.
    • Use only a light coat of oil. Too much makes chickpeas greasy rather than crisp.
    • Cool completely before judging crispness. Chickpeas firm up as they cool.

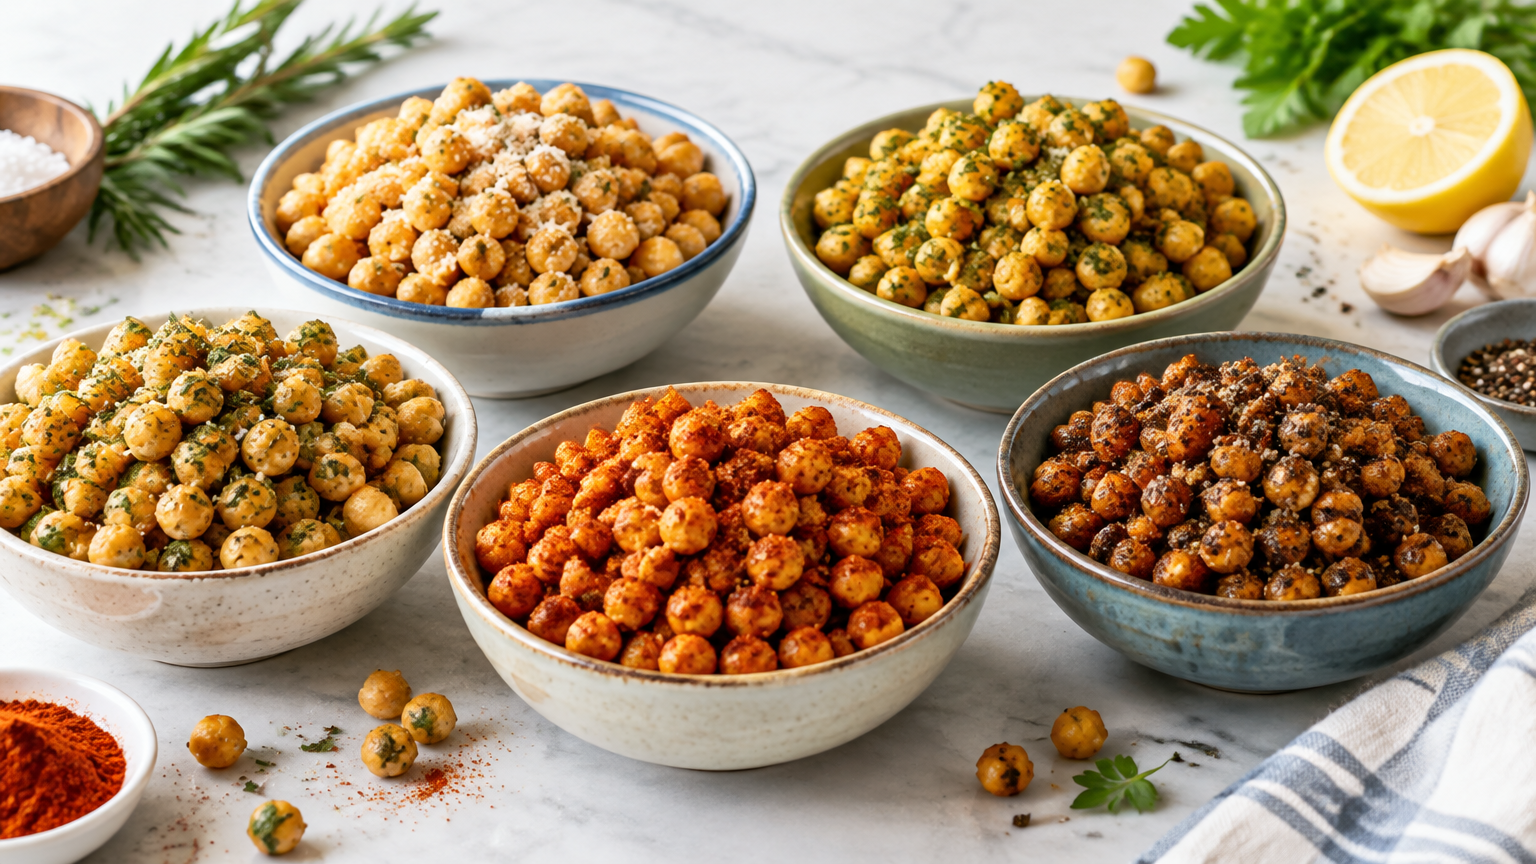
    5 Seasoning Blends for Roasted Chickpeas

    Each blend below is enough for one batch (about one 15-oz can). Treat the amounts as starting points and adjust to taste.

    1. Smoky BBQ

    • 1 teaspoon smoked paprika
    • ½ teaspoon garlic powder
    • ½ teaspoon onion powder
    • ½ teaspoon chili powder
    • 1 teaspoon brown sugar (optional)
    • Salt to taste

    Tip: If you include brown sugar, toss the chickpeas with the spices after roasting to avoid scorching. Without sugar, you can add the spices before roasting.

    2. Ranch

    • 1 teaspoon dried dill
    • 1 teaspoon dried parsley
    • 1 teaspoon dried chives
    • ½ teaspoon garlic powder
    • ½ teaspoon onion powder
    • ¼ teaspoon black pepper
    • Salt to taste

    Tip: Toss while the chickpeas are still warm so the herbs stick.

    3. Cinnamon Sugar

    • 1 tablespoon sugar
    • ½ teaspoon cinnamon
    • Pinch of salt

    Tip: Roast the chickpeas plain with a little oil, then toss with the cinnamon sugar while they're warm. This is the sweet option in an otherwise savory lineup.

    4. Curry

    • 2 teaspoons curry powder
    • ½ teaspoon cumin
    • ½ teaspoon garlic powder
    • Salt to taste
    • Pinch of cayenne (optional)

    You can toss these spices with the chickpeas and oil before roasting. Watch the color near the end, since ground spices can darken quickly.

    5. Salt and Vinegar

    • Roast the chickpeas with salt.
    • Finish with a light vinegar toss (about 1–2 teaspoons), or use vinegar powder if you have it.
    • Dry briefly or return to the oven for a few minutes.

    Tip: Liquid vinegar adds moisture, so use it sparingly and add it at the end.

    Flavor Comparison

    Blend Taste profile When to add
    Smoky BBQ Smoky, slightly sweet Before (no sugar) or after (with sugar)
    Ranch Herby, savory After, while warm
    Cinnamon Sugar Sweet, warm After, while warm
    Curry Warm and spiced Before or after
    Salt and Vinegar Tangy Vinegar at the end

    How to Store Roasted Chickpeas

    • Cool completely first. Storing warm chickpeas traps steam and softens them.
    • Use an airtight container at room temperature. If they still seem to be releasing moisture, keep the lid loose for the first several hours.
    • Expect some softening over time, especially in humid air or with wet seasonings like vinegar.
    • Safety note: If they look or smell off, discard them.

    How to Re-Crisp Roasted Chickpeas

    • Oven: Spread them on a sheet pan and warm briefly at moderate heat.
    • Air fryer: Heat for a few minutes, shaking the basket.
    • Let them cool before eating. They crisp up as they cool.

    Serving Ideas

    Eat them by the handful, or scatter them over salads, soups, and grain bowls. The cinnamon sugar version works well on yogurt bowls.

    They're also portable and desk-friendly, so they fit right into our roundup of [easy work snacks]([VERIFY: insert work snacks article URL]). Because chickpeas are an inexpensive pantry ingredient, they also belong on a list of [budget-friendly snacks]([VERIFY: insert budget snacks article URL]).

    Roasted Chickpeas FAQs

    Why aren't my roasted chickpeas crispy?

    The usual causes are chickpeas that weren't dried well, a crowded pan, or too short a cook time. Also make sure you let them cool before testing, since they're softer when hot.

    Can I use dried chickpeas instead of canned?

    Yes. Cook them fully, drain them, and dry them thoroughly before oiling.

    How long do roasted chickpeas stay crunchy?

    They're best fresh and gradually soften. Store them airtight and re-crisp as needed. I haven't tested a specific shelf life, so I won't promise one.

    Conclusion

    Dry the chickpeas well, roast them in a single layer, season according to the blend, and store them airtight. Pick one flavor to try first, then explore more ideas in our [healthy snack ideas]([VERIFY: insert pillar article URL]).

    Note: Internal link URLs and affiliate link destinations are placeholders and need to be supplied before publishing.
  • Cheap Plant-Based Snacks: 18 Budget Afternoon Snacks Under 1 Dollar a Serving

    Cheap Plant-Based Snacks: 18 Budget Afternoon Snacks Under 1 Dollar a Serving

    This article contains affiliate links. We may earn a commission if you buy through them, at no extra cost to you.

    Cheap Plant-Based Snacks: 18 Budget Afternoon Snacks Under 1 Dollar a Serving

    Meta description: Looking for cheap healthy snacks on a budget? Try 18 plant-based afternoon snacks made from beans, oats, popcorn, bananas, carrots, peanut butter and frozen fruit, each with an estimated cost per serving.

    You can make cheap healthy snacks on a budget by building them from low-cost staples (dried or canned beans, rolled oats, popcorn kernels, bananas, carrots, peanut butter, frozen fruit) and buying and storing them to avoid waste. Many servings can come in under $1, though prices vary. The cost figures below are estimates only. For a wider look at saving money, see our [complete guide to budget plant-based eating]([insert pillar URL]).

    Key Takeaways

    • Build each snack on one cheap base, then add a protein or fat and a flavor.
    • Popcorn kernels, oats and bananas are often the lowest-cost bases, but check your local unit prices.
    • Buying staples in bulk and storing them properly cuts waste, which cuts cost.
    • Every price here is a working estimate, so swap in your own numbers.

    How We Estimated Cost Per Serving

    The formula is simple: package price ÷ number of servings, added up across every ingredient in the snack.

    • Prices vary by store, brand and region. Replace our estimates with your local prices. [VERIFY: confirm the date and region the estimates were checked before publishing.]
    • Compare unit prices. Use the per-ounce or per-pound price on shelf tags to compare sizes and brands.
    • Pantry items like cinnamon, salt and oil are counted as minimal or excluded.

    Quick Answer: Cheapest Staples for Cheap Healthy Snacks on a Budget

    Staple Typical serving Why it's budget-friendly
    Popcorn kernels 2–3 Tbsp kernels Small amount of dry kernels makes a large bowl
    Rolled oats ½ cup dry Sold in large containers; used in many recipes
    Bananas 1 medium Usually sold by the pound; freeze when ripe
    Carrots 1 medium Often sold in large bags; versatile raw or roasted
    Dried or canned beans ½ cup cooked Stretch into dips, mashes and roasted snacks
    Peanut butter 1–2 Tbsp One jar covers many servings
    Frozen fruit ½ cup Keeps well and limits spoilage

    For balanced snacking, pair a carb with protein or fiber, such as a banana with peanut butter or carrots with a bean dip. These pairings tend to keep you satisfied longer.

    18 Budget Plant-Based Afternoon Snacks

    All costs are estimated per serving. [VERIFY: confirm all figures against current local prices.]

    Bean Snacks

    1. Roasted chickpeas: Drain and dry canned chickpeas, toss with a little oil and salt, and roast until crisp. Est. $0.30 2. White bean dip with carrot sticks: Blend white beans with lemon, garlic and a little oil, then serve with carrots. Est. $0.45 3. Black bean and corn salsa cup: Mix black beans, frozen or canned corn, lime and chopped onion in a cup. Est. $0.55 4. Spiced black bean mini mash on toast or crackers: Mash beans with cumin and salt, then spread. Est. $0.40

    Oat Snacks

    5. No-bake peanut butter oat bites: Stir oats, peanut butter and a sweetener, then roll into balls and chill. Est. $0.35 6. Two-ingredient banana oat cookies: Mash a ripe banana with oats, scoop, and bake. Est. $0.25 7. Overnight oats jar: Soak oats in plant milk or water with cinnamon overnight. Est. $0.45 8. Baked oat cups with frozen fruit: Combine oats, mashed banana and frozen fruit in a muffin tin, then bake. Est. $0.50

    Popcorn Snacks

    9. Stovetop popcorn with salt: Heat kernels with a little oil in a covered pot, shaking often. Est. $0.15 10. Cinnamon popcorn: Toss warm popcorn with cinnamon and a pinch of sugar. Est. $0.17 11. Chili-lime popcorn: Add chili powder, salt and lime zest or juice. Est. $0.25

    Banana Snacks

    12. Banana slices with peanut butter: Slice and drizzle or dip. Est. $0.40 13. Frozen banana "nice cream": Blend frozen banana slices until creamy. Est. $0.30

    Carrot Snacks

    14. Carrot sticks with peanut dipping sauce: Whisk peanut butter with water, lime and a dash of soy sauce. Est. $0.35 15. Roasted carrot "fries": Cut into sticks, toss with oil and salt, and roast until browned. Est. $0.25

    Frozen Fruit Snacks

    16. Frozen fruit and banana smoothie: Blend frozen fruit, banana and water or plant milk. Est. $0.60 17. Frozen fruit oat bowl: Warm oats and top with thawed frozen fruit. Est. $0.60 18. Quick fruit compote over toast or oats: Simmer frozen fruit with a splash of water until jammy, then spoon over. Est. $0.55

    How to Build a Snack Under $1 (Practical Steps)

    1. Pick one base: oats, popcorn, banana, carrots or beans. 2. Add a protein or fat: peanut butter or beans work well. 3. Add flavor: cinnamon, spices, citrus or frozen fruit. 4. Portion into single servings so you don't overeat or overspend. 5. Calculate cost per serving with the formula above, and adjust ingredients if you're over budget.

    Example: A banana (about one serving) plus 1 tablespoon of peanut butter. Divide each package price by its number of servings, then add the two numbers.

    Bulk-Buying and Storage Tips to Cut Waste

    What to Buy in Bulk

    Dried beans, rolled oats, popcorn kernels, peanut butter and frozen fruit are good candidates. They keep well and tend to have a lower unit price in larger sizes. Only buy bulk amounts you'll realistically use.

    Storage Basics

    • Oats and popcorn kernels: Keep them in airtight containers for dry pantry staples in a cool, dry place.
    • Cooked beans: Refrigerate or freeze in single-serving portions.
    • Ripe bananas: Peel and freeze them for smoothies, nice cream and baking.
    • Carrots: Follow package or produce guidance and keep them dry.
    • Frozen fruit: Keep bags tightly sealed to limit freezer burn.

    Waste-Reduction Habits

    • Label containers with dates.
    • Rotate older items to the front.
    • Plan snacks around what's ripening, such as spotty bananas becoming oat cookies.

    Plan Ahead: Snack Meal Prep

    Batching saves time and prevents impulse spending. Our [plant-based snack meal prep guide]([insert URL]) goes deeper, but a simple start is to make a batch of bean dip, roll a tray of oat bites, and portion popcorn kernels or popped popcorn into bags or jars for the week. A set of reusable containers for portioning snacks can make grab-and-go easier.

    Frequently Asked Questions

    What are the cheapest healthy snacks on a budget?

    Oats, popcorn kernels, bananas, carrots, beans, peanut butter and frozen fruit are commonly low-cost options. Check local unit prices, since they vary by store and region.

    How can I make plant-based snacks more filling without spending more?

    Pair fiber-rich foods with beans or peanut butter, such as carrots with white bean dip or oats with a spoonful of peanut butter. Keep portions practical.

    Is it cheaper to buy dried or canned beans?

    Dried beans are often cheaper per serving but need cooking time. Canned beans are convenient. Compare unit prices locally to decide.

    Conclusion

    Cheap healthy snacks on a budget come down to a few staples, simple pairings and smart storage. Pick three snacks from this list to try this week, such as stovetop popcorn, banana oat cookies and white bean dip with carrots, and track your own cost per serving. For more ways to stretch your grocery dollars, read our [complete guide to budget plant-based eating]([insert pillar URL]).

    Cost figures are estimates and are not verified prices. Prices vary by store, brand and region.

  • Cheap Plant-Based Snacks: 18 Budget Afternoon Snacks Under 1 Dollar a Serving

    Cheap Plant-Based Snacks: 18 Budget Afternoon Snacks Under 1 Dollar a Serving

    This article contains affiliate links. We may earn a commission if you buy through them, at no extra cost to you.

    Cheap Plant-Based Snacks: 18 Budget Afternoon Snacks Under 1 Dollar a Serving

    Suggested URL slug: /cheap-healthy-snacks-on-a-budget

    You can make cheap healthy snacks on a budget from low-cost staples: dried or canned beans, oats, popcorn kernels, bananas, carrots, peanut butter, and frozen fruit. Most of the snacks below should land well under $1 per serving, depending on your store and region. All costs here are estimates, and prices vary by store, brand, and region. For the bigger picture, see our pillar guide to plant-based budget eating.

    Key Takeaways

    • Seven staples cover all 18 snacks, so one shopping trip goes a long way.
    • Pair a filling base (oats, beans, banana) with a little peanut butter or beans for staying power.
    • Bulk buying only saves money if you store food well and actually eat it.
    • Check your own receipts. Your cost per serving is the number that counts.

    How We Estimated Cost Per Serving

    Simple formula

    Divide the package price by the number of servings it contains, then add any extras such as salt, oil, or spices. For example, if a bag of oats costs a certain amount and holds 15 servings, divide the price by 15. Then add a few cents for cinnamon or a drizzle of oil.

    Cost key used in this article

    • $ = under $0.35 per serving (estimate)
    • $$ = $0.35 to $0.65 per serving (estimate)
    • $$$ = $0.65 to $1.00 per serving (estimate)

    Disclaimer: These tiers are estimates, not quoted prices. Prices vary by store and region, so plug in your own receipt prices. Prep times are approximate and don't include soaking dried beans.

    18 Cheap Healthy Snacks on a Budget for the Afternoon

    Bean Snacks

    1. Roasted chickpeas ($$, about 30 minutes): Drain and dry canned chickpeas, toss with a little oil and salt, and roast until crisp. 2. White bean spread on toast ($$, 10 minutes): Mash white beans with lemon, salt, and a splash of oil, then spread on toast. 3. Seasoned black beans with salsa ($$, 5 minutes): Warm black beans with chili powder and top with salsa. Eat with a spoon or with tortilla chips.

    Oat Snacks

    4. No-bake peanut butter oat bites ($$, 10 minutes plus chilling): Mix oats and peanut butter with a sweetener of your choice, roll into balls, and chill. 5. Two-ingredient banana oat cookies ($, 20 minutes): Mash a ripe banana, stir in oats, scoop onto a tray, and bake. 6. Overnight oats in a jar ($, 5 minutes plus overnight): Combine oats with water or plant milk, add cinnamon, and refrigerate.

    Popcorn Snacks

    7. Stovetop popcorn with salt ($, 10 minutes): Heat kernels with a little oil in a covered pot, shaking until the popping slows. 8. Cinnamon popcorn ($, 10 minutes): Toss fresh popcorn with cinnamon and a pinch of sugar. 9. Savory spiced popcorn ($, 10 minutes): Season with chili powder or garlic powder and salt.

    Banana Snacks

    10. Frozen banana peanut butter bites ($$, 10 minutes plus freezing): Sandwich peanut butter between banana slices and freeze on a tray. 11. Banana "nice cream" ($, 5 minutes): Blend frozen banana slices until creamy and soft-serve-like. 12. Peanut butter banana toast ($$, 5 minutes): Spread peanut butter on toast and top with sliced banana.

    Carrot Snacks

    13. Carrot sticks with bean dip ($$, 10 minutes): Blend beans with lemon, garlic powder, and salt for a dip, then serve with raw carrot sticks. 14. Roasted carrot "fries" ($, 30 minutes): Cut carrots into sticks, toss with oil and salt, and roast until browned at the edges.

    Peanut Butter Snacks

    15. Peanut dipping sauce for raw veggies ($$, 5 minutes): Whisk peanut butter with warm water, lemon, and a little chili powder. Serve with carrots or other raw vegetables. 16. Cinnamon peanut butter toast ($$, 5 minutes): Spread peanut butter on toast and dust with cinnamon.

    Frozen Fruit Snacks

    17. Frozen fruit and oat smoothie ($$, 5 minutes): Blend frozen fruit with oats and water or plant milk. 18. Warm frozen fruit compote over oats ($$, 10 minutes): Simmer frozen fruit until soft and spoon it over cooked oats.

    Quick-Reference Table

    Snack group Main ingredients Typical tier (est.) Prep time
    Bean snacks (1–3) Beans, bread, salsa, spices $$ 5–30 min
    Oat snacks (4–6) Oats, peanut butter, banana $–$$ 5–20 min plus chill or soak
    Popcorn snacks (7–9) Kernels, oil, spices $ About 10 min
    Banana snacks (10–12) Banana, peanut butter, bread $–$$ 5–10 min plus freezing
    Carrot snacks (13–14) Carrots, beans, oil $–$$ 10–30 min
    Peanut butter and frozen fruit (15–18) Peanut butter, frozen fruit, oats $$ 5–10 min

    How to Build a Cheap Afternoon Snack in 4 Steps

    1. Pick a base. Choose beans, oats, popcorn, banana, or carrot. 2. Add protein or fat. A spoonful of peanut butter or a scoop of beans helps keep you full. 3. Add flavor cheaply. Cinnamon, salt, chili powder, garlic powder, and lemon cost very little per serving. 4. Portion into servings. Measure or pre-portion so your cost and quantity are clear.

    For example, carrot sticks (base) plus a bean dip (protein) plus lemon and garlic powder (flavor), divided into four containers, gives you a snack with a cost you can calculate.

    Bulk-Buying Tips to Save Money

    What buys well in bulk

    Dried beans, oats, popcorn kernels, peanut butter, and frozen fruit are good candidates. They are shelf-stable or freezer-friendly, and you can use them across many of the snacks above.

    Compare unit prices

    Check the price per ounce or per pound instead of the package price. A bigger package isn't always cheaper per unit, so compare on the shelf label or with your phone's calculator.

    Choose store brands and larger bags when you'll use them in time

    Store brands are often priced lower for similar staples, though this varies. A larger bag only saves money if you finish it before it goes stale or gets freezer-burned.

    Buy only what you can store and eat

    Cheap food you throw away isn't cheap. Start with one or two larger purchases and add more as you learn how fast you use them.

    Storage Tips to Cut Food Waste

    • Dry goods: Keep oats, dried beans, and popcorn kernels in airtight containers in a cool, dry place.
    • Cooked beans: Refrigerate or freeze in snack-size portions so you can thaw just what you need.
    • Bananas: Freeze ripe ones peeled and sliced, ready for nice cream, bites, or smoothies.
    • Carrots: Keep them refrigerated and use them promptly. Roast or cook any trimmings instead of tossing them.
    • Frozen fruit: Reseal the bag tightly and portion out only what you need.
    • Peanut butter: Close the lid tightly and follow the storage directions on the label.

    Make It Easier With Prep

    Batch-prepping once a week makes budget snacks easier to stick with. Roast a tray of chickpeas, portion oat bites into a container, slice and freeze bananas, and cut carrots for the week. Ten minutes of setup can save you from an expensive impulse buy at 3 p.m. For a full routine, read our snack meal prep article.

    FAQ

    What are the cheapest healthy snacks to make at home?

    Popcorn kernels, oats, bananas, carrots, and dried beans are typically among the lowest-cost options. Costs vary by store and region.

    How can I make plant-based snacks filling without spending more?

    Combine fiber with protein or fat. Oats with peanut butter or carrots with a bean dip are two easy examples.

    Is it cheaper to buy dried beans or canned beans for snacks?

    Dried beans are often cheaper per serving, but they need soaking and cooking time. Canned beans save time. Compare unit prices at your local store to decide.

    Conclusion

    Cheap healthy snacks on a budget come down to a few habits. Choose a handful of staples, prep in batches, and track your own cost per serving using your receipts. Start with two or three snacks from this list, see how they fit your week, and expand from there.

    Keep going with our pillar guide to plant-based budget eating and our snack meal prep article.

  • Snack Meal Prep: How to Make a Week of Plant-Based Afternoon Snack Boxes

    Snack Meal Prep: How to Make a Week of Plant-Based Afternoon Snack Boxes

    This article contains affiliate links. We may earn a commission if you buy through them, at no extra cost to you.

    Snack Meal Prep Ideas: How to Make a Week of Plant-Based Afternoon Snack Boxes

    By 3 p.m. the energy dip hits, and without a plan the vending machine starts to look good. These snack meal prep ideas fit into one Sunday session and give you five grab-and-go plant-based boxes, with enough variety that you won't eat the same snack all week.

    Key Takeaways

    • Build each box from four parts: something crunchy, creamy, fresh, and filling.
    • Start with the longest-cooking items, then no-cook items, then cutting and portioning.
    • Eat 3-day items early in the week and save 5-day items for Thursday and Friday.
    • Rotate three box templates (2 + 2 + 1) to avoid boredom.

    Quick Answer: How to Meal Prep Five Plant-Based Snack Boxes

    Pick one crunchy, one creamy, one fresh, and one filling item per box. Prep the longest-lasting items first, then the 3-day items. Store dips separately, and pack the most perishable fruit and veggies last. Use the 3-day vs. 5-day guide below to decide what to eat early in the week.

    Step 1: Plan Your Five Boxes

    The Simple Box Formula

    Aim for protein or fiber + crunch + fresh produce + something creamy or sweet. For example: roasted chickpeas (protein), whole-grain crackers (crunch), cucumber slices (fresh), and hummus (creamy). If a box covers all four, it will probably hold you until dinner.

    Choose Three Templates and Repeat Them

    You don't need five different recipes. Pick three templates (see below) and repeat them across the week. This keeps your shopping list short and your prep manageable.

    Step 2: Shopping List

    Tip: Shop your pantry first, then adjust quantities to match five boxes.

    Fresh Produce

    • Carrots
    • Cucumbers
    • Bell peppers
    • Grapes
    • Apples
    • Berries
    • Lemon (for apples and homemade hummus)

    Pantry and Protein

    • Chickpeas (canned or dried)
    • Nuts and seeds
    • Whole-grain crackers
    • Dried fruit
    • Oats (for energy bites)
    • Nut or seed butter
    • Dark chocolate, if desired

    Refrigerated

    • Hummus, or the ingredients to make your own
    • Plant-based yogurt
    • Baked or marinated tofu, if using

    Step 3: Sunday Prep Order

    Working in this order saves time because the oven does the slow work while you handle everything else.

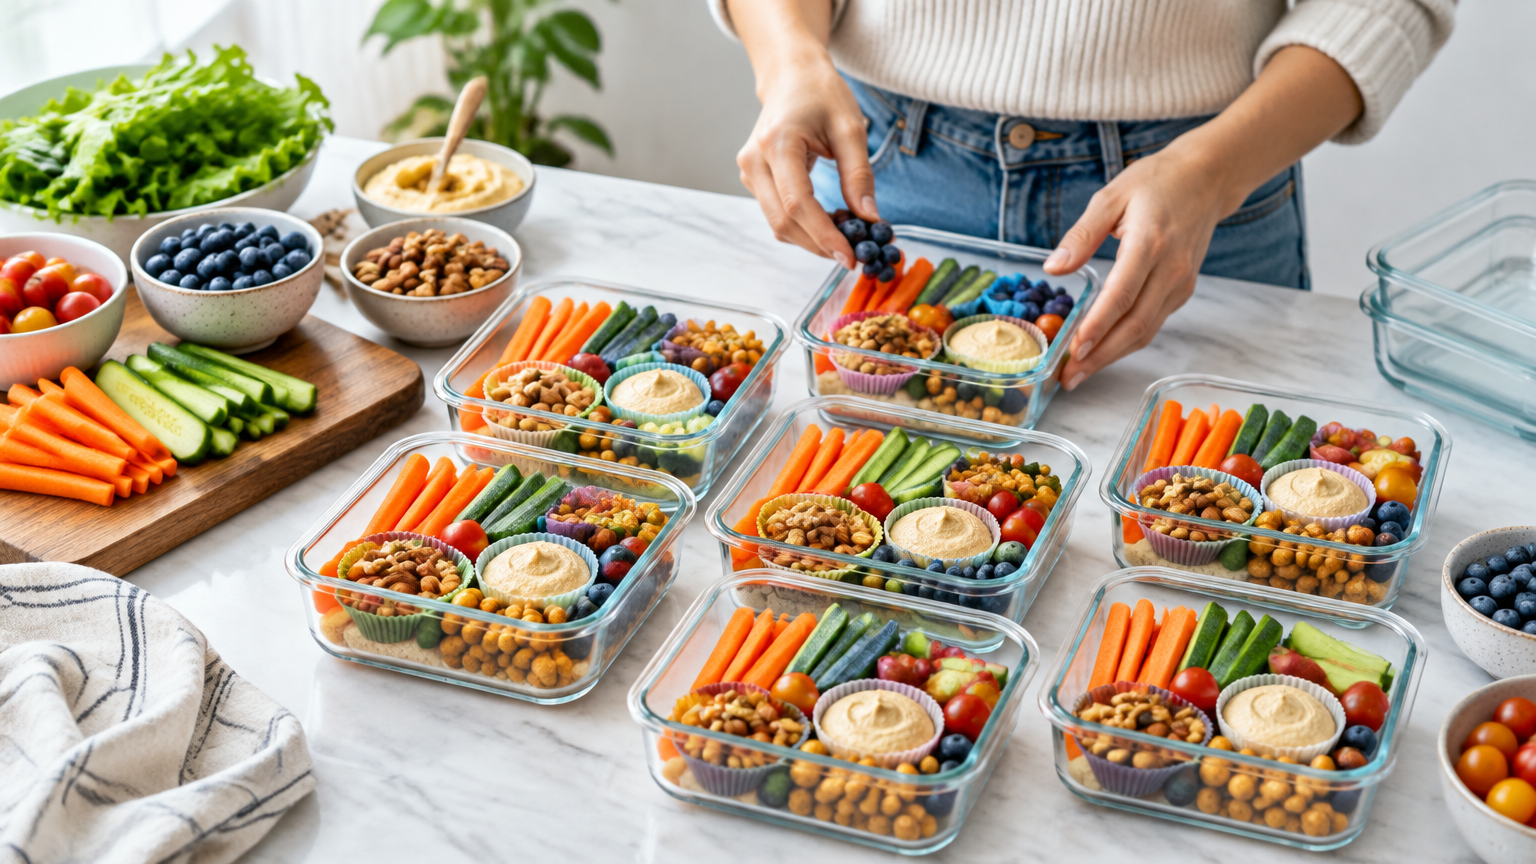
    1. Start anything that cooks unattended. Roasted chickpeas and baked tofu go in first. 2. Make no-cook items while that cooks. Mix energy bites and blend hummus or another dip. 3. Wash and cut sturdy produce. Carrots, cucumbers, and peppers are good candidates. 4. Portion dry items. Divide nuts, crackers, dried fruit, and seeds into small containers or cups. 5. Cool everything fully before packing. Warm food in a closed lid creates condensation and sogginess. 6. Assemble the boxes. Leave the most perishable items, such as cut apples and berries, for last, or pack them the day you eat them.

    Simple Prep Timeline (Approx. 60–90 Minutes, Adjust to Your Pace)

    Time Task
    0:00–0:10 Set out ingredients, preheat oven, wash produce
    0:10–0:20 Season and start roasting chickpeas or tofu
    0:20–0:40 Make dip and energy bites while the oven runs
    0:40–0:55 Cut veggies and fruit, portion dry items
    0:55–1:10 Cool, pack, label with dates
    1:10–1:20 Clean up, then refrigerate

    What Keeps 3 Days vs. 5 Days

    These are general guidelines. Freshness varies with ingredients, fridge temperature, and handling. Check store-bought labels, and discard anything that looks, smells, or tastes off.

    Better for Up to 5 Days

    • Nuts, seeds, dried fruit, and crackers (room temperature, airtight)
    • Energy bites (refrigerated)
    • Whole carrots or sturdy veggie sticks
    • Whole fruit such as apples or oranges, packed uncut

    Best Within 3 Days

    • Homemade hummus or dips
    • Cut fruit and berries
    • Cooked tofu or chickpeas
    • Plant-based yogurt portions
    • Cut cucumbers

    Strategy

    Eat 3-day items Monday through Wednesday. Save 5-day items for Thursday and Friday, or prep a mini second batch midweek. Freezing some items is another option; test a small portion first to see how it holds up.

    Container Tips

    Good containers do a lot of the work. A bento-style container set with dividers is one option, and silicone cups work well inside any box.

    • Use boxes with dividers or silicone cups to keep crunchy items from getting soggy.
    • Pack dips in small leakproof containers.
    • Keep crackers and roasted chickpeas separate from wet items.
    • Cool food completely before closing lids to limit condensation.
    • Pat produce dry after washing.
    • Label each box with the prep date.
    • Pack an ice pack if the box won't be refrigerated at work.

    Three Mix-and-Match Box Templates

    Template 1: Crunch and Dip Box

    Veggie sticks, hummus, whole-grain crackers, and olives or seeds. This is the best choice for early in the week, since the hummus and cut veggies are at their freshest.

    Template 2: Sweet and Satisfying Box

    Energy bites, apple slices or grapes, nut butter or nuts, and a square of dark chocolate. Pack whole apples and slice them the day you eat them, with a squeeze of lemon.

    Template 3: Protein Power Box

    Roasted chickpeas or baked tofu cubes, cherry tomatoes or pepper strips, a handful of nuts, and a piece of fruit. Eat the tofu version earlier in the week.

    Tip: Rotate templates across the week, for example 2 + 2 + 1 (two Crunch and Dip, two Sweet and Satisfying, one Protein Power), to avoid boredom.

    Sample Week

    Day Box
    Monday Crunch and Dip
    Tuesday Protein Power (tofu)
    Wednesday Crunch and Dip
    Thursday Sweet and Satisfying
    Friday Sweet and Satisfying

    Common Mistakes to Avoid

    • Packing wet and crunchy items together. Use dividers or separate containers.
    • Cutting all fruit on Sunday. Cut fruit is a 3-day item at best, so cut it closer to eating.
    • Skipping labels. A date on the lid removes the guesswork.
    • Making too many new recipes at once. Try one new recipe per session and keep the rest simple.

    Pre-Prep Checklist

    • [ ] Pantry checked before shopping
    • [ ] Three templates chosen
    • [ ] Oven preheated and chickpeas or tofu started
    • [ ] Dip and energy bites made
    • [ ] Produce washed, dried, and cut
    • [ ] Everything cooled before packing
    • [ ] Boxes labeled with the date

    FAQs

    How far ahead can I prep snack boxes?

    Prep most boxes on Sunday, keeping the 3-day vs. 5-day guide in mind. Hold back perishable items or prep them midweek.

    How do I keep cut fruit and veggies from getting soggy or brown?

    Dry produce well, use dividers, and add a squeeze of lemon to apples. Consider cutting the most delicate items the night before.

    Can I make these boxes high in protein without animal products?

    Yes. Use chickpeas, tofu, edamame, nuts, seeds, and hummus. Check labels if you need exact nutrition numbers.

    Related Reading

    • Our plant-based meal prep guide [VERIFY: add pillar URL] covers the full weekly system.
    • For snacks that travel well, see plant-based work snacks [VERIFY: add article URL].
    • Want more recipes? Try the plant-based cookbook guide for more snack recipes [VERIFY: add guide URL].

    Conclusion

    Good snack prep comes down to three habits: pick your templates, prep in the right order, and store everything smartly. Put the sturdy items at the end of the week and the delicate ones at the start. Try one Sunday session, swap in your favorite ingredients, and use the links above to find more recipes for next week's boxes.

  • Snack Meal Prep: How to Make a Week of Plant-Based Afternoon Snack Boxes

    Snack Meal Prep: How to Make a Week of Plant-Based Afternoon Snack Boxes

    This article contains affiliate links. We may earn a commission if you buy through them, at no extra cost to you.

    Snack Meal Prep Ideas: How to Make a Week of Plant-Based Afternoon Snack Boxes

    SEO title: Snack Meal Prep Ideas: 5 Plant-Based Snack Boxes in One Sunday Session Meta description: Step-by-step Sunday prep for five plant-based afternoon snack boxes, with a shopping list, prep order, storage times, container tips, and three box templates.

    The 3 p.m. slump tends to end with a scramble for whatever the vending machine offers. These snack meal prep ideas fix that: one Sunday session produces five grab-and-go, plant-based boxes for the week.

    Quick Answer

    To prep a week of plant-based snack boxes, choose a template (crunchy, creamy, sweet), shop once, and prep in order: bake or roast first, make dips and bites while it cooks, chop produce last, then assemble. Store sturdier items for five days and cut produce, dips, and soft items for about three.

    Key Takeaways

    • Use one formula per box: 1 crunch + 1 fresh + 1 creamy or protein + 1 sweet or extra.
    • Start with the oven, fill the waiting time with no-bake tasks, and cut produce last.
    • Eat the three-day items early in the week and save sturdier boxes for Thursday and Friday.
    • Keep wet and crunchy items in separate compartments.

    What You Need Before You Start

    Pick Your Five Boxes

    Choose from the three templates below. You can repeat one template all week or rotate all three. Repeating one simplifies shopping, while rotating keeps things interesting and spreads out the perishable items.

    Equipment Checklist

    • [ ] Sheet pan
    • [ ] Mixing bowls
    • [ ] Knife and cutting board
    • [ ] Small food processor (or a fork and some patience for mashing)
    • [ ] Five compartment containers, or standard containers plus silicone cups
    • [ ] Small lidded dip containers
    • [ ] Paper towels, labels, and a marker

    Shopping List for Five Snack Boxes

    Quantities depend on the templates you pick, so start with the per-box formula: one crunch, one fresh item, one creamy or protein item, and one sweet or extra. Multiply by five and adjust for appetite.

    Crunchy and Shelf-Stable

    • Canned or dried chickpeas
    • Nuts and seeds
    • Whole-grain crackers or rice cakes
    • Popcorn kernels

    Fresh Produce

    • Carrots, cucumber, bell pepper, celery
    • Apples or grapes
    • Berries
    • Citrus (lemons for hummus, or oranges for snacking)

    Creamy and Protein

    • Hummus ingredients (chickpeas, tahini, lemon, garlic) or store-bought hummus
    • Nut or seed butter
    • Edamame
    • Tofu or tempeh, if you want them

    Sweet and Extras

    • Dates and dried fruit
    • Rolled oats
    • Dark chocolate or cocoa
    • Cinnamon
    • Olives, if you like them in your Crunch and Dip box

    Prep Order: What to Make First

    1. Start the oven items. Toss drained, dried chickpeas (or edamame) with oil and seasoning, spread them on the sheet pan, and roast according to your recipe. 2. Make dips and no-bake items while the oven runs. Blend hummus and roll energy bites, for example dates, oats, nut butter, and cocoa. 3. Wash and cut produce, then dry it thoroughly. Moisture shortens the life of cut vegetables and fruit. 4. Portion dry items. Divide nuts, crackers, seeds, and dried fruit into small containers or silicone cups. 5. Cool everything fully, then assemble. Warm food creates condensation, which leads to sogginess. 6. Label each box with the day or an "eat by" date.

    Simple Sunday Prep Timeline

    This is a sample. Adjust it to your pace and recipes.

    Time Task
    0:00–0:10 Set up, wash produce, preheat oven
    0:10–0:20 Prep chickpeas and start roasting
    0:20–0:45 Make hummus and energy bites
    0:45–1:00 Cut and dry vegetables and fruit
    1:00–1:15 Portion dry items; cool roasted items
    1:15–1:30 Assemble boxes, label, refrigerate

    Total time is an estimate and varies with skill level and the recipes you choose.

    What Keeps 3 Days vs. 5 Days

    These are general guidelines only. Follow your recipe's storage guidance, and when in doubt, eat sooner.

    Best for About 5 Days (Sturdier Items)

    • Nuts, seeds, dried fruit, and crackers
    • Whole fruit such as apples or grapes (cut just before eating if possible)
    • Firm veggies such as carrots and celery
    • Energy bites, refrigerated

    Best for About 3 Days (More Perishable)

    • Hummus and other fresh dips
    • Cut cucumber and bell pepper
    • Cut fruit and berries
    • Tofu or tempeh and cooked edamame

    Make Day-Of or Add Late

    • Avocado or guacamole, banana, and anything that browns or softens
    • Roasted chickpeas, if you want them crisp. Keep them separate from moist items.

    Strategy

    Eat the three-day items Monday through Wednesday and save the five-day boxes for Thursday and Friday. You can also freeze energy bites (check your recipe) and thaw them later in the week.

    Container Tips for Fresh, Crunchy Snack Boxes

    • Separate wet from dry. Compartment containers or silicone cups keep dips and fruit away from crackers.
    • Dry produce well. Add a folded paper towel to absorb stray moisture.
    • Pack dips in small lidded containers so they don't migrate.
    • Give crunchy items their own airtight compartment.
    • Choose the right material. Look for leak-resistant, reusable options, and glass or microwave-safe versions if you plan to reheat anything.
    • Use an ice pack if the box travels.
    • Cool food completely before closing lids.

    Three Mix-and-Match Snack Box Templates

    Template 1: Crunch and Dip Box

    Veggie sticks (carrot, celery, bell pepper), hummus, whole-grain crackers, and olives or seeds.

    Template 2: Sweet and Energizing Box

    Apple slices or grapes, nut butter, an energy bite or two, and a small handful of nuts.

    Template 3: Savory Protein Box

    Roasted chickpeas, edamame, cherry tomatoes or cucumber, and a small portion of fruit or dried fruit.

    Formula reminder: 1 crunch + 1 fresh + 1 creamy or protein + 1 sweet or extra.

    Optional swaps for allergies: Use sunflower or pumpkin seeds in place of nuts, and seed butter in place of nut butter. Check labels on crackers, dried fruit, and chocolate for allergens.

    Sample Week

    Day Box Why
    Monday Template 1 Fresh veggies and hummus are at their best
    Tuesday Template 3 Edamame and cut cucumber are still within three days
    Wednesday Template 1 Last day for dips and cut produce
    Thursday Template 2 Whole fruit, nut butter, and bites hold up
    Friday Template 2 Sturdy ingredients carry through

    Common Mistakes to Avoid

    • Packing wet items with crunchy ones. Crackers and roasted chickpeas go soft quickly.
    • Skipping the drying step. Damp produce spoils faster.
    • Assembling while food is warm. Steam turns into condensation.
    • Prepping all five days of delicate items. Cut cucumber, berries, and fresh dips are better kept to the first half of the week.

    FAQ

    How far ahead can I prep plant-based snack boxes?

    Plan on about three days for fresh items and up to five for sturdier ones. Follow your recipe's storage guidance.

    How do I keep roasted chickpeas and crackers from getting soggy?

    Cool them fully, store them in separate airtight compartments, and keep them away from dips and cut produce.

    Can I freeze any snack box components?

    Some, such as energy bites, can be frozen. Check your recipes, and skip freezing fresh cut produce.

    Keep Going: More Snack Ideas

    • Zoom out with our plant-based meal prep guide for the full weekly system.
    • Packing for the office? See plant-based work snacks for desk-friendly options.
    • Want new fillings and flavors? Browse this plant-based cookbook guide for more recipes.

    Conclusion

    Pick your templates, prep in order, and eat the shorter-life items first. Print the shopping list and timeline above, or explore the linked guides to build out your snack rotation.

    [VERIFY: replace PILLAR_LINK and WORK_SNACKS_LINK with the live internal URLs before publishing.]

  • Sweet vs Savory Afternoon Snacks: 20 Plant-Based Ideas for Every Craving

    Sweet vs Savory Afternoon Snacks: 20 Plant-Based Ideas for Every Craving

    This article contains affiliate links. We may earn a commission if you buy through them, at no extra cost to you.

    Sweet vs Savory Afternoon Snacks: 20 Plant-Based Ideas for Every Craving

    Meta description (draft): Browse 20 sweet and savory vegan snacks sorted by craving (crunchy, creamy, chocolatey, salty, fresh), plus simple fiber-and-protein pairing tips.

    The easiest way to choose among sweet and savory vegan snacks is to start with the texture or flavor you want. Then pair a fiber-rich food (fruit, vegetables, whole grains, legumes) with a protein-rich one (nuts, seeds, soy, legumes) so the snack feels more substantial. Below you'll find 10 sweet and 10 savory ideas, plus pairing tips. For more background, see our [plant-based snacking guide]([URL placeholder]).

    Key Takeaways

    • Pick the craving first (crunchy, creamy, chocolatey, salty, or fresh), then choose the snack.
    • Pair a fiber-rich base with a protein-rich add-on for a more satisfying, filling-feeling snack.
    • A little fat, a pinch of salt or spice, and something fresh round out the flavor.
    • Check labels on crackers, chocolate, bread, and pita to confirm they're vegan.

    How to Choose Between Sweet and Savory

    Start with the craving: crunchy, creamy, chocolatey, salty, or fresh

    Texture often decides what sounds good at 3 p.m. Crunchy snacks give you something to bite into. Creamy ones feel soft and comforting. Chocolatey snacks scratch a dessert-like itch. Salty snacks lean toward savory seasoning, and fresh snacks are juicy and bright. Once you know which one you want, the sweet-or-savory choice gets easier.

    Quick decision guide

    • Want something cold and spoonable? Go creamy: coconut yogurt or chia pudding on the sweet side, hummus on the savory side.
    • Want something to crunch on while you work? Choose roasted chickpeas, veggie sticks, or oat-and-almond clusters.
    • Want something light and juicy? Reach for fresh: watermelon, orange segments, cucumber, or cherry tomatoes.
    Craving Sweet idea Savory idea
    Crunchy Cinnamon-roasted chickpeas Smoked paprika chickpeas
    Creamy Coconut yogurt with berries Hummus with carrots
    Chocolatey Cocoa almond butter on rice cakes n/a
    Salty n/a Edamame with flaky sea salt
    Fresh Apple slices with seed butter Cucumber rounds with white bean mash

    10 Sweet Vegan Snacks by Craving

    Crunchy

    1. Cinnamon-roasted chickpeas with a few raisins. Crisp, lightly sweet chickpeas (fiber and protein) with raisins for chewy contrast. 2. Oat-and-almond clusters with sliced pear. Whole-grain oats and almonds (fiber and protein) with juicy pear (fiber).

    Creamy

    3. Coconut yogurt with berries and hemp seeds. Berries bring fiber, and hemp seeds add protein and a nutty crunch. Choose an unsweetened yogurt if you want to control sweetness. 4. Chia pudding with mango and pumpkin seeds. Chia seeds and mango supply fiber, and pumpkin seeds add protein and texture.

    Chocolatey

    5. Frozen banana blended with cocoa powder and peanut butter. A thick, soft-serve-style treat. Banana provides fiber and peanut butter provides protein. 6. Whole-grain rice cakes with cocoa almond butter. A crisp base (whole grain) with a chocolatey almond spread (protein). 7. Dark chocolate squares (dairy-free) with roasted almonds. Check the label to confirm the chocolate contains no milk ingredients. Almonds add protein and fiber. If you'd like to compare options, browse dairy-free dark chocolate choices.

    Fresh

    8. Apple slices with sunflower seed butter. Crunchy apple (fiber) with seed butter (protein), which is also nut-free. 9. Orange segments with pistachios. Juicy citrus (fiber) with shelled pistachios (protein). 10. Watermelon cubes with mint and a sprinkle of sesame seeds. Very refreshing. Sesame seeds add a little protein and crunch.

    10 Savory Vegan Snacks by Craving

    Vegan check: read labels on crackers, bread, and pita, since some contain dairy, eggs, or honey.

    Crunchy

    1. Oven-roasted chickpeas with smoked paprika. Legumes supply both fiber and protein in one crunchy handful. 2. Raw veggie sticks with a handful of tamari almonds. Vegetables bring fiber, and almonds bring protein and salty depth. Check that the tamari is vegan-friendly and, if needed, gluten-free. 3. Baked kale chips with pumpkin seeds. Light, crisp greens (fiber) with pumpkin seeds (protein).

    Creamy

    4. Hummus with carrots and whole-grain pita. Chickpea-based hummus (protein and fiber) with crunchy carrots and a whole-grain scoop. 5. Smashed avocado on seeded toast with white beans. Creamy avocado, seeded bread (fiber), and white beans (protein) on top.

    Salty

    6. Edamame with flaky sea salt. Soybeans provide protein and fiber, and they're easy to eat by the handful. 7. Popcorn with nutritional yeast and a few roasted peanuts. Popcorn is a whole grain (fiber), nutritional yeast adds a savory, cheesy flavor, and peanuts add protein. 8. Olives with whole-grain crackers and cubed baked tofu. Briny olives, whole-grain crackers (fiber), and tofu (protein).

    Fresh

    9. Cucumber rounds topped with white bean mash and dill. Mash beans with lemon juice and a little olive oil for a simple spread. 10. Cherry tomatoes and basil with marinated tofu cubes. Bright, juicy tomatoes (fiber) with tofu (protein) for a light, protein-forward plate.

    Pairing Tips: Combine Fiber and Protein

    A simple formula

    Use a fiber-rich base + protein-rich add-on:

    • Fruit + nut or seed butter
    • Veggies + hummus
    • Whole-grain crackers + tofu or beans

    Pairing this way tends to make a snack feel more satisfying and filling-feeling than either part alone.

    Easy swaps

    • Swap nut butter for sunflower or pumpkin seed butter for nut-free needs.
    • Swap coconut yogurt for soy yogurt if you'd like more protein in a creamy snack.
    • Swap pita for veggie sticks, or crackers for rice cakes, depending on the crunch you want.

    Portion and flavor balance

    Aim for a modest portion of each component. Add a little fat (nuts, seeds, avocado, olive oil), a pinch of salt or spice, and something fresh (citrus, herbs, crisp produce). That combination makes a snack taste complete.

    How to Build Your Own Afternoon Snack (Practical Steps)

    1. Pick your craving. Crunchy, creamy, chocolatey, salty, or fresh. 2. Choose a fiber-rich base. Fruit, raw vegetables, whole-grain crackers, popcorn, or oats. 3. Add a protein-rich partner. Nuts, seeds, tofu, edamame, beans, or soy yogurt. 4. Add flavor or texture. Cinnamon, smoked paprika, lemon or orange zest, herbs, sesame seeds, or a drizzle of tahini. 5. Prep ahead. Wash fruit, portion nuts into small containers, and keep a dip in the fridge. A set of airtight containers for snack prep can make grab-and-go portions easier.

    Quick checklist:

    • [ ] One craving chosen
    • [ ] One fiber-rich food
    • [ ] One protein-rich food
    • [ ] One flavor boost
    • [ ] Labels checked for vegan ingredients

    When you're short on time, try these [vegan snacks you can make in five minutes]([URL placeholder]).

    FAQs

    What are some easy sweet and savory vegan snacks for work?

    Portable options work best: fruit with nut or seed butter, roasted chickpeas, and veggie sticks with hummus.

    How can I make a vegan snack more filling?

    Pair something fiber-rich with something protein-rich, and add a little fat, such as nuts, seeds, or avocado.

    Can I prep these snacks ahead of time?

    Yes. Chia pudding, roasted chickpeas, and dips keep well in the fridge or an airtight container. Cut fruit and avocado are best fresh. Follow standard food-storage guidelines for how long prepared foods should be kept. [VERIFY exact storage times against your local food-safety guidance.]

    Final Thoughts

    Choose a craving, pair fiber with protein, and rotate sweet and savory options so snack time stays interesting. For more ideas, revisit our [plant-based snacking guide]([URL placeholder]) and our list of [vegan snacks you can make in five minutes]([URL placeholder]).

  • Sweet vs Savory Afternoon Snacks: 20 Plant-Based Ideas for Every Craving

    Sweet vs Savory Afternoon Snacks: 20 Plant-Based Ideas for Every Craving

    This article contains affiliate links. We may earn a commission if you buy through them, at no extra cost to you.

    Sweet vs Savory Afternoon Snacks: 20 Plant-Based Ideas for Every Craving

    It's mid-afternoon, your focus is fading, and you're staring into the pantry. Some days you want something sweet. The next day, only something salty and crunchy will do.

    The best sweet and savory vegan snacks combine a fiber source (fruit, vegetables, whole grains, beans, seeds) with a protein source (soy yogurt, nuts, nut butter, chickpeas, edamame, tofu) so the snack feels filling and satisfying. Pick the texture you want, then pair.

    This list builds on our [plant-based snacking guide](PILLAR URL) with 20 ideas sorted by craving.

    Key Takeaways

    • Start with a texture (crunchy, creamy, chocolatey, salty, or fresh), then decide sweet or savory.
    • Pair a fiber-rich base with a plant protein for a more satisfying snack.
    • Chickpeas, nut butters, yogurt alternatives, and fruit work in either direction.
    • Prep a few components ahead so snacking is easy.
    • Check labels and allergens, especially nuts, soy, and sesame.

    How to Choose Your Snack by Craving

    Cravings are often about texture as much as flavor. This guide uses five categories: crunchy, creamy, chocolatey, salty, and fresh. Chocolatey leans sweet and salty leans savory. Crunchy, creamy, and fresh work both ways, so you can season the same base differently depending on your mood.

    Craving Sweet option Savory option
    Crunchy Cinnamon-roasted chickpeas Smoky paprika roasted chickpeas
    Creamy Soy or coconut yogurt parfait Hummus with vegetable sticks
    Chocolatey Chocolate hummus with pear slices Leans sweet
    Salty Leans savory Lightly salted edamame
    Fresh Orange segments with pistachios Cucumber rounds with cashew cream cheese

    10 Sweet Vegan Snack Ideas

    Crunchy

    1. Cinnamon-roasted chickpeas: Toss with cinnamon and roast until crisp. Pair with a few dried apricots for chew. 2. Apple slices with almond butter: Sprinkle with oats or granola for extra crunch.

    Creamy

    3. Soy or coconut yogurt parfait: Layer with berries and chia seeds. Soy yogurt adds more protein than most coconut versions, so check the label. 4. Soy milk chia pudding: Stir chia into soy milk, chill, and top with sliced fruit. 5. Frozen banana "nice cream": Blend frozen banana until smooth and swirl in peanut butter.

    Chocolatey

    6. Cocoa-oat energy bites: Combine dates, nuts, oats, and cocoa, then roll into balls. 7. Dark chocolate squares with roasted almonds: Check that the chocolate is dairy-free. 8. Chocolate hummus: Serve with pear slices or whole-grain crackers.

    Fresh

    9. Orange segments with pistachios: Juicy and crunchy in one bite. 10. Mango-lime cup with pumpkin seeds: Squeeze lime over cubed mango and top with seeds.

    10 Savory Vegan Snack Ideas

    Crunchy

    1. Smoky paprika roasted chickpeas: Season with paprika and a pinch of salt. Pack them in a small container for the afternoon. 2. Seed crackers with white bean spread: Mash white beans with lemon and garlic. 3. Air-popped popcorn with nutritional yeast: Add a handful of edamame on the side.

    Creamy

    4. Hummus with carrot, cucumber, and bell pepper sticks: Cut the vegetables ahead of time. 5. Smashed avocado and white beans on whole-grain toast: Add lemon juice and black pepper.

    Salty

    6. Lightly salted edamame in the pod: Quick to steam, and fun to eat slowly. 7. Olive tapenade on whole-grain toast: Add tofu cubes on the side. 8. Tamari-roasted pumpkin seeds or almonds: Check the tamari label if you avoid gluten.

    Fresh

    9. Cucumber rounds with cashew cream cheese: Top with chopped herbs. 10. Rice paper rolls with crunchy vegetables: Serve with peanut sauce.

    Allergen note: Many of these ideas include nuts, soy, or sesame (hummus often contains tahini). Check every label and swap ingredients as needed, such as seeds for nuts or chickpea-based options for soy.

    Pairing Tips: Fiber + Protein for a Satisfying Snack

    A Simple Formula

    Fiber base + protein partner + optional flavor boost.

    • Fiber base: fruit, vegetables, whole grains, beans, or seeds
    • Protein partner: soy yogurt, nuts, nut butter, chickpeas, edamame, or tofu
    • Flavor boost: spices, citrus, herbs, or cocoa

    Quick Pairing Examples

    • Fruit + nut or seed butter: apple with almond butter, banana with peanut butter
    • Raw vegetables + bean dip: bell pepper strips with white bean spread
    • Whole-grain crackers + tofu or hummus: add cucumber for crunch
    • Yogurt alternative + fruit + seeds: berries with chia or pumpkin seeds

    Portion and Prep Tips

    • Pre-portion dips and roasted snacks into small containers so they're ready to grab.
    • Keep a mix of shelf-stable items (nuts, crackers, canned beans) and fresh items (fruit, cut vegetables).
    • Treat these as lifestyle ideas for variety and enjoyment, not medical or dietary advice. For individual needs, talk with a qualified professional.

    How to Build Your Own Afternoon Snack (Practical Steps)

    1. Pick your craving: crunchy, creamy, chocolatey, salty, or fresh. 2. Choose sweet or savory. 3. Start with a fiber-rich base, such as fruit, vegetables, whole-grain crackers, or beans. 4. Add a plant protein, such as yogurt alternative, nut butter, edamame, tofu, or chickpeas. 5. Add flavor and texture: cinnamon, citrus, cocoa, herbs, or crunchy toppings like seeds. 6. Prep a few components ahead: roast a tray of chickpeas, mix a batch of energy bites, or wash and cut vegetables.

    Quick checklist: fiber source? protein source? something crunchy or creamy? allergens checked?

    When time is short, try our [five-minute vegan snacks](FIVE-MINUTE SNACKS URL).

    FAQ

    What are easy sweet and savory vegan snacks I can make ahead?

    Roasted chickpeas (cinnamon or paprika), energy bites, chia pudding, and hummus with cut vegetables all hold up well in the fridge or pantry. Store them in small containers for grab-and-go snacking.

    How do I make a vegan snack more filling?

    Pair a fiber source with a protein source and include some texture, such as apple with almond butter or hummus with vegetables. Many people find this combination more satisfying, though preferences vary.

    Can I find vegan snacks that work for both sweet and savory cravings?

    Yes. Chickpeas, yogurt alternatives, nut butters, and fruit adapt to either direction. Cinnamon or cocoa takes them sweet, while paprika, herbs, or tamari takes them savory.

    Conclusion

    Choose a craving, pick sweet or savory, and pair fiber with protein. Rotate through the ideas above and adjust for allergens and taste. For more, explore our [plant-based snacking guide](PILLAR URL) and [five-minute vegan snacks](FIVE-MINUTE SNACKS URL). If you're also planning the evening meal, here are some plant-based dinner ideas.

    [VERIFY: add affiliate disclosure wording per site policy, since the dinner link is an affiliate link.]

  • Healthy Afternoon Snacks for Kids That Are Plant-Based and Lunchbox-Friendly

    Healthy Afternoon Snacks for Kids That Are Plant-Based and Lunchbox-Friendly

    This article contains affiliate links. We may earn a commission if you buy through them, at no extra cost to you.

    Healthy Afternoon Snacks for Kids That Are Plant-Based and Lunchbox-Friendly

    Meta description: Easy plant-based after-school snacks kids can help make, with allergy notes, nut-free swaps, and portion and prep tips for parents.

    The after-school hunger window is real: kids walk in the door ready to eat, and you want something simple, plant-based, and portable. This guide shares five healthy afternoon snacks for kids that they can help make, plus allergy guidance and practical prep tips.

    Key Takeaways

    • Pair a fruit or vegetable with something filling, like whole grains, seeds, beans, or seed butter.
    • Nuts, sesame, and soy turn up in many plant-based foods, so read labels every time.
    • Kids can do real jobs in each recipe, such as stirring, spreading, and decorating.
    • Batch-prep on the weekend and portion snacks ahead to make weekdays easier.

    Quick Answer: What Are Good Healthy Afternoon Snacks for Kids?

    Good plant-based snacks pair a fruit or vegetable with something filling, like whole grains, seeds, beans, or nut or seed butter. Fruit with seed butter, veggie muffins, popcorn mixes, mini pita pizzas, and plant-based yogurt bark are easy to make with kids and pack well.

    The five ideas at a glance:

    1. Fruit and nut-butter (or seed-butter) dippers 2. Veggie muffins 3. Popcorn mixes 4. Mini pita pizzas 5. Frozen yogurt bark

    Before You Start: Allergy and School Safety Notes

    Common allergens in these snacks

    • Nuts: nut butters and trail-style mixes.
    • Sesame: some pita breads, hummus and tahini, and seed toppings.
    • Soy: plant-based yogurts and cheeses, some breads, and some granola bars.

    Nut-free and allergy-friendly swaps

    • Use sunflower seed butter or pumpkin seed butter instead of nut butter. Check the label for cross-contact warnings.
    • Choose oat, coconut, or pea-based yogurt if you're avoiding soy.
    • Look for sesame-free pita or flatbread.
    • Always read labels. School policies differ, so check your school's rules before packing anything.

    Choking safety

    Whole nuts, whole grapes, and popcorn are choking hazards for young children. Popcorn is generally advised against for children under 4. Adjust for your child's age, and consult your pediatrician if you're unsure.

    5 Plant-Based Afternoon Snacks Kids Can Help Make

    1. Fruit and Nut-Butter Dippers

    Apple slices, banana, pear, or strawberries served with nut or seed butter for dipping.

    • Kid job: stirring the butter (thin it with a little water if it's stiff), spreading, and dipping.
    • Lunchbox tip: pack the dip in a small container. A squeeze of lemon juice or a quick toss can limit browning on apples and pears.
    • Allergy swap: sunflower seed butter.

    2. Veggie Muffins

    Muffins made with grated zucchini or carrot, a plant-based milk, and ground flax or another egg replacer.

    • Kid job: grating (with supervision), mixing, and filling the liners.
    • Lunchbox tip: bake ahead and freeze, then move one or two to the lunchbox in the morning.
    • Allergy swap: check the plant milk for soy and use oat or another milk instead.

    3. Popcorn Mixes

    Air-popped popcorn tossed with seeds, dried fruit, or whole-grain cereal.

    • Kid job: shaking and mixing everything in a bag.
    • Lunchbox tip: pack it in a separate container so it stays crisp.
    • Allergy swap: use seeds instead of nuts. Keep the age and choking caution above in mind.

    4. Mini Pita Pizzas

    Mini pitas topped with tomato sauce, vegetables, and plant-based cheese or mashed white beans.

    • Kid job: spreading the sauce and arranging toppings.
    • Lunchbox tip: serve cold or at room temperature, or reheat at home.
    • Allergy swap: choose sesame-free pita and a soy-free or nut-free cheese alternative. Check labels.

    5. Frozen Yogurt Bark

    Plant-based yogurt spread on a lined tray, topped with fruit and seeds, frozen, and broken into pieces.

    • Kid job: spreading and decorating.
    • Lunchbox tip: pack with an ice pack, or serve at home as an after-school treat.
    • Allergy swap: use a soy-free or nut-free yogurt base. Check labels.

    Snack Comparison Table

    Snack Best kid job Lunchbox-ready? Watch for
    Fruit and seed-butter dippers Dipping, spreading Yes, with a small dip container Nuts, browning fruit
    Veggie muffins Mixing, filling liners Yes Soy in plant milk, flax or egg replacer labels
    Popcorn mixes Shaking the bag Yes, packed separately Choking risk for young children, nuts
    Mini pita pizzas Topping assembly Cold or room temperature Sesame, soy cheese
    Frozen yogurt bark Spreading, decorating Needs an ice pack Soy, nuts

    If you're building a lunchbox routine, reusable containers with small dip compartments can make packing dippers and popcorn mixes easier.

    Practical Portion Tips for Parents

    • Keep it small and balanced. An afternoon snack isn't a full meal, especially if dinner is close.
    • Pair a produce item with a filling item. Fiber, healthy fat, or plant protein all work, such as apple slices with seed butter or a veggie muffin with fruit.
    • Pre-portion. Containers or reusable bags make grab-and-go easier and help you avoid eating straight from a big bag.
    • Follow hunger cues. Portions vary by age and appetite, so let your child's hunger and fullness guide how much they eat.

    Simple Prep and Lunchbox Steps

    Step-by-step weekly routine

    1. Choose 2–3 snacks for the week with your child. Choice builds buy-in. 2. Check labels for allergens and school rules. 3. Batch-prep on the weekend. Bake muffins, freeze bark, and mix a popcorn base. 4. Portion into containers so snacks are ready to grab. 5. Pack with an ice pack if the snack needs to stay cold.

    Quick Prep Checklist

    • [ ] Labels checked for nuts, sesame, and soy
    • [ ] School snack rules reviewed
    • [ ] Muffins baked and cooled before freezing
    • [ ] Popcorn base and add-ins stored separately
    • [ ] Dips in small, leakproof containers
    • [ ] Ice pack ready for yogurt bark or other perishables

    Storage notes

    Refrigerate or freeze anything that needs it, and follow general food-safety guidance for perishables. Cool baked goods fully before freezing, and keep cold items cold until snack time. For a simple way to keep things cold, an insulated lunchbox with an ice pack can help.

    Frequently Asked Questions

    What are healthy afternoon snacks for kids with a nut allergy?

    Use seed butters such as sunflower, fruit, nut-free veggie muffins, and popcorn mixes made with seeds. Check labels for cross-contact warnings, and follow your allergist's and school's guidance.

    How can I make plant-based snacks without soy?

    Choose oat, coconut, or pea-based yogurts and milks. Check the labels on breads, cheeses, and bars too, since soy appears in many processed foods.

    Which of these snacks work best in a lunchbox?

    Veggie muffins, popcorn mixes, and fruit with a small dip container travel well. Yogurt bark and pita pizzas need cold packing or are better served at home.

    Conclusion

    You don't need to overhaul your pantry. Start with one or two of these healthy afternoon snacks for kids, let your child take on a simple job in the kitchen, and build from there. Every family's needs differ, so talk with your pediatrician or allergist about allergies, choking risk, or nutrition questions specific to your child.

    For more plant-based eating guidance for families, see our [VERIFY: pillar page title and URL].

  • Healthy Afternoon Snacks for Kids That Are Plant-Based and Lunchbox-Friendly

    Healthy Afternoon Snacks for Kids That Are Plant-Based and Lunchbox-Friendly

    This article contains affiliate links. We may earn a commission if you buy through them, at no extra cost to you.

    Healthy Afternoon Snacks for Kids That Are Plant-Based and Lunchbox-Friendly

    Meta description: Plant-based after-school snack ideas kids can help make, with allergy notes, nut-free swaps, and simple portion and prep tips for parents.

    Between the last school bell and dinner, many kids arrive home hungry and ready to raid the pantry. A few easy, plant-based snacks on hand make that window calmer for everyone. Below are five kid-friendly ideas children can help make, plus allergy guidance and lunchbox tips.

    Disclosure: Some links below may be affiliate links. They don't change our recommendations.

    Key Takeaways

    • Pair produce with a protein, healthy fat, or whole grain.
    • Give kids a safe, age-appropriate job in the kitchen.
    • Nuts, sesame, and soy can hide in plant-based foods, so read every label.
    • Batch-prep and freeze to make weekday snacks easier.

    Quick Answer: What Makes a Good Healthy Afternoon Snack for Kids?

    A good plant-based afternoon snack combines two or more food groups, such as fruit or veggies with a source of protein or healthy fat, to keep kids satisfied until dinner. Keep portions small, use whole-food ingredients when possible, and check every label for allergens. For more ideas beyond snacks, see our guide to plant-based meals for kids [VERIFY: insert pillar page URL].

    Mini checklist:

    • ✅ Produce plus protein, fat, or whole grain
    • ✅ Easy for kids to help make
    • ✅ Packs and travels well
    • ✅ Fits your school's allergy rules

    5 Plant-Based Snacks Kids Can Help Make

    1. Fruit and Nut-Butter Dippers

    Ingredients: Apple, pear, or banana slices with nut or seed butter.

    • Kid job: Spread or dip.
    • Parent job: Slice the fruit.
    • Lunchbox tip: Pack the dip in a small leak-proof container. A squeeze of lemon on apple slices limits browning. A set of small leak-proof containers with dividers makes this easier.
    • Nut-free swap: Sunflower seed butter or another school-approved seed butter.

    2. Veggie Muffins

    Ingredients: Grated zucchini or carrot, oats or whole-grain flour, plant-based milk, and flax or another egg replacer.

    • Kid job: Stir, scoop, and fill muffin cups.
    • Parent job: Grate the veggies and bake.
    • Lunchbox tip: Cool completely before packing, and freeze extras.
    • Allergy note: These contain wheat if you use wheat flour. Check plant milk for nuts or soy.

    3. Popcorn Mixes

    Ingredients: Air-popped popcorn with cinnamon or nutritional yeast, plus optional add-ins like raisins or pumpkin seeds.

    • Kid job: Measure and shake the mix in a large container.
    • Safety note: Popcorn is a choking hazard for young children. Check age guidance and skip it for toddlers and preschoolers.
    • Nut-free note: Use seeds instead of nuts, and check packaged mixes for cross-contact.

    4. Mini Pita Pizzas

    Ingredients: Mini whole-wheat pitas, tomato sauce, veggies, and plant-based cheese or mashed white beans.

    • Kid job: Add sauce and toppings.
    • Parent job: Use the oven or toaster oven.
    • Lunchbox tip: Pack the components separately, or serve at room temperature.
    • Allergy note: Pitas contain wheat. Plant-based cheeses may contain nuts or soy, so check labels.

    5. Frozen Yogurt Bark

    Ingredients: Plant-based yogurt spread on a lined tray, topped with berries and seeds, frozen, then broken into pieces.

    • Kid job: Spread the yogurt and sprinkle the toppings.
    • Lunchbox tip: Pack with an ice pack in an insulated container. It softens as it thaws, so it works best as an at-home snack or a thaw-and-eat item.
    • Allergy note: Choose a yogurt base that fits your family. Soy, coconut, oat, and almond bases differ.

    At-a-Glance Comparison

    Snack Kid job Lunchbox-friendly? Main allergens to check
    Fruit dippers Spread, dip Yes, with separate dip Nuts or seeds
    Veggie muffins Stir, scoop Yes, once cooled Wheat, plant milk (nuts/soy)
    Popcorn mixes Measure, shake Yes (age-appropriate) Nuts, cross-contact
    Mini pita pizzas Sauce, top Yes, packed separately Wheat, soy, nuts
    Frozen yogurt bark Spread, sprinkle With ice pack; best at home Soy, coconut, nuts, depending on base

    Common Allergies: Nuts, Sesame, and Soy

    Plant-based snacks often rely on nuts, sesame, and soy, which are also common allergens. A little planning helps keep snacks safe.

    Where These Allergens Hide

    • Nuts: Nut butters, some granolas, plant-based milks, yogurts, and cheeses.
    • Sesame: Tahini, hummus, and some breads and crackers.
    • Soy: Soy yogurt, some plant-based cheeses, and some baked goods.

    Always read labels, since ingredients and manufacturing practices can change.

    Nut-Free and School-Friendly Swaps

    Instead of Try
    Nut butter Seed butter (check your school's rules)
    Nut-based yogurt or milk Oat, coconut, or another option that fits your child's allergies
    Hummus with tahini A bean dip made without tahini

    Confirm your school's policy, since some schools restrict specific seeds or ingredients. Talk with your child's doctor or allergist about specific allergies.

    Portion and Prep Tips for Parents

    Portion Basics

    Aim for a small snack, not a mini meal. Adjust to your child's age, appetite, and activity, and follow your pediatrician's guidance. Pair a fruit or veggie with a protein or fat source, such as apple slices with seed butter or a veggie muffin with a piece of fruit.

    Make-Ahead Steps

    1. Pick one or two snacks for the week. 2. Batch-bake muffins and freeze bark. 3. Pre-portion dry mixes in containers. 4. Wash and cut produce, and store it in the fridge. 5. Label allergen-safe items.

    A silicone muffin liner set can make batch baking and freezing simpler.

    Lunchbox Packing Tips

    • Use small containers and dividers.
    • Add an ice pack for perishable items.
    • Keep sauces and dips separate.

    Getting Kids Involved Safely

    • Assign age-appropriate tasks such as washing produce, stirring, and sprinkling. Keep knives and hot items for adults.
    • Wash hands and clean surfaces to avoid allergen cross-contact.

    FAQs

    What are healthy afternoon snacks for kids that are nut-free and plant-based?

    Good options include seed butter with fruit, veggie muffins made with a nut-free milk, pita pizzas with bean spread, and seed-based popcorn mixes (for age-appropriate kids). Check all labels.

    How do I keep plant-based snacks fresh in a lunchbox?

    Cool baked items before packing, use ice packs, keep wet and dry items separate, and add lemon juice to cut fruit if needed.

    Can kids with a soy or sesame allergy eat these snacks?

    Often yes, with substitutions such as soy-free yogurt and tahini-free dips. Always check labels and consult your child's allergist.

    Conclusion

    Start small: pick one snack this week, let your child take on a safe kitchen job, and check every label for allergens. Batch-prepping a couple of options makes the after-school rush easier. For more family-friendly ideas, explore our pillar guide to plant-based meals for kids [VERIFY: insert pillar page URL].

    Internal link ideas: a lunchbox ideas post and an allergy-friendly swaps post [VERIFY: add URLs if available].

  • High-Protein Plant-Based Snacks for Work (Desk-Friendly and No Microwave)

    High-Protein Plant-Based Snacks for Work (Desk-Friendly and No Microwave)

    This article contains affiliate links. We may earn a commission if you buy through them, at no extra cost to you.

    High Protein Vegan Snacks for Work: Desk-Friendly, No Microwave Needed

    Meta description: Find high protein vegan snacks for work that need no microwave: edamame, chickpeas, tofu bites, energy balls, dips, and soy yogurt.

    This guide is for office, hybrid, and remote workers who want filling snacks with no reheating. It covers six options that travel well: edamame, roasted chickpeas, tofu bites, protein energy balls, bean dips, and soy yogurt cups.

    Key takeaways

    • All six snacks can be eaten cold or at room temperature.
    • Soy-based options (edamame, tofu, soy yogurt) are typically the highest in protein per serving.
    • Protein figures below are approximate and vary by brand, so check your label.
    • Keep perishables at 40°F or below, and don't leave them out more than 2 hours.

    Quick Answer: Best High Protein Vegan Snacks for Work

    Edamame, roasted chickpeas, baked tofu bites, protein energy balls, bean dips with veggies or crackers, and soy yogurt cups all travel well and are eaten cold or at room temperature. Soy-based options (edamame, tofu, soy yogurt) are typically the highest in protein per serving.

    • Edamame: Salty, snackable green soybeans.
    • Roasted chickpeas: Crunchy and shelf-stable.
    • Tofu bites: Savory cubes you can eat with a toothpick.
    • Protein energy balls: Sweet, make-ahead bites.
    • Bean dips: Creamy spreads for veggies and crackers.
    • Soy yogurt cups: Grab-and-go and spoonable.

    Approximate Protein per Serving

    Figures are approximate, based on standard nutrition data (e.g., USDA FoodData Central). Values vary by brand, recipe, and portion size, so check your label.

    Snack-by-snack ranges

    Snack Serving Approx. protein
    Edamame, shelled, cooked 1/2 cup about 9 g
    Edamame, shelled, cooked 1 cup about 17 g
    Roasted chickpeas 1 oz about 5–7 g (brand-dependent)
    Tofu bites (firm or baked tofu) 3 oz about 8–12 g
    Bean dips (hummus, black bean dip) 2 tbsp about 2–3 g
    Soy yogurt cup 5–6 oz about 5–8 g (varies widely)
    Protein energy balls 1 ball Depends on ingredients (nut butter, oats, protein powder); calculate from your recipe or label

    For soy yogurt, unsweetened and flavored versions can differ, so compare labels.

    How to read labels

    • Serving size: Many packages hold more than one serving, so the protein number on the front may cover only a small portion.
    • Added sugar: Flavored soy yogurts and some energy balls can contain more than you'd expect.
    • Sodium: Roasted chickpeas, marinated tofu, and dips can add up quickly, especially if you snack on them daily.

    Desk-Friendly Snack Ideas (No Microwave)

    Edamame

    Buy shelled edamame or pods, and portion them into a small container. Sprinkle with salt or chili flakes. Cooked edamame is perishable, so keep it cold until you eat it. Shelled edamame is the easiest to eat at a keyboard, and pods take a bit more time and need a spot for the empties.

    Roasted Chickpeas

    Shelf-stable store-bought bags or homemade batches both work. They're crunchy, portable, and need no fridge. Check the sodium on the label, and keep them in an airtight container so they stay crisp.

    Tofu Bites

    Choose pre-baked or marinated tofu, cut it into cubes, and eat it cold with toothpicks. A tamari, lemon, or spice-rub marinade adds flavor without reheating. Because tofu is perishable, pack it with a cold source.

    Protein Energy Balls

    Energy balls are a sweet option made from ingredients like nut butter, oats, and protein powder. Because protein varies so much by recipe, calculate it from your ingredients. For a make-ahead option, see our [high-protein vegan energy balls recipe]([insert energy balls article URL]) [VERIFY URL].

    Bean Dips with Veggies or Crackers

    Hummus or black bean dip is modest in protein on its own, at about 2–3 g per 2 tablespoons. Pairing it with veggies, whole-grain crackers, or both adds fiber and makes it more filling. Single-serve dip cups are convenient for the office.

    Soy Yogurt Cups

    Soy yogurt is spoonable and easy to stash in an office fridge. Stir in nuts, seeds, or hemp seeds for extra protein and crunch. Check labels for added sugar, especially in flavored cups.

    How to Build a Protein-Rich Desk Snack (Practical Steps)

    1. Pick a base protein: edamame, tofu, chickpeas, or soy yogurt. 2. Add fiber or crunch: veggies, whole-grain crackers, or fruit. 3. Add a flavor boost: a spice blend, lemon, salsa, or tamari. 4. Portion into containers the night before so you can grab and go. 5. Pack with a cold source if the snack is perishable.

    Practical examples

    • Shelled edamame + chili flakes + cucumber slices
    • Baked tofu cubes + tamari dipping cup + carrot sticks
    • Soy yogurt + hemp seeds + berries
    • Black bean dip + whole-grain crackers + bell pepper strips

    Packing and Storage Tips

    Keeping perishables safe

    Use an insulated bag with an ice pack for tofu, soy yogurt, dips, and cooked edamame. Refrigerate at 40°F or below. Per USDA guidance, discard perishables left out more than 2 hours (1 hour if the temperature is above 90°F). An insulated lunch bag with an ice pack makes this easier on commute days.

    Shelf-stable picks

    Roasted chickpeas, single-serve nut butter, and shelf-stable dip cups don't need refrigeration, which makes them good desk-drawer options. Check each package for storage directions.

    Containers and layout

    • Use small, leakproof containers for dips and marinated tofu.
    • Keep dips separate from crackers to prevent sogginess.
    • Store crunchy items in airtight containers. A set of leakproof snack containers can help with portioning.

    Office fridge tips

    Label your items with your name and the date, and portion everything into single servings. That makes snacks easy to grab and easy to toss on schedule.

    Energy ball storage

    Refrigerate energy balls in an airtight container, and follow your recipe's storage guidance.

    Quick desk-snack checklist

    • ☐ Protein base chosen
    • ☐ Fiber or crunch added
    • ☐ Sodium and added sugar checked
    • ☐ Perishables packed with a cold source
    • ☐ Dips and crackers packed separately
    • ☐ Containers labeled

    FAQs

    1. What are the best high protein vegan snacks for work without refrigeration? Roasted chickpeas, shelf-stable single-serve nut butter, and energy balls for short periods work best. Keep tofu, soy yogurt, and dips cold.

    2. How much protein should a vegan work snack have? There is no single rule. Many people aim for a snack with some protein plus fiber to feel full. Individual needs vary, so consult a registered dietitian for personal targets.

    3. Can I prep these snacks ahead for the week? Yes for roasted chickpeas, energy balls, and portioned dips and tofu. Follow safe refrigeration times and check for spoilage before eating.

    Related Reading / Next Steps

    • Pillar guide: [Complete Guide to Vegan Protein]([insert pillar URL]) [VERIFY URL]
    • Recipe: [high-protein vegan energy balls recipe]([insert energy balls article URL]) [VERIFY URL]

    Conclusion

    The best high protein vegan snacks for work are simple, portable, and need no microwave. Pair a protein base with fiber, portion it ahead of time, and keep perishables cold. Pick two snacks from this list and prep them this week to see what fits your workday.

    Protein values are approximate and drawn from standard nutrition data such as USDA FoodData Central. Always check product labels for your specific brand. This article offers general nutrition information, not personal medical advice.