
This article contains affiliate links. We may earn a commission if you buy through them, at no extra cost to you.
How to Harvest, Dry, and Store Herbs from Your Home Medicinal Garden
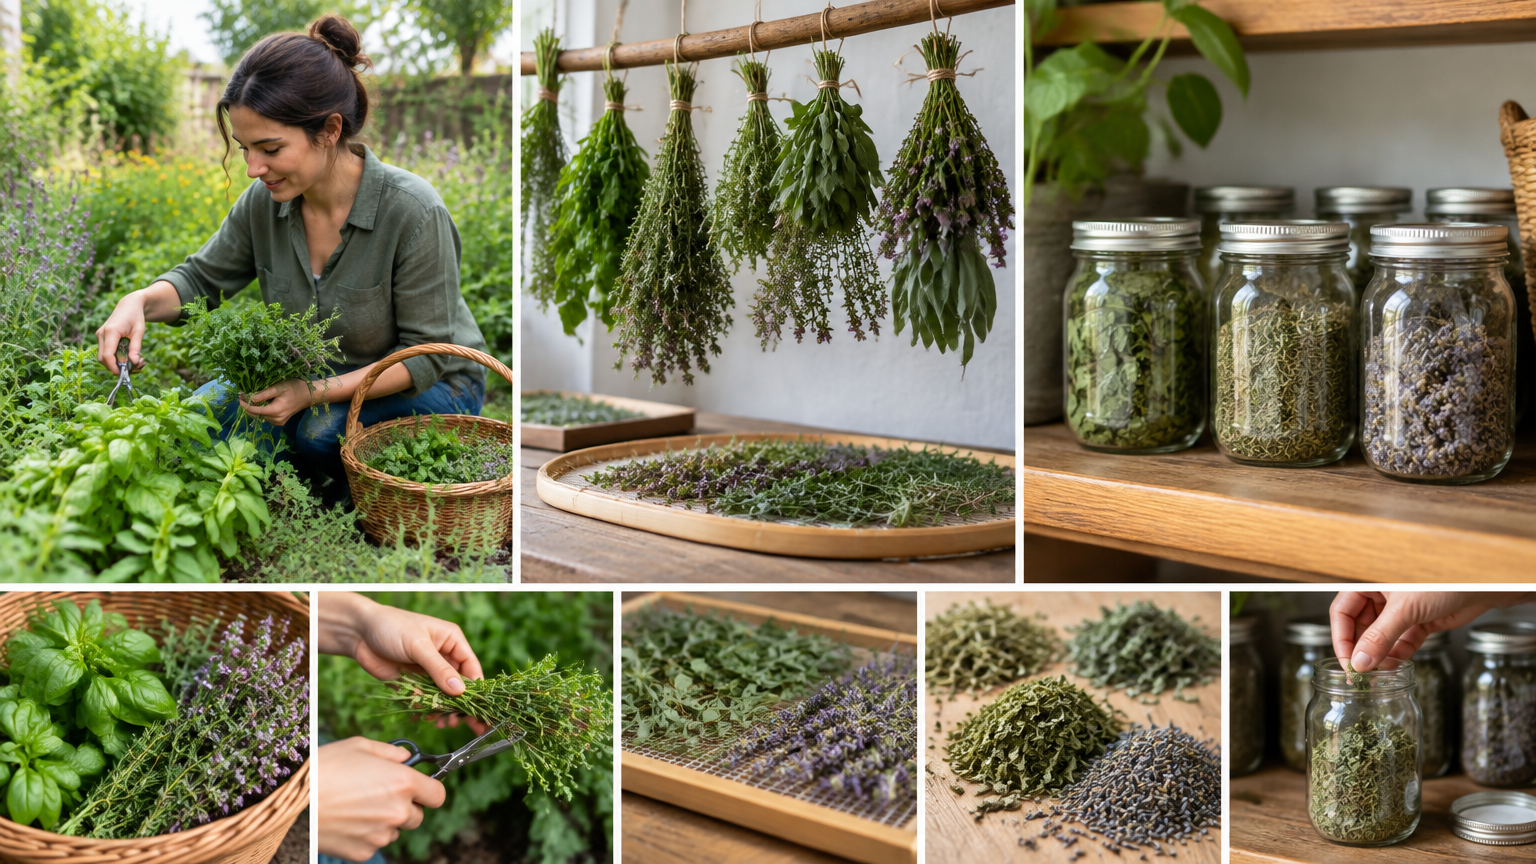
Growing the plants is only half the job. What you do after the harvest (cutting, drying, storing, and labeling) determines the condition of the material you end up with. This guide covers how to harvest and dry medicinal herbs, and it is limited to handling and storage. It does not cover uses or preparations, so please direct any questions about using an herb to a qualified professional.
Key Takeaways
- Harvest in mid to late morning, after the dew has dried, using clean, sharp tools.
- Only harvest plants you have positively identified.
- Dry in a warm, shaded, well-ventilated space until the material is brittle.
- Cool everything completely before sealing it in clean, dry, airtight containers.
- Label every container with the plant name and date, and never mix species in one jar.
Quick Answer: How to Harvest and Dry Medicinal Herbs
1. Harvest in the morning after dew has dried, using clean, sharp tools. 2. Remove damaged, discolored, or dirty material. 3. Dry in a shaded, warm, well-ventilated space until brittle. 4. Store in airtight containers away from light and heat. 5. Label each container with the plant name and date.
The rest of this guide expands on each step.
Before You Start
Confirm plant identity
Only harvest plants you have positively identified. Check each plant's label or your garden map before you cut. If you have any doubt about what a plant is, leave it in the ground and consult a reliable reference or a knowledgeable local source. Look-alike plants exist, and a mix-up at harvest carries into everything that follows.
Gather supplies
Set everything out before you head to the garden so cut material doesn't sit around waiting. You will need:
- Clean pruners or scissors
- Baskets or trays (shallow ones prevent crushing)
- String or rubber bands
- Drying screens or racks
- Paper bags
- Airtight jars
- Labels and a marker
If you'd rather buy supplies together, a medical garden kit is one option, though check the contents yourself before purchasing, since this guide can't speak to what any particular kit includes. For a general look at drying and storage gear, see these drying and storage supply options.
Harvest Timing Cues
Time of day
Mid to late morning, after the dew has evaporated, is the common recommendation. Plants are no longer wet, and you avoid the heat of the afternoon, which can leave cuttings wilted before you get them into the shade.
Plant-part cues (general, varies by species)
The right moment depends on which part of the plant you want and on the species itself. These are general cues:
| Plant part | General timing cue |
|---|---|
| Leaves | Before or around flowering, while growth is healthy |
| Flowers | At or near full bloom |
| Seeds | When seed heads are mature and dry on the plant |
| Roots | After the plant has finished its active growth, often in fall |
Tip: Check a reliable, species-specific reference for each plant. A cue that works for one herb may be wrong for another, so treat this table as a starting point rather than a rule.
Conditions to avoid
Skip material that is wet, wilted, diseased, or pest-damaged. Wet plant matter holds moisture that slows drying, and damaged material can cause problems in storage. If rain is in the forecast, wait for a dry day and let the plants dry off fully before cutting.
Clean Cutting Techniques
Step-by-step
1. Sanitize tools. Wipe blades with a clean cloth and a suitable sanitizer, then let them dry. 2. Cut healthy stems just above a leaf node. This is a common pruning practice that leaves the plant in better shape to regrow. 3. Take only a portion of the plant. Leave enough behind so it can keep growing. How much is safe to take varies by species, so consult a species-specific reference [VERIFY for each plant]. 4. Handle gently. Bruised material can darken and degrade, so lay cuttings in the basket rather than piling or stuffing them. 5. Move cuttings to shade right away. Don't leave a full basket sitting in the sun while you keep harvesting.
Cleaning
Shake off insects and loose debris outdoors before bringing material inside. Rinse only if needed, such as when there is visible soil or splash-back, and then pat the material dry thoroughly. Any leftover surface water slows drying.
Roots are the exception. They usually need washing to remove soil, and larger roots may need slicing so they dry through evenly. Dry them completely before storage, since thick pieces hold moisture longer than leaves do.
Drying Methods Compared
Air-drying (best starting point)
Air-drying needs little equipment and is forgiving for beginners.
- Bundle small bunches loosely, or lay material in a single layer on screens. Tight bundles trap moisture in the middle.
- Hang or place the herbs in a warm, shaded, well-ventilated spot out of direct sun.
- For seed heads, use paper bags with ventilation holes. The bag catches falling seeds and keeps dust off. Tie the bag loosely around the stems and hang it upside down.
Drying time varies with humidity, the thickness of the plant part, and airflow, so judge by how the material feels rather than by the calendar.
Dehydrator
A dehydrator can help if your climate is humid.
- Use the low setting and follow the manufacturer's guidance.
- Spread material in a single layer without overlapping.
- Check often, because thin leaves can finish well before stems or roots.
Oven
An oven is a backup option when you have no other choice.
- Use the lowest setting, with the door slightly ajar if that is safe for your oven.
- Watch closely to avoid scorching. Material can go from nearly done to overdone quickly.
Pros and cons
| Method | Speed | Ease | Equipment needed | Risk of over-drying |
|---|---|---|---|---|
| Air-drying | Slower | Easy | Minimal (string, racks, bags) | Low |
| Dehydrator | Faster | Easy to moderate | Dehydrator | Moderate |
| Oven | Fast | Moderate; needs attention | Existing oven | Higher |
How to tell herbs are fully dry
- Leaves crumble when rubbed.
- Stems snap rather than bend.
- Flowers feel papery.
- Roots are hard throughout.
If any part feels flexible, cool, or slightly damp, keep drying.
Airtight Storage
Containers
Glass jars with tight lids are a common choice. Make sure each container is clean and completely dry before you fill it. Even a little leftover moisture from washing can cause trouble later.
Preparing material
- Cool completely before sealing. Warm material, especially from a dehydrator or oven, can create condensation inside the jar.
- Keep leaves whole or in large pieces if possible. Crushing them increases surface area, so many gardeners wait to crumble material until needed. Whether and how to process herbs for use is outside the scope of this guide.
Where to store
Choose a cool, dark, dry place away from the stove and sunlight. A cupboard or pantry shelf that stays out of the kitchen's heat and steam works well. If your jars are clear, a closed cupboard handles the light problem.
Early checks
Look at your jars in the first few days. If you see condensation on the glass, the material wasn't dry enough. Take it out and re-dry it. If you find any mold, discard the whole batch rather than trying to salvage part of it.
Labeling with Date and Plant Name
A jar of dried leaves with no label becomes a guessing game within weeks. For each container, include:
- Common name
- Latin name (this helps prevent confusion between similarly named plants)
- Plant part (leaf, flower, seed, root)
- Harvest date
- Garden location or bed
Use waterproof labels or a marker that won't smudge, and test it on a spare label first, since jars can get damp or wiped down. Rotate your stock, using older material first, and note any changes in appearance, aroma, or texture over time so you know when it's time to replace a batch.
Quick labeling checklist
- [ ] Common name
- [ ] Latin name
- [ ] Plant part
- [ ] Harvest date
- [ ] Garden location
- [ ] Smudge-proof ink
Common Mistakes to Avoid
- Harvesting wet plants. Extra surface moisture slows drying.
- Drying in direct sun. Shade and airflow are the goal, not intense light.
- Crowding racks. Overlapping material dries unevenly and traps moisture.
- Storing before fully dry. This is a leading reason jars develop condensation or mold.
- Skipping labels. Many dried herbs look alike once dry.
- Mixing species in one jar. Keep each plant, and ideally each plant part, in its own container.
FAQs
How do I know my herbs are dry enough to store?
Use the brittleness test. Leaves should crumble, stems should snap, flowers should feel papery, and roots should be hard. If there is any flexibility or moisture, re-dry the material before storing it.
Can I use a dehydrator or oven instead of air-drying?
Yes, with low heat and close monitoring. Both are faster than air-drying but carry a higher risk of over-drying or scorching, especially in an oven. Air-drying is slower but gentler and needs little equipment. Whichever you choose, let the material cool completely before sealing it.
How should I store dried herbs, and how long do they last?
Store them in clean, airtight containers in a cool, dark, dry place, with every container labeled. No one can give an honest universal shelf life, because it depends on the plant, the plant part, how well it was dried, and storage conditions. Quality fades over time, so check your jars periodically and replace older material with fresh harvests.
Conclusion
The workflow comes down to this: identify, harvest cleanly in the morning, dry in a shaded and ventilated spot until brittle, store airtight in a cool, dark place, and label everything with the plant name and date.
This guide covers handling and storage only. For questions about using any herb, consult a qualified professional.