Author: latinino

  • Soil, Pots, and Growing Media for a Medicinal Garden Kit: What to Use and What to Skip

    Soil, Pots, and Growing Media for a Medicinal Garden Kit: What to Use and What to Skip

    This article contains affiliate links. We may earn a commission if you buy through them, at no extra cost to you.

    Soil, Pots, and Growing Media for a Medicinal Garden Kit: What to Use and What to Skip

    Short answer: For most herbs grown from a kit, the best soil for medicinal herbs is a light, well-draining, peat- or coir-based potting mix (not garden soil), in a container with drainage holes. Herbs differ in how much moisture they tolerate, so match the mix and watering habits to each plant.

    This guide covers growing media, drainage, containers, and watering only. It does not cover fertilizer, and it makes no health or medicinal-effect claims.

    Key Takeaways

    • Choose a bagged potting mix labeled for containers, not soil dug from a yard.
    • Drainage holes matter more than pot style or color.
    • Group herbs by water needs: Mediterranean-type herbs prefer drier conditions, while mint and basil prefer steadier moisture.
    • Kit pellets or starter soil are for germination. Most plants will need a larger pot later.
    • Check the soil before every watering instead of following a fixed schedule.

    Quick "use vs. skip" snapshot

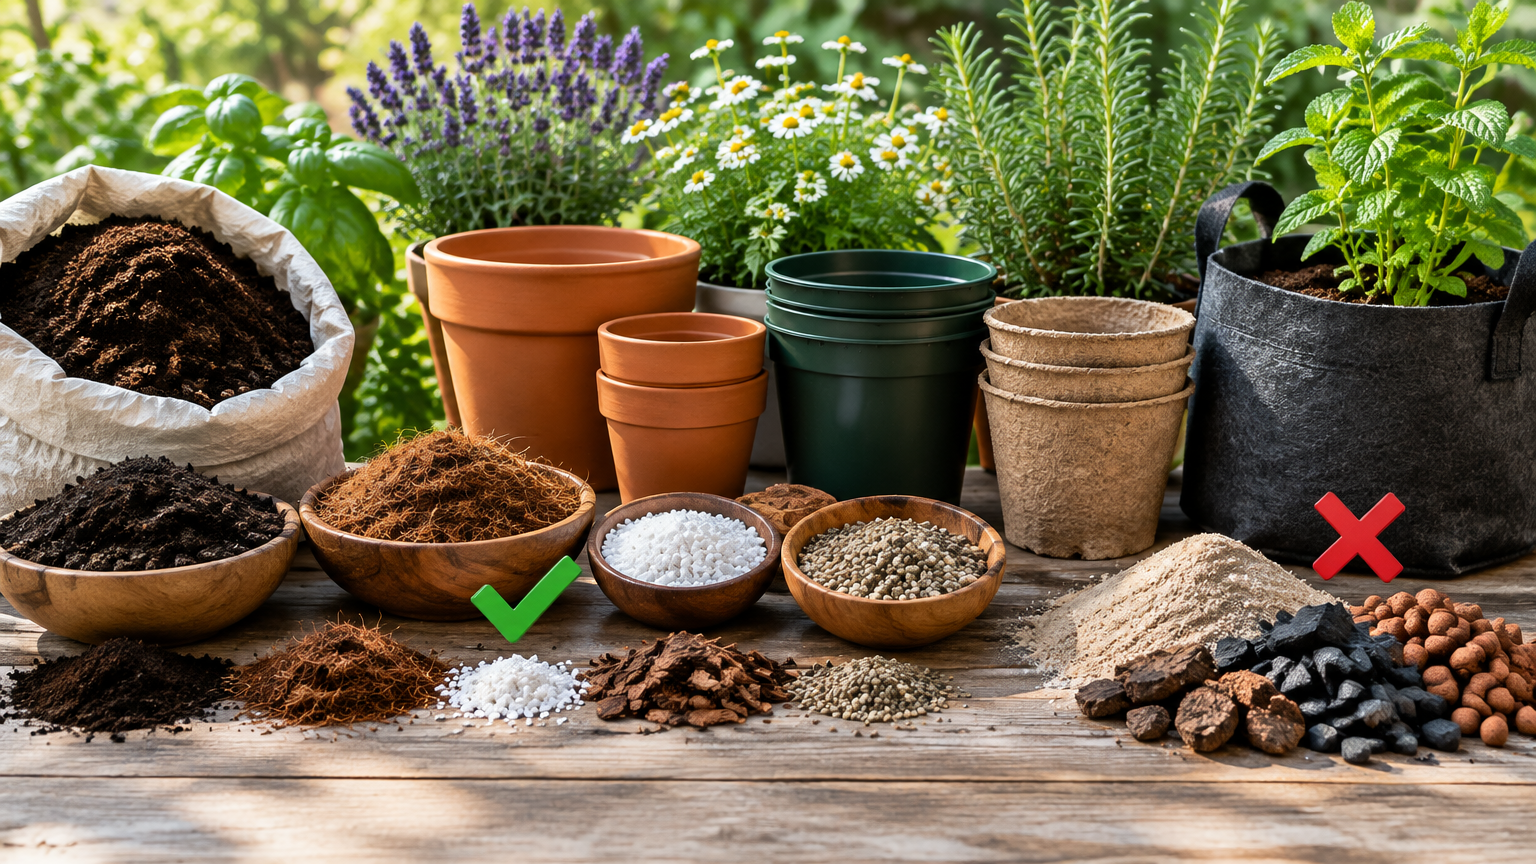
    • Use: quality potting mix, perlite or a similar drainage amendment, pots with holes, saucers or trays
    • Skip: garden soil, heavy moisture-retaining mixes for dry-loving herbs, pots without drainage, unlabeled bulk soil

    What Makes a Good Growing Medium for Herbs

    Key traits: drainage, aeration, moderate moisture retention

    Roots need both water and air. A good container mix holds enough moisture to keep roots hydrated, but lets excess water drain so air pockets stay open. When a mix stays soggy, roots can't get oxygen, and that is a common reason container herbs struggle.

    Common components and their roles

    • Peat or coir: The base of many potting mixes. Both hold moisture and keep the mix light. Coir is made from coconut husk and is often sold as a peat alternative.
    • Perlite: Lightweight white granules that create air spaces and help water move through.
    • Coarse sand: Sometimes added to improve drainage in mixes for drought-tolerant plants. Use coarse sand, not fine, which can pack tightly.
    • Compost: Decomposed organic matter that adds body and some moisture retention. In this guide it is treated only as a structural ingredient, and fertilizing is outside the scope.

    Potting mix vs. garden soil vs. seed-starting mix

    • Potting mix is formulated for containers: light, loose, and designed to drain.
    • Garden soil is dense and often contains clay or silt. In a pot it tends to compact, hold too much water, and restrict air. It may also carry weed seeds, pests, or disease organisms.
    • Seed-starting mix is finer and lighter, suited to germination. It works well for the first weeks but offers less body for larger plants.

    What to Use and What to Skip

    Use: quality potting mix, drainage amendments, pots with holes, saucers

    • A fresh, bagged potting mix labeled for containers or herbs
    • Added perlite or a similar material if the mix feels heavy or you're growing drought-tolerant herbs
    • Containers with drainage holes
    • Saucers or trays to catch runoff, emptied after watering

    If you're buying a mix separately, a well-draining potting mix suited to container herbs is a practical starting point. Check that the label describes it as a container or potting mix.

    Skip: garden soil, heavy mixes, pots without drainage, gravel layers

    • Garden soil: It compacts in containers and drains poorly.
    • Heavy or "moisture-control" mixes for dry-loving herbs: These are designed to hold more water, which can work against herbs like rosemary or thyme.
    • Pots without drainage holes: Water collects at the bottom and keeps roots wet.
    • Gravel layers at the bottom of pots: Many extension sources say a gravel layer does not improve drainage and can leave the soil above it wetter. [VERIFY: confirm against a specific university extension source before publishing.] Drainage holes and a suitable mix do the real work.

    Skip: unlabeled or contaminated bulk soil

    Bulk soil with no label or unknown origin may contain contaminants, pests, or weed seeds. For plants you may use around the home, start with a mix whose ingredients and intended use are clearly stated.

    How Common Herbs Differ in Moisture and Drainage Needs

    Keep this general. Always defer to your kit's instructions, seed packets, and plant tags, since needs vary by variety and growing conditions.

    Prefer drier, fast-draining conditions

    Lavender, thyme, sage, and rosemary are commonly described as Mediterranean-type herbs. They generally do better with fast-draining mix and a drying-out period between waterings. Heavy, constantly damp soil is a frequent problem for them.

    Prefer more consistent moisture

    Mint, lemon balm, and basil generally prefer soil that stays more evenly moist, though not waterlogged. They tend to wilt visibly when dry, so they may need more frequent checks.

    Middle ground and variable plants

    Chamomile and calendula usually fall somewhere in between, and recommendations vary. Use the seed packet for guidance.

    Herb group Examples Moisture preference Mix adjustment
    Drier, fast-draining Lavender, thyme, sage, rosemary Let soil dry between waterings Add extra perlite or coarse material; use a terracotta pot if helpful
    Consistent moisture Mint, lemon balm, basil Evenly moist, not soggy Standard potting mix; check often
    Middle ground Chamomile, calendula Varies; check packet Standard potting mix with good drainage

    Kit-Provided Pellets or Soil vs. Buying Separately

    What kit media usually are

    Many kits include compressed pellets that expand with water, or a small amount of starter soil. These are convenient and sized for germination, so they take the guesswork out of the first stage. Because no product details were supplied for your specific kit, check its instructions for exactly what's included.

    Limitations

    Kit media come in small volumes, which leaves little room for mature roots. Starter pellets also can't support a full-sized plant indefinitely.

    When to transplant

    Consider moving seedlings to a larger pot with fresh potting mix when they have outgrown their starter container. Signs include roots emerging from the bottom or crowding the pellet, and top-heavy or cramped growth. Follow your kit's guidance on timing.

    When buying separately makes sense

    • You need more volume than the kit provides
    • You want to customize the mix for different herbs
    • You're moving up to larger containers
    • Buying in larger quantities is more economical for you

    What to check on labels

    • Intended use (container, potting, or herb mix)
    • Listed ingredients
    • Drainage or aeration descriptions
    • Whether the mix is meant for seed starting or established plants

    For more on picking containers to match, see this guide to choosing herb planters and pots.

    Choosing Pots and Container Materials

    Drainage holes first, then material

    Before comparing materials, confirm the pot has drainage holes. If you love a decorative pot without holes, use it as an outer cover and keep the herb in a plain pot with holes inside, removing it to water and drain.

    Material comparison

    • Terracotta: Porous, so it breathes and dries faster. This suits drier-preferring herbs but may need more frequent watering for moisture-loving ones.
    • Plastic: Retains moisture longer and is lightweight. It's useful for thirstier herbs but easier to overwater.
    • Glazed ceramic: Holds moisture similarly to plastic and is heavier. Check for drainage holes.
    • Fabric pots: Breathable and allow excess moisture to escape through the sides. They may dry out faster.

    Size and spacing

    Avoid oversized pots for small seedlings. A large volume of soil around tiny roots stays wet longer. Move up gradually, and consider each herb's growth habit. Mint, for example, spreads vigorously, while thyme stays compact.

    Shared planters vs. individual pots

    Shared planters look good, but only combine herbs with similar water needs. Putting rosemary and basil in one container means one of them will likely be unhappy. Individual pots make it easier to tailor watering.

    Step-by-Step: Setting Up Your Kit

    1. Check kit instructions and plant list. Note each herb's needs. 2. Choose containers with drainage. Confirm holes and match size to seedlings. 3. Pre-moisten the mix or hydrate pellets as directed. Dry potting mix can repel water at first. 4. Fill pots, leaving space below the rim. This keeps water from spilling over. 5. Sow at the depth listed on the seed packet. 6. Place in the light recommended for each herb. 7. Label and group by water needs. 8. Transplant when seedlings outgrow their starter container.

    Avoiding Overwatering

    Check the soil before watering

    Use the finger test: press a finger into the soil and water only if it feels dry at the depth appropriate for that herb. You can also lift the pot. A light pot usually means dry mix, a heavy one means moisture remains.

    Water thoroughly, then empty saucers

    Water until it drains from the bottom, then discard excess from the saucer so roots aren't sitting in water.

    Warning signs

    • Yellowing leaves
    • Wilting despite wet soil
    • Mold or algae on the surface
    • Fungus gnats hovering around the pot

    Adjusting for season, pot material, and light

    Plants generally use less water in cooler or lower-light conditions. Terracotta dries faster than plastic. Let the soil and plant guide you rather than the calendar.

    Quick fixes

    • Improve airflow around plants
    • Repot into a drier, better-draining mix if the soil stays soggy
    • Reduce watering frequency
    • Let the surface dry out before the next watering

    Common Mistakes to Avoid

    • Using a pot that's too large for a seedling
    • Skipping drainage holes
    • Mixing thirsty and drought-tolerant herbs in one planter
    • Reusing old mix without checking for pests or disease
    • Following a fixed watering schedule instead of checking the soil
    • Adding a gravel layer and assuming it fixes drainage

    FAQs

    Can I use garden soil for herbs in pots?

    It's best to avoid it. Garden soil tends to compact in containers, drains poorly, and may carry pests or weed seeds. A potting mix made for containers is a safer choice.

    Do I need to repot herbs from the kit's pellets or starter soil?

    Usually, yes, eventually. Starter media are sized for germination and early growth. When roots fill the container or seedlings look cramped, move them into a larger pot with fresh potting mix, following your kit's directions.

    How do I know if I'm overwatering my herbs?

    Look for yellowing leaves, wilting even though the soil is wet, surface mold or algae, and gnats. Check that the soil feels dry at the right depth before watering again, and make sure the pot drains freely.

    Conclusion

    The best soil for medicinal herbs grown from a kit is a light, well-draining potting mix in pots with drainage holes. Group herbs by water needs, and let the soil's condition decide when to water. Above all, follow your kit's specific instructions and seed packets, since they reflect the plants you're actually growing.

  • Plant-Based Family Dinners on a Budget: How to Cook for Picky Eaters Without Making Separate Meals

    Plant-Based Family Dinners on a Budget: How to Cook for Picky Eaters Without Making Separate Meals

    This article contains affiliate links. We may earn a commission if you buy through them, at no extra cost to you.

    Plant-Based Family Dinners on a Budget: How to Cook for Picky Eaters Without Making Separate Meals

    One dinner, four opinions, and a grocery budget that only stretches so far. It's a familiar squeeze. Plant based family dinners on a budget get easier when you stop cooking one fixed plate and start cooking flexible parts. This guide shows a build-your-own approach using affordable staples, so everyone can choose and no one needs a separate meal.

    The Short Answer

    Cook one set of simple, separate components: a base, a hearty item, a vegetable or two, a sauce, and a topping. Let each person build their own plate. Include at least one familiar food, keep seasoning simple, and offer new items without pressure.

    Key Takeaways

    • Serve components separately and let each person assemble their own plate.
    • Always include at least one "safe" food the whole table will likely eat.
    • Cook plainly, then add sauces and seasoning at the table.
    • Stick to five parts: base, hearty item, vegetables, sauce, topping.
    • Leftover components can become lunches or tomorrow's dinner.

    Why Deconstructed Dinners Work for Picky Eaters and Tight Budgets

    Choice without extra cooking

    Everyone picks from the same pots. One person builds a plate of rice and beans, another adds roasted vegetables and sauce, and a third sticks to pasta and a few cucumber slices. You cook once, and the variety comes from how people assemble the parts.

    Lower pressure at the table

    When kids and adults control what goes on their plates, there is less to negotiate. Nobody is handed a mixed casserole and told to finish it. A visible, optional spread lets people approach new foods on their own terms.

    Easy reuse

    Components store better than finished casseroles. Leftover rice can become fried rice, extra beans can go into a quesadilla, and roasted vegetables can top a flatbread. Reuse is one of the biggest ways a build-your-own format saves money.

    Budget-Friendly Building Blocks

    Think in categories rather than recipes. Once you have a few favorites in each, you can mix them endlessly.

    Bases

    Rice, pasta, potatoes, tortillas, bread, noodles, and oats or polenta. These are filling, familiar, and usually inexpensive. They are also the foods most likely to be the "safe" item on the table.

    Hearty items

    Dried or canned beans, lentils, chickpeas, and tofu. Dried beans and lentils generally cost less per serving than canned, but they take more time. Canned beans are a fine shortcut on busy nights.

    Vegetables

    Use frozen, canned, and seasonal produce. Offer some raw and some cooked, since many picky eaters have strong preferences about texture. Frozen vegetables cut prep time and let you avoid buying more fresh produce than you'll use.

    Toppings for crunch and flavor

    Toasted seeds, breadcrumbs, crushed tortilla chips, shredded cabbage, and fresh herbs all add texture for very little money. A small amount goes a long way.

    Tip: Buy dry staples in larger quantities when it suits your budget and storage space, then batch-cook them. A big pot of rice or beans on the weekend can anchor several dinners. If you cook in batches often, sturdy food storage containers make it easier to keep components separate and ready to reheat.

    How to Set Up a Build-Your-Own Plant-Based Dinner (Step by Step)

    1. Pick a format. Bowls, tacos, pasta, baked potatoes, or flatbreads all work. 2. Choose your components. Aim for one base, one hearty item, two vegetables, one sauce, and one topping. 3. Include a "safe" food. Choose something everyone will likely eat, such as plain pasta, rice, or warm tortillas. 4. Cook components plainly. Add seasoning or sauce at the table, not in the pot. 5. Serve family-style. Use separate dishes so foods don't touch and people can see their options. 6. Keep it low-pressure. No required bites. Just an open invitation to try. 7. Save extras. Pack leftover components separately for later meals.

    Quick Component Checklist

    Component Pick Example
    Base 1 Rice, pasta, or tortillas
    Hearty item 1 Black beans, lentils, or baked tofu
    Vegetables 2 One raw (shredded cabbage), one cooked (roasted carrots)
    Sauce 1 Salsa or garlic-herb olive oil
    Topping 1 Toasted seeds or crushed tortilla chips
    Safe food 1 Plain pasta, bread, or rice

    Using Familiar Textures and Flavors

    Match textures kids already like

    • Crispy: oven-roasted chickpeas, toasted breadcrumbs
    • Creamy: mashed potatoes, bean spreads
    • Soft: pasta, rice
    • Crunchy: raw vegetable sticks, shredded cabbage

    If someone rejects a food, the problem is often texture rather than flavor. Offering the same ingredient in a different texture can change the response.

    Borrow familiar formats

    Taco night, pizza night, pasta night, noodle bowls, and "dippers and dips" are formats most people already know. Familiar structure makes unfamiliar ingredients feel less risky, because the meal still looks like something they recognize.

    Offer vegetables in different forms

    The same vegetable can be roasted, raw, mashed, finely chopped, or blended into a sauce. Put out a small bowl of finely chopped peppers next to a bowl of roasted pepper strips and let people choose. Blended vegetables in a tomato sauce are another option, though some families prefer to know what's in their food, so decide what works for yours.

    Gradual Introductions Without Pressure

    Add one new item at a time

    Place a single new component next to familiar favorites. If the table has five new foods at once, it can feel overwhelming.

    Start small, or just look and smell

    A spoonful on the side of the plate is enough. Some people need several exposures before they try something, and looking or smelling counts as participation.

    Try the same food a different way

    If roasted cauliflower gets ignored, try it raw, mashed, or chopped small on another night. Changing the preparation gives the food a fresh chance without making it a battle.

    Let kids help

    Kids can wash vegetables, stir a sauce, sprinkle toppings, or assemble their own tacos. Handling food is a low-stakes way to get comfortable with it.

    Simple, Low-Cost Sauces That Tie It Together

    Sauces make plain components taste like a meal. Make one or two per dinner, not all of them.

    • Tomato sauce or salsa: works on pasta, rice, potatoes, and flatbreads.
    • Garlic-herb olive oil: good over noodles, bread, and roasted vegetables.
    • Peanut or sunflower-seed-style sauce: great on noodle bowls. Check for allergies first, and use a seed-based option if nuts are a concern.
    • Lemon-tahini dressing: works on bowls, raw vegetables, and baked potatoes.
    • Blended white bean sauce: creamy and mild, useful on pasta or as a dip.
    • BBQ-style or sweet-and-savory stir-fry sauce: a familiar flavor for roasted tofu, vegetables, or rice.

    Tip: Serve sauces on the side so each person controls the amount. This also lets you keep the shared dishes mild.

    Five Sample Dinner Formats

    Format Base Hearty item Vegetables Sauce Topping
    Taco or burrito bar Tortillas or rice Seasoned black or pinto beans Corn, shredded lettuce or cabbage Salsa Crushed tortilla chips
    Pasta bar Pasta White beans or lentils Steamed broccoli, cherry tomatoes Tomato sauce Toasted breadcrumbs
    Rice or noodle bowls Rice or noodles Baked tofu or edamame Shredded carrots, cucumber Peanut or stir-fry sauce Toasted seeds
    Baked potato bar Baked potatoes Chickpeas or chili-style beans Frozen peas, roasted broccoli Lemon-tahini dressing Chopped herbs
    Flatbread or pita pizzas Flatbread or pita Mashed white beans or crumbled tofu Peppers, spinach, mushrooms Tomato sauce Garlic-herb olive oil drizzle

    Each of these can be adjusted to what's on sale or already in your pantry.

    Planning and Saving Tips

    • Plan two or three base meals per week and rotate the toppings and sauces. Taco night can look different each time without any new shopping.
    • Cook extra base and bean components for reuse. Extra rice and beans make a quick bowl or burrito the next day.
    • Use frozen and canned items to reduce prep and waste.
    • Keep a short list of family-approved components. When you're stuck, start from that list and add one new item.

    If you want help organizing meals, a beginner-friendly plant-based meal planning guide can provide extra structure and shopping list ideas.

    Common Pitfalls to Avoid

    • Making too many components. Five or six parts are plenty. More dishes means more cooking and more dishes to wash.
    • Serving only unfamiliar foods. Always include at least one thing people will reliably eat.
    • Pressuring or bargaining at the table. "Three more bites" tends to make new foods feel like a chore.
    • Over-seasoning the shared dishes. Keep the base components mild and let people add flavor through sauces and toppings.

    FAQs

    How do I make plant-based dinners for picky eaters without cooking separate meals?

    Cook shared components, then let each person assemble their own plate. Keep one familiar item available and put sauces and seasonings on the side.

    What are good budget staples for deconstructed plant-based dinners?

    Rice, pasta, potatoes, tortillas, dried or canned beans, lentils, frozen vegetables, and simple pantry sauces.

    What if my child only eats the base and skips everything else?

    That's okay. Keep offering the other components without pressure, and let them build on familiar favorites at their own pace.

    Conclusion

    The formula is simple: base, hearty item, vegetables, sauce, topping. Serve the parts separately and let everyone build their own plate. Try one build-your-own night this week, and consider writing down your family's go-to components as a checklist or shopping list.

  • Which Specialty Plant-Based Ingredients Are Worth Buying First? Nutritional Yeast, Tahini, Miso, and More

    Which Specialty Plant-Based Ingredients Are Worth Buying First? Nutritional Yeast, Tahini, Miso, and More

    This article contains affiliate links. We may earn a commission if you buy through them, at no extra cost to you.

    Which Specialty Plant-Based Ingredients Are Worth Buying First? Nutritional Yeast, Tahini, Miso, and More

    The Short Answer

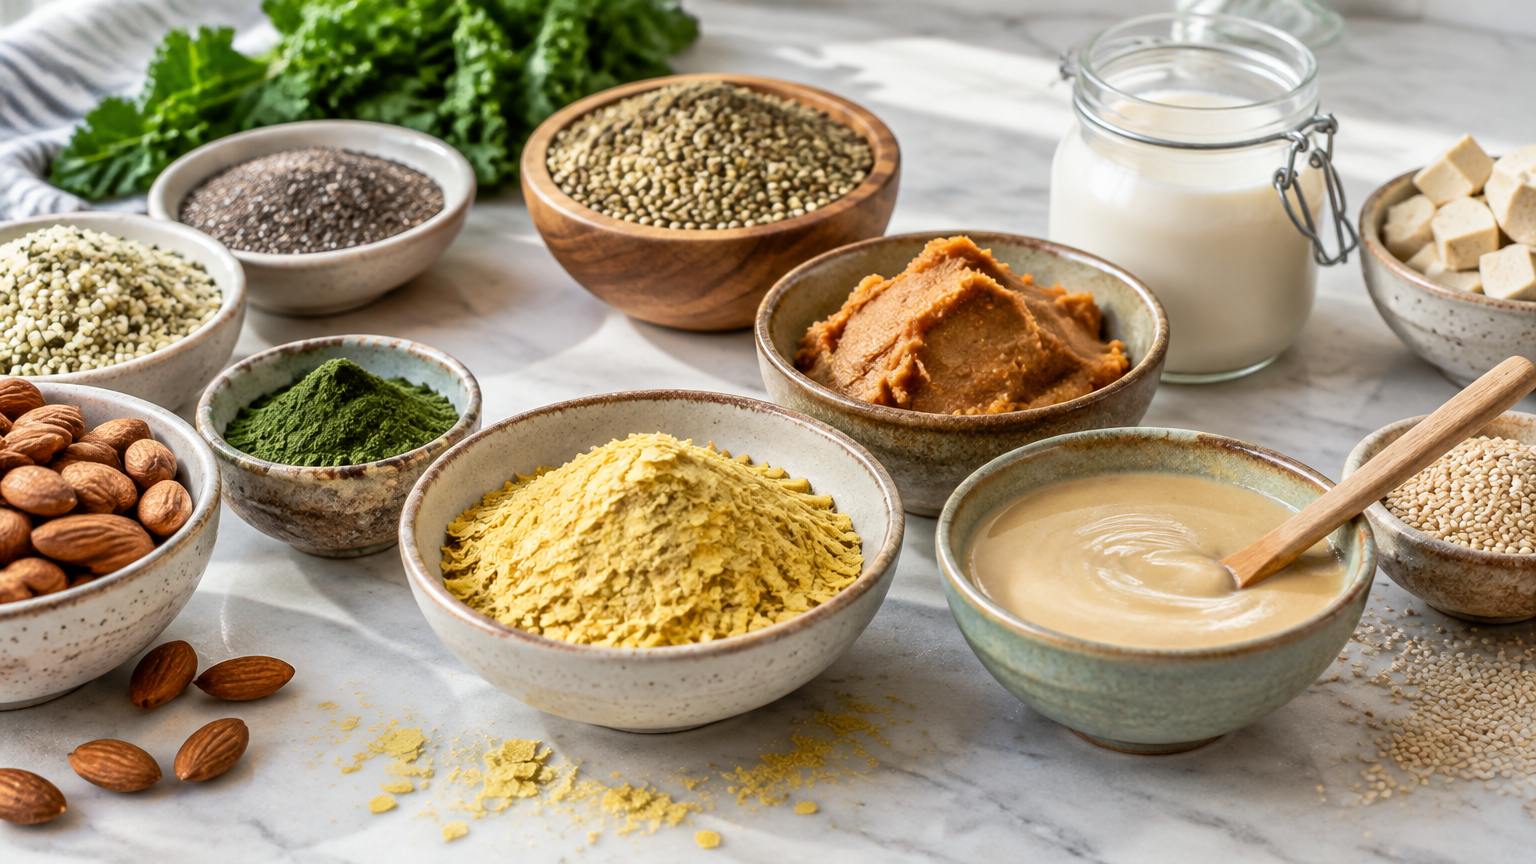
    Buy the ingredient that fixes a flavor gap in dishes you already cook. For most beginners, that means miso (savory depth), tahini (creamy sauces and dressings), or nutritional yeast (cheesy, savory flavor), whichever matches what you make most often.

    Skip or delay ingredients tied to a single recipe, such as vital wheat gluten and kala namak, until you know you'll repeat that recipe. Prices and brands vary, so check each label for storage and shelf-life instructions.

    Key Takeaways

    • Start with one ingredient that solves a problem in meals you already make.
    • Miso, tahini, and nutritional yeast cover the most common gaps: umami, creaminess, and cheesiness.
    • Single-purpose items like kala namak and vital wheat gluten can wait.
    • Buy the smallest size available, date the container, and use it in at least three meals in two weeks.
    • Many gaps can be filled with pantry staples, so specialty items are a convenience, not a requirement.

    How to Choose Your First Purchases (Practical Steps)

    Specialty ingredients are easy to overbuy because each one promises a new style of cooking. A better approach is to start with the meals you already cook and work backward.

    1. List your 5 most-cooked meals. Examples: pasta, grain bowls, stir-fries, soups, salads. 2. Identify what's missing. Is it creaminess, umami, cheesiness, smokiness, or egg-like flavor? 3. Match the gap to one ingredient from the guide below. 4. Buy the smallest size available, if one is offered. 5. Plan to use it in at least 3 meals within the first two weeks. If you can't name three, wait. 6. Check the label for storage directions, and write the open date on the container.

    A practical example: Say your regular rotation is pasta with tomato sauce, a weekly grain bowl, and a vegetable soup. Your pasta may lack a savory, cheesy finish (nutritional yeast), your grain bowl may need a creamy dressing (tahini), and your soup may taste flat (miso). Pick the gap that bothers you most, buy that one, and use it up before buying another.

    Ingredient-by-Ingredient Guide

    Nutritional Yeast

    How it's used: Nutritional yeast is a flaky, savory seasoning with a cheesy flavor. It suits pasta, popcorn, roasted vegetables, tofu scrambles, and creamy sauces. Many cooks sprinkle it on at the end, as they would grated cheese.

    How to store it: Keep it in an airtight container in a cool, dark, dry place, and follow any label directions.

    Substitute or skip: Skip it if you don't want a cheesy-savory flavor. For a rough stand-in, use a little miso or salted ground cashews with lemon juice. The flavor will differ, but it can bring savory richness to a sauce or topping.

    Buy it if: You make pasta, popcorn, or scrambles often and want a savory finish.

    Tahini

    How it's used: Tahini is a sesame paste. It's best for hummus, dressings, sauces, baked goods, and grain bowls. A spoonful thinned with lemon juice and water makes a simple sauce for roasted vegetables or salads.

    How to store it: Follow the label. Many people refrigerate it after opening. Oil separation is normal, so stir well before using.

    Substitute or skip: Sunflower seed butter, cashew butter, or peanut butter can work in some sauces, though the flavor will change. Skip tahini if you rarely make dressings or hummus.

    Buy it if: You eat a lot of salads and bowls and want one ingredient that makes them more satisfying.

    Miso

    How it's used: Miso is a fermented soybean paste that adds savory depth. It works well in soups, marinades, glazes, dressings, and savory sauces. A small amount can make a plain vegetable broth or a simple dressing taste more rounded.

    How to store it: Refrigerate it after opening, in a tightly sealed container.

    Substitute or skip: Soy sauce or tamari plus a pinch of salt, or tomato paste, can supply umami, though you won't get the fermented funk. Skip miso if you avoid soy or sodium, or if you don't cook soups and sauces.

    Buy it if: Your soups, noodle dishes, or sauces taste flat and you want more depth.

    Tamari or Soy Sauce

    How it's used: Both are everyday seasonings for stir-fries, marinades, noodles, and general salting. Many cooks already own one, so this is often less a specialty purchase than a quality choice.

    How to store it: Follow the label, and keep the cap clean and tight.

    Substitute or skip: Regular soy sauce works unless you need gluten-free food. In that case, choose tamari labeled gluten-free. Don't assume any tamari is gluten-free without checking.

    Buy it if: You cook stir-fries or noodles regularly and don't have either yet.

    Smoked Paprika or Liquid Smoke

    How it's used: Both add a smoky note. They suit beans, roasted vegetables, plant-based "bacon" flavors, and chili.

    How to store it: Keep spices in a cool, dark, airtight spot. Liquid smoke can go in the pantry.

    Substitute or skip: Start with smoked paprika, which is more versatile. Skip liquid smoke unless you want a strong barbecue-style flavor.

    Buy it if: Your bean dishes, chili, or roasted vegetables taste one-dimensional.

    Raw Cashews

    How it's used: Blended, cashews make cream sauces, dressings, desserts, and plant-based "cheese." They're a go-to for dairy-free creaminess, though they're often a pricier pantry item.

    How to store it: Keep them in a cool, dry place. Refrigerate or freeze for longer storage to help prevent rancidity.

    Substitute or skip: Silken tofu, white beans, or soaked sunflower seeds can replace cashews in some sauces. Skip them if you don't make creamy sauces regularly.

    Buy it if: Creamy pasta sauces, soups, or dressings are already part of your routine.

    Kala Namak (Black Salt)

    How it's used: Kala namak has a sulfur note that gives egg-like flavor to tofu scrambles and similar dishes.

    How to store it: Use an airtight container, kept dry.

    Substitute or skip: Regular salt works, but you'll lose the sulfur note, and the flavor can mellow with cooking. Skip it unless you make egg-style dishes often.

    Buy it if: You've already made egg-style dishes a few times and want the flavor to be closer.

    Vital Wheat Gluten

    How it's used: It's the base for homemade seitan and other chewier textures.

    How to store it: Keep it in a cool, dry, airtight container.

    Substitute or skip: Store-bought tofu, tempeh, beans, or mushrooms can provide hearty texture without the extra step. Skip it if you don't plan to make seitan, and avoid it if you need gluten-free food.

    Buy it if: You've decided to try seitan and know which recipe you'll make first.

    Quick Buying Priorities by Cooking Style

    If you mostly cook… Buy first Then consider
    Soups and noodles Miso Tamari
    Salads and bowls Tahini Miso (for dressings)
    Pasta and snacks Nutritional yeast Smoked paprika
    Creamy sauces Raw cashews Nutritional yeast
    Egg-style dishes or seitan Try the recipe once first Kala namak or vital wheat gluten

    If you're ready to shop for the core trio, you can compare options for miso, tahini, and nutritional yeast and choose the smallest size offered.

    How to Avoid Wasting Money

    • Buy one ingredient at a time and use it up before adding another.
    • Test substitutes first when a recipe calls for something you rarely use. A spoonful of tomato paste or soy sauce may tell you whether you'd miss the real thing.
    • Choose small containers for items you're unsure about.
    • Store according to the label, and write the open date on opened items.

    A useful rule is that an ingredient has to earn a spot in your rotation. If you've used it in three meals and want it in a fourth, it's a keeper. If it's still sitting there after a month, skip it next time.

    FAQs

    What is the single best specialty ingredient for a beginner to buy first?

    It depends on your cooking. Miso suits soups and sauces, tahini suits dressings and bowls, and nutritional yeast suits pasta, popcorn, and savory toppings.

    Can I skip specialty ingredients and still cook good plant-based meals?

    Yes. Everyday ingredients such as beans, tofu, soy sauce, tomato paste, lemon, garlic, and spices can cover many flavor needs. Specialty items add convenience or a specific flavor, not necessity.

    How do I know if an ingredient has gone bad?

    Check the label first. Discard items with mold, off or rancid smells, or unusual texture. Natural oil separation in tahini is normal, but a sharp rancid smell is not.

    Conclusion

    The most useful specialty ingredient is the one that solves a real flavor gap in the meals you already cook. Miso, tahini, and nutritional yeast are good starting points because each one covers a common need: savory depth, creaminess, or a cheesy finish. Hold off on single-purpose items like kala namak and vital wheat gluten until you know you'll make the recipe again.

    Pick one ingredient, buy the smallest size, date it when you open it, and plan three meals around it. Then expand slowly. For ideas on how to put them to work, browse a starter list and recipe roundup using miso, tahini, and nutritional yeast.

  • Choosing Training Treats for Chew Redirection: Size, Texture, and Ingredient Considerations

    Choosing Training Treats for Chew Redirection: Size, Texture, and Ingredient Considerations

    This article contains affiliate links. We may earn a commission if you buy through them, at no extra cost to you.

    Choosing Training Treats for Chew Redirection: Size, Texture, and Ingredient Considerations

    Disclosure: This article contains affiliate links. This guide does not rank brands, and no products were tested for it.

    The best training treats for dogs used in chew redirection are small, soft or easily swallowed, highly appealing to your dog, and low enough in calories to use many times a day. Check the label for ingredients your dog can't have, and ask your vet how treats fit into your dog's overall diet.

    Key Takeaways

    • Pick treats your dog eats in one or two seconds so sessions keep moving.
    • Cut treats into tiny pieces to control calories and speed up repetition.
    • Read both the calorie information and the ingredient list before buying.
    • Keep more than one value level on hand: everyday treats and a higher-value option for tough trades.
    • Ask your vet about treat allowances, especially with allergies, weight concerns, or medical diets.

    Why Treat Choice Matters for Chew Redirection

    What redirection and trading look like

    Redirection means swapping something off-limits for something allowed. Your dog grabs a sock, you offer a treat or an approved chew, and your dog gives up the sock. The treat is the payment, so it needs to be worth the deal.

    Why "drop it" practice needs a treat your dog values more than the item

    If the treat is less interesting than the object, your dog has little reason to let go. A dry, bland biscuit may work for trading a paper towel but fail against a stolen chicken bone. Practice with items of different value, and match your treat to the challenge.

    Why short sessions favor quick-to-eat treats

    Short sessions of a few minutes depend on rhythm: ask, reward, repeat. If your dog spends 15 seconds crunching each reward, the rhythm breaks and focus drifts. Treats that disappear quickly keep your dog engaged.

    Soft vs. Crunchy Treats

    Soft treats

    Soft treats are quick to swallow and easy to break apart, so there is less pausing between repetitions. They tend to suit trading and "drop it" drills, where timing matters.

    Crunchy treats

    Crunchy treats may last longer in a pouch and can feel less messy. But they can be slow to eat, leave crumbs your dog stops to search for, and make noise that may distract some dogs. Some are also hard to break into small pieces.

    Which to choose by situation

    Situation Often a good fit Why
    Trading a household item Soft, small, appealing Fast swap, minimal pause
    "Drop it" drills Soft, easily divided Many quick repetitions
    Distracting environments Soft, higher-value Competes with smells and sights
    Easy, calm practice at home Small crunchy pieces or kibble Lower value is often enough

    Every dog differs. Your dog's own response is the best guide.

    Size Considerations

    Why tiny pieces work

    Tiny pieces allow faster repetition, fill your dog less, and add fewer calories per reward. A dog who gets 20 small rewards stays interested longer than one who gets two large ones and feels done.

    How to cut or break treats down

    For many dogs, pea-sized or smaller works well. Soft treats can be pinched or cut with kitchen scissors. Do it before the session so you aren't fumbling mid-training. Treats that crumble unpredictably are harder to portion.

    Matching size to your dog

    A pea-sized piece may be generous for a toy breed, so go smaller, closer to a grain of rice or a lentil. A large breed may be fine with a slightly bigger piece, but keeping it small still helps with speed and calories. Adjust to your dog.

    Practical example: You're practicing "drop it" with a small rope toy. You hold six pea-sized soft pieces in a pouch. Your dog releases the toy, you reward, then often hand the toy back. That keeps the game fair and the sessions short.

    Calorie Awareness

    Why treat calories add up

    Ten rewards in one session, three sessions a day, equals thirty treats. Even small calories compound, particularly for small dogs.

    Reading the calorie information

    Check whether the package lists calories per treat or per serving, and check what a "serving" is. If calories are listed per serving, you may need to estimate per piece after cutting. If the package doesn't state calories clearly, that is worth noting when comparing products [VERIFY: calorie statement requirements vary by product type and region].

    Planning treats as part of the daily total

    Treats count toward your dog's daily intake. On heavy training days, you may need to reduce meal portions slightly. Ask your vet before changing amounts.

    Asking your vet what allowance suits your dog

    A sensible treat allowance depends on size, age, activity, and health. Your vet can give a personalized number rather than a general rule.

    Ingredient, Allergy, and Sensitivity Label Checks

    Reading the ingredient list

    Ingredients are generally listed in order of weight, so the first few tell you the most. Note the protein sources and any additives, colors, or flavorings you don't recognize. A shorter, understandable list makes it easier to spot problems.

    Avoiding known triggers

    If your dog has reacted to certain proteins or grains, scan every label for them, including less obvious forms such as "meal," "by-product," or "flavor." Also check for allergen statements. Don't assume a flavor name tells you everything.

    Limited-ingredient options

    For dogs with sensitivities, limited-ingredient treats can make label checking simpler. Confirm with your vet before switching, especially if your dog is on a prescribed or elimination diet.

    Checking for unsafe ingredients

    Look for xylitol, a known toxin to dogs, particularly in human foods or specialty products. If you see it, don't use the product for your dog. Other foods are also unsafe for dogs, so if you use human food as treats, verify each one with your vet or a reliable veterinary source.

    Introducing a new treat gradually

    Start with a small amount and watch for digestive changes (loose stools, vomiting) or skin changes (itching, redness). Introduce one new item at a time so you can identify the cause of any problem.

    Practical Steps to Choose and Use Treats

    1. List your goals: trading, "drop it," short sessions. 2. Note your dog's profile: size, age, health needs, known sensitivities. 3. Pick a soft, small treat with a simple, understandable ingredient list. 4. Check calories and plan the daily treat amount. 5. Test a small amount and watch your dog's reaction. 6. Keep a few treat types for different value levels, everyday versus higher-value for harder trades. 7. Store treats properly and keep them handy in a pouch. 8. Review with your vet if your dog has health issues, weight concerns, or a special diet.

    If you're ready to compare options, you can browse soft, small-piece training treats and apply the checklist below to each label.

    If you also want a structured training program to pair with your treat plan, Brain Training for Dogs is one resource to look at. Review the details on the page yourself to decide whether it suits you.

    What to Look for When Comparing Products

    Checklist

    Factor What to check
    Size/breakability Can you easily make pea-sized or smaller pieces?
    Texture Soft and quick to eat, or crunchy and slow?
    Calories Per treat or per serving? Is it clear?
    Ingredient clarity Understandable list, identifiable protein sources
    Allergen info Does it avoid your dog's known triggers?
    Packaging Resealable? Easy to portion?

    Evaluating claims without relying on marketing language

    Phrases like "premium," "natural," or "irresistible" aren't a substitute for the ingredient list and calorie information. Focus on what the label specifically states, and be cautious about health claims you can't verify. If a claim matters to your dog's health, ask your vet.

    Why this guide offers no brand rankings or testing claims

    This guide doesn't rank brands or claim to have tested any product. Your dog's size, tastes, and sensitivities make a universal "best" unreliable, so the checklist is meant to help you judge products yourself.

    When to Talk to Your Vet

    Check in with your vet if your dog has:

    • Diet restrictions or a prescribed food
    • Weight management needs
    • Suspected allergies
    • Digestive issues
    • Medications that interact with diet or affect appetite

    FAQ

    What are the best training treats for dogs during "drop it" practice?

    Small, soft, appealing treats that your dog eats quickly. Vary the value as needed: use everyday treats for easy items and higher-value ones for harder trades.

    How many training treats can my dog have per day?

    It depends on your dog's size, activity level, and overall diet. Ask your vet for a personalized treat allowance, and count training treats toward the daily total.

    Can I use regular food or kibble instead of treats?

    Often, yes, for easy tasks. Save higher-value treats for harder trades, and count all calories either way.

    Conclusion

    Choosing the best training treats for dogs in chew redirection comes down to a few practical filters: small pieces, a texture your dog eats quickly, calories you've accounted for, and a label you've read closely. Use the checklist to compare products, introduce new treats gradually, and keep a mix of everyday and higher-value options. Before you change your dog's diet or treat plan, consult your vet.

  • Common Beginner Medicinal Garden Problems: Troubleshooting Yellow Leaves, Leggy Seedlings, and Pests

    Common Beginner Medicinal Garden Problems: Troubleshooting Yellow Leaves, Leggy Seedlings, and Pests

    This article contains affiliate links. We may earn a commission if you buy through them, at no extra cost to you.

    Common Beginner Medicinal Garden Problems: Troubleshooting Yellow Leaves, Leggy Seedlings, and Pests

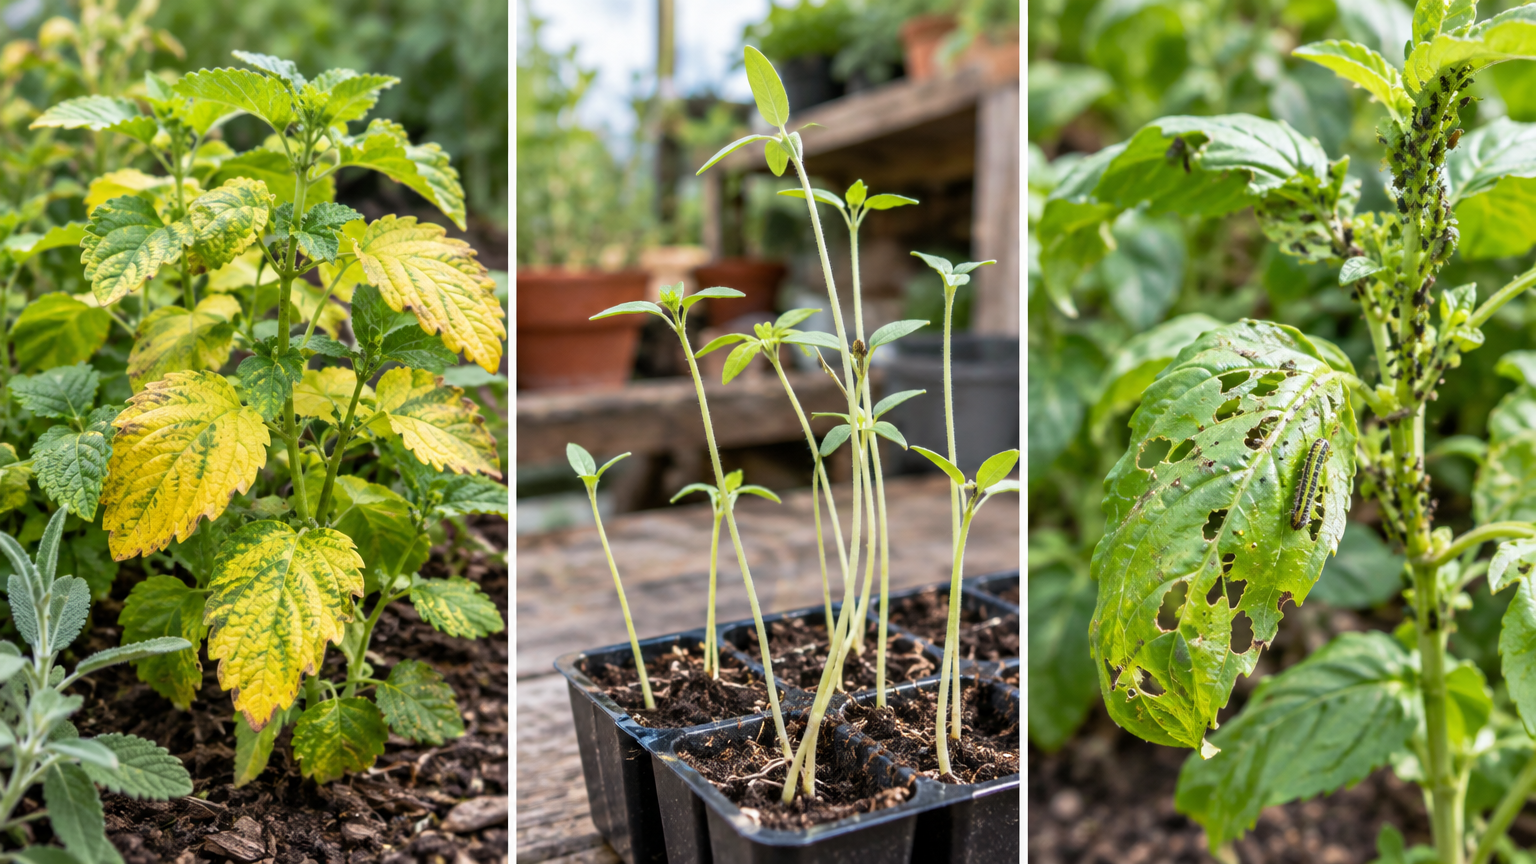
    Few things are more discouraging than watching a new herb garden struggle in its first few weeks. Leaves turn yellow, seedlings flop over, a fuzzy film appears on the soil, or tiny insects show up from nowhere. The good news is that most medicinal herb garden problems have simple, low-risk explanations, and most can be addressed with small adjustments to watering, light, airflow, and spacing.

    This guide is organized by symptom so you can find what you see and work through the likely causes. Note: this article contains affiliate links, which means we may earn a commission if you click through and purchase, at no extra cost to you.

    Quick Answer

    Most medicinal herb garden problems in beginner gardens come from a few basics: too much or too little water, too little light, poor airflow, and crowding. Match what you see to the symptom sections below, change one thing at a time, and wait several days to judge the result. Also check your kit's instructions and your local cooperative extension office for guidance specific to your plants and region.

    Key Takeaways

    • Overwatering and low light are two of the most common beginner stumbling blocks. Check them first.
    • Change one variable at a time, or you won't know what helped.
    • Gentle fixes (adjusting watering, moving plants closer to light, adding airflow, thinning) are usually the best starting point.
    • Confirm that any pest-control product is labeled for your plant type and intended use before you use it.
    • When symptoms spread quickly or you can't identify the cause, ask your local extension office or the kit manufacturer.

    Before You Troubleshoot

    A few minutes of review can save you from chasing the wrong problem.

    • Confirm what you planted. Check the seed packet or kit guide for each herb's light, water, spacing, and temperature needs. Different herbs have different preferences, and a routine that suits one may not suit another.
    • Look at the whole setup. Consider container drainage, your light source and its distance from the plants, room temperature, and airflow.
    • Keep notes or photos. Record watering dates and any changes you make. Patterns become much easier to spot after a week or two.
    • Change one variable at a time. If you move the plants, change the watering, and add fertilizer all on the same day, you won't know which change worked.

    If you're still setting up, a beginner-friendly overview of starting a medicinal herb garden kit can help you review the basics. The kit's own instructions remain your best reference, since no product specifics were supplied for this article.

    Symptom-Based Troubleshooting

    Yellowing Leaves

    Yellow leaves are one of the most frequent complaints, and the cause isn't always obvious. The pattern matters: Are the oldest leaves yellowing first, or the newest? Is the whole plant pale, or only a few leaves? Is the soil soggy or bone dry?

    Likely causes:

    • Overwatering or poor drainage, where soil stays soggy
    • Underwatering, where soil is dry and crispy
    • Low light
    • Nutrient shortage, especially if older leaves yellow first
    • Crowded or root-bound roots
    • Transplant stress
    • Normal aging of the lowest leaves
    • Pests (check leaf undersides)

    Gentle fixes:

    • Check soil moisture a finger-depth down before watering. If it still feels damp, wait.
    • Make sure pots have drainage holes and don't sit in standing water.
    • Move plants to brighter light if needed.
    • Remove badly yellowed leaves so the plant isn't carrying dead weight.
    • Feed only as the kit or label directs, and avoid overfeeding.

    Practical example: Say your basil-type seedlings in a windowsill tray have yellow lower leaves, and the soil is dark and damp every time you check. Waterlogging is a likely suspect. Empty the tray, let the top layer dry slightly, and confirm the pot drains freely. If the yellowing doesn't spread to new leaves over the following week, you're probably on the right track.

    Leggy Seedlings

    Leggy seedlings have long, thin, pale stems and small leaves. They are stretching toward light, and the stems are often too weak to hold themselves up.

    Likely causes:

    • Not enough light
    • Light source too far away
    • Temperatures warmer than the plant prefers
    • Crowded seedlings competing for light

    Gentle fixes:

    • Increase light and follow the grow light manufacturer's distance guidance.
    • Rotate containers regularly for even light.
    • Thin crowded seedlings so the strongest have room.
    • Add gentle airflow, which encourages sturdier stems.
    • Check the kit instructions for daily light duration and ideal temperature.
    • Support stems, or bury them deeper when transplanting, only if the plant type tolerates it. Confirm this for each herb, because some plants do not respond well to deep planting.

    Practical example: If seedlings on a dim shelf lean sharply toward a window, rotate the tray each day and move it to a brighter spot, or add a light source positioned according to its manufacturer's guidance. If you decide the shelf simply doesn't get enough light, you could compare grow light and seed-starting setups to find something suited to your space.

    Keep in mind that stretched growth may not fully revert. The goal is to help new growth come in sturdier.

    Mold on Soil

    A white or gray fuzzy film on the soil surface is common in new seed trays. It usually signals that conditions are staying too damp for too long.

    Likely causes:

    • Soil staying wet too long
    • Poor airflow
    • A humidity dome left on too long
    • Low light or cool conditions that slow drying

    Gentle fixes:

    • Let the surface dry slightly between waterings, as appropriate for the herb.
    • Remove the dome or open its vents once seedlings emerge, per kit directions.
    • Scrape off the affected surface layer and replace it with fresh mix.
    • Improve airflow with a small fan on low, not aimed directly at seedlings.
    • Water from the bottom or at the soil line, and empty excess water from trays.
    • If growth is poor and the soil is persistently wet, consider restarting with fresh mix and clean containers.

    Practical example: A tray under a closed dome shows fuzz on the surface a week after sprouting. Open the vents or remove the dome, scrape off the top layer, add a thin layer of fresh mix, and water only when the surface begins to dry. Check again over the next several days.

    Pest Signs

    Pests can appear even on indoor plants. Early detection makes them much easier to manage, so look closely at stems and the undersides of leaves.

    Common signs and possible culprits:

    • Sticky residue, clustered tiny insects, or curled leaves: aphids
    • Tiny flying insects near soil: fungus gnats, often linked to constantly moist soil
    • Fine webbing or speckled leaves: spider mites
    • Small white flying insects when plants are disturbed: whiteflies

    Gentle fixes:

    • Isolate affected plants so problems don't spread.
    • Inspect leaf undersides and stems regularly.
    • Rinse leaves with a gentle water spray, or wipe them down.
    • Remove heavily affected leaves.
    • Let soil dry more between waterings to discourage gnats.
    • Use sticky traps to monitor flying insects.
    • Before using any pest-control product, confirm it is labeled for your plant type and intended use. Ask your local extension service for options.

    Because these herbs may be used in ways other than decoration, be especially careful with any product you apply. Label directions matter, and an extension office can help you choose appropriately.

    Quick Reference Table

    Symptom Check first Low-risk first step
    Yellow leaves Soil moisture, drainage, light Check a finger-depth down; empty standing water
    Leggy seedlings Light distance and duration, temperature Increase light; rotate trays; thin crowding
    Mold on soil Dome, airflow, how wet the surface stays Open vents; scrape surface; let it dry slightly
    Tiny flying insects Soil moisture Let soil dry more; use sticky traps
    Webbing or speckled leaves Leaf undersides Isolate plant; rinse or wipe leaves
    Sticky residue, curled leaves Stems and new growth Isolate plant; rinse; remove heavily affected leaves

    Prevention Habits for New Growers

    Good habits prevent many of these problems before they start.

    • Water based on soil moisture, not a rigid schedule. Temperature, light, and pot size all change how fast soil dries.
    • Give plants adequate spacing and thin when needed. Crowding contributes to leggy growth, mold, and pest problems.
    • Provide steady light and good airflow.
    • Use clean containers and fresh seed-starting mix.
    • Inspect plants a few times per week. Catching a problem early makes the fix simpler.

    A Simple Weekly Checklist

    • [ ] Check soil moisture before watering
    • [ ] Empty any standing water from trays
    • [ ] Rotate containers for even light
    • [ ] Look at leaf undersides and stems
    • [ ] Remove dead or badly yellowed leaves
    • [ ] Note any changes in your journal or photos

    When to Get Local Help

    Sometimes a problem needs a second set of eyes. Seek help if:

    • Symptoms spread quickly or don't improve after adjustments.
    • You can't identify the pest or problem.
    • You're unsure which treatments are appropriate.

    Contact your local cooperative extension office or the kit manufacturer's support, and bring clear photos of the whole plant, affected leaves, and the soil surface. Extension offices can offer region-specific advice that general guides can't.

    FAQs

    Why are my herb seedlings turning yellow?

    Common reasons include watering problems, low light, crowding, or nutrient shortage. Check soil moisture and drainage first, then light, and compare your setup with the kit instructions.

    Can I fix leggy seedlings?

    You can often improve them by increasing light, lowering temperatures if they're too warm, thinning, and adding gentle airflow. Existing stretched growth may not fully revert, but new growth can be sturdier.

    What should I do if mold appears on the soil surface?

    Reduce moisture, increase airflow, remove covers as directed, and scrape off the affected layer. If it keeps returning, replace the mix and use clean containers.

    Conclusion

    Most medicinal herb garden problems come down to the same handful of factors: water, light, airflow, and spacing. Start by identifying the symptom, work through the likely causes, and make one gentle change at a time. Give each change several days before you judge it, and keep notes so you can see what's working.

    Your kit's instructions and your local cooperative extension office are valuable resources, especially for questions about specific plants, pests, or treatments. With patient observation and small adjustments, many early setbacks turn into useful lessons for the rest of the growing season.

  • Are Plant-Based Meat Substitutes Worth Buying on a Budget? How to Compare Burgers, Crumbles, and Nuggets

    Are Plant-Based Meat Substitutes Worth Buying on a Budget? How to Compare Burgers, Crumbles, and Nuggets

    This article contains affiliate links. We may earn a commission if you buy through them, at no extra cost to you.

    Are Plant-Based Meat Substitutes Worth Buying on a Budget? How to Compare Burgers, Crumbles, and Nuggets

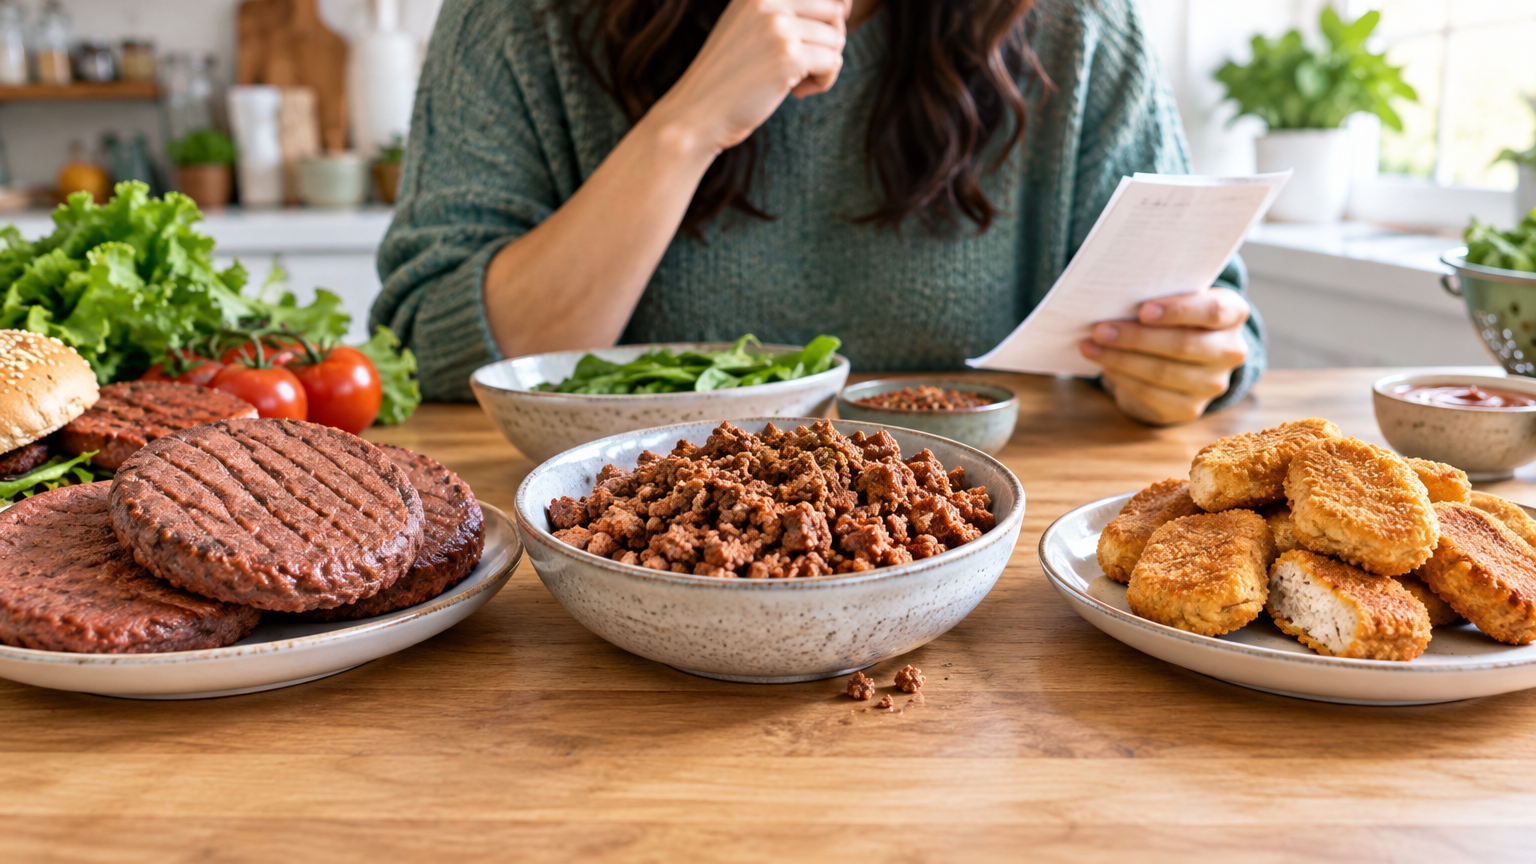
    Plant-based burgers, crumbles, and nuggets can be convenient, but whether they fit your grocery budget depends on your prices, your habits, and what your household actually eats. This guide gives you a four-part checklist for comparing budget plant based meat substitutes, plus a simple method for measuring them against homemade options like bean burgers.

    Direct Answer: Are They Worth It?

    Sometimes. Packaged plant-based meat substitutes can be worth buying when they save time, help you get a meal on the table at home, or replace a more expensive takeout or convenience option. They may not be the best value if you cook often and already have cheaper staples like beans, lentils, oats, or rice on hand.

    Worth is personal. It depends on:

    • The price per serving at your store
    • Ingredients you want or want to avoid
    • How you like to cook
    • Whether the product actually gets eaten

    Prices and formulas vary by store, region, and brand, and they change over time. This article doesn't name winners or quote prices. Use your own receipts, shelf tags, and package labels.

    Key Takeaways

    • Calculate price per serving, not per package.
    • Read the ingredient list and Nutrition Facts for what matters to your household.
    • Match the cooking method to the time and equipment you have.
    • Count the cost of everything else on the plate, not just the main item.
    • Compare at least two packaged options and one homemade version before deciding.

    Quick Comparison Checklist

    Copy this table into a notes app or onto paper and fill it in at the store.

    Check What to record Why it matters
    Price per serving Package price ÷ servings per package Makes different package sizes comparable
    Realistic serving Is one serving enough for one person? Label servings may be smaller than what you eat
    Main ingredients First few ingredients, allergens Shows the base and flags dietary conflicts
    Nutrition Facts Sodium, protein, fat per serving Compare against your own needs
    Cooking method Stove, oven, air fryer, microwave; cook time Affects effort, cleanup, and energy use
    Storage Frozen or refrigerated; shelf life after opening Affects waste and freezer space
    Dinner fit Extras needed (buns, sides, sauce) Reveals the true cost of the meal

    1. Price per Serving

    This is the number most shoppers skip, and it's the most useful one for budgeting.

    • Find the serving size on the label, not just the package count. A bag of nuggets might list a serving as a specific number of pieces or a weight.
    • Divide the package price by servings per package. For example: your price ÷ servings listed = cost per serving.
    • Ask whether a serving is realistic for your household. One patty may be a full portion for one person, while a serving of nuggets may be a few pieces that feel more like a side.
    • Check the unit price on the shelf tag (price per ounce or pound) when you're comparing items sold by weight.
    • Factor in sale prices, store brands, and format. Frozen and refrigerated versions may be priced differently in your store, so check both sections.

    2. Ingredient List

    • Look at the first few ingredients to see the main base, such as soy, pea protein, wheat, beans, or vegetables. Ingredients are listed by amount, so the first few tell you the most.
    • Check for allergens like soy, wheat/gluten, and nuts. The allergen statement is usually near the ingredient list.
    • Compare sodium, protein, and fat per serving on the Nutrition Facts panel, based on your own dietary needs or guidance from your healthcare provider.
    • Notice the length of the list only if it matters to you. A shorter or longer list isn't automatically better or worse. What matters is whether the ingredients suit your household.

    3. Cooking Method

    • Identify the instructions: stove, oven, air fryer, microwave, or a combination.
    • Consider cook time, cleanup, and extras. Does it need added oil, a sheet pan, or a specific appliance?
    • Check whether it cooks from frozen, which matters on busy nights.
    • Note storage. How much freezer space does it take? How long does it keep in the fridge once opened? [VERIFY on each package, since guidance differs by product.]

    4. Fit in a Home-Cooked Dinner

    A low-cost main dish can still lead to an expensive dinner if it needs a lot of add-ons.

    • Does it work in dishes you already make, like tacos, pasta sauce, stir-fry, sandwiches, or sheet-pan meals?
    • Count what you need to add: vegetables, grains, sauces, buns, toppings.
    • Check whether one package covers your household or whether you'd need two.
    • Think about leftovers. Will it reheat well enough that you'd eat it the next day? Your own trial is the best test.

    If you're still building your repertoire of meatless meals, a resource with plant-based dinner ideas can help you judge how a product might fit into recipes you'd actually cook.

    How to Compare by Product Type

    Burgers, crumbles, and nuggets are used differently, so compare them in different ways.

    Burgers

    • Compare cost per patty, patty size, and the number of patties per package.
    • Remember that you may still need buns, cheese or toppings, and a side.
    • Best for: quick, single-serve meals where convenience is the priority.

    Crumbles

    • Compare cost per cooked cup or per recipe use, if the label gives enough information. If it doesn't, compare cost per serving and note how much your recipe calls for.
    • Crumbles are flexible. They can go into sauces, chili, tacos, and casseroles.
    • They may stretch further when mixed with vegetables, beans, or grains, which can lower the cost per plate.

    Nuggets

    • Compare cost per piece and per serving. Check the serving size carefully, because it's easy to underestimate how many pieces a person will eat.
    • Decide whether nuggets are a main dish or a side/snack in your household. That changes how many packages you'll buy.

    Compare Against Homemade Options

    Homemade bean burgers are a common comparison point because the ingredients are often pantry staples. Whether they're actually cheaper is something you can check in a few minutes.

    Build a Simple Homemade Cost Estimate

    1. List the ingredients for a homemade bean burger, such as canned beans, oats or breadcrumbs, spices, and a binder. 2. Write down what you paid for each, using receipts or current store prices. 3. Estimate how much of each ingredient goes into one batch. A fraction of a can of beans, a few spoonfuls of spices, and so on. 4. Divide the total batch cost by the number of patties the batch makes. 5. Compare that to the packaged per-serving cost you calculated earlier.

    A simple worksheet might look like this:

    Item Amount used Cost for that amount
    Canned beans [your amount] [your price]
    Oats or breadcrumbs [your amount] [your price]
    Spices and binder [your amount] [your price]
    Batch total [sum]
    Per patty [sum ÷ patties]

    Compare More Than Price

    Price is only part of the picture. Consider:

    • Time: prep, cooking, and cleanup for homemade versus heating a packaged product.
    • Skill and equipment: mashing, forming, and pan-frying or baking. Do you have what you need, and do you enjoy it?
    • Texture and taste: your household's acceptance matters. A cheaper option that nobody eats isn't a bargain.
    • Storage: homemade patties can often be frozen, but test this yourself and see how they hold up.
    • Waste: will leftover ingredients, like half a can of beans, get used before they spoil?

    When Each Option May Make Sense

    • Packaged may fit when you have limited time, want consistent results, or only use meat substitutes occasionally.
    • Homemade may fit when you cook frequently, already have pantry staples, or want control over ingredients.
    • A mix can work too. You might use packaged crumbles on a busy weeknight and make homemade patties when you have time.

    Practical Steps to Decide

    1. Pick one meal you want to replace, such as burger night or taco night. 2. Record the price, servings, and cooking method for two or three packaged options. 3. Estimate a homemade version's per-serving cost using the worksheet above. 4. Add the cost of sides and extras (buns, vegetables, sauces) for each version so you're comparing whole meals. 5. Try the smallest or sale-priced package first before committing to a larger one. 6. Note whether your household eats it and whether it fits your routine. 7. Recheck prices periodically, since they change.

    A Practical Example

    Say your goal is to replace a weekly takeout burger night. You'd write down the per-patty cost of two packaged burger options, then add buns and toppings. Next you'd estimate your homemade bean burger cost per patty plus the same buns and toppings. Finally, compare each total to what you usually spend on takeout. If you want to see what's available in your area, you can browse plant-based meat substitutes and note the serving sizes and cooking instructions before you shop.

    Budget Tips

    • Compare store brands and name brands using the unit price on the shelf tag.
    • Check both the freezer and refrigerated sections. Similar products may be priced and packaged differently.
    • Buy larger packs only if you'll use them before they expire, or if the product freezes well according to the package.
    • Stretch with what you already have. Vegetables, beans, and grains can bulk up crumbles in sauces, tacos, and casseroles.

    FAQs

    How do I calculate price per serving for plant-based meat substitutes?

    Divide the package price by the servings per container listed on the label. If you typically eat more than one serving, multiply the result by the number of servings you actually eat to get your real cost per meal.

    Are homemade bean burgers always cheaper than store-bought options?

    Not necessarily. Compare your actual ingredient costs, the time you spend, and whether you'll use up leftover ingredients. Homemade can be a good value when you already have staples on hand, but it depends on your prices and habits.

    What should I check on the label besides price?

    Check serving size, main ingredients, allergens, sodium, protein, cooking instructions, and storage guidance. These tell you whether the product fits your diet, your kitchen, and your schedule.

    Conclusion

    Budget plant based meat substitutes aren't automatically a bargain or a splurge. Their value depends on cost per serving, ingredients, cooking method, and how well they fit the dinners you already make. Take the checklist with you to the store and compare at least two packaged options with a homemade version. Then choose what fits your budget and routine, and recheck every so often as prices change.

  • Plant-Based Dinners in 20 Minutes or Less: Quick Budget Ideas for Busy Nights

    Plant-Based Dinners in 20 Minutes or Less: Quick Budget Ideas for Busy Nights

    This article contains affiliate links. We may earn a commission if you buy through them, at no extra cost to you.

    Plant-Based Dinners in 20 Minutes or Less: Quick Budget Ideas for Busy Nights

    The easiest quick plant based dinners for beginners combine a fast base (instant rice, couscous, pasta, tortillas), a ready protein (canned beans, chickpeas, lentils, tofu), frozen vegetables, and a flavorful sauce or seasoning. Heat, combine, season, and eat. The patterns below are flexible templates, not strict recipes, so swap in whatever you already have.

    Key Takeaways

    • Every dinner here follows one formula: base + protein + vegetable + flavor.
    • Canned beans, instant grains, and frozen vegetables need little or no prep, which keeps weeknight cooking short.
    • Starting the slowest item first (usually water for rice or pasta) is the biggest time-saver.
    • A small, versatile stock of staples can cover all five patterns.
    • Cook extra grains or beans once and reuse them the next night.

    The Simple 20-Minute Formula

    Most fast plant-based dinners are variations on four parts:

    Base + protein + vegetable + flavor

    • Base: instant rice, couscous, quick-cooking pasta, noodles, tortillas, or flatbread
    • Protein: canned beans, chickpeas, lentils, or tofu
    • Vegetable: frozen vegetables, which are already washed and chopped
    • Flavor: sauce, spices, salsa, or acid like lemon or vinegar

    Practical steps

    1. Start the slowest item first. Put water on for pasta or rice before you do anything else. 2. Drain and rinse canned beans while that water heats. 3. Cook vegetables straight from frozen in a skillet or the microwave. There's no need to thaw them first. 4. Combine everything and add sauce, spices, or acid (lemon, vinegar, salsa). 5. Taste and adjust salt at the end, since canned goods and bottled sauces already contain some.

    Once this order feels natural, you can improvise without a recipe.

    5 Fast Dinner Patterns

    Here's a quick comparison, followed by details on each pattern.

    Pattern Base Protein Vegetable Flavor Start first
    Burrito bowls Instant rice Black or pinto beans Frozen corn or peppers Salsa Rice
    Tofu stir-fry Instant rice or noodles Firm tofu Frozen stir-fry mix Soy or stir-fry sauce Rice or noodles
    White bean and greens pasta Quick-cooking pasta Canned white beans Frozen spinach or kale Garlic, olive oil, lemon Pasta water
    Chickpea curry Instant rice or flatbread Canned chickpeas Frozen vegetables Curry powder or paste Grain
    Bean-and-veggie soup or stew Toast or crackers Canned beans or lentil pouches Frozen vegetables Broth, tomatoes, dried herbs Everything in one pot

    1. Burrito Bowls

    Build: instant rice, canned black or pinto beans, frozen corn or peppers, salsa, and optional avocado.

    Prep-order tip: Start the rice first. While it cooks, warm the beans and frozen vegetables together in one pan, then assemble the bowls.

    Practical example: Spoon rice into a bowl, then add the warm beans and corn. Top with salsa and sliced avocado if you have it. A squeeze of lime and a pinch of chili flakes or cumin add flavor with almost no effort. If you'd rather use tortillas, warm them in a dry pan and turn the same filling into burritos or tacos.

    2. Tofu and Frozen-Veggie Stir-Fry

    Build: firm tofu, frozen stir-fry vegetables, soy sauce or another bottled stir-fry sauce, and instant rice or noodles.

    Prep-order tip: Start the rice or noodles, then cube and sear the tofu. Add the frozen vegetables next and the sauce last so it doesn't burn.

    Practical example: Pat the tofu dry with a towel so it browns instead of steaming. Sear it in a hot, oiled skillet until golden on a few sides, then push it aside or remove it. Add the frozen vegetables and stir until hot. Pour in the sauce for the final minute and serve over the rice or noodles. Sesame seeds or chili flakes are an easy finish if you have them.

    3. White Bean and Greens Pasta

    Build: quick-cooking pasta, canned white beans, frozen spinach or kale, garlic, olive oil, and lemon.

    Prep-order tip: Put the water on to boil first. Add the frozen greens and beans to the pan or pot during the last few minutes of the pasta's cooking time.

    Practical example: While the pasta cooks, warm olive oil with minced garlic in a large skillet over low heat, taking care not to brown the garlic. Drain the pasta, saving a small cup of the cooking water. Toss the pasta, beans, and greens in the skillet, adding splashes of pasta water until the sauce coats everything. Finish with lemon juice and black pepper. If you use frozen spinach, press out extra water so the dish doesn't turn soupy.

    4. Chickpea Curry

    Build: canned chickpeas, canned tomatoes or coconut milk, curry powder or paste, frozen vegetables, and instant rice or flatbread.

    Prep-order tip: Start the grain, then toast the spices briefly in oil before adding liquids, chickpeas, and vegetables. Simmer until heated through.

    Practical example: Warm a spoonful of oil in a saucepan and stir in the curry powder or paste for under a minute, until fragrant. Add the tomatoes or coconut milk, the rinsed chickpeas, and a couple of handfuls of frozen vegetables such as peas or mixed vegetables. Simmer until everything is hot, then taste. A squeeze of lemon or lime brightens the finished dish. Serve over rice or with warmed flatbread. Using tomatoes gives a tangier curry, while coconut milk makes it creamier.

    5. Fast Bean-and-Veggie Soup or Stew

    Build: canned beans or pre-cooked lentil pouches, broth, canned tomatoes, frozen vegetables, dried herbs, and toast or crackers on the side.

    Prep-order tip: Combine everything in one pot first, then use the simmer time to prepare the sides.

    Practical example: Add broth, tomatoes, beans or lentils, frozen vegetables, and a teaspoon or so of dried herbs (Italian seasoning or thyme work well) to a pot. Bring it to a simmer. While it heats, toast bread or set out crackers. Season at the end, since broth and canned tomatoes may already be salty. If you want a thicker stew, mash a few beans against the side of the pot with a spoon.

    What to Keep on Hand for Rushed Evenings

    A short, repeatable stock list is what makes these dinners possible when you're tired. You can use this as a checklist. If you want a printable version, a beginner plant-based pantry checklist can help you organize it by store section.

    Pantry

    • [ ] Canned beans, chickpeas, and lentils
    • [ ] Instant or quick-cooking rice, couscous, and pasta
    • [ ] Canned tomatoes, broth, and coconut milk
    • [ ] Tortillas or flatbread

    If you're ready to stock up on basics like instant rice and canned beans, buy only what fits the patterns you plan to try first.

    Freezer

    • [ ] Mixed stir-fry vegetables, spinach, corn, peas, and peppers
    • [ ] Optional: frozen cooked rice or edamame

    Fridge

    • [ ] Tofu, hummus, and lemons or limes

    Flavor Boosters

    • [ ] Soy sauce, salsa, curry powder, garlic, chili flakes, and olive oil

    Many of these items overlap across patterns. Beans work in bowls, pasta, and soup, and one bag of frozen vegetables can go into a stir-fry or a curry.

    Budget and Time-Saving Tips

    • Choose versatile staples. Pick items that work in several patterns, such as canned beans, frozen mixed vegetables, and a single all-purpose spice blend, rather than ingredients for only one dish.
    • Rinse canned beans, and check labels for sodium if that matters to you. Rinsing is a common way to reduce the salt from the canning liquid, and labels vary by brand and product.
    • Cook once and use twice. Make extra rice or beans tonight and use them tomorrow in a bowl, a soup, or a quick curry. Refrigerate leftovers promptly.
    • Use one pan or one pot. Fewer dishes mean less time spent after dinner. Soups, curries, and skillet meals are good for this. For more ideas, see one-pot plant-based meal ideas.
    • Build from what's already in your kitchen. If you have half a bag of frozen peas, put them in the curry instead of buying something new.

    FAQ

    Are canned beans and frozen vegetables acceptable for plant-based dinners?

    Yes. They are pre-cooked or ready to cook, which makes them practical for beginners. Rinsing canned beans is a common way to reduce the salt from the canning liquid.

    How can I make quick plant-based dinners more filling?

    Include a protein (beans, lentils, tofu), a starch or whole grain, and a source of fat such as olive oil, nuts, seeds, or avocado.

    Can I prep any of this ahead?

    Yes. Cook extra grains, rinse and store beans, chop fresh vegetables, or mix sauces in advance. Refrigerate leftovers promptly.

    Conclusion

    Quick plant-based cooking comes down to a repeatable formula: a fast base, a ready protein, frozen vegetables, and a flavorful finish. Pick one of the five patterns, stock a few staples, and rotate flavors with salsa, soy sauce, curry powder, or lemon as the week goes on. The same cans and bags can make very different dinners.

    Start with one pattern this week and build your pantry list around it. Once the steps feel familiar, you can mix and match the patterns without a recipe.

  • Savory Roasted Chickpeas: 5 Crunchy Flavors for an Easy Afternoon Snack

    Savory Roasted Chickpeas: 5 Crunchy Flavors for an Easy Afternoon Snack

    This article contains affiliate links. We may earn a commission if you buy through them, at no extra cost to you.

    Savory Roasted Chickpeas: 5 Crunchy Flavors for an Easy Afternoon Snack

    Meta description: A reliable roasted chickpeas recipe for the oven or air fryer, plus five seasoning blends: smoky BBQ, ranch, cinnamon sugar, curry, and salt and vinegar.

    A can of chickpeas can become a crunchy, inexpensive snack with very little effort. This roasted chickpeas recipe gives you one dependable method for the oven or air fryer, five seasoning blends, and tips for storing and re-crisping. If you want more ideas to round out your snack rotation, browse our [healthy snack ideas]([VERIFY: insert pillar article URL]).

    How to Make Roasted Chickpeas (Quick Answer)

    Drain and rinse canned chickpeas, then dry them thoroughly. Toss them with a little oil and salt and roast in a single layer until crisp, using either an oven or an air fryer. Season delicate or sugary blends after cooking so they don't burn.

    Note: Times and temperatures vary by appliance, so check early. Look for a deep golden color and a dry, hollow rattle when you shake the pan.

    Key Takeaways

    • Dry the chickpeas well. This matters more than any other step.
    • Use a single layer and only a light coat of oil.
    • Add sugary or fine herb seasonings after roasting.
    • Let the chickpeas cool completely before judging crispness.
    • Store them airtight and re-crisp briefly in the oven or air fryer.

    Ingredients and Equipment

    Ingredients (for one batch):

    • One 15-oz can chickpeas, drained and rinsed. Dried chickpeas that you've fully cooked and drained also work.
    • 1–2 tablespoons neutral oil, such as olive or avocado
    • About ½ teaspoon salt, adjusted to taste

    Equipment:

    Why Drying Chickpeas Matters

    Surface moisture turns to steam in the heat, and steam gives you chewy chickpeas instead of crisp ones. A dry surface also helps the oil and seasoning cling, so each chickpea browns evenly and tastes seasoned rather than patchy.

    How to Dry Them

    1. Rinse, shake, and pat. Rinse the chickpeas in a colander, shake off the water, then pat them dry with a towel. 2. Optional air-dry. Spread them on a towel for a while. As they dry, rub them gently to loosen any loose skins, then discard the skins. 3. Dry again before oiling. Give them one last pat right before you add oil, since they can pick up moisture while they sit.

    Step-by-Step Method

    Oven Method

    1. Preheat the oven to 400°F (a starting point, so adjust for your oven). 2. Dry the chickpeas thoroughly. 3. Toss them with oil and salt in a bowl. 4. Spread them in a single layer on a rimmed baking sheet. 5. Roast, shaking the pan partway through. Start checking around 20 minutes and keep going if needed. 6. Turn off the oven and let the chickpeas cool on the pan to finish crisping.

    Doneness cue: They should look deep golden, feel dry, and rattle on the pan. If they still feel soft in the center, return them to the oven for a few more minutes.

    Air-Fryer Method

    1. Prep the chickpeas the same way: rinse, dry well, then toss with oil and salt. 2. Cook in a single layer at 375–390°F. 3. Shake the basket often. Start checking after about 10 minutes. 4. If the basket is crowded, cook in batches. 5. Cool completely before tasting.

    Tips for Extra Crunch

    • Don't overcrowd the pan. Crowding traps steam.
    • Use only a light coat of oil. Too much makes chickpeas greasy rather than crisp.
    • Cool completely before judging crispness. Chickpeas firm up as they cool.

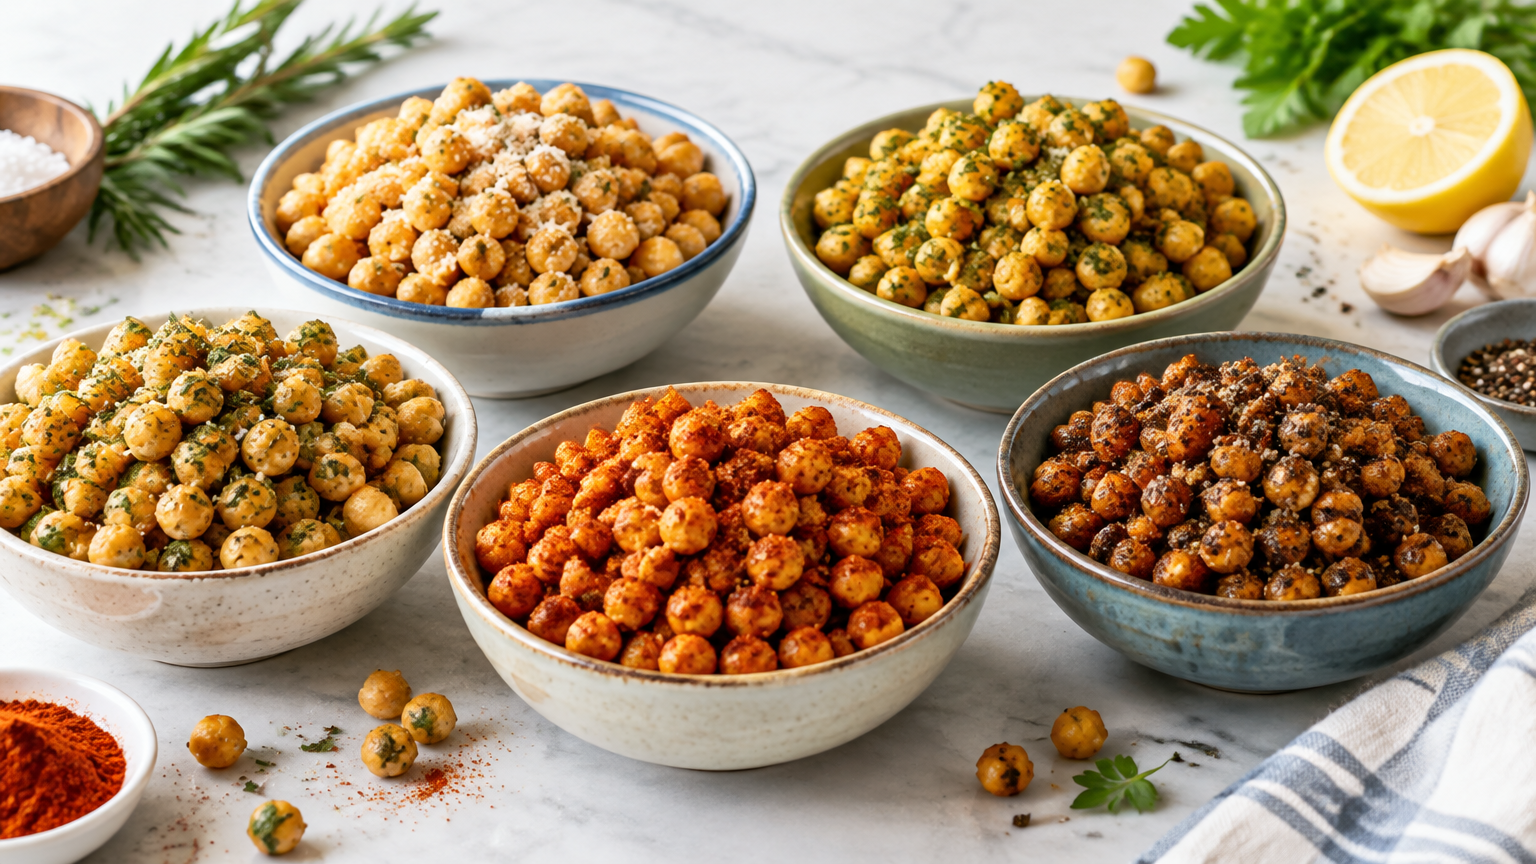
    5 Seasoning Blends for Roasted Chickpeas

    Each blend below is enough for one batch (about one 15-oz can). Treat the amounts as starting points and adjust to taste.

    1. Smoky BBQ

    • 1 teaspoon smoked paprika
    • ½ teaspoon garlic powder
    • ½ teaspoon onion powder
    • ½ teaspoon chili powder
    • 1 teaspoon brown sugar (optional)
    • Salt to taste

    Tip: If you include brown sugar, toss the chickpeas with the spices after roasting to avoid scorching. Without sugar, you can add the spices before roasting.

    2. Ranch

    • 1 teaspoon dried dill
    • 1 teaspoon dried parsley
    • 1 teaspoon dried chives
    • ½ teaspoon garlic powder
    • ½ teaspoon onion powder
    • ¼ teaspoon black pepper
    • Salt to taste

    Tip: Toss while the chickpeas are still warm so the herbs stick.

    3. Cinnamon Sugar

    • 1 tablespoon sugar
    • ½ teaspoon cinnamon
    • Pinch of salt

    Tip: Roast the chickpeas plain with a little oil, then toss with the cinnamon sugar while they're warm. This is the sweet option in an otherwise savory lineup.

    4. Curry

    • 2 teaspoons curry powder
    • ½ teaspoon cumin
    • ½ teaspoon garlic powder
    • Salt to taste
    • Pinch of cayenne (optional)

    You can toss these spices with the chickpeas and oil before roasting. Watch the color near the end, since ground spices can darken quickly.

    5. Salt and Vinegar

    • Roast the chickpeas with salt.
    • Finish with a light vinegar toss (about 1–2 teaspoons), or use vinegar powder if you have it.
    • Dry briefly or return to the oven for a few minutes.

    Tip: Liquid vinegar adds moisture, so use it sparingly and add it at the end.

    Flavor Comparison

    Blend Taste profile When to add
    Smoky BBQ Smoky, slightly sweet Before (no sugar) or after (with sugar)
    Ranch Herby, savory After, while warm
    Cinnamon Sugar Sweet, warm After, while warm
    Curry Warm and spiced Before or after
    Salt and Vinegar Tangy Vinegar at the end

    How to Store Roasted Chickpeas

    • Cool completely first. Storing warm chickpeas traps steam and softens them.
    • Use an airtight container at room temperature. If they still seem to be releasing moisture, keep the lid loose for the first several hours.
    • Expect some softening over time, especially in humid air or with wet seasonings like vinegar.
    • Safety note: If they look or smell off, discard them.

    How to Re-Crisp Roasted Chickpeas

    • Oven: Spread them on a sheet pan and warm briefly at moderate heat.
    • Air fryer: Heat for a few minutes, shaking the basket.
    • Let them cool before eating. They crisp up as they cool.

    Serving Ideas

    Eat them by the handful, or scatter them over salads, soups, and grain bowls. The cinnamon sugar version works well on yogurt bowls.

    They're also portable and desk-friendly, so they fit right into our roundup of [easy work snacks]([VERIFY: insert work snacks article URL]). Because chickpeas are an inexpensive pantry ingredient, they also belong on a list of [budget-friendly snacks]([VERIFY: insert budget snacks article URL]).

    Roasted Chickpeas FAQs

    Why aren't my roasted chickpeas crispy?

    The usual causes are chickpeas that weren't dried well, a crowded pan, or too short a cook time. Also make sure you let them cool before testing, since they're softer when hot.

    Can I use dried chickpeas instead of canned?

    Yes. Cook them fully, drain them, and dry them thoroughly before oiling.

    How long do roasted chickpeas stay crunchy?

    They're best fresh and gradually soften. Store them airtight and re-crisp as needed. I haven't tested a specific shelf life, so I won't promise one.

    Conclusion

    Dry the chickpeas well, roast them in a single layer, season according to the blend, and store them airtight. Pick one flavor to try first, then explore more ideas in our [healthy snack ideas]([VERIFY: insert pillar article URL]).

    Note: Internal link URLs and affiliate link destinations are placeholders and need to be supplied before publishing.

  • The Adolescent Chewing Phase: What to Expect From Teenage Dogs and How to Manage It

    The Adolescent Chewing Phase: What to Expect From Teenage Dogs and How to Manage It

    This article contains affiliate links. We may earn a commission if you buy through them, at no extra cost to you.

    The Adolescent Chewing Phase: What to Expect From Teenage Dogs and How to Manage It

    Meta description: The adolescent dog chewing phase can start after teething ends. Learn why teenage dogs chew again and how to manage it with consistent rules, supervised freedom, and training.

    Disclosure: This article contains affiliate links. If you use them, the site may earn a commission.

    The puppy teeth are gone, yet your dog is chewing again, sometimes more destructively than before. Table legs, shoes, and remote controls are suddenly fair game. This is common during adolescence, which runs roughly from 6 to 18 months, though timing varies by dog and breed. This article explains why the adolescent dog chewing phase happens, what to expect, and how to manage it with a practical plan.

    Key takeaways

    • Adolescent chewing is separate from teething and is driven more by behavior, energy, and environment.
    • Timing and intensity vary by individual dog and breed.
    • Consistent rules, supervised freedom, and ongoing training are the foundation of management.
    • Sudden, extreme chewing or swallowing non-food items warrants a call to your veterinarian.

    Quick Answer: What Is the Adolescent Dog Chewing Phase?

    The adolescent dog chewing phase is a period, roughly 6 to 18 months, when a dog that is past teething chews new or more items. It is driven by maturing behavior, more energy, curiosity, and greater freedom. It is manageable with consistent rules, supervision, and ongoing training.

    Timing and intensity vary by individual dog and breed. Some dogs barely show it, while others have clear peaks.

    Adolescent Chewing vs. Teething: Key Differences

    Teething chewing (puppy stage)

    Teething is linked to losing baby teeth and the arrival of adult teeth. It typically ends within the first several months of life. Chewing during this time often helps soothe sore gums.

    Adolescent chewing

    Adolescent chewing is not primarily about mouth discomfort. It is more about behavior, energy, and the environment your dog lives in. A dog with a full set of adult teeth may chew because it is bored, curious, or has simply learned that chewing the couch is rewarding.

    Quick comparison

    Teething Adolescent chewing
    Main cause Baby teeth falling out, adult teeth emerging Maturing behavior, energy, curiosity, freedom
    Typical timing First several months Roughly 6 to 18 months (varies)
    What helps Safe, appropriate chew items; patience Consistent rules, supervision, outlets, training

    Why Teenage Dogs Chew More (or Start Again)

    Exploration and mouth-based curiosity

    Dogs investigate the world with their mouths. As adolescents grow more confident and mobile, they find more things to explore, and they can reach more of them.

    Excess energy and boredom

    A growing body with plenty of energy and too little to do is a recipe for chewing. If exercise and mental work do not match the dog's needs, the dog will often invent its own entertainment.

    Increased independence and testing of boundaries

    Teenage dogs often seem to "forget" what they learned as puppies. They are more independent and may test the rules, including what is and isn't okay to chew.

    Too much freedom too soon

    Owners often relax rules once the dog looks grown. A dog that was reliable in a gated kitchen may suddenly have the run of the house. Physical size may be adult-like while judgment is still developing. This is one of the most common reasons chewing flares up.

    Stress, frustration, or changes in routine

    A new schedule, a move, a houseguest, or long stretches alone can all push a dog to chew as a way of coping or releasing tension.

    When chewing may signal something else

    Check with a veterinarian if you notice:

    • Sudden or extreme chewing that is out of character
    • Swallowing non-food items
    • Signs of mouth pain, such as drooling, dropping food, or pulling away when touched near the face

    What to Expect: Timing Varies by Dog and Breed

    The 6-to-18-month window is a rough guide, not a fixed schedule. Several factors shape what you will see:

    • Breed and size: Breeds and sizes mature at different rates, and chewing habits can differ.
    • Individual temperament: Some dogs are naturally more mouthy.
    • Exercise and mental stimulation: Unmet needs often show up as chewing.
    • Past training: Dogs with solid foundations often recover more quickly from adolescent regression.

    Some dogs sail through with only a chewed sock or two. Others have noticeable peaks and quiet stretches. Avoid expecting an exact end date. Focus on progress and consistency instead.

    How to Manage the Adolescent Chewing Phase

    Step 1: Set consistent rules

    • Make sure every household member follows the same expectations. Mixed messages slow learning.
    • Create clear "yours vs. not yours" categories. Keep dog items in one place and reward your dog for chewing them.
    • When your dog grabs something off-limits, calmly trade for an appropriate item rather than chasing or scolding.

    Example: Your dog picks up a slipper. Instead of chasing, you offer a chew toy, say "good," and put the slipper away.

    Step 2: Use supervised freedom

    Give access to space gradually, and let your dog earn more freedom as reliability grows.

    • Use baby gates, closed doors, or a tether while you are watching.
    • Provide a crate or pen for safe downtime. See our crate training basics guide if your dog is new to this.
    • Remove temptations such as shoes, remotes, and laundry.

    Example: Start with one dog-proofed room. After a few weeks without incidents, add a second room while you are home.

    Step 3: Provide appropriate outlets

    • Rotate several safe chew items with different textures so they stay interesting.
    • Offer food puzzles, sniff walks, and structured play.
    • Match exercise and mental work to your dog's age, breed, and health. If you are unsure what suits your dog, ask your veterinarian.

    Step 4: Reinforce training

    • Practice "drop it," "leave it," and "trade" in calm moments, not only when your dog has something forbidden.
    • Reward good choices, such as picking up a chew toy on their own.
    • Keep sessions short and frequent, and expect some regression during adolescence.

    If you want structured guidance for daily practice, a program such as Brain Training for Dogs is one option to explore. [VERIFY: confirm program details before adding any claims about content or results.]

    Step 5: Manage the environment

    • Dog-proof high-risk areas such as cords, trash cans, and shoe racks.
    • Use taste deterrents only if they are safe for your dog, and treat them as a supplement, not a fix.

    What to avoid

    • Punishment after the fact. Dogs may not connect it to the chewing, and it can increase stress and confusion.
    • Giving old shoes or household items as toys. Dogs cannot tell the difference between "old" and "new."
    • Unsafe chews. Choose items suited to your dog's size and chewing style, and supervise.

    When to Call a Professional

    Veterinarian: Contact your vet for a sudden change in behavior, signs of pain, ingesting non-food items, or any suspected medical issue.

    Trainer or behaviorist: Consider help if chewing is paired with anxiety, if the dog is destructive when left alone, or if there is no improvement despite consistent management.

    Quick Checklist

    • [ ] Everyone in the home uses the same rules
    • [ ] Dog-proofed shoes, laundry, and small items out of reach
    • [ ] Freedom increases gradually and only with supervision
    • [ ] Several safe chews rotated regularly
    • [ ] Daily exercise, sniffing, and mental work
    • [ ] "Drop it," "leave it," and "trade" practiced often
    • [ ] Good choices rewarded
    • [ ] No punishment after the fact
    • [ ] Vet or trainer contacted if chewing seems extreme

    FAQs

    How long does the adolescent dog chewing phase last?

    It is often tied to the roughly 6-to-18-month stage, but it varies by dog and breed. Consistent management helps it pass with fewer problems.

    Is adolescent chewing the same as teething?

    No. Teething relates to losing baby teeth and getting adult teeth. Adolescent chewing is more tied to behavior, energy, curiosity, and environment.

    Will my dog grow out of chewing on their own?

    Many dogs chew less as they mature, but habits can stick if they are rehearsed. Redirect your dog, reward appropriate chewing, and limit unsupervised access.

    Conclusion

    The adolescent dog chewing phase is a normal stage for many dogs, and it is manageable. Three pillars carry most of the work: consistent rules, supervised freedom, and training reinforcement. Build a simple daily routine with exercise, chew time, short training sessions, and safe downtime. If chewing seems extreme or you are worried about your dog's health or stress level, consult a veterinarian or qualified trainer.

    Related reading (to link internally): puppy teething guide; safe chew toys by chewing style; crate training basics; teaching "drop it" and "leave it."

  • Easy Chickpea Curry for Beginners: A Budget Weeknight Dinner With Pantry Ingredients

    Easy Chickpea Curry for Beginners: A Budget Weeknight Dinner With Pantry Ingredients

    This article contains affiliate links. We may earn a commission if you buy through them, at no extra cost to you.

    Easy Chickpea Curry for Beginners: A Budget Weeknight Dinner With Pantry Ingredients

    Easy chickpea curry for beginners takes about 30 minutes and uses canned chickpeas, canned tomatoes or coconut milk, an onion, garlic, and common spices like curry powder, cumin, and turmeric. Sauté the aromatics, toast the spices, add the liquid and chickpeas, simmer until thickened, then season to taste.

    This guide gives you a flexible, low-effort recipe built for a budget weeknight dinner, plus simple fixes for the most common problems: bland flavor, watery sauce, and harsh spices.

    Key Takeaways

    • Canned chickpea curry needs only a handful of pantry ingredients and one pot.
    • Choose a tomato base for tang, coconut milk for creaminess, or combine them for balance.
    • Toast the spices in oil for under a minute to bring out their flavor.
    • Salt, acid, and simmer time fix most bland curries. Uncovered simmering and mashed chickpeas fix most watery ones.
    • Start mild and let everyone add heat at the table.

    What You'll Need (Pantry Ingredients)

    The recipe below makes about 3–4 servings. Amounts are flexible, so treat them as a starting point rather than a strict formula.

    Core ingredients

    • 2 cans (about 15 oz each) chickpeas, drained and rinsed
    • 1 medium onion, chopped
    • 3 cloves garlic, minced
    • 2 tablespoons oil (any neutral cooking oil works)
    • Base: one 14–15 oz can diced or crushed tomatoes, or one 13.5 oz can coconut milk, or half of each
    • 1½ to 2 tablespoons curry powder, or a blend of 2 teaspoons cumin, 2 teaspoons coriander, 1 teaspoon turmeric, and ½ teaspoon chili powder
    • Salt, starting with ½ teaspoon and adjusting at the end

    Optional add-ins

    • A thumb-sized piece of fresh ginger, grated
    • 1–2 tablespoons tomato paste for deeper flavor
    • A few handfuls of spinach or a cup of frozen vegetables
    • Lemon or lime juice to brighten the finished dish
    • Fresh cilantro for garnish

    Basic equipment

    You need a medium pot or deep skillet, a wooden spoon, and a colander for rinsing the chickpeas. If you're missing a wide, deep pan, a deep skillet or sauté pan gives you plenty of surface area for the sauce to thicken evenly. A regular pot works fine too.

    Quick shopping checklist

    Item Have it?
    Canned chickpeas (2 cans) ☐
    Onion and garlic ☐
    Cooking oil ☐
    Canned tomatoes and/or coconut milk ☐
    Curry powder (or cumin, coriander, turmeric, chili powder) ☐
    Salt ☐
    Optional: ginger, tomato paste, spinach, lemon/lime, cilantro ☐

    Which Base Should You Choose: Tomatoes or Coconut Milk?

    Both bases work well in canned chickpea curry. The difference is mostly in taste and texture.

    • Tomato base: Tangier and lighter. The acidity gives the curry a bright, punchy flavor, and the sauce tends to look deep orange-red.
    • Coconut milk base: Creamier and milder. It softens the spices and gives the sauce a rounder, richer feel.
    • Combination: Balanced and rich. The tomatoes bring tang while the coconut milk smooths it out. This is a good choice if you want a middle path.

    How to decide: Use what's in your pantry. If you only have tomatoes, you're set. If you only have coconut milk, you're also set, and a squeeze of lemon at the end will add the brightness tomatoes would have provided. If you have both, try half a can of each for your first batch and adjust next time.

    If you're building a rotation of meatless meals, these plant-based dinner ideas can help you plan around staples like canned chickpeas.

    Step-by-Step: How to Make Easy Chickpea Curry for Beginners

    Step 1: Prep the chickpeas and aromatics

    Drain and rinse the chickpeas in a colander. Chop the onion, mince the garlic, and grate the ginger if you're using it. Having everything ready before you turn on the stove helps, because the garlic and spices cook quickly.

    Step 2: Cook the onion

    Heat the oil in your pot over medium heat. Add the onion with a pinch of salt and cook, stirring occasionally, for about 5–8 minutes, until soft and lightly golden. Don't rush this step. Well-cooked onion gives the sauce a sweeter, more developed base.

    Step 3: Add garlic and spices

    Stir in the garlic (and ginger, if using) along with the curry powder or your spice blend. Cook for about 30–60 seconds, stirring constantly. You should smell the spices become fragrant. If they start to stick or look like they might scorch, add a splash of water right away.

    If you're using tomato paste, add it now and cook it for a minute until it darkens slightly.

    Step 4: Add tomatoes and/or coconut milk

    Pour in your chosen base. Stir well and scrape up any browned bits from the bottom of the pot, since they carry a lot of flavor. If you're using tomatoes alone, add about ¼ to ½ cup water to keep the sauce from getting too thick too soon.

    Step 5: Add chickpeas and simmer

    Add the drained chickpeas and stir to coat. Bring to a gentle bubble, then lower the heat and simmer uncovered for about 15–20 minutes, stirring occasionally. Use the back of your spoon to lightly mash a few chickpeas against the side of the pot. The mashed ones release starch and help thicken the sauce naturally.

    If you're adding spinach or frozen vegetables, stir them in during the last 3–5 minutes.

    Step 6: Season and finish

    Taste the curry. Add salt a pinch at a time. Then add a squeeze of lemon or lime juice to wake up the flavors. Stir in chopped cilantro if you have it. Taste once more and adjust. This final tasting step is what turns an okay curry into a good one.

    How to Adjust the Spice Level

    "Curry powder" blends vary widely in heat, so it helps to know your options.

    Make it milder

    • Use a mild curry powder, or reduce the chili powder in a homemade blend.
    • Skip any fresh or dried chili.
    • Use more coconut milk in the base.
    • Stir a spoonful of yogurt into individual bowls at serving time.

    Make it spicier

    • Add chili powder, red pepper flakes, or a chopped fresh chili.
    • Finish with a little black pepper.
    • Add heat gradually, ¼ teaspoon at a time, and taste between additions. Heat often builds as the curry simmers, so go slowly.

    Tip for tailoring to a group

    Cook the pot on the mild side, then let people customize their own bowls with hot sauce, chili flakes, or sliced fresh chili at the table. This works especially well for mixed households.

    Serving Ideas

    With rice

    Basmati, jasmine, or any plain rice is a classic partner. The rice soaks up the sauce and balances the spices.

    With bread

    Naan, pita, flatbread, or even simple toast all work for scooping. Warm the bread briefly in a dry skillet or oven first.

    Other easy options

    • Spoon the curry over a baked potato
    • Serve with cooked quinoa
    • Add a simple side salad for freshness
    • Top with a dollop of yogurt

    Leftovers note

    Store leftover curry in a covered container in the refrigerator. Reheat it thoroughly until hot throughout, adding a splash of water if the sauce has thickened. Curries often taste even more flavorful the next day as the spices meld.

    Troubleshooting Bland or Watery Curry

    Even simple recipes can go sideways. Here's how to rescue the most common issues.

    If the curry tastes bland

    • Add salt in small amounts. Under-salting is the most common culprit. Add a pinch, stir, and taste.
    • Add acid. A squeeze of lemon or lime juice, or a small splash of vinegar, brightens flat flavors.
    • Bloom more spice. Heat a teaspoon of oil in a small pan, add a little more curry powder or cumin for 20–30 seconds, then stir it into the pot. You can also add more garlic or ginger.
    • Simmer longer. Another 5–10 minutes can deepen the flavor.

    If the curry is too watery

    • Simmer uncovered longer. Evaporation concentrates the sauce.
    • Mash some chickpeas. Press a handful against the side of the pot to thicken.
    • Stir in tomato paste. A spoonful adds body and flavor. Cook it for a couple of minutes.

    If it's too thick, sour, or harsh

    • Too thick: Thin with water or broth, a few tablespoons at a time.
    • Too sour: Balance with a pinch of sugar or a bit more coconut milk.
    • Harsh or raw-tasting spices: This usually means the spices didn't cook long enough. Simmer the curry a bit longer, or bloom some extra spice in oil as described above.

    Quick-fix summary

    Problem First thing to try Backup fix
    Bland Pinch of salt, then lemon/lime Bloom more spice in oil
    Watery Simmer uncovered Mash chickpeas or add tomato paste
    Too thick Splash of water or broth Reheat gently, stirring
    Too sour Pinch of sugar More coconut milk
    Raw-tasting spices Simmer longer Bloom extra spice in oil

    FAQs

    Can I make chickpea curry without coconut milk?

    Yes. Use canned tomatoes alone, adding a little water as needed. If you want creaminess, finish with yogurt or a plant-based alternative.

    Do I need to rinse canned chickpeas?

    Rinsing is common and helps remove the canning liquid, which some people find has a strong taste. Follow the can's label and your own preference.

    What can I use if I don't have curry powder?

    Combine common ground spices such as cumin, coriander, turmeric, and chili powder, adjusting to taste. The amounts listed in the ingredients section are a good starting point.

    Final Takeaway

    Easy chickpea curry for beginners comes down to a few repeatable habits: cook the onion until soft, toast the spices briefly, simmer until the sauce thickens, and taste before serving. Because it relies on pantry ingredients and swaps easily between tomatoes and coconut milk, it fits comfortably into a budget weeknight dinner routine.

    Try the base recipe once as written. Then make it your own with different spices, more or less heat, and your favorite rice or bread on the side.