Category: Plant-Based Living

Everyday plant-based meals, beginner tips, and practical kitchen ideas.

  • Best Plant-Based Cookbooks for Beginners on a Budget: What to Look for Before You Buy

    Best Plant-Based Cookbooks for Beginners on a Budget: What to Look for Before You Buy

    This article contains affiliate links. We may earn a commission if you buy through them, at no extra cost to you.

    Best Plant-Based Cookbooks for Beginners on a Budget: What to Look for Before You Buy

    Title tag: Best Plant-Based Cookbooks for Beginners on a Budget: Buyer's Guide Meta description: Learn how to choose the best plant based cookbooks for beginners on a budget. Compare cookbook types, evaluation criteria, and a quick preview checklist before you buy.

    New plant-based cooks often buy a cookbook with long ingredient lists, unfamiliar items, or complicated techniques, then cook from it once or twice. That is an expensive way to learn what doesn't work for you. This guide gives you a simple framework to judge any cookbook before you spend money. It uses criteria, not rankings, so you can evaluate any title yourself, whether you're holding it in a store or reading a preview online.

    Disclosure: Some links in this article may be affiliate links. They don't change the criteria below.

    —

    Quick Answer: What Makes a Plant-Based Cookbook Good for Beginners?

    The best plant based cookbooks for beginners use ingredients you can find at a regular grocery store, keep recipes short, and build on pantry staples. They also offer realistic weeknight timing and give clear step-by-step instructions. Budget-friendly options reuse ingredients across recipes to reduce waste.

    Key takeaways: the five criteria

    • Ingredient accessibility: most items are available at a standard supermarket.
    • Recipe length: short ingredient lists and few steps.
    • Pantry-based cooking: recipes rely on repeatable staples.
    • Weeknight timing: stated times that seem realistic for your skill level.
    • Clear instructions: plain language, numbered steps, and visual cues.

    —

    How to Evaluate a Beginner Plant-Based Cookbook

    1. Ingredient Accessibility

    A cookbook is only useful if you can buy what it calls for. Flip through and note whether most recipes rely on common produce, beans, grains, canned goods, and frozen items such as vegetables and fruit.

    Watch for specialty items that appear in many recipes: specific flours, fermented products, niche meat or dairy substitutes, or unusual spice blends. One or two in a book is manageable. If nearly every recipe needs one, your grocery bill and your number of store trips will climb.

    Also look for substitution notes. A book that says "use any canned bean" or "swap spinach for kale" teaches flexibility and helps you cook with what you already have.

    2. Recipe Length

    Short ingredient lists and few steps are easier for new cooks. Check whether recipes fit on one page or span several. A recipe that sprawls across multiple pages often has more components to manage at once, which is stressful when you're still learning.

    Pay attention to sub-recipes. If a dinner requires a homemade sauce, a homemade "cheese," and a separate topping before you can assemble the main dish, the real time and effort are much higher than the title suggests. A few such recipes are fine for weekend projects. A book full of them is not beginner-friendly.

    3. Pantry-Based Cooking

    Pantry-based cooking is one of the biggest levers for budget-conscious cooks. Look for a pantry-stocking guide or starter shopping list near the front of the book. Then check whether recipes reuse the same staples, such as lentils, rice, oats, canned tomatoes, and a core set of spices.

    Reuse matters because it reduces waste. If a recipe calls for a small amount of an ingredient you'll never use again, you've paid for a full package to use a spoonful. Favor books that explain storage and leftovers, such as how long cooked grains keep or how to freeze a batch of soup.

    If you're still building your foundation, this introduction to plant-based cooking basics can help you decide which staples to stock first.

    4. Weeknight Timing

    Look for stated prep and cook times, then judge whether they seem realistic for you. A recipe listing "15 minutes" may assume fast knife skills and pre-chopped vegetables. As a beginner, you may want to mentally add some buffer.

    Check for one-pot, sheet-pan, or batch-cooking options, which reduce both active time and cleanup. Meal-prep or make-ahead guidance is also a good sign, since it helps you plan around a busy schedule instead of cooking from scratch every night.

    5. Clear Instructions

    Good instructions are the difference between a confident first attempt and a frustrating one. Look for:

    • Numbered steps written in plain language
    • Visual cues such as "until golden" or "until the onions are soft" instead of time alone
    • Explained techniques, such as how to cook dried beans or press tofu, and a glossary for unfamiliar terms
    • Both US and metric measurements, if you need them

    Photos are helpful but not essential. Test whether the text can stand alone: could you cook the recipe if the photo weren't there?

    —

    Cookbook Types to Consider

    Different books serve different goals. Matching the type to your situation is as important as judging an individual title.

    Beginner Basics and Foundations Books

    These teach techniques and core recipes, such as cooking grains, building a basic soup, and roasting vegetables. They're good for building skills you'll use for years.

    Budget and Pantry-Focused Books

    These emphasize inexpensive staples and minimal waste. They often include shopping lists and ways to reuse leftovers.

    Quick and Easy / Weeknight Books

    These prioritize short timelines and minimal equipment. They suit people who mostly need dinner on the table fast.

    One-Pot, Sheet-Pan, or Slow-Cooker Books

    These reduce cleanup and active time. Check equipment requirements first, since a slow cooker or large sheet pans may be an added cost.

    Meal-Prep and Batch-Cooking Books

    These are useful for planning and for saving money by cooking in bulk. Check that they give clear storage and reheating guidance.

    Cuisine-Specific Plant-Based Books

    Some culinary traditions are naturally plant-forward, such as those built around beans, lentils, and vegetables. These can be flavorful and economical, but verify that the key ingredients are available where you live.

    Quick Comparison

    Type Best for Watch out for
    Beginner basics Learning techniques Slower, project-style recipes
    Budget/pantry Saving money, reducing waste Repetitive flavors if you cook often
    Quick and easy Busy weeknights Reliance on pre-made products
    One-pot/sheet-pan/slow-cooker Less cleanup Required equipment
    Meal-prep/batch Planning ahead Storage space, unclear storage notes
    Cuisine-specific Flavor variety Local ingredient availability

    —

    Preview Checklist: What to Check Before You Buy

    Use this list with a "Look Inside" preview, a sample chapter, or a library copy.

    • [ ] Read the table of contents. Are recipes organized by meal, time, or ingredient? Which fits how you plan?
    • [ ] View 3–5 sample recipes from different sections, not just the showcase ones.
    • [ ] Count the ingredients in each sample recipe.
    • [ ] Highlight anything you can't find locally. If that's more than one item per recipe, consider another book.
    • [ ] Look for a pantry list or basics chapter.
    • [ ] Confirm prep and cook times are listed.
    • [ ] Read the instructions. Could you follow them without prior experience?
    • [ ] Look for substitutions, storage notes, and nutrition information if you need them.
    • [ ] Check the publication date and edition for updates. [VERIFY edition details at time of purchase.]
    • [ ] Read a range of reviews for comments on clarity and ingredient access, without relying on any single rating.

    Practical example: Say you preview three dinner recipes. The first has 8 ingredients, all from the produce aisle and canned goods. The second needs 14 ingredients, including two you've never seen in your store. The third has a homemade sauce as a separate recipe. Only the first is a clear fit. If the other two are typical of the book, keep looking.

    —

    How to Shop on a Budget

    • Borrow first. A library copy lets you cook a few recipes at no cost.
    • Consider used copies or e-book editions, which often cost less than new print.
    • Look for free sample chapters or publisher previews to check style and clarity.
    • Choose one focused book instead of several general ones. A single book that matches your goal beats a shelf of unused ones.
    • Test two or three recipes before buying more titles.

    —

    Practical Steps: Choose Your Cookbook in 15 Minutes

    1. Define your goal: weeknight meals, saving money, or learning basics. 2. Shortlist 2–3 books by type using the categories above. If dinners are your priority, you could browse plant-based dinner cookbooks to build a shortlist, then judge each one with the checklist rather than by its cover or title. 3. Preview sample recipes using the checklist. 4. Compare each book against the five criteria: ingredient accessibility, recipe length, pantry-based cooking, weeknight timing, and clear instructions. 5. Pick one and cook a few recipes before expanding your collection.

    —

    Red Flags to Avoid

    • Long ingredient lists in most sample recipes
    • Frequent specialty ingredients without alternatives
    • Missing times or vague directions
    • Heavy reliance on pre-made specialty products, which can raise costs and limit flexibility
    • Claims of guaranteed results, whether for health, weight loss, or savings, without support

    —

    FAQs

    What should a beginner look for in a plant-based cookbook?

    Look for short recipes, common ingredients, clear steps, realistic times, and pantry-friendly meals. A basics chapter or starter shopping list is a bonus.

    Are plant-based cookbooks cheaper to cook from?

    It depends on the recipes and ingredients you choose. Staples like beans, grains, and seasonal produce can be economical, but specialty products may raise costs. Check the ingredient lists in the sample recipes to estimate what you'd actually spend.

    Should I buy a print book or an e-book?

    Choose based on how you cook. Print is easy to reference in the kitchen, while e-books may cost less and are searchable. Preview either format first.

    —

    Conclusion

    Finding the best plant based cookbooks for beginners comes down to applying the same five criteria every time: accessible ingredients, short recipes, pantry-based cooking, realistic weeknight timing, and clear instructions. Combine those with the preview checklist and you can judge any book on its merits, without relying on hype or rankings.

    Next step: Build a shortlist of two or three books, run the checklist on each, and choose the one that fits your budget and schedule. Cook a few recipes before buying another. A cookbook only earns its price if you actually use it.
  • Plant-Based Bowl Dinners: How to Build a Cheap Grain Bowl Without a Recipe

    Plant-Based Bowl Dinners: How to Build a Cheap Grain Bowl Without a Recipe

    This article contains affiliate links. We may earn a commission if you buy through them, at no extra cost to you.

    Plant-Based Bowl Dinners: How to Build a Cheap Grain Bowl Without a Recipe

    Meta description: Learn a simple build-your-own formula for cheap plant based grain bowl ideas: pick a grain, protein, vegetables, sauce, and crunchy topping, then reuse leftovers all week.

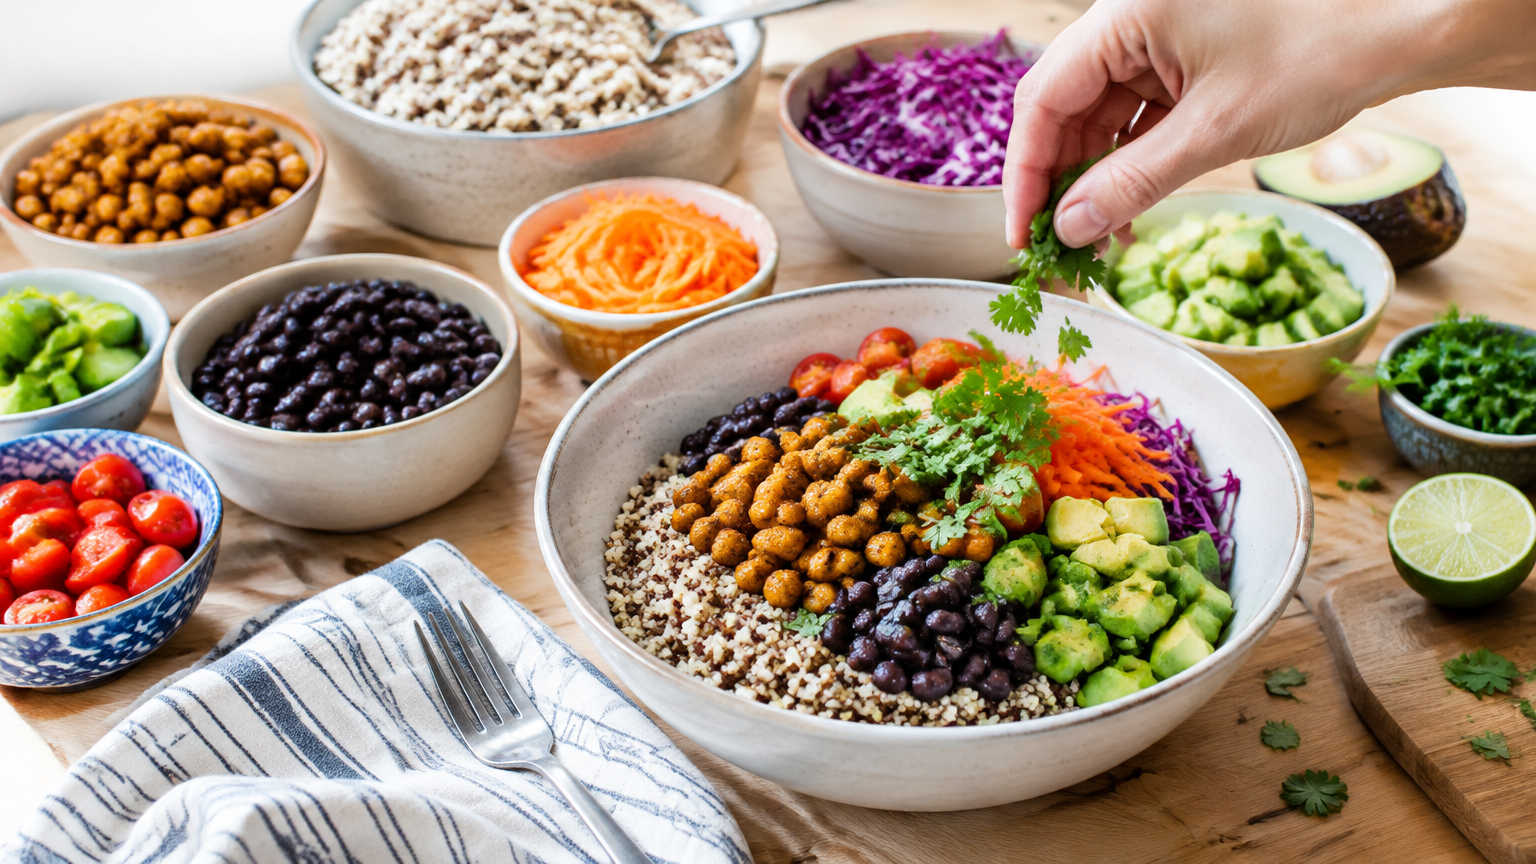
    Bowl dinners work because they're a formula, not a recipe. Once you know the five building blocks, you can shop sales, use what's in the fridge, and still end up with a satisfying meal. This guide covers a five-part framework, budget-friendly combinations, ways to reuse leftovers, and a simple one-week rotation. These cheap plant based grain bowl ideas will help you cook with less planning and less waste.

    Key Takeaways

    • Every bowl is Grain + Protein + Veg + Sauce + Crunch.
    • Swap freely within each category based on what's cheap or already in your kitchen.
    • Cook grains, beans, and one tray of vegetables once, then vary the sauce and topping through the week.
    • Season each component separately so the bowl doesn't taste flat.
    • Add acid (lemon, lime, vinegar) and something crunchy to make simple ingredients taste finished.

    The Short Answer: The 5-Part Cheap Grain Bowl Formula

    Build a bowl from a grain base, a plant protein, roasted or raw vegetables, a sauce, and a crunchy topping. Choose inexpensive staples for each part, cook in batches, and mix and match through the week.

    Formula: Grain + Protein + Veg + Sauce + Crunch

    Use what you have. If a recipe-free approach feels loose, remember that each category is interchangeable: no barley, use rice; no chickpeas, use lentils; no tahini, use peanut butter.

    Step-by-Step: Build Your Bowl Without a Recipe

    Step 1: Choose a Grain Base

    Budget-friendly options include:

    • Rice (brown or white)
    • Barley
    • Bulgur
    • Couscous
    • Pasta
    • Savory oats
    • Quinoa, if you find it on sale
    • Leftover cooked grains from other meals

    Tip: Cook a big batch and season it lightly. A pinch of salt, a splash of vinegar, or cooking in broth instead of water gives the base some flavor of its own.

    Rough ratio: Aim for about half the bowl to be grain and vegetables combined, then adjust to your appetite. Hungrier? Add more grain and protein. Want something lighter? Add more vegetables.

    Step 2: Add a Plant Protein

    Affordable choices include:

    • Canned or dried beans
    • Lentils
    • Chickpeas
    • Tofu
    • Tempeh
    • Peanuts
    • Frozen edamame

    Tip: Dried beans and lentils are typically the lowest cost per serving, while canned beans save time. If you're new to dried beans, a beginner's guide to cooking dried beans from scratch can walk you through soaking and simmering.

    Flavor tip: Season the protein separately. Toss chickpeas with smoked paprika and salt, marinate tofu in soy sauce, or simmer lentils with garlic and bay leaf. Unseasoned beans dumped on top are the fastest route to a bland bowl.

    Step 3: Pick Roasted or Raw Vegetables

    Roasted: carrots, sweet potatoes, cabbage, cauliflower, broccoli, onions, squash

    Raw: shredded cabbage, cucumber, carrots, tomatoes, greens

    Frozen vegetables are a low-waste option. You use only what you need, and nothing wilts in the crisper drawer.

    Basic roasting method: Toss chopped vegetables with oil and salt, spread them on a pan without crowding, and roast until browned at the edges. Timing varies by vegetable, so check often. Dense vegetables like squash take longer than broccoli.

    Tip: Use one roasted and one raw vegetable in each bowl. Warm, caramelized sweet potato next to cool, crisp cabbage gives you contrast without extra effort.

    Step 4: Make a Simple Sauce

    Sauce does the most to make a bowl taste like a meal. You don't need exact recipes, just templates:

    • Creamy: peanut butter or tahini + lemon or vinegar + water + salt
    • Tangy: oil + vinegar or citrus + mustard or herbs
    • Savory: soy sauce + garlic + a little sweetener + water
    • Spicy: hot sauce or chili flakes stirred into any base
    • Yogurt-style: plant-based yogurt + lemon + garlic

    Tip: Thin the sauce with water until it's pourable, then taste and adjust. Too flat? Add salt or acid. Too sharp? Add a little sweetener or oil. Too thick? More water.

    Step 5: Finish With a Crunchy Topping

    Crunch makes the difference between a pile of soft food and a bowl you want to finish. Options include:

    • Toasted seeds (sunflower, pumpkin, sesame)
    • Chopped nuts
    • Crushed crackers or tortilla chips
    • Toasted breadcrumbs
    • Crispy chickpeas
    • Thinly sliced raw onion

    Tip: Add the topping just before eating so it stays crunchy.

    Cheap Plant Based Grain Bowl Ideas (Budget Combinations)

    Here are five combinations built from common pantry staples. Treat them as starting points.

    Grain Protein Vegetables Sauce Crunch
    Rice Black beans Roasted sweet potato + shredded cabbage Lime-chili sauce Crushed tortilla chips
    Barley Chickpeas Roasted carrots + cucumber Lemon-tahini sauce Sunflower seeds
    Brown rice Tofu Frozen broccoli + shredded carrots Peanut-soy sauce Peanuts
    Lentils + rice Lentils (built in) Roasted cabbage + onion Mustard vinaigrette Toasted breadcrumbs
    Couscous or bulgur White beans Tomatoes + greens Garlic-yogurt sauce Chopped nuts

    What each one offers:

    • Rice + black beans + sweet potato: A sweet, smoky, bright bowl with a taco-night feel.
    • Barley + chickpeas + carrots: Chewy, earthy, and lemony, with a Mediterranean tilt.
    • Brown rice + tofu + broccoli: A takeout-style bowl using frozen vegetables and a quick peanut sauce.
    • Lentils + rice + roasted cabbage: A rustic, hearty combination where the mustard vinaigrette cuts through the richness.
    • Couscous or bulgur + white beans + tomatoes: The quickest option, since couscous and bulgur need little cooking.

    Budget-Saving Tips

    • Buy grains and dried beans in bulk when you have storage space.
    • Choose seasonal or frozen vegetables. Frozen are handy when fresh produce is pricey.
    • Make sauces at home from pantry basics rather than buying several bottled dressings.
    • Stick to one flavor profile per bowl (say, lime and chili, or lemon and tahini) so you aren't buying a dozen ingredients for one meal.

    Prices vary by store and region, so compare unit prices rather than assuming any one item is cheapest.

    How to Reuse Leftovers in Bowls

    Bowls are one of the easiest ways to use leftovers because every component is flexible.

    • Leftover grains: Reheat with a splash of water, or crisp them in a hot pan for a toasty, fried-rice-style base.
    • Leftover roasted vegetables: Serve them cold over greens, or blend them with a little oil, lemon, and salt into a sauce or spread.
    • Leftover beans or lentils: Mash them into a spread for toast or wraps, or season them and add them to a new bowl.
    • Odds and ends: Vegetable scraps and stray produce go into a "clean-out" bowl. Half an onion, a lone carrot, and a handful of greens all work.
    • Leftover sauce: Use it as a salad dressing, sandwich spread, or dip.

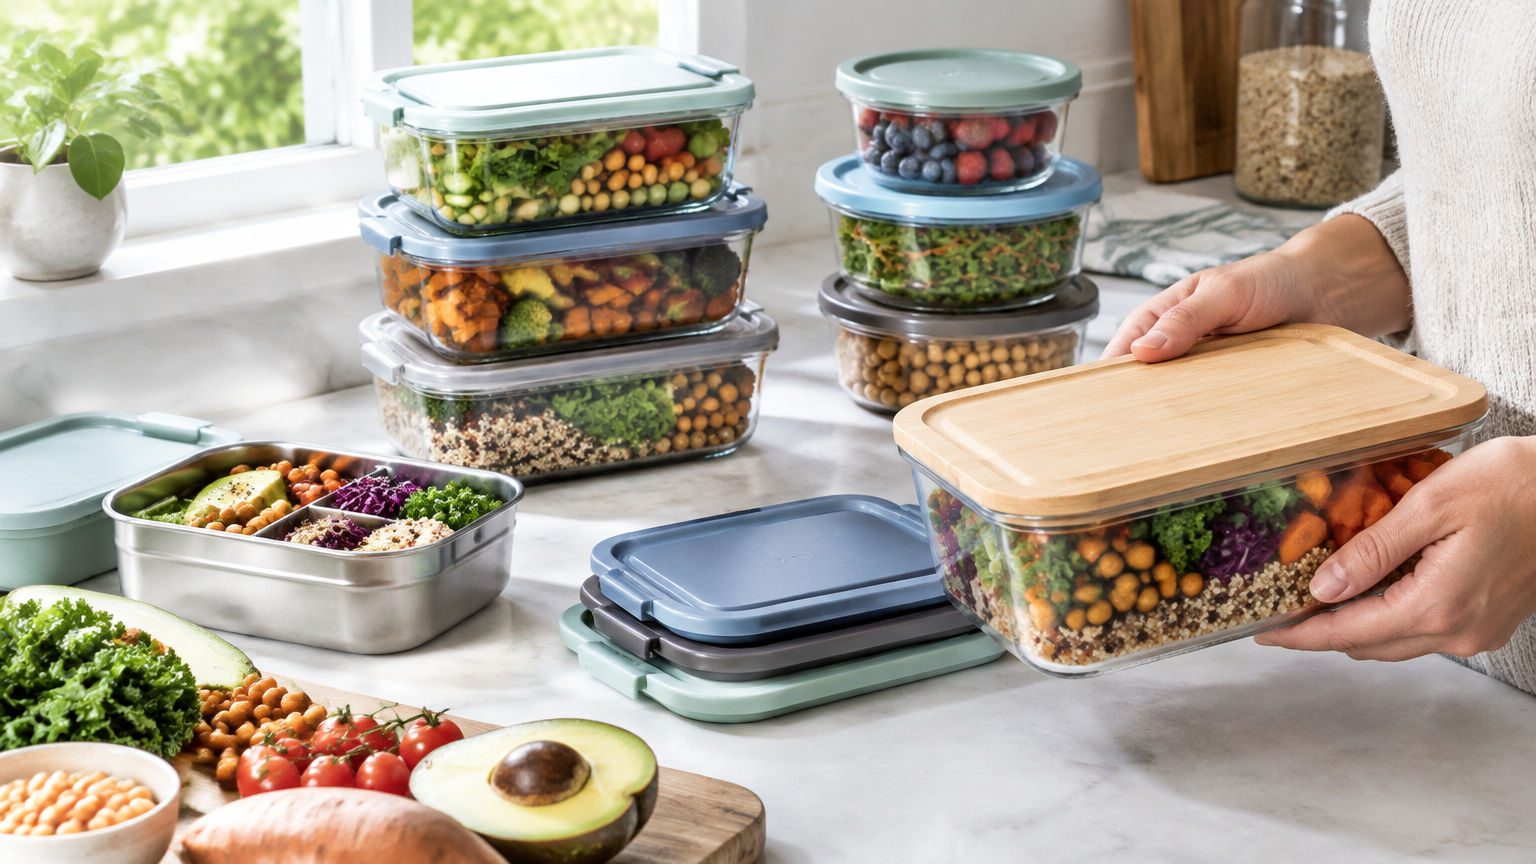
    Storage note: Refrigerate cooked food promptly in airtight containers, and follow standard food safety guidance (such as from your national or local food safety agency) for how long to keep leftovers. A set of stackable airtight containers for meal prep makes it easier to store each component separately.

    A Simple Weekly Rotation

    Prep once (about an hour, flexible): Cook one grain, one pot of beans or lentils, and one tray of roasted vegetables, and make one or two sauces. That's the base for the whole week.

    Sample week (adjust to what you have):

    • Monday: Rice + beans + roasted vegetables + chili-lime sauce
    • Tuesday: Same grain + tofu or chickpeas + raw slaw + peanut sauce
    • Wednesday: Leftover vegetables + lentils + vinaigrette + seeds
    • Thursday: Fresh grain or pasta + beans + greens + tahini sauce
    • Friday: Clean-out bowl with all leftovers + favorite sauce + crunch
    • Weekend: Try a new grain, sauce, or topping

    Tip: Change the sauce and topping to make repeated bases feel different. The same rice and beans taste like three different dinners with lime-chili sauce and tortilla chips, then peanut sauce and peanuts, then tahini and seeds. For more on sheet-pan technique, a guide to roasting vegetables without a recipe can help you vary the vegetables too.

    Quick Build-Your-Bowl Checklist

    • [ ] One grain, cooked and lightly seasoned
    • [ ] One protein, seasoned separately
    • [ ] One roasted vegetable
    • [ ] One raw vegetable or handful of greens
    • [ ] One sauce, tasted and adjusted
    • [ ] One crunchy topping, added last

    Common Mistakes to Avoid

    • Bland grains. Season the cooking water or toss cooked grains with salt and a splash of vinegar.
    • Skipping acid. A squeeze of lemon or lime, or a splash of vinegar, brightens the whole bowl.
    • Too many ingredients. Stick to the five parts. More items mean more cost and more cleanup, not necessarily better flavor.
    • No texture contrast. If everything is soft, add crunch.
    • Dressing too early. Sauce a bowl right before eating, especially if the toppings should stay crisp.

    FAQs

    How do I make a plant-based grain bowl filling?

    Include a solid portion of protein (beans, lentils, or tofu), a whole grain, and some healthy fat from the sauce, seeds, or nuts. Plenty of vegetables add volume, and a well-seasoned sauce makes the bowl more satisfying.

    What is the cheapest base for a grain bowl?

    Rice, barley, oats, and bulgur are often inexpensive, especially in bulk. Prices vary by store and region, so compare unit prices at your own market.

    Can I meal prep grain bowls for the week?

    Yes. Store the components separately and assemble the bowls when you eat. Keep sauces and crunchy toppings apart until serving, and follow food safety guidelines for storage times.

    Conclusion

    The best cheap plant based grain bowl ideas aren't recipes at all. They're a repeatable system: Grain + Protein + Veg + Sauce + Crunch. Cook a few staples once, keep your sauces simple, and rotate toppings to keep dinners interesting without extra spending.

    This week, pick one item from each category and build your first bowl. Taste, adjust, and see what you'd change next time. That's the whole method.

  • Best Budget Plant-Based Protein Sources for Dinner: What to Buy and How to Use Them

    Best Budget Plant-Based Protein Sources for Dinner: What to Buy and How to Use Them

    This article contains affiliate links. We may earn a commission if you buy through them, at no extra cost to you.

    Best Budget Plant-Based Protein Sources for Dinner: What to Buy and How to Use Them

    Meta description: Looking for cheap plant based protein sources for dinner? Compare beans, lentils, tofu, tempeh, chickpeas, peanut butter, and TVP, and learn to calculate cost per serving from shelf tags.

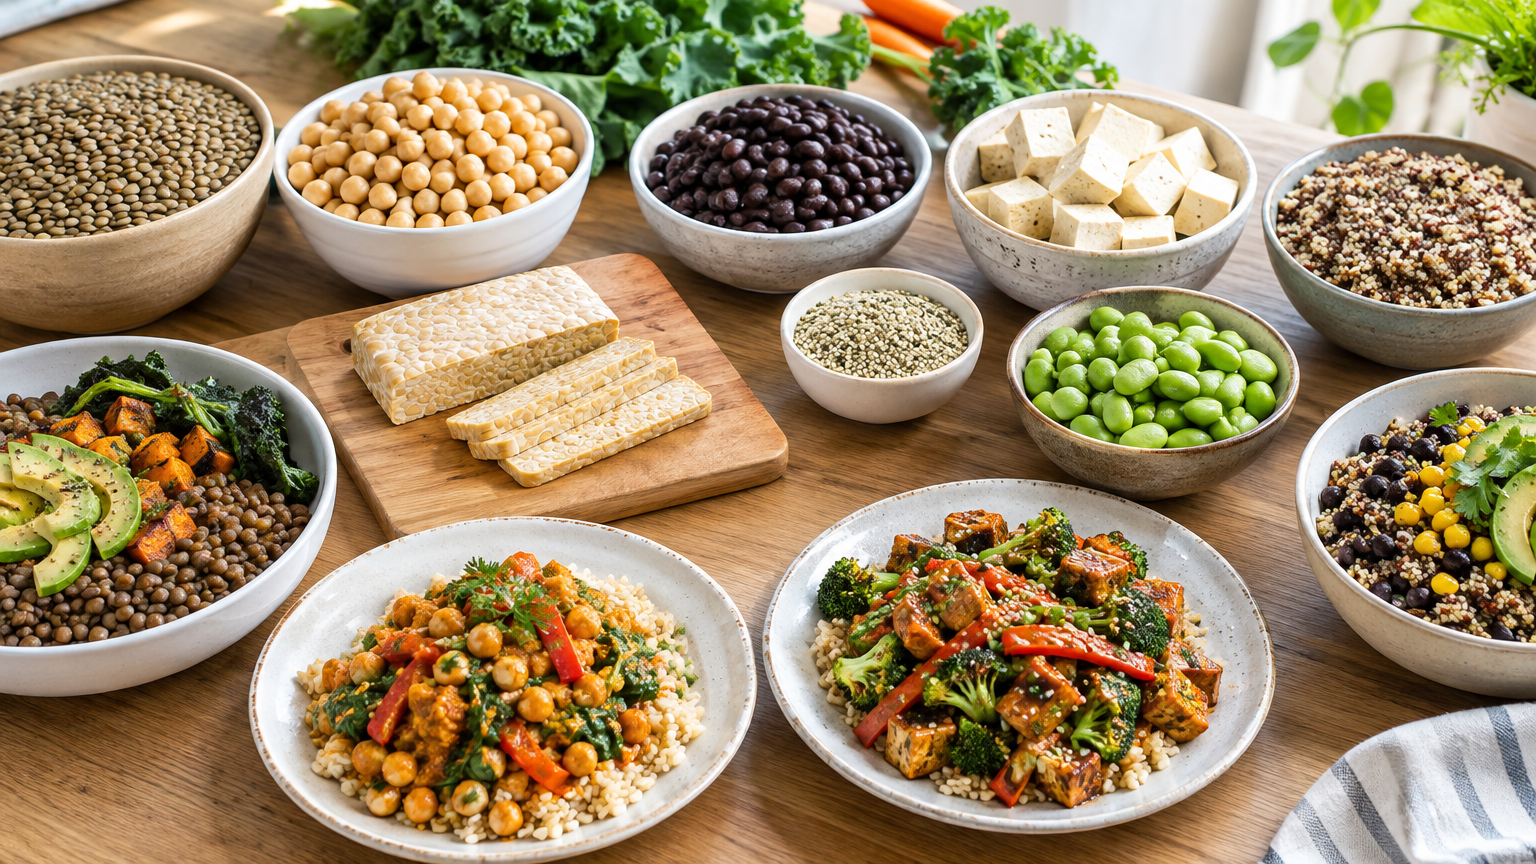
    Dried or canned beans, lentils, chickpeas, and textured vegetable protein (TVP) are usually the lowest-cost cheap plant based protein sources for dinner. Tofu, tempeh, and peanut butter often cost more per serving, but they save prep time or add variety. Check this against the unit prices on your own store's shelf tags.

    This guide gives you a side-by-side comparison, a step-by-step cost-per-serving method, and practical dinner ideas.

    Disclosure: This article may contain affiliate links. Nutrition information here is general and not medical advice.

    Key Takeaways

    • Dried legumes and TVP are the most likely low-cost picks, but local prices decide.
    • Canned legumes and pressed tofu trade a little extra cost for much less effort.
    • Compare products using cost per serving and cost per 10 g of protein, taken from the label.
    • Pick two or three staples that fit your cooking time rather than buying one of everything.

    Quick Answer: Which Cheap Plant Based Protein Sources for Dinner Are Worth Buying?

    Choose by goal:

    • Lowest likely cost: dried beans, lentils, dried chickpeas, TVP
    • Lowest effort: canned beans, canned chickpeas, pressed or pre-cooked tofu
    • Most meat-like texture: TVP, tempeh, extra-firm tofu
    • Pantry backup: peanut butter, canned legumes

    Prices vary by store and region, so use the method below instead of relying on a fixed price.

    Comparison Table: Format, Storage, Prep Effort, Best Dinner Uses

    Protein Common formats Storage Prep effort Best dinner uses
    Beans Dried, canned, sometimes frozen or pouched Dried: cool, dry pantry. Canned: pantry. Cooked leftovers: refrigerator or freezer Dried: soak and simmer. Canned: rinse and heat Chili, burritos, soups, rice bowls
    Lentils Dried, canned, pouched Dried: pantry Dried: usually no soak, simmer (check package) Dal, soups, stews, lentil "bolognese"
    Tofu Shelf-stable, refrigerated blocks (soft to extra-firm), pre-baked Check package. Refrigerate after opening Low to moderate: drain, press (optional), season Stir-fries, scrambles, baked cubes, curries
    Tempeh Refrigerated or frozen blocks Follow package. Refrigerate or freeze Moderate: slice, sometimes steam, then sear or bake Sandwiches, grain bowls, crumbles, stir-fries
    Chickpeas Dried, canned Same as beans Dried: soak and simmer. Canned: rinse Curries, roasted chickpeas, salads, pasta
    Peanut butter Jars Pantry (check label) Very low Peanut sauces, noodles, stews, dressings
    TVP Dry granules or chunks Dry pantry. Rehydrated: refrigerate Low: rehydrate in hot liquid and season Tacos, chili, sloppy joes, pasta sauce

    Always confirm storage and cook times against the package label, since brands differ.

    How to Compare Cost Per Serving Using Shelf Tags and Package Weights

    Shelf prices change often, so a method is more useful than a number. This one takes a few minutes in the store.

    What You Need

    • Shelf tag: the price and the unit price (per ounce, pound, or count)
    • Package net weight and servings per container from the Nutrition Facts panel
    • Serving size and protein grams per serving from the same panel

    Step-by-Step

    1. Find the shelf price and the servings per container on the label. 2. Calculate cost per serving: shelf price ÷ servings per container. 3. Calculate cost per protein: cost per serving ÷ protein grams per serving. Multiply by 10 or 20 to compare per 10 g or 20 g of protein. 4. Use the shelf tag's unit price to compare sizes within the same product type, such as two sizes of the same lentils. 5. Compare the same state of product: dry against dry, canned against canned. Dried beans and lentils expand when cooked, so judge them by the label's serving, not by raw package weight. 6. Record your numbers in a notes app or spreadsheet.

    Fill-in Worksheet (no prices quoted)

    Item Shelf price Package weight Servings Protein per serving Cost per serving Cost per 10 g protein
    Example: dried lentils ___ ___ ___ ___ ___ ___
    Example: canned chickpeas ___ ___ ___ ___ ___ ___
    Example: extra-firm tofu ___ ___ ___ ___ ___ ___
    Example: TVP ___ ___ ___ ___ ___ ___

    Want a printable version? Get a printable cost-per-serving worksheet and shopping checklist.

    Common Pitfalls

    • Comparing different serving sizes. One product's serving may be a different weight than another's, so always normalize with cost per 10 g of protein.
    • Ignoring drained weight on canned goods. Liquid is part of the can's weight but not the food you eat. Use the label's serving information.
    • Forgetting add-ins. Oil, spices, sauces, and grains add to the real cost of dinner. A cheap protein with expensive seasoning may not stay cheap.
    • Assuming store brand or bulk is cheaper. Check the unit price. Sometimes it is, sometimes it isn't.

    What to Buy: Best Picks by Dinner Need

    Lowest Cost Per Serving (verify with your shelf tags)

    Dried beans, lentils, dried chickpeas, and TVP are the usual front-runners because you pay for the food itself rather than water, packaging, or refrigeration. Confirm with your own math. A sale on canned beans can beat an unsold dried bag.

    Fastest Weeknight Options

    Canned beans or chickpeas need only a rinse and a heat-through. Pre-pressed or pre-baked tofu skips the draining step. TVP rehydrates quickly in hot liquid. These cost a bit more in some stores but can cut dinner prep sharply.

    Best for Meal Prep

    Cook dried legumes in a big batch and portion them for the week. Baked tofu or tempeh also holds up well in lunch and dinner containers. Follow the package guidance on how long opened or cooked items keep.

    Best Pantry Backups

    Canned legumes, peanut butter, and TVP keep well in the pantry, so they rescue dinner when fresh groceries run out. If you are stocking up, browse pantry-friendly plant-based protein staples and compare the unit prices against your local store using the worksheet above.

    Buying Tips

    • Compare store brand and name brand unit prices.
    • Check sodium and ingredients on canned goods. Rinsing canned beans is a common way to reduce surface sodium.
    • Consider frozen options or bulk bins where available.
    • Buy only what you can store and use. Cheap food that gets thrown away isn't cheap.

    How to Use Each Protein for Dinner

    Beans and Chickpeas

    Rinse canned versions. Simmer with spices, tomatoes, or broth so they absorb flavor. Dried versions need soaking and simmering per the package. Mash some beans into the pot to thicken chili or soup. Chickpeas also roast well for bowls and salads.

    Lentils

    Cook lentils directly into soups, stews, or curries. Many varieties don't need soaking, but check the package. Red lentils tend to break down into a creamy texture, while firmer varieties hold their shape for salads and bowls.

    Tofu and Tempeh

    Press and sear tofu so it browns instead of steaming. Slice and brown tempeh, and steam it first if the package suggests that to soften any bitterness. Both take on flavor from marinades, so use bold sauces such as soy-ginger, barbecue, or curry paste.

    Peanut Butter

    Whisk peanut butter into a sauce with soy sauce, an acid like lime juice or vinegar, and hot water until smooth. Toss it with noodles and vegetables, or stir a spoonful into a stew. Check the label for added sugar and salt.

    TVP

    Rehydrate TVP in hot broth, then season well, since it is mild on its own. Cook it in a sauce so it absorbs flavor and develops a ground-meat-like texture. It suits tacos, chili, sloppy joes, and pasta sauce.

    Sample Budget Dinner Combos

    These are ideas only, with no cost claims. Run your own numbers with the worksheet.

    • Lentil and rice bowl with vegetables: simmer lentils with garlic and cumin, then serve over rice with whatever vegetables are on hand.
    • Chickpea and tomato curry: simmer chickpeas in canned tomatoes with curry spices and serve with rice or flatbread.
    • TVP tacos with beans: season rehydrated TVP with taco spices, then add warmed beans, salsa, and shredded cabbage.
    • Tofu stir-fry with peanut sauce: sear pressed tofu, add frozen or fresh vegetables, and finish with a whisked peanut sauce.
    • Tempeh grain bowl: brown sliced tempeh and pile it over cooked grains with greens and a sauce of your choice.

    Storage and Waste-Reduction Tips

    • Store dried goods airtight in a cool, dry place.
    • Freeze cooked beans in meal-size portions so you can thaw only what you need.
    • Use opened tofu or tempeh within the time stated on the package.
    • Label rehydrated TVP with the date and refrigerate promptly. [VERIFY: check the TVP package for its recommended refrigerated storage time.]
    • Plan two or three dinners around the same cooked batch, such as lentils in a bowl one night and soup the next.

    FAQs

    What is the cheapest plant-based protein for dinner?

    Usually dried beans, lentils, or TVP, but it depends on local prices. Use the cost-per-serving and cost-per-protein steps to check at your own store.

    Are canned beans or dried beans the better value?

    Dried often has a lower cost per serving, but canned saves time. Compare shelf-tag unit prices and factor in your prep time.

    How do I compare tofu, tempeh, and TVP fairly?

    Use the label's serving size and protein grams, calculate cost per serving and per 10 g of protein, and compare in the same prepared state when possible. TVP is sold dry and expands when rehydrated, so rely on the label's serving rather than package weight.

    Conclusion and Next Step

    The cheapest option is the one your own shelf tags support, and the cost-per-serving method lets you check that in minutes. Choose two or three staples, such as one dried legume, one quick canned or pressed option, and one pantry backup, and match them to how much time you have to cook.

    Ready to start? Download or print the worksheet and take it on your next grocery run, or shop the staples list and compare unit prices before you buy.

    This article offers general nutrition and shopping information and is not medical advice. For dietary needs or health conditions, consult a qualified professional.

  • How to Cook Tofu for Beginners: Simple Methods for Easy Weeknight Dinners

    How to Cook Tofu for Beginners: Simple Methods for Easy Weeknight Dinners

    This article contains affiliate links. We may earn a commission if you buy through them, at no extra cost to you.

    How to Cook Tofu for Beginners: Simple Methods for Easy Weeknight Dinners

    Tofu is mild on its own, which is its biggest advantage: it takes on the flavor of whatever you cook it with. This guide covers which tofu to buy, whether you need to press it, and four easy methods tied to quick weeknight dinners.

    Key takeaways

    • Start with extra-firm or firm tofu. It's the easiest to handle.
    • Pressing helps with crisping, but you can skip it for scrambles, crumbles, and soups.
    • Dry tofu, a hot pan, and patience are what make the surface golden.
    • Add wet sauces near the end so the crisp surface doesn't steam away.
    • Pick one method and one dinner idea to try this week.

    The Short Answer: How to Cook Tofu for Beginners

    Buy firm or extra-firm tofu, pat it dry (press it if you have time), cut it into cubes or crumble it, and season it well. Then pan-fry it for crisp edges, bake it for a hands-off option, or scramble or crumble it for a soft, savory filling. Cook until the surface is golden.

    Tofu Types: Which One to Buy

    Tofu is sold in several textures, and the right one depends on what you're making. Here's a quick comparison before the details.

    Tofu type Texture Best for
    Silken / soft Delicate, custard-like Blending, soups, sauces
    Medium / firm Holds together, still tender Scrambles, gentle pan-frying
    Extra-firm Dense, easy to cut Pan-frying, baking, crumbling
    Pre-seasoned / baked Already firm Slicing into bowls or sandwiches

    Silken and soft tofu

    Silken and soft tofu are delicate. They work well blended into sauces or added to soups, but they tend to fall apart in a hot pan or on a sheet pan. Save them for recipes that call for them specifically.

    Medium and firm tofu

    These hold together well enough for scrambles and gentle pan-frying. Firm tofu is a good all-purpose choice if your store doesn't carry extra-firm. It's a bit softer, so handle it more carefully when you flip it.

    Extra-firm tofu

    For most beginners, extra-firm is the easiest starting point. It's simple to cut into even pieces, it browns well, and it crumbles into a ground-style texture. If you're only going to buy one type to learn on, this is it.

    Pre-seasoned or baked tofu (optional)

    Some stores sell tofu that's already seasoned or baked. It's firm and ready to slice into rice bowls, salads, or sandwiches. It's a handy shortcut on busy nights, though you can also cook plain tofu yourself and control the flavor.

    Tip: Check the package label. Texture names vary by brand, so one company's "firm" may feel different from another's.

    Do You Need to Press Tofu?

    Not always. Whether pressing is worth the time depends on what you're making.

    When pressing helps: Pan-frying and baking. Less surface moisture means better browning and a crisper exterior.

    When you can skip it: Scrambles, crumbles, soups, and sauces, or any night you're short on time. In these dishes, the tofu is broken up or simmered, so extra moisture matters less. For scrambles and crumbles, you can simply pat the tofu dry or let it cook off in the pan.

    Quick pressing steps

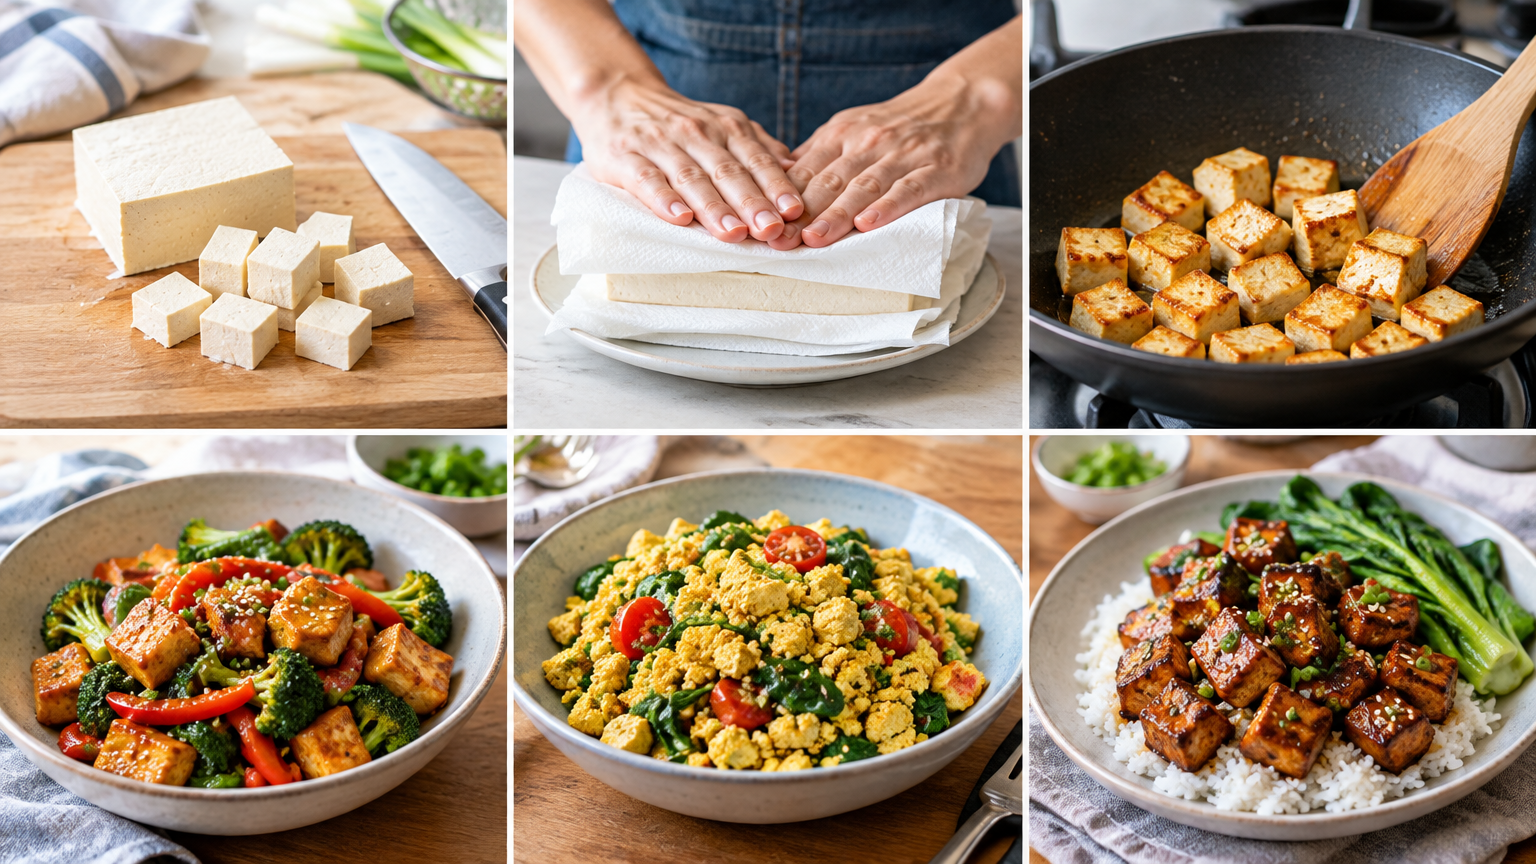
    1. Drain the tofu and wrap it in a clean towel or paper towels. 2. Set a heavy pan or plate with a weight on top. 3. Wait 15–30 minutes, then pat dry.

    A heavy skillet with a can or two on top works fine. If you find yourself pressing tofu often, a dedicated tofu press is an option, but it isn't required to get started.

    Note: Silken tofu should not be pressed. It's too delicate and will break apart.

    Basic Prep Before Cooking

    A few simple habits make every method work better:

    • Cut evenly. Cubes, slabs, or triangles of similar size cook at the same rate. Pieces around three-quarters of an inch to an inch are a comfortable size for beginners.
    • Season it. Tofu needs more seasoning than you might expect. Use salt, pepper, and spices, or toss it with a little soy sauce. For a crisper surface, you can toss the pieces with a small amount of cornstarch. This step is optional.
    • Use enough oil. A thin, even coat in the pan helps prevent sticking and encourages browning.

    Prep checklist

    • [ ] Tofu drained and patted dry (or pressed)
    • [ ] Pieces cut to an even size
    • [ ] Seasoning ready
    • [ ] Oil measured out
    • [ ] Sauce mixed and set aside for the end

    Four Easy Ways to Cook Tofu (with Dinner Ideas)

    Each method below pairs with a simple weeknight dinner, so you can go from technique to meal without much planning.

    Pan-Fry

    Pan-frying gives you crisp edges and a chewy bite, and it's quick.

    Steps:

    1. Heat oil in a nonstick or cast-iron skillet over medium-high heat. 2. Add dry tofu in a single layer. 3. Cook without moving it until the underside is golden, usually several minutes. 4. Flip and repeat on the other sides. 5. Add sauce at the end and toss to coat.

    Easy dinner: A stir-fry or rice bowl. Cook the tofu first and set it aside. Then heat frozen vegetables in the same pan, add a store-bought stir-fry sauce, and return the tofu. Serve over rice. For more ideas along these lines, browse these easy plant-based dinner ideas.

    Bake

    Baking is the most hands-off option. It's useful when you want to prep something else while dinner cooks.

    Steps:

    1. Heat the oven to about 400°F. 2. Toss cubed tofu with oil and seasoning. 3. Spread it on a lined sheet pan, leaving space between pieces. 4. Bake, flipping halfway, until browned and firm at the edges.

    Oven times vary, so start checking early and adjust to your oven.

    Easy dinner: Sheet-pan tofu with chopped vegetables. Put the vegetables on the same pan (cut them to a size that cooks in a similar time), then serve everything over rice or noodles with a drizzle of sauce.

    Scramble

    A tofu scramble is soft, savory, and forgiving. It's the best method for medium or firm tofu, and it doesn't require pressing.

    Steps:

    1. Heat a little oil in a pan over medium heat. 2. Crumble firm or medium tofu into the hot pan. 3. Season with salt, pepper, and spices of your choice. 4. Stir until heated through and lightly golden.

    Easy dinner: Breakfast-for-dinner burritos or tacos. Fill warm tortillas with the scramble, beans, and salsa. It comes together in about the time it takes to warm the tortillas.

    Crumble

    Crumbled tofu is browned a bit longer than a scramble, so the pieces turn slightly crisp. Extra-firm tofu works best.

    Steps:

    1. Break extra-firm tofu into small pieces with your hands or a fork. 2. Cook in a skillet with oil until browned and slightly crisp, stirring occasionally. 3. Add seasoning or sauce at the end.

    Easy dinner: Use it as taco filling, stir it into a pasta sauce, or add it to fried rice. Because it's already in small pieces, it mixes easily into whatever you're making.

    Method-at-a-glance

    Method Best tofu Press first? Pairs with
    Pan-fry Extra-firm or firm Helpful Stir-fry, rice bowls
    Bake Extra-firm Helpful Sheet-pan dinners
    Scramble Medium or firm Optional Burritos, tacos
    Crumble Extra-firm Optional Tacos, pasta, fried rice

    Simple Flavor Ideas

    Because tofu is mild, almost any familiar flavor works. A few easy combinations:

    • Soy sauce and garlic for stir-fries and rice bowls
    • Taco seasoning for crumbles and scrambles
    • Barbecue sauce for baked tofu in sandwiches or bowls
    • Curry paste or powder for a simple skillet dinner with rice
    • Lemon, herbs, and black pepper for a lighter, fresh flavor

    Add sauces near the end. Wet sauce poured on too early can steam off the crisp surface you worked to build. Brown the tofu first, then add sauce for the last minute or so.

    Common Beginner Mistakes

    • Crowding the pan. Too much tofu at once traps steam and prevents browning. Cook in batches if needed.
    • Moving the tofu too soon. Let it sit until a crust forms. If it sticks, it usually isn't ready to flip.
    • Skipping seasoning. Unseasoned tofu tastes bland. Season before, during, or after cooking.
    • Using silken tofu for frying. It's too delicate and will fall apart.
    • Adding wet sauce too early. This softens the surface. Save it for the end.

    Storing Leftovers

    Refrigerate cooked tofu in an airtight container. For unused raw tofu, follow the directions on the package, and eat leftovers within a few days. If you're unsure how long a particular product keeps, check the label

    FAQ

    Can I cook tofu without pressing it? Yes. Pressing is optional for scrambles, crumbles, and soups. It mainly helps with crisping when you're pan-frying or baking.

    What type of tofu is best for beginners? Extra-firm is the easiest to cut, brown, and handle. Firm tofu also works well.

    How do I keep tofu from sticking to the pan? Use a nonstick or well-oiled pan, preheat it, pat the tofu dry, and let it form a crust before flipping.

    Conclusion

    Learning how to cook tofu for beginners comes down to a few choices: pick firm or extra-firm tofu, press it if you have time, and choose one method for tonight. Pan-fry it for a stir-fry, bake it on a sheet pan, scramble it for tacos, or crumble it into fried rice.

    Try one method this week, and save the dinner idea that works best for you. Once one method feels familiar, the others are easy to add.

  • Budget Plant-Based Stir-Fry for Beginners: A Simple Formula Using Tofu, Frozen Veggies, and Rice

    Budget Plant-Based Stir-Fry for Beginners: A Simple Formula Using Tofu, Frozen Veggies, and Rice

    This article contains affiliate links. We may earn a commission if you buy through them, at no extra cost to you.

    Easy Plant-Based Stir-Fry on a Budget: A Simple Formula Using Tofu, Frozen Veggies, and Rice

    A stir-fry is a template, not a strict recipe. Once you know the pattern, you can cook whatever is on sale this week without hunting for a new recipe. The pattern is four parts: protein + vegetables + sauce + starch.

    Key takeaways

    • Every stir-fry follows the same four parts: protein, vegetables, sauce, and starch.
    • Frozen vegetables go into the pan straight from the freezer. Don't thaw them.
    • Dry tofu and a hot pan are the two biggest factors in browning.
    • A basic sauce of soy sauce, acid, sweetener, cornstarch, and aromatics can be adjusted to taste.
    • Nearly every ingredient can be swapped for something cheaper or more convenient.

    Quick Answer: The Easy Plant-Based Stir-Fry Formula

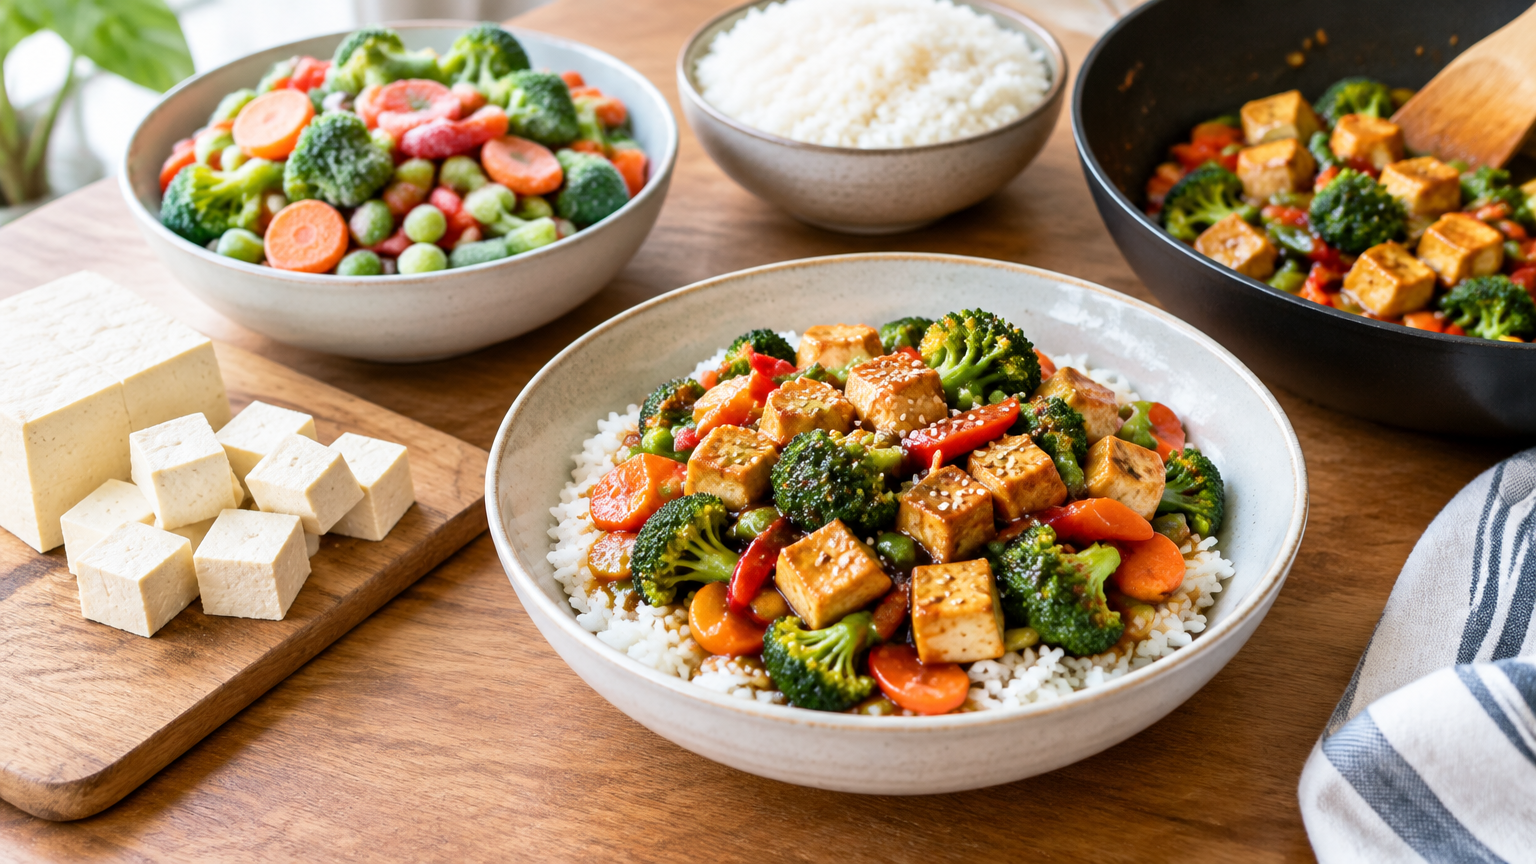
    For an easy plant based stir fry on a budget, cook pressed tofu until golden, add frozen vegetables straight from the freezer, stir in a simple soy-based sauce, and serve over rice. Use the same pattern each time and swap ingredients based on price.

    The formula at a glance:

    • Protein: extra-firm tofu
    • Vegetables: frozen stir-fry mix or single-vegetable bags
    • Sauce: soy sauce + acid + sweetener + thickener + aromatics
    • Starch: rice (or noodles, or other grains)

    If you're building a bigger rotation of meatless meals, these plant-based dinner ideas can give you more templates to pair with this one.

    What You Need (Budget Pantry and Equipment)

    You likely own most of this already, and everything here has many other uses.

    Pantry staples

    • Soy sauce: the salty, savory base of the sauce.
    • Vinegar: rice vinegar or any mild vinegar. This adds brightness.
    • Sugar or another sweetener: it balances the salt and acid.
    • Cornstarch: it thickens the sauce so it clings to the food.
    • Neutral oil: any high-heat-friendly cooking oil works.
    • Garlic: fresh, or jarred if that's cheaper or more convenient.
    • Ginger: fresh, jarred, or ground.

    Equipment

    • A large skillet or wok
    • A spatula or wooden spoon
    • A small bowl for mixing the sauce

    If you don't own a large, sturdy pan yet, a large skillet or wok is the one piece of equipment worth considering. A pan with plenty of surface area makes it easier to avoid crowding.

    Money-saving shopping tips

    • Buy frozen vegetables in larger bags. You can use what you need and return the rest to the freezer.
    • Choose store brands. For plain frozen vegetables, rice, soy sauce, and cornstarch, store brands are usually a sensible choice.
    • Buy tofu in standard blocks. Plain extra-firm blocks are generally a simple, low-cost option compared with flavored or pre-cut versions.
    • Cook rice in bulk. A large batch covers several meals.
    • Check the freezer aisle for single-vegetable bags. Mixing your own blend can sometimes be more flexible than a premade mix.

    Step-by-Step: How to Make a Beginner Stir-Fry

    Step 1: Prep everything first

    Stir-frying moves fast. Before you turn on the heat:

    • Cook the rice (or reheat leftovers).
    • Mix the sauce in a small bowl.
    • Press and cube the tofu.
    • Open the bag of vegetables and set it near the stove.
    • Mince the garlic and ginger.

    Step 2: Press and dry the tofu

    Drain the tofu, wrap it in clean towels or paper towels, and blot gently. Pressing it under a weight for a while is optional but helps with browning. Either way, cut it into bite-size cubes and pat the cubes dry. Surface moisture creates steam, and steam prevents browning.

    Step 3: Brown the tofu

    Heat a tablespoon or two of oil in your pan over medium-high heat. Add the tofu in a single layer and leave it alone. When the pieces release easily from the pan, flip them. Keep cooking until most sides are golden, then remove the tofu to a plate.

    Step 4: Cook the frozen vegetables

    Add the vegetables straight from frozen. Don't thaw them. Cook over high heat, stirring regularly, until they're heated through and the extra water has evaporated. If your pan is small, cook in batches. Overcrowding traps steam and leaves the vegetables soft and watery.

    Step 5: Add aromatics and sauce

    Push the vegetables aside, or lower the heat slightly, and add the garlic and ginger. Stir them for about 30 seconds, until fragrant. Return the tofu to the pan, stir the sauce once more (the cornstarch settles), and pour it in. Stir until it thickens and coats everything.

    Step 6: Serve over rice

    Taste before serving and adjust:

    • Flat or dull? Add a splash more vinegar or lime juice.
    • Too sharp? Add a pinch more sweetener.
    • Not savory enough? Add a little more soy sauce.

    Spoon the stir-fry over warm rice and serve.

    Basic Pan Technique for Better Results

    A few habits matter more than any specific ingredient:

    • Heat the pan before adding oil. A hot pan helps food sear instead of stick.
    • Use enough heat to sizzle. If the garlic or sauce begins to burn, lower the heat.
    • Don't crowd the pan. Food piled deep steams instead of browning. Cook in batches if needed.
    • Stir often once vegetables are in, but let the tofu sit. Tofu needs undisturbed contact with the pan to form a crust.
    • Add the sauce at the end. Early sauce makes everything soggy and can scorch.

    Common mistakes to avoid:

    Mistake What happens Fix
    Wet tofu Steams, sticks, falls apart Blot and pat dry
    Cold pan Food sticks, no browning Preheat before adding oil
    Sauce added too early Soggy food, burnt sugar Add after vegetables are cooked
    Overcrowded pan Watery, pale vegetables Cook in batches

    A Pantry-Based Stir-Fry Sauce Ratio

    You don't need bottled stir-fry sauce. A handful of pantry items does the job.

    Starter ratio (for about 4 cups of food, 2–3 servings)

    • 3 tbsp soy sauce
    • 1 tbsp vinegar or lime juice
    • 1 tbsp sugar (or maple syrup or agave)
    • 1 tsp cornstarch mixed with ¼ cup cold water
    • 1–2 cloves garlic, minced, and about 1 tsp ginger

    Whisk everything together in a small bowl. Treat this as a flexible starting point and adjust to taste. If you're cooking for more people, scale up the ratio proportionally.

    Easy variations

    • Spicy: add chili flakes or chili sauce.
    • Nutty: stir in a spoonful of peanut butter or a little sesame oil.
    • Sweet-tangy: add a splash of orange or pineapple juice.
    • Salt note: if you're using low-sodium soy sauce, you may need more to get the same savory depth. Add it gradually and taste.

    Ingredient Substitutions: Cook What's on Sale

    The formula works because each part is replaceable. Here's how to adapt.

    Protein swaps

    Tofu can be replaced with tempeh, canned or cooked chickpeas, edamame, or other beans. Cooking times and texture will differ. Canned beans and edamame mainly need heating through, while tempeh benefits from browning like tofu does. Drain and dry canned beans well before cooking.

    Vegetable swaps

    Use frozen stir-fry blends, or single bags of broccoli, peppers, or green beans. Fresh cabbage and carrots also work well and often keep for a long time in the fridge. Hard vegetables like carrots should go in a bit earlier or be cut small so they cook through.

    Starch swaps

    White or brown rice, quinoa, noodles, or other cooked grains all work. Use whatever you already have or can cook in bulk.

    Sauce swaps

    • Soy sauce → tamari (a gluten-free option, but check the label) or coconut aminos (usually milder, so adjust to taste)
    • Sugar → any sweetener
    • Vinegar → lemon or lime juice
    • Cornstarch → arrowroot or potato starch

    Quick swap table

    Component Default Easy alternatives
    Protein Extra-firm tofu Tempeh, chickpeas, edamame, other beans
    Vegetables Frozen stir-fry mix Broccoli, peppers, green beans, cabbage, carrots
    Starch Rice Quinoa, noodles, other cooked grains
    Salty base Soy sauce Tamari, coconut aminos
    Acid Vinegar Lemon or lime juice
    Sweetener Sugar Maple syrup, agave, other sweeteners
    Thickener Cornstarch Arrowroot, potato starch

    Shopping and cooking checklist

    • [ ] Rice cooked or reheated
    • [ ] Sauce mixed in a bowl
    • [ ] Tofu drained, dried, and cubed
    • [ ] Vegetables opened and within reach
    • [ ] Garlic and ginger ready
    • [ ] Pan large enough to avoid crowding

    Make It Last: Meal Prep and Leftovers

    Stir-fry is a good candidate for batch cooking:

    • Cook a big batch of rice and mix a double batch of sauce. You'll have the base for another meal ready to go.
    • Store components separately. Keeping rice, tofu, vegetables, and sauce apart helps preserve texture.
    • Reheat in a skillet. Add a splash of water if the food seems dry.
    • Follow standard food-safety guidance for cooling and storing leftovers. Refrigerate promptly and check official guidance for recommended storage times. [VERIFY exact timeframes before publishing if you plan to state them.]

    FAQs

    Do I need to thaw frozen vegetables before stir-frying?

    Usually no. Cook them from frozen over high heat so excess moisture evaporates. Thawing first can make them watery.

    How do I keep tofu from falling apart or sticking?

    Use extra-firm tofu, pat it dry, preheat the pan, and use enough oil. Let it brown before flipping, since pieces release more easily once a crust forms.

    Can I make this stir-fry without a wok?

    Yes. A large skillet works. Use high heat, avoid overcrowding, and cook in batches if needed.

    Conclusion

    The whole method fits in one line: protein + vegetables + sauce + starch. Brown dry tofu, cook frozen vegetables over high heat, finish with a quick pantry sauce, and serve over rice. Once the pattern feels familiar, you can swap in whatever is on sale this week, whether that's a different bean, another bag of frozen vegetables, or a grain you already have at home.

    Try the template once as written, then change one ingredient the next time. For more ideas, look into rice meal prep, tofu cooking basics, and building a budget pantry list. Those are natural next steps for stretching this formula across a full week of dinners.

  • Easy Plant-Based Pasta Dinners for Beginners: 8 Cheap Ideas With Simple Ingredients

    Easy Plant-Based Pasta Dinners for Beginners: 8 Cheap Ideas With Simple Ingredients

    This article contains affiliate links. We may earn a commission if you buy through them, at no extra cost to you.

    Easy Plant-Based Pasta Dinners for Beginners: 8 Cheap Ideas With Simple Ingredients

    Meta description: Eight easy plant based pasta dinners made with budget staples like canned tomatoes, beans, frozen vegetables, and basic aromatics. Includes ingredient lists, swaps, and tips to stretch your sauce.

    Plant-based pasta night doesn't need specialty products or a long shopping list. Most of what you need is probably in your pantry or freezer already. Below are eight simple dinners built from those staples, with ingredient lists, swaps, and tips for stretching your sauce.

    Quick answer: Easy plant based pasta dinners rely on a few budget staples: dried pasta, canned tomatoes, beans or lentils, frozen vegetables, and aromatics like garlic and onion. Cook the pasta, build a quick sauce in one pan, combine with a splash of pasta water, and season with salt, pepper, and an acid like lemon or vinegar.

    Key Takeaways

    • A handful of staples can make dozens of different dinners.
    • Beans, lentils, and chickpeas add substance to any sauce.
    • Reserved pasta water helps a small amount of sauce coat a lot of pasta.
    • Acid and salt are the quickest fixes for bland pasta.
    • Nearly every recipe here accepts swaps, so use what you have.

    What You Need in a Budget Plant-Based Pasta Pantry

    Core staples

    • Dried pasta (spaghetti, penne, rotini, or whatever shape you like)
    • Canned crushed or diced tomatoes
    • Canned beans, chickpeas, or lentils
    • Frozen spinach, peas, broccoli, or mixed vegetables
    • Olive oil or any neutral oil

    Basic aromatics and flavor boosters

    • Onion and garlic
    • Dried Italian herbs
    • Red pepper flakes
    • Tomato paste
    • Soy sauce
    • Lemon or vinegar

    If you're building a pantry from scratch, a beginner-friendly list of plant-based pantry staples can help you plan a first shopping trip.

    Check labels

    Most dried pasta is made from just wheat and water, but some varieties, especially fresh or egg pastas, contain egg. Read the ingredient list to confirm a pasta is plant-based. The same goes for store-bought sauces and broths.

    How to Make Easy Plant Based Pasta Dinners: The Basic Method

    Every recipe below follows this same pattern.

    1. Boil and cook the pasta. Use well-salted water. Before draining, reserve about a cup of the cooking water. 2. Soften the aromatics. Cook chopped onion and garlic in oil over medium heat until fragrant and soft. 3. Build the sauce. Add tomatoes, beans, or vegetables and simmer until everything is hot and slightly thickened. 4. Combine. Toss the pasta into the sauce, adding pasta water a splash at a time until it looks glossy. 5. Taste and adjust. Add salt, acid, or heat until it tastes balanced.

    8 Cheap, Easy Plant-Based Pasta Dinners

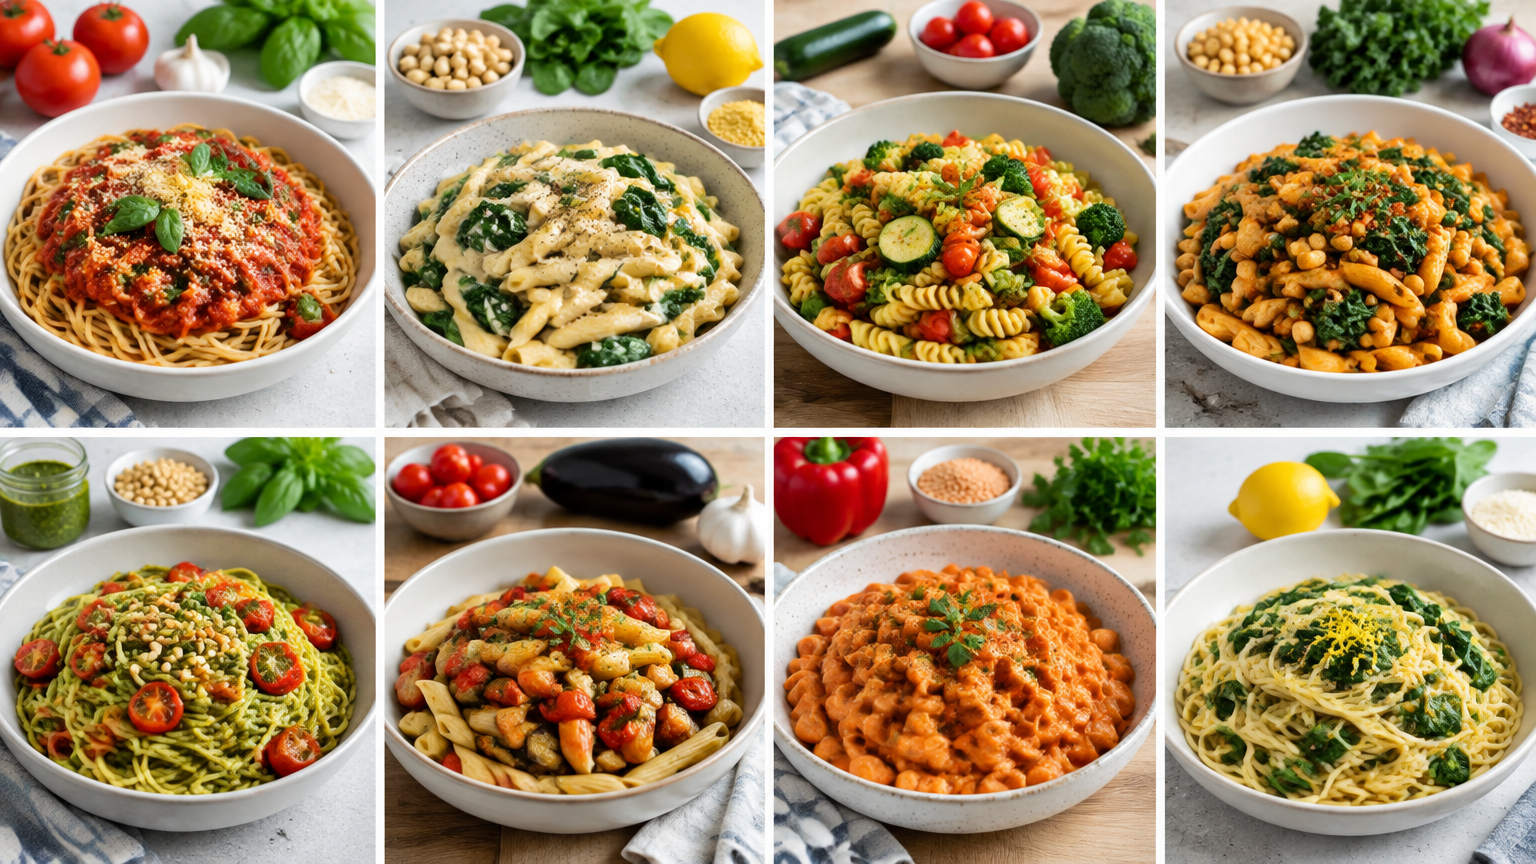
    1. Pantry Marinara Pasta

    A basic tomato sauce you can make with almost no planning.

    Ingredients: pasta, 1 can crushed tomatoes, 1 small onion, 2–3 garlic cloves, olive oil, dried Italian herbs, salt

    Method: Soften the onion and garlic in oil, add tomatoes and herbs, and simmer 10–15 minutes. Toss with cooked pasta and a splash of pasta water.

    Swaps: Use diced tomatoes for a chunkier sauce. Add a pinch of red pepper flakes for heat.

    2. White Bean and Garlic Pasta

    A light, savory dish with no tomatoes.

    Ingredients: pasta, 1 can white beans (drained), 3–4 garlic cloves, olive oil, lemon, frozen spinach, salt, pepper

    Method: Gently cook sliced garlic in oil, add beans and spinach, and warm through. Toss with pasta, pasta water, and a squeeze of lemon.

    Swaps: Use chickpeas or any mild bean. Try vinegar instead of lemon.

    3. Chickpea and Tomato Pasta

    Hearty and a little smoky.

    Ingredients: pasta, 1 can chickpeas, 1 can diced tomatoes, 1 onion, olive oil, paprika or chili flakes, salt

    Method: Cook the onion in oil, stir in paprika, then add chickpeas and tomatoes. Simmer 10 minutes and toss with pasta.

    Swaps: Swap in white beans or lentils. Use a small shape like shells or macaroni so the chickpeas nestle in.

    4. Lentil Bolognese-Style Pasta

    A thick, meaty-style sauce without the meat.

    Ingredients: pasta, 1 can lentils (or about 1½ cups cooked), 1 can crushed tomatoes, 1 onion, 1 carrot (if available), 2 tablespoons tomato paste, garlic, oil, dried herbs

    Method: Cook the chopped onion, carrot, and garlic in oil. Stir in tomato paste for a minute, then add tomatoes and lentils and simmer 15–20 minutes. Serve over pasta.

    Swaps: Use brown or green lentils, or crumbled firm tofu. Skip the carrot or use celery.

    5. Garlic and Oil Pasta With Frozen Broccoli

    A minimalist dinner that comes together fast.

    Ingredients: pasta, 2 cups frozen broccoli, 4 garlic cloves, olive oil, red pepper flakes, salt

    Method: Add the broccoli to the pasta water for the last few minutes of cooking. Warm sliced garlic and pepper flakes in oil, then toss everything together with pasta water.

    Swaps: Use frozen peas, green beans, or spinach. Add a squeeze of lemon or a splash of vinegar.

    6. Creamy Tomato Pasta With Peas

    Creamy without dairy.

    Ingredients: pasta, 1 can crushed tomatoes, 1 cup frozen peas, onion, garlic, oil, plant milk or ½ can blended white beans, salt

    Method: Make a simple tomato sauce, then stir in a splash of plant milk or blended beans. Add peas for the last few minutes.

    Swaps: Use any unsweetened plant milk. Spinach or corn can replace the peas.

    7. Peanut-Soy Noodle-Style Pasta

    Pasta with a noodle-bowl twist.

    Ingredients: spaghetti or linguine, 2–3 tablespoons peanut butter, 2 tablespoons soy sauce, 1–2 garlic cloves, frozen mixed vegetables, vinegar or lime, hot water

    Method: Whisk peanut butter, soy sauce, garlic, and vinegar with a little hot pasta water until smooth. Toss with cooked pasta and warmed vegetables.

    Swaps: For a nut-free version, use sunflower seed butter. For gluten-free, use gluten-free pasta and tamari (check the label).

    8. One-Pot Tomato and Bean Pasta

    The easiest cleanup of the bunch.

    Ingredients: short pasta, 1 can diced tomatoes, 1 can kidney or cannellini beans, onion, garlic, water or broth, frozen vegetables, dried herbs, salt

    Method: Cook the onion and garlic, then add tomatoes, beans, herbs, and enough liquid to cover the pasta. Simmer, stirring often, until the pasta is tender, adding vegetables near the end.

    Swaps: Use any bean. Gluten-free pasta may cook faster, so start checking it early.

    How to Make Your Sauce Stretch Across More Servings

    • Add bulk. Beans, lentils, or frozen vegetables increase volume without much extra effort.
    • Use pasta water. Starchy water thins and coats without needing more sauce.
    • Build depth another way. Tomato paste or a splash of soy sauce adds flavor so you don't need extra cans of tomatoes.
    • Blend some beans. Mash or blend part of a can into the sauce for body.
    • Pad the plate. Serve over a generous portion of pasta with a side salad or bread.
    • Store smart. Keep leftover sauce separate from pasta, then refrigerate or freeze it in portions.

    Easy Swaps and Substitutions

    Pasta swaps

    Any shape works with most sauces. Whole wheat and gluten-free pastas are fine substitutes; follow the package times, since they can cook differently.

    Protein swaps

    Canned beans, lentils, and chickpeas are interchangeable in most recipes. Crumbled firm tofu also works in the tomato-based sauces.

    Vegetable swaps

    Frozen spinach, peas, broccoli, and mixed vegetables all work. Stir them in near the end so they don't turn mushy.

    Flavor swaps

    Change the herbs, add spices like paprika or cumin, or finish with lemon or vinegar. Nutritional yeast, if you have it, adds a savory, cheesy note. For a quick reference on ingredient stand-ins, see this plant-based substitution guide.

    Beginner Tips for Better Flavor

    • Salt the pasta water. It seasons the pasta from the inside.
    • Don't skip the acid. Lemon or vinegar brightens flat-tasting sauces.
    • Toast tomato paste. Cook it briefly in oil before adding liquid.
    • Finish well. A drizzle of olive oil, black pepper, or dried herbs makes a simple dish feel complete.

    Frequently Asked Questions

    Are easy plant based pasta dinners filling enough?

    Yes, when you include beans, lentils, or chickpeas and vegetables alongside the pasta. Those additions make the meal more substantial than plain noodles with sauce.

    How can I make plant-based pasta without expensive ingredients?

    Rely on dried pasta, canned tomatoes, beans, frozen vegetables, and basic aromatics. Swap what you have on hand for what a recipe calls for.

    Can I store or freeze leftovers?

    Generally, cooked pasta and sauce can be refrigerated in airtight containers. Sauces freeze well, though pasta texture may soften after freezing. Follow standard food-safety guidance for storage times and reheating.

    Conclusion

    Easy plant based pasta dinners come down to a few reliable staples and a simple method. Pick one or two of these ideas, stock the basics, and rotate in swaps as your pantry changes. Save this list for later, or try one recipe this week and see which becomes your go-to.

  • Budget Plant-Based Grocery Shopping Guide: Where to Shop and How to Compare Prices

    Budget Plant-Based Grocery Shopping Guide: Where to Shop and How to Compare Prices

    This article contains affiliate links. We may earn a commission if you buy through them, at no extra cost to you.

    Budget Plant-Based Grocery Shopping Guide: Where to Shop and How to Compare Prices

    Plant-based eating can be affordable or expensive, depending on where you shop and what you put in the cart. This guide compares store types in general terms and shows you how to run the price comparisons yourself. Prices vary by region, store, and season, so check local prices before committing to any one store.

    Disclosure: This article contains affiliate links. They don't change the advice here, and no product claims are made about the linked offerings.

    Quick Answer: How to Do Plant-Based Grocery Shopping on a Budget

    Plant based grocery shopping on a budget starts with building meals around staples such as dried or canned beans, lentils, rice, oats, frozen vegetables, and seasonal produce. Compare stores using unit prices rather than package prices, choose store brands where the quality suits you, and use more than one store type if that makes sense in your area.

    Key takeaways:

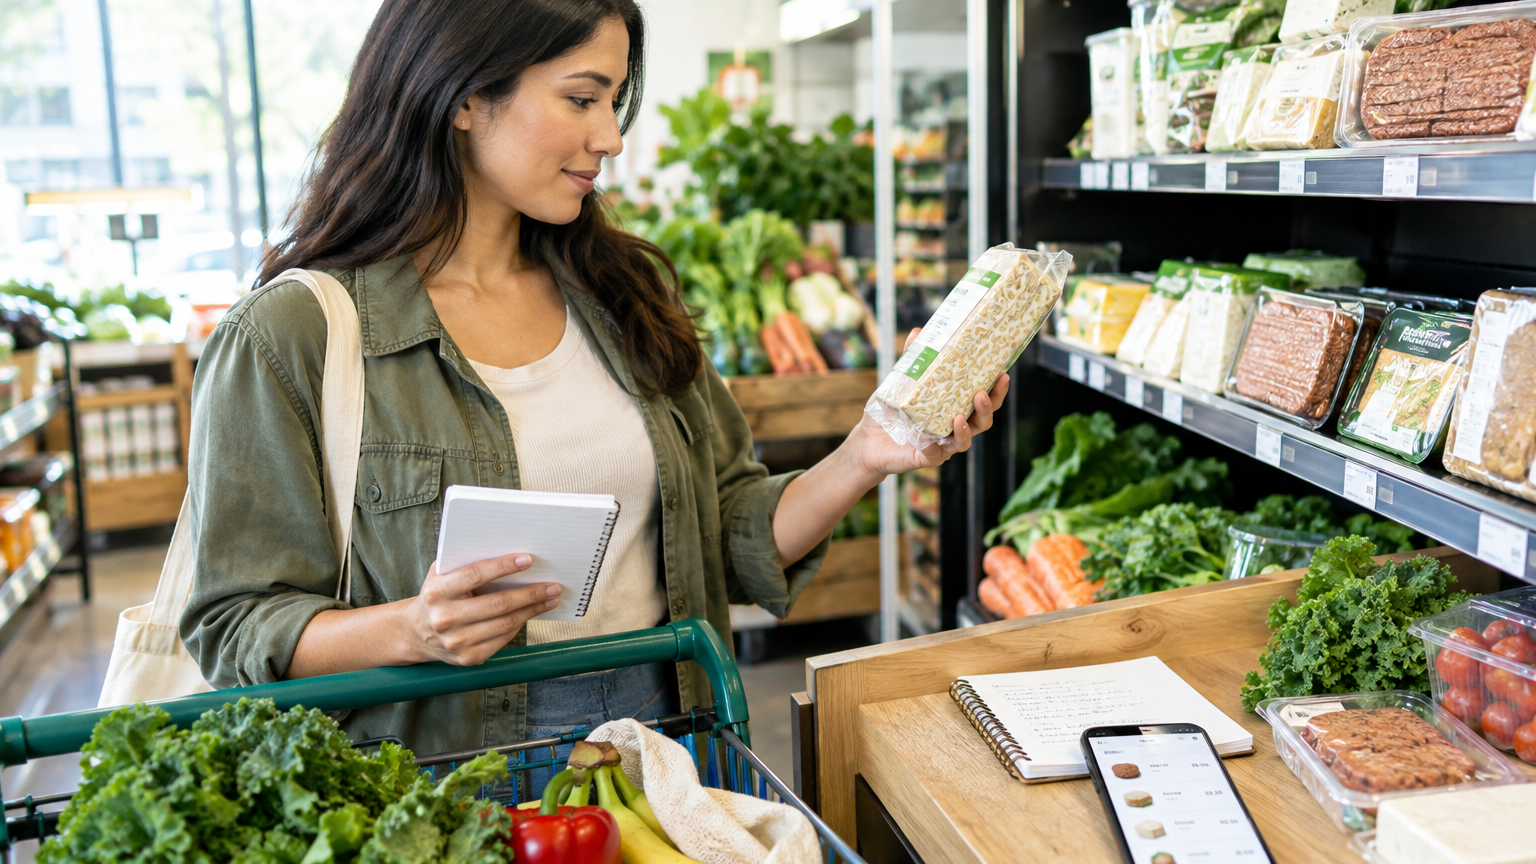
    • Compare unit prices, not package prices. The shelf tag usually shows the per-ounce, per-pound, or per-count price.
    • Try store brands for staples. Start with one item and expand if you're satisfied.
    • Buy produce in season. Use frozen or canned when fresh is out of season.
    • Match the store type to the item. No single store is cheapest for everything.
    • Verify prices locally. What's true in one city may not hold in another.

    Where to Shop: Comparing Your Options

    No single store type is cheapest for everything. Use the comparisons below as a starting point, then test them against the stores near you.

    Conventional Supermarkets

    Pros: Supermarkets offer a wide selection, including plant-based specialty items, along with weekly sales, loyalty programs, and convenience.

    Cons: Name-brand and specialty products may cost more than comparable items elsewhere.

    Best for: One-stop shopping, weekly sales, and store-brand staples. If you want everything in a single trip, a supermarket is often the practical choice. Loyalty programs and digital coupons can help, but only if the items they discount are things you already buy.

    Discount Grocers

    Pros: Many discount grocers focus on lower-cost private labels and basics.

    Cons: The selection may be smaller or change often, and some specialty plant-based items may be limited or absent.

    Best for: Pantry staples, produce, and store-brand items. If your meals rely on rice, pasta, canned beans, frozen vegetables, and oats, a discount grocer is worth including in your comparison. You may still need another store for specific items you can't find there.

    Ethnic and International Markets

    Pros: These markets are often good sources for spices, legumes, rice, tofu, noodles, and produce. Larger package sizes may also be available.

    Cons: Labels may be in other languages, and selection varies from store to store.

    Best for: Spices, grains, legumes, tofu, and specialty produce. If you cook with many spices or use a lot of legumes, an international market can be a useful second stop. Check unit prices here too, since large packages are not automatically cheaper. A translation app can help with unfamiliar labels, and you can always ask staff about ingredients.

    Warehouse Clubs

    Pros: Bulk sizes can lower the unit cost of shelf-stable and freezer items.

    Cons: You'll need to pay a membership fee, have room to store large packages, and avoid buying more than you can use before it spoils.

    Best for: Households that can store and use larger quantities, such as oats, rice, frozen produce, nuts, and nut butters. Before joining, compare the unit prices of your regular items against other local options, and factor in the membership cost.

    Online Grocery Delivery

    Pros: Online ordering makes price comparison easy, lets you save lists, and tends to reduce impulse buying. It can also give you access to stores you might not otherwise reach.

    Cons: Watch for delivery fees, tips, markups, or order minimums. You also have less control over produce selection.

    Best for: Convenience, mobility or time constraints, and comparing prices before you buy. Even if you shop in person, browsing a store's website can help you check prices and unit costs in advance.

    Quick Comparison Table

    Store type Typical strengths Watch-outs Good for
    Conventional supermarket Wide selection, sales, loyalty programs Name-brand and specialty items may cost more One-stop shopping, store-brand staples
    Discount grocer Private labels and basics Smaller or changing selection Pantry staples, produce
    Ethnic/international market Spices, legumes, rice, tofu, noodles, produce Labels in other languages; selection varies Spices, grains, legumes, tofu
    Warehouse club Bulk sizes on shelf-stable and frozen items Membership fee, storage, potential waste Larger households with storage space
    Online delivery Easy comparison, saved lists, fewer impulse buys Fees, tips, markups, minimums Convenience, limited time or transportation

    How to Compare Prices Accurately

    Use Unit Pricing

    Unit pricing is the most reliable way to compare options when packages come in different sizes.

    • Find the unit price on the shelf tag. It's usually listed per ounce, pound, count, or liter.
    • Compare the same unit across brands and sizes. If one tag lists price per ounce and another lists price per pound, convert them before you decide.
    • Check that the larger package is actually cheaper per unit. Bigger isn't always better value. Also ask whether you'll use it before it spoils.

    Practical example: Say you're choosing between two sizes of rolled oats. Don't compare the sticker prices. Look at each shelf tag's unit price, confirm both use the same unit, and pick the lower one only if you'll finish the larger bag while it's still fresh.

    Choose Store Brands Strategically

    Store brands are often a good place to look for savings on basics, but quality and taste can vary.

    • Compare ingredient lists against the name-brand version, and taste-test with one item first before switching a whole category.
    • Good candidates include canned beans, frozen vegetables, pasta, rice, oats, plant milks, and canned tomatoes.
    • Check labels for dietary needs, such as allergens or fortification, since store-brand and name-brand products can differ.

    If a store brand meets your needs on ingredients and taste, it may be a good value. If you notice a difference you care about, go back to the name brand for that item only.

    Buy Seasonal Produce

    In-season produce is often more plentiful and may cost less, but check local prices, since conditions vary by region.

    • Use frozen or canned produce when fresh is out of season. Check labels for added sugar or sodium if that matters to you.
    • Look for seasonal items at local markets, in store flyers, and on in-store signs.
    • Stay flexible. If your recipe calls for one vegetable and another seasonal one works just as well, swap it.

    Watch for Common Price Traps

    • Specialty convenience foods. Meat and dairy alternatives and other prepared plant-based products may cost more than whole-food staples.
    • Smaller packages and pre-cut produce. These often cost more per unit than whole or larger versions.
    • Sale items you won't use. A sale is only a deal if the food gets eaten.

    Step-by-Step: Build a Budget-Friendly Plant-Based Shopping Routine

    1. Plan meals around staples (grains, legumes, vegetables, fruit) and note what you already have. If you want inspiration, browse plant-based dinner ideas and pick recipes built on ingredients you'll reuse. 2. Write a list organized by store section so you don't wander and impulse-buy. 3. Check local store flyers, apps, or websites for current prices. 4. Compare unit prices for your top 10 to 15 regular items across two or three stores. 5. Assign items to the store that works best. For example, staples at a discount grocer and spices at an international market. 6. Choose store brands for basics, and name brands only where you notice a difference. 7. Buy seasonal produce and stock up on frozen or canned options. 8. Store food properly and plan leftovers to reduce waste. 9. Review your receipts or order history monthly and adjust your routine.

    Quick Checklist Before You Shop

    • [ ] I've checked what I already have at home.
    • [ ] My list is organized by store section.
    • [ ] I've compared unit prices on my regular items.
    • [ ] I know which items are better bought in bulk and which aren't.
    • [ ] I have a plan for using perishable items.

    Which Option Is Right for You?

    • Small household or limited storage: A supermarket or discount grocer, with selective bulk buying, is usually the most practical fit.
    • Large household or good storage: A warehouse club may suit shelf-stable and frozen staples, if the unit prices hold up.
    • Cooking with many spices, legumes, or tofu: Ethnic and international markets are worth a visit.
    • Limited time or transportation: Online delivery can help, after you compare fees and markups.

    Tip: Run a small price test. Buy the same basket of items at two stores, or compare the same basket on their websites, and see how the totals and unit prices compare. If you're ready to put your plan into action, you can also shop plant-based dinner options and compare them with what you'd make from staples.

    Frequently Asked Questions

    Is plant-based grocery shopping always cheaper?

    Not necessarily. Staples like beans, lentils, rice, oats, and seasonal produce are often budget-friendly, while specialty or processed plant-based products can cost more. Compare prices at your local stores.

    Are warehouse clubs worth it for plant-based shoppers?

    They can be if you have storage space, will use the bulk quantities, and the unit prices beat other local options after accounting for membership costs. Compare before joining.

    How do I know if a store brand is a good value?

    Compare unit prices and ingredient lists, then try a small amount. If quality and taste meet your needs, it may be a good value.

    Conclusion and Next Step

    Plant based grocery shopping on a budget comes down to a few habits: compare unit prices, try store brands for staples, buy seasonal produce, and match each store type to the items it handles best. You don't need to commit to a single store. Many households do best with a primary store plus an occasional stop elsewhere for specific items.

    Your next step: Pick five staple items, check their unit prices at two or three local stores this week, and build your routine from the results. Prices and availability vary by location, so verify everything locally before you change how you shop.

  • Easy Plant-Based Sauces and Seasonings That Make Cheap Dinners Taste Better

    Easy Plant-Based Sauces and Seasonings That Make Cheap Dinners Taste Better

    This article contains affiliate links. We may earn a commission if you buy through them, at no extra cost to you.

    Easy Plant-Based Sauces and Seasonings That Make Cheap Dinners Taste Better

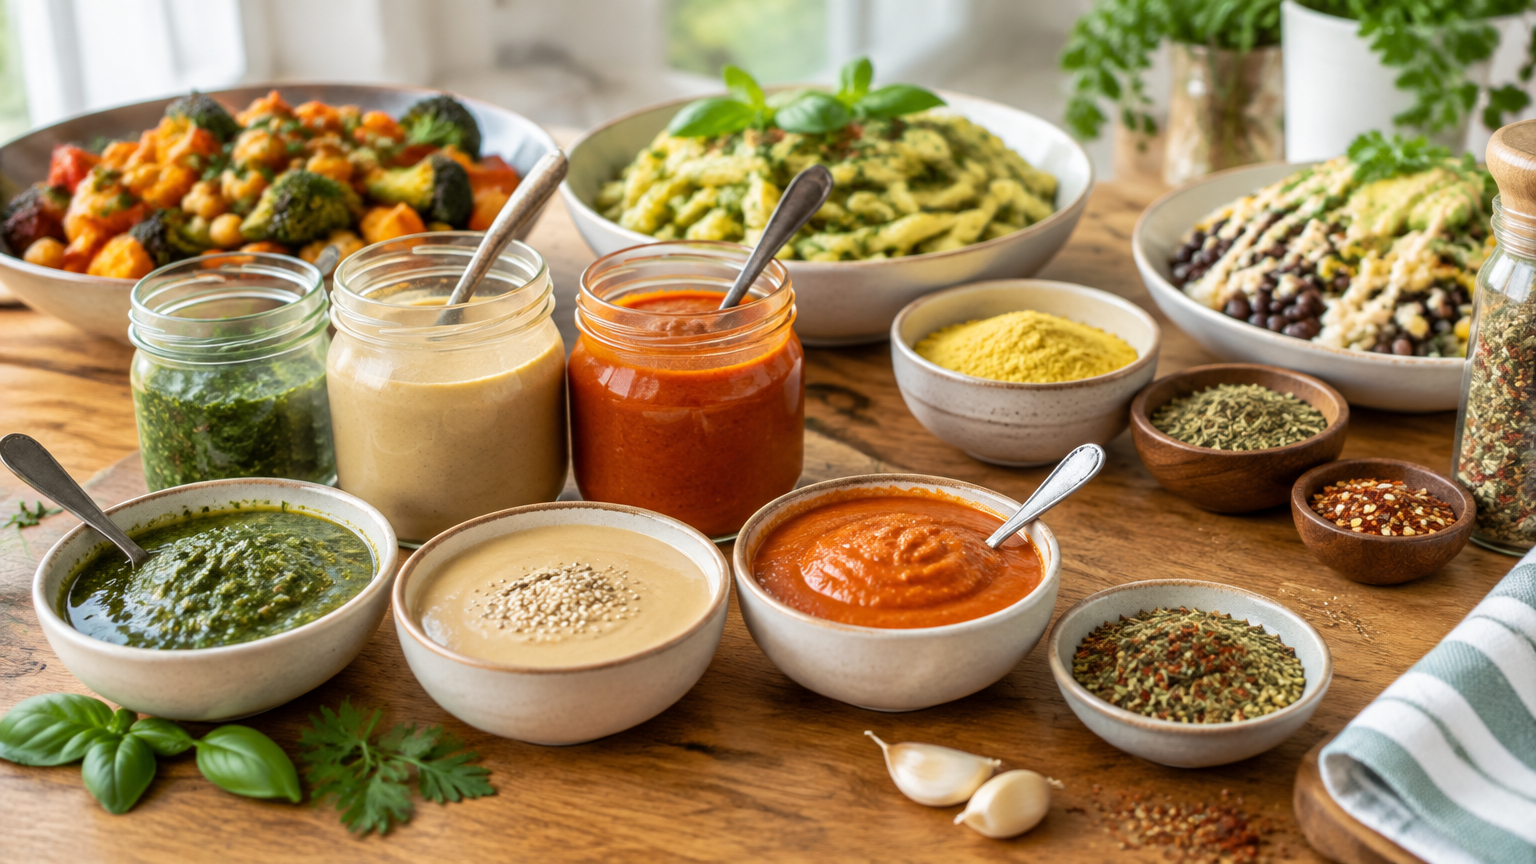
    The easiest plant-based sauces for beginners use pantry staples and need only a bowl and a whisk, or a blender. Start with five: peanut sauce, tahini-lemon, tomato-garlic, a cashew-free creamy sauce, and spicy soy-ginger. Each turns plain rice, beans, or vegetables into a meal. Add a few basic spices and you can vary the flavor all week.

    Key Takeaways

    • Five sauces cover most flavor styles: nutty, tangy, savory-tomato, creamy, and spicy.
    • Three of the five (peanut, tahini-lemon, spicy soy-ginger) need no cooking.
    • Season in this order: salt first, then acid, then spice.
    • One sauce plus a cheap base, a protein, and vegetables makes a complete dinner.
    • Make one sauce in bulk and change the toppings through the week.

    How to Use This Guide

    Each sauce below has an ingredient list, quick steps, and serving ideas. A few ground rules make them easier to follow:

    • Amounts are starting points. Taste, then adjust salt, acid (lemon or vinegar), and heat.
    • Thin with water one tablespoon at a time. It's easy to add more and hard to take it back.
    • Thicken by adding more of the main ingredient, such as more peanut butter, tahini, or beans.

    If you like learning from structured recipes, a beginner-friendly plant-based cookbook or recipe collection can be a useful companion once you've tried these basics.

    Spice-Rack Starter List

    You don't need a full spice wall. A small set covers a wide range of flavors.

    Core spices and seasonings

    • Salt and black pepper
    • Garlic powder
    • Onion powder
    • Smoked paprika
    • Ground cumin
    • Chili flakes or cayenne
    • Dried oregano or Italian seasoning
    • Curry powder or chili powder (pick one to start)

    Flavor boosters to keep on hand

    • Soy sauce or tamari
    • Vinegar (rice or apple cider)
    • Lemons or bottled lemon juice
    • Nutritional yeast
    • Fresh garlic and ginger

    Beginner tip

    Buy small amounts of spices first. Add more only after you use them up. That keeps your spending low and shows you which flavors you actually reach for.

    Five Easy Plant-Based Sauces

    1. Peanut Sauce

    Ingredients:

    • 3 tablespoons peanut butter
    • 1 tablespoon soy sauce or tamari
    • 1 tablespoon lime juice or vinegar
    • 1 small clove garlic, minced (or a pinch of garlic powder)
    • 1 teaspoon sweetener (maple syrup or sugar)
    • 2–4 tablespoons warm water
    • Optional: chili flakes

    Steps: Whisk everything together in a bowl. Add warm water a spoonful at a time until the sauce is pourable.

    Use it on:

    • Rice with steamed broccoli or cabbage
    • Noodles
    • Roasted sweet potatoes
    • As a dip for raw vegetables

    Tip: Warm water blends into peanut butter more easily than cold.

    2. Tahini-Lemon Sauce

    Ingredients:

    • 3 tablespoons tahini
    • 2 tablespoons lemon juice
    • 1 small clove garlic, minced
    • Pinch of salt
    • 2–4 tablespoons water
    • Optional: a pinch of cumin

    Steps: Whisk the tahini and lemon juice. It will thicken and look clumpy at first, which is normal. Add water gradually until smooth, then season to taste.

    Use it on:

    • Chickpeas
    • Roasted carrots or cauliflower
    • Grain bowls
    • Falafel-style patties

    Tip: If it tastes bitter, see the troubleshooting section below.

    3. Tomato-Garlic Sauce

    Ingredients:

    • 1 can (about 14–15 oz) crushed tomatoes
    • 2 tablespoons olive oil
    • 2–3 cloves garlic, sliced or minced
    • 1 teaspoon oregano or Italian seasoning
    • Salt to taste
    • Pinch of sugar, only if the sauce tastes too acidic
    • Optional: chili flakes

    Steps: Gently cook the garlic in the oil over low to medium heat until fragrant, without letting it brown. Add the tomatoes and seasonings. Simmer until slightly thickened.

    Use it on:

    • White beans over rice
    • Pasta
    • Sautéed zucchini or eggplant
    • Baked potatoes

    Tip: This is the one sauce here that needs a stove, but it stays hands-off while it simmers.

    4. Cashew-Free Creamy Sauce

    Many plant-based creamy sauces rely on cashews. White beans make a budget-friendly alternative.

    Ingredients:

    • 1 can white beans (cannellini or great northern), drained and rinsed
    • 2 tablespoons olive oil
    • 2 tablespoons lemon juice
    • 1 clove garlic
    • 2 tablespoons nutritional yeast
    • ½ teaspoon salt, plus more to taste
    • ¼–½ cup water, as needed

    Steps: Blend until smooth, adding water as needed. Warm gently in a small pot if you'd like it hot.

    Use it on:

    • Pasta
    • Steamed or roasted vegetables
    • Rice bowls
    • As a spread or salad dressing

    Note: Sunflower seeds or silken tofu also work as a base. Adjust the liquid to get the texture you want. Sunflower seeds may need soaking or a stronger blender [VERIFY based on your blender and the seeds you use].

    5. Spicy Soy-Ginger Sauce

    Ingredients:

    • 3 tablespoons soy sauce or tamari
    • 1 teaspoon grated fresh ginger
    • 1 clove garlic, minced
    • 1 tablespoon rice vinegar
    • ½ teaspoon chili flakes or 1 teaspoon chili sauce
    • 1 teaspoon sweetener
    • Optional: a splash of water
    • Optional: a few drops of sesame oil, if you have it

    Steps: Stir everything together. For a thicker glaze, simmer briefly with a small cornstarch-and-water mixture (about 1 teaspoon cornstarch mixed into 2 teaspoons cold water).

    Use it on:

    • Stir-fried vegetables over rice
    • Tofu
    • Black beans
    • Roasted broccoli

    Tip: Start with less chili. You can always stir in more.

    Quick Comparison Table

    Sauce Cooking needed? Main flavor Good with
    Peanut No (whisk) Nutty, savory, a little sweet Rice, noodles, sweet potatoes, raw veggies
    Tahini-lemon No (whisk) Tangy, earthy Chickpeas, roasted vegetables, grain bowls
    Tomato-garlic Yes (simmer) Savory, herby White beans, pasta, potatoes
    Cashew-free creamy No cooking (blender) Mild, lemony, creamy Pasta, vegetables, rice bowls
    Spicy soy-ginger No (stir) Salty, sharp, spicy Stir-fries, tofu, black beans

    Simple Formula for Cheap Dinners

    You don't need a recipe for every meal. Use this pattern:

    1. Pick a base: rice, potatoes, pasta, or another grain. 2. Add a protein: beans, lentils, chickpeas, or tofu. 3. Add vegetables: fresh, frozen, roasted, or sautéed. 4. Spoon on one sauce. 5. Finish with something fresh or crunchy, such as herbs, scallions, or seeds.

    Practical examples

    • Rice + black beans + frozen broccoli + spicy soy-ginger sauce + scallions. Heat the beans and broccoli, then drizzle the sauce over the top.
    • Baked potato + white beans + tomato-garlic sauce + chopped parsley. Spoon the warm beans and sauce over a split potato.
    • Quinoa or rice + chickpeas + roasted carrots + tahini-lemon sauce + sesame seeds. Roast the carrots while the grain cooks.
    • Pasta + steamed cauliflower + cashew-free creamy sauce + black pepper. Toss everything in the warm sauce.
    • Noodles + shredded cabbage + peanut sauce + crushed peanuts. Serve warm or cold.

    Make-Ahead and Storage Tips

    • Make a double batch of one sauce at the start of the week.
    • Store in airtight containers in the refrigerator and use within a few days.
    • Stir or whisk before serving, and add a little water if the sauce has thickened.
    • Discard any sauce that smells or looks off.

    Sauces made with beans or tomatoes are perishable, so treat them like leftovers. Label the container with the date so you don't have to guess. If you plan to batch-cook often, a set of airtight glass storage containers makes it easier to keep sauces organized, though any clean lidded container works.

    Beginner Troubleshooting

    • Too thick: add water a spoonful at a time.
    • Too bitter (tahini): add a little more lemon, salt, or sweetener.
    • Too salty: add water, acid, or more of the base ingredient.
    • Bland: add salt first, then acid, then spice.

    A quick tasting checklist

    Before serving any sauce, taste it and ask:

    • [ ] Does it need more salt?
    • [ ] Does it taste flat? Add lemon, lime, or vinegar.
    • [ ] Do you want more heat? Add chili flakes a pinch at a time.
    • [ ] Is it the right thickness for the dish?
    • [ ] Does it need something sweet to soften sharp or bitter notes?

    FAQ

    What are the easiest plant-based sauces for beginners to make?

    Peanut sauce, tahini-lemon, and spicy soy-ginger are the simplest. They need no cooking and just a whisk.

    Can I make creamy sauces without cashews?

    Yes. Blend white beans, silken tofu, or sunflower seeds with lemon, garlic, and a little oil or water.

    How do I use these sauces on a budget?

    Pair a sauce with inexpensive staples like rice, beans, frozen vegetables, or potatoes. Make one sauce in bulk and change the toppings through the week.

    Conclusion

    Plain rice, beans, and vegetables become much more interesting with a good sauce. Start with one this week. Peanut or tahini-lemon is a good first pick because it needs only a bowl and a whisk. Once you're comfortable, add a second sauce, then build out your spice rack gradually. Taste as you go, adjust the salt, acid, and heat, and you'll soon be making these without measuring.

  • Plant-Based Meal Prep Containers and Storage: What to Look For Before You Buy

    Plant-Based Meal Prep Containers and Storage: What to Look For Before You Buy

    This article contains affiliate links. We may earn a commission if you buy through them, at no extra cost to you.

    Plant-Based Meal Prep Containers and Storage: What to Look For Before You Buy

    Direct answer: The best meal prep containers for plant based meals are the ones that match how you cook, reheat, and store your food. Prioritize material (glass or plastic), a size that fits your portions, a lid seal suited to saucy or wet foods, confirmed microwave and freezer compatibility, and a shape that stacks well in your fridge. Then choose container types by component, because grains, beans, sauces, and roasted vegetables each have different needs.

    Key Takeaways

    • Neither glass nor plastic is universally better. Choose based on whether you mostly reheat at home or carry meals daily.
    • Buy a mix of sizes instead of one size for everything.
    • Lid seal quality matters most for sauces, soups, and cooked beans in liquid.
    • Check the label for the base and the lid separately. They often have different ratings.
    • Test one or two containers before committing to a full set.

    Quick Buying Checklist

    Use this table as a starting point. Each row is expanded in the sections below.

    Feature What to check Why it matters
    Material Glass or plastic, based on your routine Affects weight, staining, and durability
    Size and portion fit Capacity and depth versus your typical portions Prevents overfilled or half-empty containers
    Lid type and seal Snap-lock, silicone gasket, vented, or press-on Determines leak resistance and reheating ease
    Compatibility labels Microwave, freezer, dishwasher, oven Avoids damage and misuse
    Stackability Uniform shapes, nesting when empty Saves fridge, freezer, and cabinet space
    Cleaning Stain and odor concerns, removable gaskets Affects long-term use
    Quantity Enough for your prep schedule Avoids running short mid-week

    Material: Glass vs. Plastic

    Glass

    Pros

    • Generally resists staining and odors, which is useful with turmeric, tomato, and curry-based dishes.
    • Easy to see contents at a glance.
    • Often oven-safe, but only if the manufacturer says so.

    Cons

    • Heavier to carry.
    • Can chip or break.
    • The lid may be a different material, such as plastic, so check the lid's ratings separately.

    Plastic

    Pros

    • Lightweight and portable.
    • Usually less breakable, which helps for commuting or travel.

    Cons

    • May stain or hold odors, especially after tomato sauces and spice-heavy dishes.
    • Ratings vary, so check the label for microwave, freezer, and dishwasher use.

    How to Decide

    • Mostly reheating at home or at an office with a microwave: glass may suit you well.
    • Carrying meals daily or packing for travel: lightweight plastic may suit you better.
    • Always check manufacturer labels for temperature limits and care instructions.
    • If BPA-free labeling matters to you, look for it and verify it on the specific product rather than assuming. [VERIFY on each product's packaging or listing]

    If you're leaning toward glass, you can compare glass meal prep container sets and check each listing for lid material and compatibility details.

    Size and Portion Fit

    Common Size Considerations

    • Single-compartment vs. multi-compartment. Single compartments are flexible for bowls and batch storage. Multi-compartment designs keep components separate.
    • Full meal vs. single component. Decide whether each container holds a complete meal or just one prepped ingredient.
    • Depth. Deeper containers suit bowls, stews, and beans. Shallow trays suit roasted vegetables.

    Practical Steps

    1. Decide how many meals you prep per week. This sets your minimum container count. 2. Measure a typical portion of grains, beans, and vegetables. Fill a measuring cup or scoop and pour it into a candidate container to see how it fits. 3. Choose a mix of sizes rather than all one size. A few larger containers and several smaller ones cover most needs. 4. Leave headspace for foods that expand when frozen, such as soups and cooked beans in liquid.

    Practical example: Say you prep four lunches a week, each with a grain, a bean dish, and roasted vegetables. You might choose four medium containers for assembled meals, plus two or three small ones for sauces. If you also batch-cook grains for the freezer, add a few shallow, freezer-labeled containers.

    Lid Seals and Leak Resistance

    Lid Types

    • Snap-lock lids clamp down on all sides and generally suit liquids.
    • Silicone-gasket lids add a flexible seal around the rim.
    • Vented lids let steam escape during reheating.
    • Simple press-on lids are convenient for dry or low-moisture foods but may not suit sauces.

    Match the Lid to the Use

    • Use tight seals for sauces, soups, and dressings.
    • Use vented lids for reheating.
    • Check whether gaskets are removable for cleaning. Trapped residue is a common problem.
    • Test new containers with water before packing sauces. Fill, seal, turn upside down over a sink, and shake gently.
    • Confirm that lids are microwave- and freezer-safe, not just the base.

    Microwave, Freezer, and Dishwasher Compatibility

    What to Verify on the Label

    • Microwave-safe for both base and lid
    • Freezer-safe
    • Dishwasher-safe (top rack only, if specified)
    • Oven-safe, if you plan to bake or reheat in the oven

    Don't assume that one rating covers another. A container can be microwave-safe but not freezer-safe, or the base can be rated for the oven while the lid is not. If a label is unclear or missing, treat the rating as unconfirmed. [VERIFY with the manufacturer]

    Practical Tips

    • Cool food before sealing and freezing. Hot food sealed in a container can create condensation.
    • Avoid sudden temperature changes with glass unless the manufacturer states it's safe.
    • Vent lids when microwaving, by opening a vent or resting the lid loosely on top, as the instructions direct.

    Stackability and Storage

    Containers spend more time in your fridge, freezer, and cabinets than in your hands. Consider the following:

    • Uniform shapes such as square or rectangular tend to use fridge space efficiently.
    • Nesting containers save cabinet space when empty.
    • Lids that fit multiple sizes simplify organization and reduce the hunt for matching pieces.
    • Flat, stackable containers help with freezer organization.
    • Clear sides or lids make contents easy to identify.
    • Label with dates using tape and a marker, or a dry-erase option if the surface allows.

    Before you buy, measure the shelf height and depth in your fridge and freezer. A container that looks compact online may not fit a crowded shelf.

    Match Container Types to Prepped Components

    Different foods behave differently in storage. Here's how to match them.

    Grains (rice, quinoa, farro)

    • Medium, shallow containers cool faster and portion easily.
    • Freezer-safe options work well for batch freezing in meal-sized portions.

    Beans and Legumes

    • Deeper containers with tight lids suit beans, especially when stored with liquid.
    • Leave headspace if you plan to freeze them.

    Sauces, Dressings, and Soups

    • Small leak-resistant containers or jars with secure seals work well.
    • Freezer-safe, with expansion room, if you'll freeze them.

    For sauces and dressings, a set of small leak-resistant sauce containers can be a useful add-on to your main set. Check the lid ratings before buying.

    Roasted Vegetables

    • Shallow, vented or loosely sealed containers help limit sogginess.
    • Separate compartments, or storing them apart from sauces, keeps textures better.

    Fresh Items (greens, cut fruit, toppings)

    • Separate compartments or small containers keep ingredients from getting wet or wilting.

    Assembled Bowls

    • Multi-compartment containers, or layered storage with sauce kept separate, let you build bowls without everything blending together.

    Practical example: For a grain bowl, store the grain in one compartment, roasted vegetables in another, and beans in a third, with a small sauce container alongside. At mealtime, combine them and reheat the parts that need it. Add fresh greens afterward.

    Cleaning, Stains, and Odors

    • Tomato, turmeric, and curry-based foods may stain some plastics.
    • Removable gaskets help prevent trapped residue.
    • Check whether the material is dishwasher-safe, and whether lids and gaskets need hand-washing.

    If you cook with a lot of tomato or spice, this may push you toward glass for those dishes, or toward dedicating certain plastic containers to less-staining foods.

    For more on prepping the components themselves, see this guide to batch-cooking plant-based staples.

    How to Build Your Starter Set

    1. List your weekly prep components. Write down the grains, beans, sauces, and vegetables you prepare most often. 2. Pick a primary material. Choose glass, plastic, or a deliberate mix. 3. Choose 2–3 sizes. Cover assembled meals, single components, and shallow roasting-tray storage. 4. Add small sauce containers. Dressings and sauces benefit from dedicated, leak-resistant options. 5. Verify label claims. Check microwave, freezer, dishwasher, and oven ratings for both bases and lids. 6. Test before buying a full set. Try one or two pieces for sealing, stacking, and reheating, then expand.

    FAQs

    Are glass or plastic meal prep containers better for plant-based meals?

    Neither is universally better. Glass suits home reheating and stain resistance, while plastic suits portability. Base the choice on your routine and the product's labeling.

    Can I freeze beans, grains, and sauces in meal prep containers?

    Many of these foods freeze well, but only in containers labeled freezer-safe. Cool food first and leave headspace for liquids.

    How do I keep roasted vegetables from getting soggy in storage?

    Cool them before sealing, use a shallow container, and store sauces separately. Consider a vented lid for reheating.

    Conclusion: Final Pre-Purchase Checklist

    Choosing meal prep containers for plant based meals comes down to matching features to your actual routine, not to a single "best" option. Before you check out, confirm the following:

    • [ ] Material fits your routine
    • [ ] Sizes match your portions
    • [ ] Lids seal as needed
    • [ ] Microwave, freezer, and dishwasher labels confirmed
    • [ ] Containers stack and fit your fridge
    • [ ] Each component has a suitable container type

    Start small, test the seals and reheating on a couple of pieces, and build out your set once you know what works for your kitchen.

  • Frozen vs. Fresh vs. Canned Produce for Plant-Based Meals on a Budget

    Frozen vs. Fresh vs. Canned Produce for Plant-Based Meals on a Budget

    This article contains affiliate links. We may earn a commission if you buy through them, at no extra cost to you.

    Frozen vs. Fresh vs. Canned Produce for Plant-Based Meals on a Budget

    Meta description: A practical guide to choosing frozen, fresh, or canned vegetables for plant-based dinners on a budget, with tips on storage, food waste, and reading labels.

    Plant-based dinners can get expensive, or wasteful, when a crisper drawer full of produce spoils before you cook it. This dinner-by-dinner guide to frozen vs canned vegetables on a plant-based budget shows which form works best for stir-fries, soups, curries, and sheet-pan meals, plus storage, food waste, and label-reading tips. It focuses on cost, texture, convenience, and cooking results, not health outcomes.

    The Short Answer: Which Form Should You Buy?

    No single form wins. Frozen is often the most flexible for stir-fries, curries, and sheet-pan meals. Canned is handy for soups, stews, and pantry backups. Fresh works best when you will use it soon, want a specific texture, or find it in season at a good price.

    Dinner type Best-fit form Why
    Stir-fry Fresh for crisp vegetables; frozen for broccoli, blends, edamame Fresh gives the most crunch; frozen is pre-cut and quick
    Soup or stew Canned tomatoes, beans, corn; frozen added late; fresh aromatics Long simmering suits soft textures
    Curry Canned tomatoes, chickpeas, coconut milk; frozen spinach, cauliflower, peas Sauce-based dishes forgive softer vegetables
    Sheet-pan meal Fresh hardy vegetables; frozen as a backup; canned chickpeas Roasting needs structure and low moisture

    Prices vary by store and region, so compare unit prices locally rather than assuming one form is always cheaper.

    Quick Comparison: Frozen vs. Canned vs. Fresh

    Cost and Unit Pricing

    Shelf tags usually list a unit price, such as price per ounce or per pound. Use it to compare across package sizes and forms. Also think about edible yield. Fresh produce may need trimming, peeling, or coring, so some of what you pay for ends up in the compost. Frozen and canned vegetables are usually ready to use, so the weight you buy is closer to the weight you cook. Fresh can still be the better value when it is in season or sold loose, so you can buy only what you need.

    Texture and Cooking Behavior

    • Frozen: Usually softer after cooking than fresh. Frozen vegetables tend to hold up better in cooked dishes than in raw ones.
    • Canned: Already cooked and soft. They work best when simmered, mashed, or blended.
    • Fresh: Gives you the most control over crispness and browning, which matters in stir-fries and roasting.

    Convenience and Prep Time

    Fresh vegetables need washing, chopping, and more cleanup. Frozen vegetables skip most of that. You open the bag and portion what you need. Canned vegetables and beans are the quickest of all, needing only a can opener and, if you choose, a colander for draining.

    Shelf Life and Flexibility

    Each form needs different space: the pantry for canned, the freezer for frozen, and the fridge or counter for fresh. Check package dates and storage instructions instead of assuming timelines. Canned and frozen items give you a cushion when plans change, while fresh produce asks you to cook on a schedule.

    Best Form for Each Dinner Type

    Stir-Fries

    Fresh vegetables are the best choice when you want crisp textures. Bell peppers, cabbage, and carrots all stay snappy in a hot pan.

    Frozen vegetables also work well. Broccoli, stir-fry blends, and edamame are common options. A few tips:

    • Cook from frozen over high heat.
    • Avoid overcrowding the pan, which causes steaming instead of searing.
    • If the product looks watery, thaw and drain it first.

    Canned vegetables have limited use here. Baby corn, water chestnuts, and bamboo shoots are the usual exceptions, and they add texture without extra prep.

    Example: Sauté fresh cabbage and carrots, add a handful of frozen edamame, and toss in drained canned water chestnuts at the end. Serve over rice with your favorite sauce.

    Soups and Stews

    Canned tomatoes, beans, and corn make an easy base, and long simmering suits their soft texture. Add frozen vegetables near the end of cooking so they do not turn mushy. Keep a few fresh aromatics, such as onion, garlic, and celery, since they build flavor and cost little compared with the whole pot of food.

    Example: Simmer onion and garlic, then add canned tomatoes, canned beans, and broth. Stir in frozen mixed vegetables for the last few minutes.

    Curries

    Curries are forgiving, which makes them ideal for pantry staples. Canned tomatoes, chickpeas, and coconut milk are a common trio. Frozen spinach, cauliflower, peas, and green beans slip easily into the sauce.

    Use fresh where texture matters, such as potatoes and onions. Potatoes hold their shape and soak up flavor, and onions form the foundation of the sauce.

    Sheet-Pan Meals

    Fresh hardy vegetables roast best. Sweet potatoes, carrots, and Brussels sprouts brown well and keep their structure.

    Frozen vegetables can work with care:

    • Roast at high heat.
    • Spread them in a single layer so they do not steam.
    • Pat them dry if they are icy.

    Canned chickpeas are a good add-in once they are drained and dried well, since they can turn crisp at the edges. Avoid canned soft vegetables for roasting, as they tend to fall apart.

    Step-by-Step: Build a Budget-Friendly Produce Plan

    1. Plan 3–4 dinners and note which produce form fits each one. 2. Buy fresh for the first half of the week, and rely on frozen or canned for the second half. 3. Check unit prices and store brands before you commit. 4. Keep a short list of staples: frozen mixed vegetables, frozen greens, canned tomatoes, and canned beans. 5. Cook the most perishable fresh items first. 6. Rotate older pantry and freezer items to the front so they get used.

    If you like working from templates, plant-based meal planning resources can help you organize a weekly plan around this approach.

    Storage Tips for Each Form

    Fresh Produce

    Store produce according to type. Some items belong in the fridge and others on the counter. Keep produce dry and avoid washing until you are ready to use it, since extra moisture can speed spoilage.

    Frozen Produce

    Reseal bags tightly, press out the air, and label them with the date opened. Avoid thaw-and-refreeze cycles, which can hurt texture and quality. If your bags keep ending up half-open, freezer-friendly storage containers are one option for keeping partial portions organized.

    Canned Produce

    Store cans in a cool, dry place. Transfer leftovers from opened cans to a covered container in the fridge instead of storing them in the can. Follow package guidance and safe food handling practices, and do not use cans with severe damage or bulging. For specifics on storage times, check USDA guidance rather than relying on rules of thumb.

    Reducing Food Waste

    • Use "first in, first out" shelving. Put newer items behind older ones.
    • Freeze fresh vegetables you will not use in time. Check guidance on blanching for specific items first, since not every vegetable freezes the same way.
    • Save scraps for homemade broth. Onion ends, carrot peels, and celery trimmings can go in a bag in the freezer until you have enough.
    • Cook in flexible formats. Fried rice, soup, curry, and grain bowls absorb leftovers easily.
    • Portion frozen vegetables. Take only what you need and return the rest to the freezer promptly.
    • Plan one "clean-out-the-fridge" meal each week. It turns odds and ends into dinner.

    How to Read Labels: Sodium, Sauces, and Add-Ins

    Frozen Vegetables

    Check for sauce packets, seasonings, butter, or cream. Plain frozen vegetables usually have a short ingredient list, often just the vegetable itself. Sauced blends can be convenient, but they may cost more per ounce of vegetable and limit how you can season the dish.

    Canned Vegetables and Beans

    If you want more control over seasoning, look for "no salt added," "low sodium," or "reduced sodium" on the label. Draining and rinsing may reduce some surface sodium, but check the label to see what applies to the specific product. Also look at the packing liquid, which may be water, brine, syrup, or sauce.

    General Label Checks

    • Read the ingredient list, serving size, and sodium per serving.
    • Watch for added sugars in canned fruit or sauced products.
    • Confirm the product fits your needs, including vegan preferences and allergen concerns.
    • Verify that "plant-based" items do not contain animal-derived ingredients in their sauces or seasonings.

    Quick checklist for the store:

    • [ ] Is the unit price lower than the alternatives?
    • [ ] Is the ingredient list short?
    • [ ] Are there sauces, butter, or cream I do not want?
    • [ ] Does the label say "no salt added" or similar, if I want that?
    • [ ] Will I realistically use the whole package?

    Common Mistakes to Avoid

    • Buying large bags or cans you will not finish. A bargain only counts if you use it.
    • Overcooking frozen vegetables. They are often partly cooked already, so they need less time than you might expect.
    • Adding salt before tasting canned items. Canned foods may already be seasoned.
    • Skipping unit price comparisons. Package size can hide the real cost.
    • Using the wrong form for the cooking method. Soft canned vegetables will not roast well, and frozen vegetables will not stay crisp in a raw salad.

    FAQs

    Is it better to buy frozen or canned vegetables on a budget?

    It depends on the dish and local prices. Frozen often suits stir-fries, curries, and sheet-pan meals, while canned suits soups, stews, and sauces. Compare unit prices and consider how likely you are to use the whole package.

    How do I keep frozen vegetables from getting soggy?

    Cook them from frozen over high heat, avoid crowding the pan, and pat off excess ice or moisture. For soups and curries, add them near the end of cooking.

    Do I need to rinse canned vegetables and beans?

    Not always. Rinsing can reduce surface salt or remove packing liquid you do not want, but some recipes benefit from the liquid. Check the label and match your choice to the dish.

    Conclusion / Key Takeaways

    Comparing frozen vs canned vegetables for a plant-based budget comes down to matching the form to the meal, not picking a winner.

    • Match the form to the cooking method. Fresh for crisp and roasted dishes, frozen for flexible weeknight meals, canned for simmered ones.
    • Keep a mix of fresh, frozen, and canned on hand so a change of plans does not mean wasted food.
    • Read labels for sauces, added ingredients, and sodium.
    • Store and rotate your food to cut waste.
    • Compare unit prices at your own store, since prices vary by region.

    Start with one week of 3–4 planned dinners, use the table and checklist above, and adjust based on what you actually finish.