Category: Plant-Based Living

Everyday plant-based meals, beginner tips, and practical kitchen ideas.

  • Plant-Based Family Dinners on a Budget: How to Cook for Picky Eaters Without Making Separate Meals

    Plant-Based Family Dinners on a Budget: How to Cook for Picky Eaters Without Making Separate Meals

    This article contains affiliate links. We may earn a commission if you buy through them, at no extra cost to you.

    Plant-Based Family Dinners on a Budget: How to Cook for Picky Eaters Without Making Separate Meals

    One dinner, four opinions, and a grocery budget that only stretches so far. It's a familiar squeeze. Plant based family dinners on a budget get easier when you stop cooking one fixed plate and start cooking flexible parts. This guide shows a build-your-own approach using affordable staples, so everyone can choose and no one needs a separate meal.

    The Short Answer

    Cook one set of simple, separate components: a base, a hearty item, a vegetable or two, a sauce, and a topping. Let each person build their own plate. Include at least one familiar food, keep seasoning simple, and offer new items without pressure.

    Key Takeaways

    • Serve components separately and let each person assemble their own plate.
    • Always include at least one "safe" food the whole table will likely eat.
    • Cook plainly, then add sauces and seasoning at the table.
    • Stick to five parts: base, hearty item, vegetables, sauce, topping.
    • Leftover components can become lunches or tomorrow's dinner.

    Why Deconstructed Dinners Work for Picky Eaters and Tight Budgets

    Choice without extra cooking

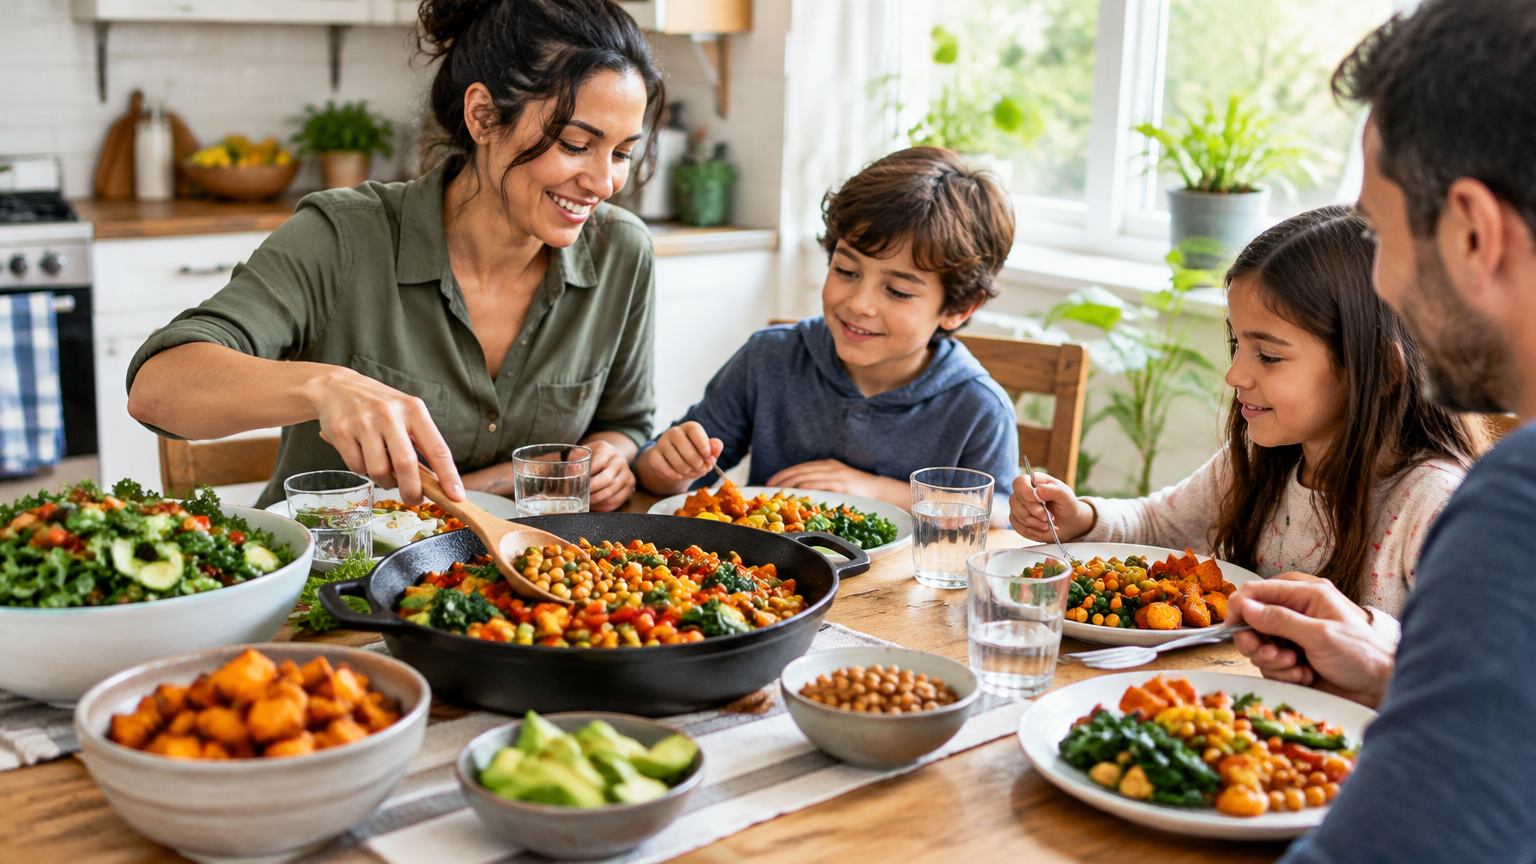
    Everyone picks from the same pots. One person builds a plate of rice and beans, another adds roasted vegetables and sauce, and a third sticks to pasta and a few cucumber slices. You cook once, and the variety comes from how people assemble the parts.

    Lower pressure at the table

    When kids and adults control what goes on their plates, there is less to negotiate. Nobody is handed a mixed casserole and told to finish it. A visible, optional spread lets people approach new foods on their own terms.

    Easy reuse

    Components store better than finished casseroles. Leftover rice can become fried rice, extra beans can go into a quesadilla, and roasted vegetables can top a flatbread. Reuse is one of the biggest ways a build-your-own format saves money.

    Budget-Friendly Building Blocks

    Think in categories rather than recipes. Once you have a few favorites in each, you can mix them endlessly.

    Bases

    Rice, pasta, potatoes, tortillas, bread, noodles, and oats or polenta. These are filling, familiar, and usually inexpensive. They are also the foods most likely to be the "safe" item on the table.

    Hearty items

    Dried or canned beans, lentils, chickpeas, and tofu. Dried beans and lentils generally cost less per serving than canned, but they take more time. Canned beans are a fine shortcut on busy nights.

    Vegetables

    Use frozen, canned, and seasonal produce. Offer some raw and some cooked, since many picky eaters have strong preferences about texture. Frozen vegetables cut prep time and let you avoid buying more fresh produce than you'll use.

    Toppings for crunch and flavor

    Toasted seeds, breadcrumbs, crushed tortilla chips, shredded cabbage, and fresh herbs all add texture for very little money. A small amount goes a long way.

    Tip: Buy dry staples in larger quantities when it suits your budget and storage space, then batch-cook them. A big pot of rice or beans on the weekend can anchor several dinners. If you cook in batches often, sturdy food storage containers make it easier to keep components separate and ready to reheat.

    How to Set Up a Build-Your-Own Plant-Based Dinner (Step by Step)

    1. Pick a format. Bowls, tacos, pasta, baked potatoes, or flatbreads all work. 2. Choose your components. Aim for one base, one hearty item, two vegetables, one sauce, and one topping. 3. Include a "safe" food. Choose something everyone will likely eat, such as plain pasta, rice, or warm tortillas. 4. Cook components plainly. Add seasoning or sauce at the table, not in the pot. 5. Serve family-style. Use separate dishes so foods don't touch and people can see their options. 6. Keep it low-pressure. No required bites. Just an open invitation to try. 7. Save extras. Pack leftover components separately for later meals.

    Quick Component Checklist

    Component Pick Example
    Base 1 Rice, pasta, or tortillas
    Hearty item 1 Black beans, lentils, or baked tofu
    Vegetables 2 One raw (shredded cabbage), one cooked (roasted carrots)
    Sauce 1 Salsa or garlic-herb olive oil
    Topping 1 Toasted seeds or crushed tortilla chips
    Safe food 1 Plain pasta, bread, or rice

    Using Familiar Textures and Flavors

    Match textures kids already like

    • Crispy: oven-roasted chickpeas, toasted breadcrumbs
    • Creamy: mashed potatoes, bean spreads
    • Soft: pasta, rice
    • Crunchy: raw vegetable sticks, shredded cabbage

    If someone rejects a food, the problem is often texture rather than flavor. Offering the same ingredient in a different texture can change the response.

    Borrow familiar formats

    Taco night, pizza night, pasta night, noodle bowls, and "dippers and dips" are formats most people already know. Familiar structure makes unfamiliar ingredients feel less risky, because the meal still looks like something they recognize.

    Offer vegetables in different forms

    The same vegetable can be roasted, raw, mashed, finely chopped, or blended into a sauce. Put out a small bowl of finely chopped peppers next to a bowl of roasted pepper strips and let people choose. Blended vegetables in a tomato sauce are another option, though some families prefer to know what's in their food, so decide what works for yours.

    Gradual Introductions Without Pressure

    Add one new item at a time

    Place a single new component next to familiar favorites. If the table has five new foods at once, it can feel overwhelming.

    Start small, or just look and smell

    A spoonful on the side of the plate is enough. Some people need several exposures before they try something, and looking or smelling counts as participation.

    Try the same food a different way

    If roasted cauliflower gets ignored, try it raw, mashed, or chopped small on another night. Changing the preparation gives the food a fresh chance without making it a battle.

    Let kids help

    Kids can wash vegetables, stir a sauce, sprinkle toppings, or assemble their own tacos. Handling food is a low-stakes way to get comfortable with it.

    Simple, Low-Cost Sauces That Tie It Together

    Sauces make plain components taste like a meal. Make one or two per dinner, not all of them.

    • Tomato sauce or salsa: works on pasta, rice, potatoes, and flatbreads.
    • Garlic-herb olive oil: good over noodles, bread, and roasted vegetables.
    • Peanut or sunflower-seed-style sauce: great on noodle bowls. Check for allergies first, and use a seed-based option if nuts are a concern.
    • Lemon-tahini dressing: works on bowls, raw vegetables, and baked potatoes.
    • Blended white bean sauce: creamy and mild, useful on pasta or as a dip.
    • BBQ-style or sweet-and-savory stir-fry sauce: a familiar flavor for roasted tofu, vegetables, or rice.

    Tip: Serve sauces on the side so each person controls the amount. This also lets you keep the shared dishes mild.

    Five Sample Dinner Formats

    Format Base Hearty item Vegetables Sauce Topping
    Taco or burrito bar Tortillas or rice Seasoned black or pinto beans Corn, shredded lettuce or cabbage Salsa Crushed tortilla chips
    Pasta bar Pasta White beans or lentils Steamed broccoli, cherry tomatoes Tomato sauce Toasted breadcrumbs
    Rice or noodle bowls Rice or noodles Baked tofu or edamame Shredded carrots, cucumber Peanut or stir-fry sauce Toasted seeds
    Baked potato bar Baked potatoes Chickpeas or chili-style beans Frozen peas, roasted broccoli Lemon-tahini dressing Chopped herbs
    Flatbread or pita pizzas Flatbread or pita Mashed white beans or crumbled tofu Peppers, spinach, mushrooms Tomato sauce Garlic-herb olive oil drizzle

    Each of these can be adjusted to what's on sale or already in your pantry.

    Planning and Saving Tips

    • Plan two or three base meals per week and rotate the toppings and sauces. Taco night can look different each time without any new shopping.
    • Cook extra base and bean components for reuse. Extra rice and beans make a quick bowl or burrito the next day.
    • Use frozen and canned items to reduce prep and waste.
    • Keep a short list of family-approved components. When you're stuck, start from that list and add one new item.

    If you want help organizing meals, a beginner-friendly plant-based meal planning guide can provide extra structure and shopping list ideas.

    Common Pitfalls to Avoid

    • Making too many components. Five or six parts are plenty. More dishes means more cooking and more dishes to wash.
    • Serving only unfamiliar foods. Always include at least one thing people will reliably eat.
    • Pressuring or bargaining at the table. "Three more bites" tends to make new foods feel like a chore.
    • Over-seasoning the shared dishes. Keep the base components mild and let people add flavor through sauces and toppings.

    FAQs

    How do I make plant-based dinners for picky eaters without cooking separate meals?

    Cook shared components, then let each person assemble their own plate. Keep one familiar item available and put sauces and seasonings on the side.

    What are good budget staples for deconstructed plant-based dinners?

    Rice, pasta, potatoes, tortillas, dried or canned beans, lentils, frozen vegetables, and simple pantry sauces.

    What if my child only eats the base and skips everything else?

    That's okay. Keep offering the other components without pressure, and let them build on familiar favorites at their own pace.

    Conclusion

    The formula is simple: base, hearty item, vegetables, sauce, topping. Serve the parts separately and let everyone build their own plate. Try one build-your-own night this week, and consider writing down your family's go-to components as a checklist or shopping list.
  • Which Specialty Plant-Based Ingredients Are Worth Buying First? Nutritional Yeast, Tahini, Miso, and More

    Which Specialty Plant-Based Ingredients Are Worth Buying First? Nutritional Yeast, Tahini, Miso, and More

    This article contains affiliate links. We may earn a commission if you buy through them, at no extra cost to you.

    Which Specialty Plant-Based Ingredients Are Worth Buying First? Nutritional Yeast, Tahini, Miso, and More

    The Short Answer

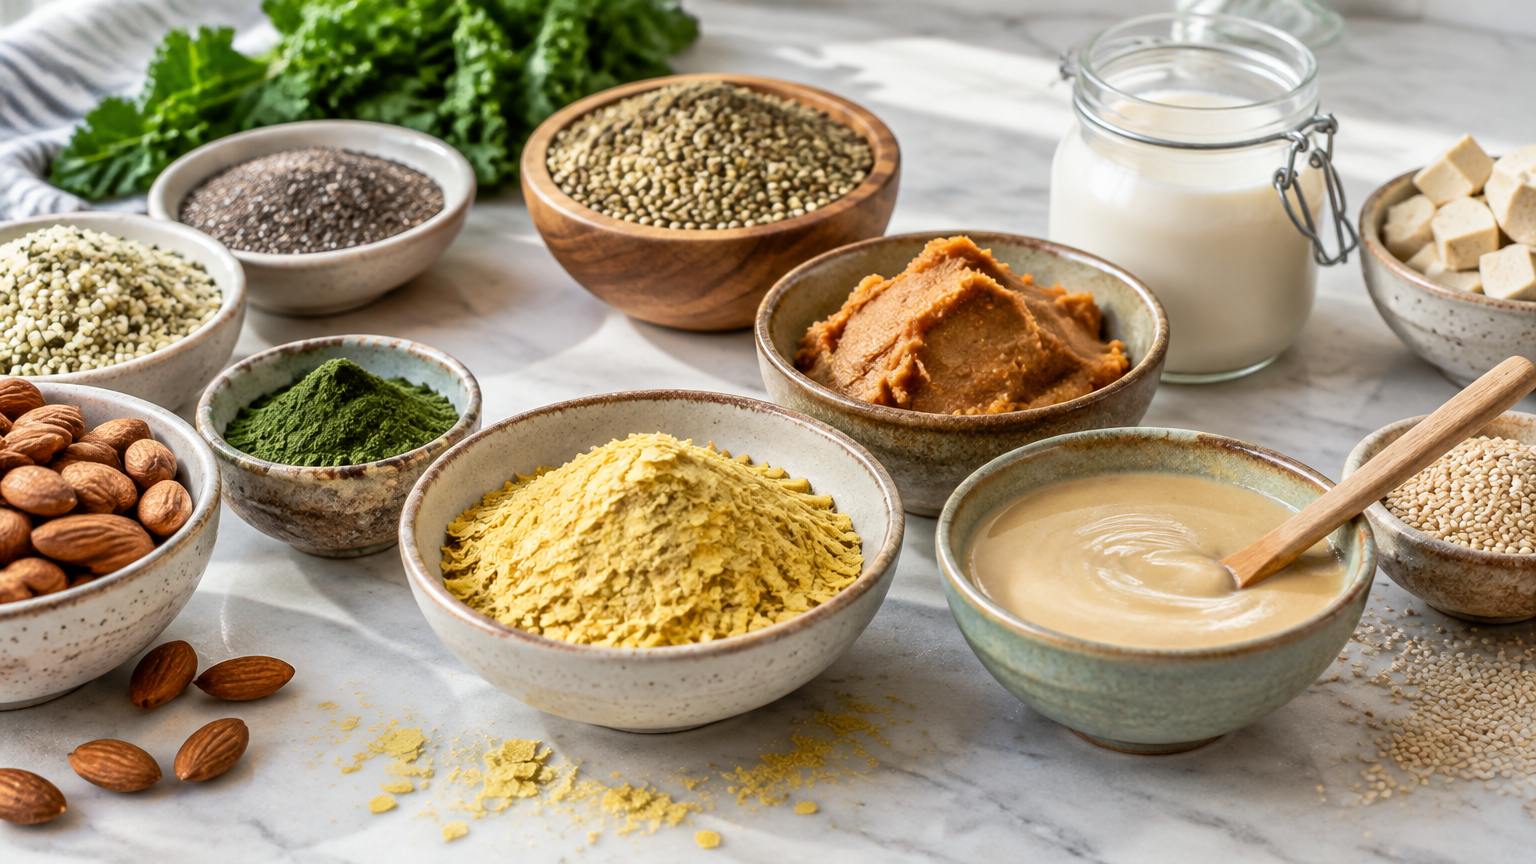
    Buy the ingredient that fixes a flavor gap in dishes you already cook. For most beginners, that means miso (savory depth), tahini (creamy sauces and dressings), or nutritional yeast (cheesy, savory flavor), whichever matches what you make most often.

    Skip or delay ingredients tied to a single recipe, such as vital wheat gluten and kala namak, until you know you'll repeat that recipe. Prices and brands vary, so check each label for storage and shelf-life instructions.

    Key Takeaways

    • Start with one ingredient that solves a problem in meals you already make.
    • Miso, tahini, and nutritional yeast cover the most common gaps: umami, creaminess, and cheesiness.
    • Single-purpose items like kala namak and vital wheat gluten can wait.
    • Buy the smallest size available, date the container, and use it in at least three meals in two weeks.
    • Many gaps can be filled with pantry staples, so specialty items are a convenience, not a requirement.

    How to Choose Your First Purchases (Practical Steps)

    Specialty ingredients are easy to overbuy because each one promises a new style of cooking. A better approach is to start with the meals you already cook and work backward.

    1. List your 5 most-cooked meals. Examples: pasta, grain bowls, stir-fries, soups, salads. 2. Identify what's missing. Is it creaminess, umami, cheesiness, smokiness, or egg-like flavor? 3. Match the gap to one ingredient from the guide below. 4. Buy the smallest size available, if one is offered. 5. Plan to use it in at least 3 meals within the first two weeks. If you can't name three, wait. 6. Check the label for storage directions, and write the open date on the container.

    A practical example: Say your regular rotation is pasta with tomato sauce, a weekly grain bowl, and a vegetable soup. Your pasta may lack a savory, cheesy finish (nutritional yeast), your grain bowl may need a creamy dressing (tahini), and your soup may taste flat (miso). Pick the gap that bothers you most, buy that one, and use it up before buying another.

    Ingredient-by-Ingredient Guide

    Nutritional Yeast

    How it's used: Nutritional yeast is a flaky, savory seasoning with a cheesy flavor. It suits pasta, popcorn, roasted vegetables, tofu scrambles, and creamy sauces. Many cooks sprinkle it on at the end, as they would grated cheese.

    How to store it: Keep it in an airtight container in a cool, dark, dry place, and follow any label directions.

    Substitute or skip: Skip it if you don't want a cheesy-savory flavor. For a rough stand-in, use a little miso or salted ground cashews with lemon juice. The flavor will differ, but it can bring savory richness to a sauce or topping.

    Buy it if: You make pasta, popcorn, or scrambles often and want a savory finish.

    Tahini

    How it's used: Tahini is a sesame paste. It's best for hummus, dressings, sauces, baked goods, and grain bowls. A spoonful thinned with lemon juice and water makes a simple sauce for roasted vegetables or salads.

    How to store it: Follow the label. Many people refrigerate it after opening. Oil separation is normal, so stir well before using.

    Substitute or skip: Sunflower seed butter, cashew butter, or peanut butter can work in some sauces, though the flavor will change. Skip tahini if you rarely make dressings or hummus.

    Buy it if: You eat a lot of salads and bowls and want one ingredient that makes them more satisfying.

    Miso

    How it's used: Miso is a fermented soybean paste that adds savory depth. It works well in soups, marinades, glazes, dressings, and savory sauces. A small amount can make a plain vegetable broth or a simple dressing taste more rounded.

    How to store it: Refrigerate it after opening, in a tightly sealed container.

    Substitute or skip: Soy sauce or tamari plus a pinch of salt, or tomato paste, can supply umami, though you won't get the fermented funk. Skip miso if you avoid soy or sodium, or if you don't cook soups and sauces.

    Buy it if: Your soups, noodle dishes, or sauces taste flat and you want more depth.

    Tamari or Soy Sauce

    How it's used: Both are everyday seasonings for stir-fries, marinades, noodles, and general salting. Many cooks already own one, so this is often less a specialty purchase than a quality choice.

    How to store it: Follow the label, and keep the cap clean and tight.

    Substitute or skip: Regular soy sauce works unless you need gluten-free food. In that case, choose tamari labeled gluten-free. Don't assume any tamari is gluten-free without checking.

    Buy it if: You cook stir-fries or noodles regularly and don't have either yet.

    Smoked Paprika or Liquid Smoke

    How it's used: Both add a smoky note. They suit beans, roasted vegetables, plant-based "bacon" flavors, and chili.

    How to store it: Keep spices in a cool, dark, airtight spot. Liquid smoke can go in the pantry.

    Substitute or skip: Start with smoked paprika, which is more versatile. Skip liquid smoke unless you want a strong barbecue-style flavor.

    Buy it if: Your bean dishes, chili, or roasted vegetables taste one-dimensional.

    Raw Cashews

    How it's used: Blended, cashews make cream sauces, dressings, desserts, and plant-based "cheese." They're a go-to for dairy-free creaminess, though they're often a pricier pantry item.

    How to store it: Keep them in a cool, dry place. Refrigerate or freeze for longer storage to help prevent rancidity.

    Substitute or skip: Silken tofu, white beans, or soaked sunflower seeds can replace cashews in some sauces. Skip them if you don't make creamy sauces regularly.

    Buy it if: Creamy pasta sauces, soups, or dressings are already part of your routine.

    Kala Namak (Black Salt)

    How it's used: Kala namak has a sulfur note that gives egg-like flavor to tofu scrambles and similar dishes.

    How to store it: Use an airtight container, kept dry.

    Substitute or skip: Regular salt works, but you'll lose the sulfur note, and the flavor can mellow with cooking. Skip it unless you make egg-style dishes often.

    Buy it if: You've already made egg-style dishes a few times and want the flavor to be closer.

    Vital Wheat Gluten

    How it's used: It's the base for homemade seitan and other chewier textures.

    How to store it: Keep it in a cool, dry, airtight container.

    Substitute or skip: Store-bought tofu, tempeh, beans, or mushrooms can provide hearty texture without the extra step. Skip it if you don't plan to make seitan, and avoid it if you need gluten-free food.

    Buy it if: You've decided to try seitan and know which recipe you'll make first.

    Quick Buying Priorities by Cooking Style

    If you mostly cook… Buy first Then consider
    Soups and noodles Miso Tamari
    Salads and bowls Tahini Miso (for dressings)
    Pasta and snacks Nutritional yeast Smoked paprika
    Creamy sauces Raw cashews Nutritional yeast
    Egg-style dishes or seitan Try the recipe once first Kala namak or vital wheat gluten

    If you're ready to shop for the core trio, you can compare options for miso, tahini, and nutritional yeast and choose the smallest size offered.

    How to Avoid Wasting Money

    • Buy one ingredient at a time and use it up before adding another.
    • Test substitutes first when a recipe calls for something you rarely use. A spoonful of tomato paste or soy sauce may tell you whether you'd miss the real thing.
    • Choose small containers for items you're unsure about.
    • Store according to the label, and write the open date on opened items.

    A useful rule is that an ingredient has to earn a spot in your rotation. If you've used it in three meals and want it in a fourth, it's a keeper. If it's still sitting there after a month, skip it next time.

    FAQs

    What is the single best specialty ingredient for a beginner to buy first?

    It depends on your cooking. Miso suits soups and sauces, tahini suits dressings and bowls, and nutritional yeast suits pasta, popcorn, and savory toppings.

    Can I skip specialty ingredients and still cook good plant-based meals?

    Yes. Everyday ingredients such as beans, tofu, soy sauce, tomato paste, lemon, garlic, and spices can cover many flavor needs. Specialty items add convenience or a specific flavor, not necessity.

    How do I know if an ingredient has gone bad?

    Check the label first. Discard items with mold, off or rancid smells, or unusual texture. Natural oil separation in tahini is normal, but a sharp rancid smell is not.

    Conclusion

    The most useful specialty ingredient is the one that solves a real flavor gap in the meals you already cook. Miso, tahini, and nutritional yeast are good starting points because each one covers a common need: savory depth, creaminess, or a cheesy finish. Hold off on single-purpose items like kala namak and vital wheat gluten until you know you'll make the recipe again.

    Pick one ingredient, buy the smallest size, date it when you open it, and plan three meals around it. Then expand slowly. For ideas on how to put them to work, browse a starter list and recipe roundup using miso, tahini, and nutritional yeast.

  • Are Plant-Based Meat Substitutes Worth Buying on a Budget? How to Compare Burgers, Crumbles, and Nuggets

    Are Plant-Based Meat Substitutes Worth Buying on a Budget? How to Compare Burgers, Crumbles, and Nuggets

    This article contains affiliate links. We may earn a commission if you buy through them, at no extra cost to you.

    Are Plant-Based Meat Substitutes Worth Buying on a Budget? How to Compare Burgers, Crumbles, and Nuggets

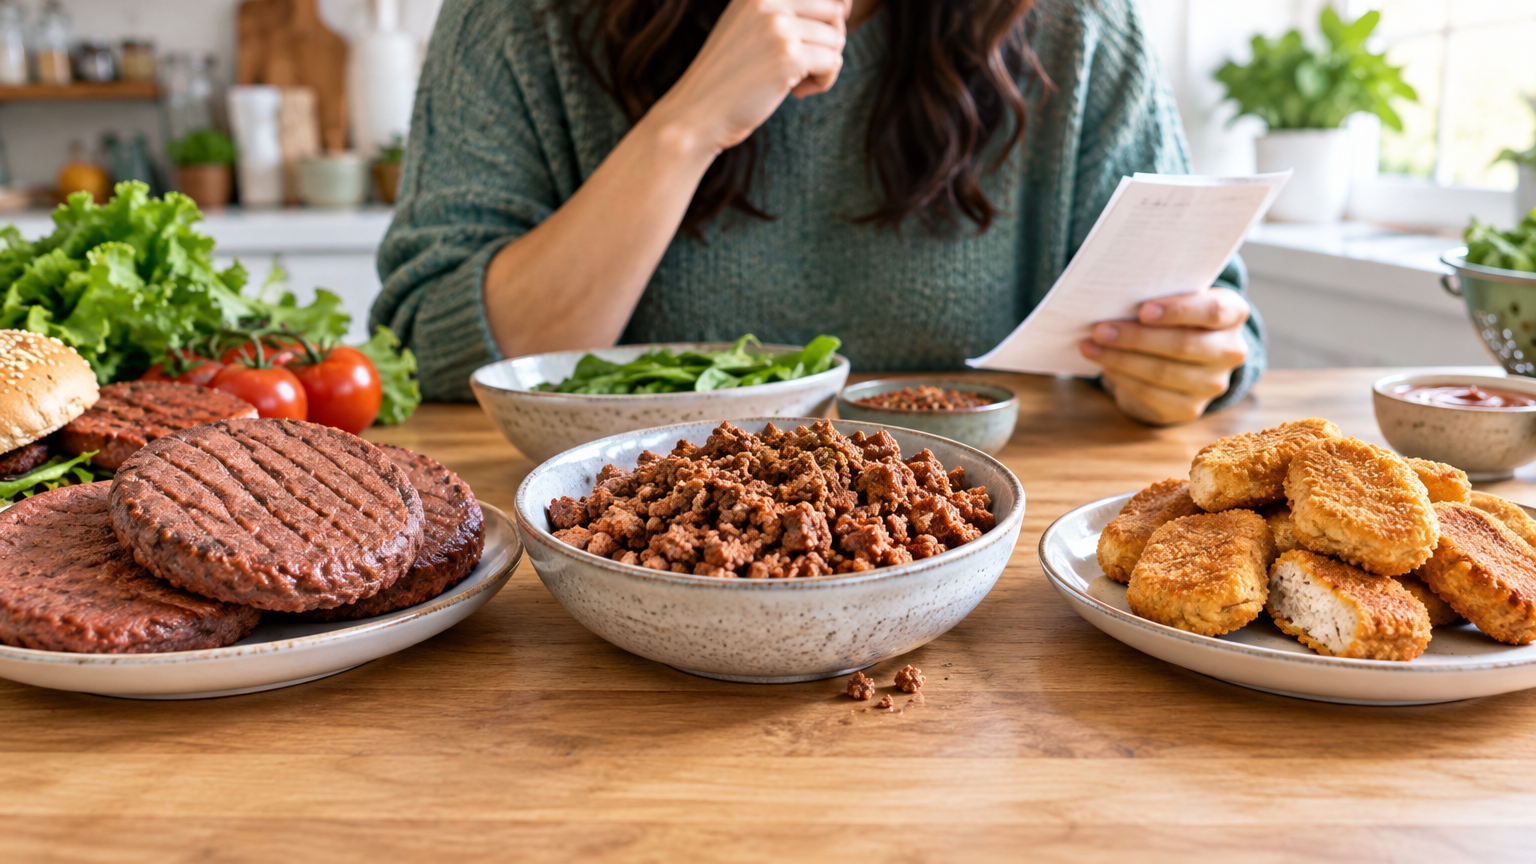
    Plant-based burgers, crumbles, and nuggets can be convenient, but whether they fit your grocery budget depends on your prices, your habits, and what your household actually eats. This guide gives you a four-part checklist for comparing budget plant based meat substitutes, plus a simple method for measuring them against homemade options like bean burgers.

    Direct Answer: Are They Worth It?

    Sometimes. Packaged plant-based meat substitutes can be worth buying when they save time, help you get a meal on the table at home, or replace a more expensive takeout or convenience option. They may not be the best value if you cook often and already have cheaper staples like beans, lentils, oats, or rice on hand.

    Worth is personal. It depends on:

    • The price per serving at your store
    • Ingredients you want or want to avoid
    • How you like to cook
    • Whether the product actually gets eaten

    Prices and formulas vary by store, region, and brand, and they change over time. This article doesn't name winners or quote prices. Use your own receipts, shelf tags, and package labels.

    Key Takeaways

    • Calculate price per serving, not per package.
    • Read the ingredient list and Nutrition Facts for what matters to your household.
    • Match the cooking method to the time and equipment you have.
    • Count the cost of everything else on the plate, not just the main item.
    • Compare at least two packaged options and one homemade version before deciding.

    Quick Comparison Checklist

    Copy this table into a notes app or onto paper and fill it in at the store.

    Check What to record Why it matters
    Price per serving Package price ÷ servings per package Makes different package sizes comparable
    Realistic serving Is one serving enough for one person? Label servings may be smaller than what you eat
    Main ingredients First few ingredients, allergens Shows the base and flags dietary conflicts
    Nutrition Facts Sodium, protein, fat per serving Compare against your own needs
    Cooking method Stove, oven, air fryer, microwave; cook time Affects effort, cleanup, and energy use
    Storage Frozen or refrigerated; shelf life after opening Affects waste and freezer space
    Dinner fit Extras needed (buns, sides, sauce) Reveals the true cost of the meal

    1. Price per Serving

    This is the number most shoppers skip, and it's the most useful one for budgeting.

    • Find the serving size on the label, not just the package count. A bag of nuggets might list a serving as a specific number of pieces or a weight.
    • Divide the package price by servings per package. For example: your price ÷ servings listed = cost per serving.
    • Ask whether a serving is realistic for your household. One patty may be a full portion for one person, while a serving of nuggets may be a few pieces that feel more like a side.
    • Check the unit price on the shelf tag (price per ounce or pound) when you're comparing items sold by weight.
    • Factor in sale prices, store brands, and format. Frozen and refrigerated versions may be priced differently in your store, so check both sections.

    2. Ingredient List

    • Look at the first few ingredients to see the main base, such as soy, pea protein, wheat, beans, or vegetables. Ingredients are listed by amount, so the first few tell you the most.
    • Check for allergens like soy, wheat/gluten, and nuts. The allergen statement is usually near the ingredient list.
    • Compare sodium, protein, and fat per serving on the Nutrition Facts panel, based on your own dietary needs or guidance from your healthcare provider.
    • Notice the length of the list only if it matters to you. A shorter or longer list isn't automatically better or worse. What matters is whether the ingredients suit your household.

    3. Cooking Method

    • Identify the instructions: stove, oven, air fryer, microwave, or a combination.
    • Consider cook time, cleanup, and extras. Does it need added oil, a sheet pan, or a specific appliance?
    • Check whether it cooks from frozen, which matters on busy nights.
    • Note storage. How much freezer space does it take? How long does it keep in the fridge once opened? [VERIFY on each package, since guidance differs by product.]

    4. Fit in a Home-Cooked Dinner

    A low-cost main dish can still lead to an expensive dinner if it needs a lot of add-ons.

    • Does it work in dishes you already make, like tacos, pasta sauce, stir-fry, sandwiches, or sheet-pan meals?
    • Count what you need to add: vegetables, grains, sauces, buns, toppings.
    • Check whether one package covers your household or whether you'd need two.
    • Think about leftovers. Will it reheat well enough that you'd eat it the next day? Your own trial is the best test.

    If you're still building your repertoire of meatless meals, a resource with plant-based dinner ideas can help you judge how a product might fit into recipes you'd actually cook.

    How to Compare by Product Type

    Burgers, crumbles, and nuggets are used differently, so compare them in different ways.

    Burgers

    • Compare cost per patty, patty size, and the number of patties per package.
    • Remember that you may still need buns, cheese or toppings, and a side.
    • Best for: quick, single-serve meals where convenience is the priority.

    Crumbles

    • Compare cost per cooked cup or per recipe use, if the label gives enough information. If it doesn't, compare cost per serving and note how much your recipe calls for.
    • Crumbles are flexible. They can go into sauces, chili, tacos, and casseroles.
    • They may stretch further when mixed with vegetables, beans, or grains, which can lower the cost per plate.

    Nuggets

    • Compare cost per piece and per serving. Check the serving size carefully, because it's easy to underestimate how many pieces a person will eat.
    • Decide whether nuggets are a main dish or a side/snack in your household. That changes how many packages you'll buy.

    Compare Against Homemade Options

    Homemade bean burgers are a common comparison point because the ingredients are often pantry staples. Whether they're actually cheaper is something you can check in a few minutes.

    Build a Simple Homemade Cost Estimate

    1. List the ingredients for a homemade bean burger, such as canned beans, oats or breadcrumbs, spices, and a binder. 2. Write down what you paid for each, using receipts or current store prices. 3. Estimate how much of each ingredient goes into one batch. A fraction of a can of beans, a few spoonfuls of spices, and so on. 4. Divide the total batch cost by the number of patties the batch makes. 5. Compare that to the packaged per-serving cost you calculated earlier.

    A simple worksheet might look like this:

    Item Amount used Cost for that amount
    Canned beans [your amount] [your price]
    Oats or breadcrumbs [your amount] [your price]
    Spices and binder [your amount] [your price]
    Batch total [sum]
    Per patty [sum ÷ patties]

    Compare More Than Price

    Price is only part of the picture. Consider:

    • Time: prep, cooking, and cleanup for homemade versus heating a packaged product.
    • Skill and equipment: mashing, forming, and pan-frying or baking. Do you have what you need, and do you enjoy it?
    • Texture and taste: your household's acceptance matters. A cheaper option that nobody eats isn't a bargain.
    • Storage: homemade patties can often be frozen, but test this yourself and see how they hold up.
    • Waste: will leftover ingredients, like half a can of beans, get used before they spoil?

    When Each Option May Make Sense

    • Packaged may fit when you have limited time, want consistent results, or only use meat substitutes occasionally.
    • Homemade may fit when you cook frequently, already have pantry staples, or want control over ingredients.
    • A mix can work too. You might use packaged crumbles on a busy weeknight and make homemade patties when you have time.

    Practical Steps to Decide

    1. Pick one meal you want to replace, such as burger night or taco night. 2. Record the price, servings, and cooking method for two or three packaged options. 3. Estimate a homemade version's per-serving cost using the worksheet above. 4. Add the cost of sides and extras (buns, vegetables, sauces) for each version so you're comparing whole meals. 5. Try the smallest or sale-priced package first before committing to a larger one. 6. Note whether your household eats it and whether it fits your routine. 7. Recheck prices periodically, since they change.

    A Practical Example

    Say your goal is to replace a weekly takeout burger night. You'd write down the per-patty cost of two packaged burger options, then add buns and toppings. Next you'd estimate your homemade bean burger cost per patty plus the same buns and toppings. Finally, compare each total to what you usually spend on takeout. If you want to see what's available in your area, you can browse plant-based meat substitutes and note the serving sizes and cooking instructions before you shop.

    Budget Tips

    • Compare store brands and name brands using the unit price on the shelf tag.
    • Check both the freezer and refrigerated sections. Similar products may be priced and packaged differently.
    • Buy larger packs only if you'll use them before they expire, or if the product freezes well according to the package.
    • Stretch with what you already have. Vegetables, beans, and grains can bulk up crumbles in sauces, tacos, and casseroles.

    FAQs

    How do I calculate price per serving for plant-based meat substitutes?

    Divide the package price by the servings per container listed on the label. If you typically eat more than one serving, multiply the result by the number of servings you actually eat to get your real cost per meal.

    Are homemade bean burgers always cheaper than store-bought options?

    Not necessarily. Compare your actual ingredient costs, the time you spend, and whether you'll use up leftover ingredients. Homemade can be a good value when you already have staples on hand, but it depends on your prices and habits.

    What should I check on the label besides price?

    Check serving size, main ingredients, allergens, sodium, protein, cooking instructions, and storage guidance. These tell you whether the product fits your diet, your kitchen, and your schedule.

    Conclusion

    Budget plant based meat substitutes aren't automatically a bargain or a splurge. Their value depends on cost per serving, ingredients, cooking method, and how well they fit the dinners you already make. Take the checklist with you to the store and compare at least two packaged options with a homemade version. Then choose what fits your budget and routine, and recheck every so often as prices change.

  • Plant-Based Dinners in 20 Minutes or Less: Quick Budget Ideas for Busy Nights

    Plant-Based Dinners in 20 Minutes or Less: Quick Budget Ideas for Busy Nights

    This article contains affiliate links. We may earn a commission if you buy through them, at no extra cost to you.

    Plant-Based Dinners in 20 Minutes or Less: Quick Budget Ideas for Busy Nights

    The easiest quick plant based dinners for beginners combine a fast base (instant rice, couscous, pasta, tortillas), a ready protein (canned beans, chickpeas, lentils, tofu), frozen vegetables, and a flavorful sauce or seasoning. Heat, combine, season, and eat. The patterns below are flexible templates, not strict recipes, so swap in whatever you already have.

    Key Takeaways

    • Every dinner here follows one formula: base + protein + vegetable + flavor.
    • Canned beans, instant grains, and frozen vegetables need little or no prep, which keeps weeknight cooking short.
    • Starting the slowest item first (usually water for rice or pasta) is the biggest time-saver.
    • A small, versatile stock of staples can cover all five patterns.
    • Cook extra grains or beans once and reuse them the next night.

    The Simple 20-Minute Formula

    Most fast plant-based dinners are variations on four parts:

    Base + protein + vegetable + flavor

    • Base: instant rice, couscous, quick-cooking pasta, noodles, tortillas, or flatbread
    • Protein: canned beans, chickpeas, lentils, or tofu
    • Vegetable: frozen vegetables, which are already washed and chopped
    • Flavor: sauce, spices, salsa, or acid like lemon or vinegar

    Practical steps

    1. Start the slowest item first. Put water on for pasta or rice before you do anything else. 2. Drain and rinse canned beans while that water heats. 3. Cook vegetables straight from frozen in a skillet or the microwave. There's no need to thaw them first. 4. Combine everything and add sauce, spices, or acid (lemon, vinegar, salsa). 5. Taste and adjust salt at the end, since canned goods and bottled sauces already contain some.

    Once this order feels natural, you can improvise without a recipe.

    5 Fast Dinner Patterns

    Here's a quick comparison, followed by details on each pattern.

    Pattern Base Protein Vegetable Flavor Start first
    Burrito bowls Instant rice Black or pinto beans Frozen corn or peppers Salsa Rice
    Tofu stir-fry Instant rice or noodles Firm tofu Frozen stir-fry mix Soy or stir-fry sauce Rice or noodles
    White bean and greens pasta Quick-cooking pasta Canned white beans Frozen spinach or kale Garlic, olive oil, lemon Pasta water
    Chickpea curry Instant rice or flatbread Canned chickpeas Frozen vegetables Curry powder or paste Grain
    Bean-and-veggie soup or stew Toast or crackers Canned beans or lentil pouches Frozen vegetables Broth, tomatoes, dried herbs Everything in one pot

    1. Burrito Bowls

    Build: instant rice, canned black or pinto beans, frozen corn or peppers, salsa, and optional avocado.

    Prep-order tip: Start the rice first. While it cooks, warm the beans and frozen vegetables together in one pan, then assemble the bowls.

    Practical example: Spoon rice into a bowl, then add the warm beans and corn. Top with salsa and sliced avocado if you have it. A squeeze of lime and a pinch of chili flakes or cumin add flavor with almost no effort. If you'd rather use tortillas, warm them in a dry pan and turn the same filling into burritos or tacos.

    2. Tofu and Frozen-Veggie Stir-Fry

    Build: firm tofu, frozen stir-fry vegetables, soy sauce or another bottled stir-fry sauce, and instant rice or noodles.

    Prep-order tip: Start the rice or noodles, then cube and sear the tofu. Add the frozen vegetables next and the sauce last so it doesn't burn.

    Practical example: Pat the tofu dry with a towel so it browns instead of steaming. Sear it in a hot, oiled skillet until golden on a few sides, then push it aside or remove it. Add the frozen vegetables and stir until hot. Pour in the sauce for the final minute and serve over the rice or noodles. Sesame seeds or chili flakes are an easy finish if you have them.

    3. White Bean and Greens Pasta

    Build: quick-cooking pasta, canned white beans, frozen spinach or kale, garlic, olive oil, and lemon.

    Prep-order tip: Put the water on to boil first. Add the frozen greens and beans to the pan or pot during the last few minutes of the pasta's cooking time.

    Practical example: While the pasta cooks, warm olive oil with minced garlic in a large skillet over low heat, taking care not to brown the garlic. Drain the pasta, saving a small cup of the cooking water. Toss the pasta, beans, and greens in the skillet, adding splashes of pasta water until the sauce coats everything. Finish with lemon juice and black pepper. If you use frozen spinach, press out extra water so the dish doesn't turn soupy.

    4. Chickpea Curry

    Build: canned chickpeas, canned tomatoes or coconut milk, curry powder or paste, frozen vegetables, and instant rice or flatbread.

    Prep-order tip: Start the grain, then toast the spices briefly in oil before adding liquids, chickpeas, and vegetables. Simmer until heated through.

    Practical example: Warm a spoonful of oil in a saucepan and stir in the curry powder or paste for under a minute, until fragrant. Add the tomatoes or coconut milk, the rinsed chickpeas, and a couple of handfuls of frozen vegetables such as peas or mixed vegetables. Simmer until everything is hot, then taste. A squeeze of lemon or lime brightens the finished dish. Serve over rice or with warmed flatbread. Using tomatoes gives a tangier curry, while coconut milk makes it creamier.

    5. Fast Bean-and-Veggie Soup or Stew

    Build: canned beans or pre-cooked lentil pouches, broth, canned tomatoes, frozen vegetables, dried herbs, and toast or crackers on the side.

    Prep-order tip: Combine everything in one pot first, then use the simmer time to prepare the sides.

    Practical example: Add broth, tomatoes, beans or lentils, frozen vegetables, and a teaspoon or so of dried herbs (Italian seasoning or thyme work well) to a pot. Bring it to a simmer. While it heats, toast bread or set out crackers. Season at the end, since broth and canned tomatoes may already be salty. If you want a thicker stew, mash a few beans against the side of the pot with a spoon.

    What to Keep on Hand for Rushed Evenings

    A short, repeatable stock list is what makes these dinners possible when you're tired. You can use this as a checklist. If you want a printable version, a beginner plant-based pantry checklist can help you organize it by store section.

    Pantry

    • [ ] Canned beans, chickpeas, and lentils
    • [ ] Instant or quick-cooking rice, couscous, and pasta
    • [ ] Canned tomatoes, broth, and coconut milk
    • [ ] Tortillas or flatbread

    If you're ready to stock up on basics like instant rice and canned beans, buy only what fits the patterns you plan to try first.

    Freezer

    • [ ] Mixed stir-fry vegetables, spinach, corn, peas, and peppers
    • [ ] Optional: frozen cooked rice or edamame

    Fridge

    • [ ] Tofu, hummus, and lemons or limes

    Flavor Boosters

    • [ ] Soy sauce, salsa, curry powder, garlic, chili flakes, and olive oil

    Many of these items overlap across patterns. Beans work in bowls, pasta, and soup, and one bag of frozen vegetables can go into a stir-fry or a curry.

    Budget and Time-Saving Tips

    • Choose versatile staples. Pick items that work in several patterns, such as canned beans, frozen mixed vegetables, and a single all-purpose spice blend, rather than ingredients for only one dish.
    • Rinse canned beans, and check labels for sodium if that matters to you. Rinsing is a common way to reduce the salt from the canning liquid, and labels vary by brand and product.
    • Cook once and use twice. Make extra rice or beans tonight and use them tomorrow in a bowl, a soup, or a quick curry. Refrigerate leftovers promptly.
    • Use one pan or one pot. Fewer dishes mean less time spent after dinner. Soups, curries, and skillet meals are good for this. For more ideas, see one-pot plant-based meal ideas.
    • Build from what's already in your kitchen. If you have half a bag of frozen peas, put them in the curry instead of buying something new.

    FAQ

    Are canned beans and frozen vegetables acceptable for plant-based dinners?

    Yes. They are pre-cooked or ready to cook, which makes them practical for beginners. Rinsing canned beans is a common way to reduce the salt from the canning liquid.

    How can I make quick plant-based dinners more filling?

    Include a protein (beans, lentils, tofu), a starch or whole grain, and a source of fat such as olive oil, nuts, seeds, or avocado.

    Can I prep any of this ahead?

    Yes. Cook extra grains, rinse and store beans, chop fresh vegetables, or mix sauces in advance. Refrigerate leftovers promptly.

    Conclusion

    Quick plant-based cooking comes down to a repeatable formula: a fast base, a ready protein, frozen vegetables, and a flavorful finish. Pick one of the five patterns, stock a few staples, and rotate flavors with salsa, soy sauce, curry powder, or lemon as the week goes on. The same cans and bags can make very different dinners.

    Start with one pattern this week and build your pantry list around it. Once the steps feel familiar, you can mix and match the patterns without a recipe.

  • Easy Chickpea Curry for Beginners: A Budget Weeknight Dinner With Pantry Ingredients

    Easy Chickpea Curry for Beginners: A Budget Weeknight Dinner With Pantry Ingredients

    This article contains affiliate links. We may earn a commission if you buy through them, at no extra cost to you.

    Easy Chickpea Curry for Beginners: A Budget Weeknight Dinner With Pantry Ingredients

    Easy chickpea curry for beginners takes about 30 minutes and uses canned chickpeas, canned tomatoes or coconut milk, an onion, garlic, and common spices like curry powder, cumin, and turmeric. Sauté the aromatics, toast the spices, add the liquid and chickpeas, simmer until thickened, then season to taste.

    This guide gives you a flexible, low-effort recipe built for a budget weeknight dinner, plus simple fixes for the most common problems: bland flavor, watery sauce, and harsh spices.

    Key Takeaways

    • Canned chickpea curry needs only a handful of pantry ingredients and one pot.
    • Choose a tomato base for tang, coconut milk for creaminess, or combine them for balance.
    • Toast the spices in oil for under a minute to bring out their flavor.
    • Salt, acid, and simmer time fix most bland curries. Uncovered simmering and mashed chickpeas fix most watery ones.
    • Start mild and let everyone add heat at the table.

    What You'll Need (Pantry Ingredients)

    The recipe below makes about 3–4 servings. Amounts are flexible, so treat them as a starting point rather than a strict formula.

    Core ingredients

    • 2 cans (about 15 oz each) chickpeas, drained and rinsed
    • 1 medium onion, chopped
    • 3 cloves garlic, minced
    • 2 tablespoons oil (any neutral cooking oil works)
    • Base: one 14–15 oz can diced or crushed tomatoes, or one 13.5 oz can coconut milk, or half of each
    • 1½ to 2 tablespoons curry powder, or a blend of 2 teaspoons cumin, 2 teaspoons coriander, 1 teaspoon turmeric, and ½ teaspoon chili powder
    • Salt, starting with ½ teaspoon and adjusting at the end

    Optional add-ins

    • A thumb-sized piece of fresh ginger, grated
    • 1–2 tablespoons tomato paste for deeper flavor
    • A few handfuls of spinach or a cup of frozen vegetables
    • Lemon or lime juice to brighten the finished dish
    • Fresh cilantro for garnish

    Basic equipment

    You need a medium pot or deep skillet, a wooden spoon, and a colander for rinsing the chickpeas. If you're missing a wide, deep pan, a deep skillet or sauté pan gives you plenty of surface area for the sauce to thicken evenly. A regular pot works fine too.

    Quick shopping checklist

    Item Have it?
    Canned chickpeas (2 cans) ☐
    Onion and garlic ☐
    Cooking oil ☐
    Canned tomatoes and/or coconut milk ☐
    Curry powder (or cumin, coriander, turmeric, chili powder) ☐
    Salt ☐
    Optional: ginger, tomato paste, spinach, lemon/lime, cilantro ☐

    Which Base Should You Choose: Tomatoes or Coconut Milk?

    Both bases work well in canned chickpea curry. The difference is mostly in taste and texture.

    • Tomato base: Tangier and lighter. The acidity gives the curry a bright, punchy flavor, and the sauce tends to look deep orange-red.
    • Coconut milk base: Creamier and milder. It softens the spices and gives the sauce a rounder, richer feel.
    • Combination: Balanced and rich. The tomatoes bring tang while the coconut milk smooths it out. This is a good choice if you want a middle path.

    How to decide: Use what's in your pantry. If you only have tomatoes, you're set. If you only have coconut milk, you're also set, and a squeeze of lemon at the end will add the brightness tomatoes would have provided. If you have both, try half a can of each for your first batch and adjust next time.

    If you're building a rotation of meatless meals, these plant-based dinner ideas can help you plan around staples like canned chickpeas.

    Step-by-Step: How to Make Easy Chickpea Curry for Beginners

    Step 1: Prep the chickpeas and aromatics

    Drain and rinse the chickpeas in a colander. Chop the onion, mince the garlic, and grate the ginger if you're using it. Having everything ready before you turn on the stove helps, because the garlic and spices cook quickly.

    Step 2: Cook the onion

    Heat the oil in your pot over medium heat. Add the onion with a pinch of salt and cook, stirring occasionally, for about 5–8 minutes, until soft and lightly golden. Don't rush this step. Well-cooked onion gives the sauce a sweeter, more developed base.

    Step 3: Add garlic and spices

    Stir in the garlic (and ginger, if using) along with the curry powder or your spice blend. Cook for about 30–60 seconds, stirring constantly. You should smell the spices become fragrant. If they start to stick or look like they might scorch, add a splash of water right away.

    If you're using tomato paste, add it now and cook it for a minute until it darkens slightly.

    Step 4: Add tomatoes and/or coconut milk

    Pour in your chosen base. Stir well and scrape up any browned bits from the bottom of the pot, since they carry a lot of flavor. If you're using tomatoes alone, add about ¼ to ½ cup water to keep the sauce from getting too thick too soon.

    Step 5: Add chickpeas and simmer

    Add the drained chickpeas and stir to coat. Bring to a gentle bubble, then lower the heat and simmer uncovered for about 15–20 minutes, stirring occasionally. Use the back of your spoon to lightly mash a few chickpeas against the side of the pot. The mashed ones release starch and help thicken the sauce naturally.

    If you're adding spinach or frozen vegetables, stir them in during the last 3–5 minutes.

    Step 6: Season and finish

    Taste the curry. Add salt a pinch at a time. Then add a squeeze of lemon or lime juice to wake up the flavors. Stir in chopped cilantro if you have it. Taste once more and adjust. This final tasting step is what turns an okay curry into a good one.

    How to Adjust the Spice Level

    "Curry powder" blends vary widely in heat, so it helps to know your options.

    Make it milder

    • Use a mild curry powder, or reduce the chili powder in a homemade blend.
    • Skip any fresh or dried chili.
    • Use more coconut milk in the base.
    • Stir a spoonful of yogurt into individual bowls at serving time.

    Make it spicier

    • Add chili powder, red pepper flakes, or a chopped fresh chili.
    • Finish with a little black pepper.
    • Add heat gradually, ¼ teaspoon at a time, and taste between additions. Heat often builds as the curry simmers, so go slowly.

    Tip for tailoring to a group

    Cook the pot on the mild side, then let people customize their own bowls with hot sauce, chili flakes, or sliced fresh chili at the table. This works especially well for mixed households.

    Serving Ideas

    With rice

    Basmati, jasmine, or any plain rice is a classic partner. The rice soaks up the sauce and balances the spices.

    With bread

    Naan, pita, flatbread, or even simple toast all work for scooping. Warm the bread briefly in a dry skillet or oven first.

    Other easy options

    • Spoon the curry over a baked potato
    • Serve with cooked quinoa
    • Add a simple side salad for freshness
    • Top with a dollop of yogurt

    Leftovers note

    Store leftover curry in a covered container in the refrigerator. Reheat it thoroughly until hot throughout, adding a splash of water if the sauce has thickened. Curries often taste even more flavorful the next day as the spices meld.

    Troubleshooting Bland or Watery Curry

    Even simple recipes can go sideways. Here's how to rescue the most common issues.

    If the curry tastes bland

    • Add salt in small amounts. Under-salting is the most common culprit. Add a pinch, stir, and taste.
    • Add acid. A squeeze of lemon or lime juice, or a small splash of vinegar, brightens flat flavors.
    • Bloom more spice. Heat a teaspoon of oil in a small pan, add a little more curry powder or cumin for 20–30 seconds, then stir it into the pot. You can also add more garlic or ginger.
    • Simmer longer. Another 5–10 minutes can deepen the flavor.

    If the curry is too watery

    • Simmer uncovered longer. Evaporation concentrates the sauce.
    • Mash some chickpeas. Press a handful against the side of the pot to thicken.
    • Stir in tomato paste. A spoonful adds body and flavor. Cook it for a couple of minutes.

    If it's too thick, sour, or harsh

    • Too thick: Thin with water or broth, a few tablespoons at a time.
    • Too sour: Balance with a pinch of sugar or a bit more coconut milk.
    • Harsh or raw-tasting spices: This usually means the spices didn't cook long enough. Simmer the curry a bit longer, or bloom some extra spice in oil as described above.

    Quick-fix summary

    Problem First thing to try Backup fix
    Bland Pinch of salt, then lemon/lime Bloom more spice in oil
    Watery Simmer uncovered Mash chickpeas or add tomato paste
    Too thick Splash of water or broth Reheat gently, stirring
    Too sour Pinch of sugar More coconut milk
    Raw-tasting spices Simmer longer Bloom extra spice in oil

    FAQs

    Can I make chickpea curry without coconut milk?

    Yes. Use canned tomatoes alone, adding a little water as needed. If you want creaminess, finish with yogurt or a plant-based alternative.

    Do I need to rinse canned chickpeas?

    Rinsing is common and helps remove the canning liquid, which some people find has a strong taste. Follow the can's label and your own preference.

    What can I use if I don't have curry powder?

    Combine common ground spices such as cumin, coriander, turmeric, and chili powder, adjusting to taste. The amounts listed in the ingredients section are a good starting point.

    Final Takeaway

    Easy chickpea curry for beginners comes down to a few repeatable habits: cook the onion until soft, toast the spices briefly, simmer until the sauce thickens, and taste before serving. Because it relies on pantry ingredients and swaps easily between tomatoes and coconut milk, it fits comfortably into a budget weeknight dinner routine.

    Try the base recipe once as written. Then make it your own with different spices, more or less heat, and your favorite rice or bread on the side.

  • Easy Plant-Based Sheet Pan Dinners: A Beginner Formula for Minimal Cleanup

    Easy Plant-Based Sheet Pan Dinners: A Beginner Formula for Minimal Cleanup

    This article contains affiliate links. We may earn a commission if you buy through them, at no extra cost to you.

    Easy Plant-Based Sheet Pan Dinners: A Beginner Formula for Minimal Cleanup

    Meta description: Learn a simple formula for easy plant based sheet pan dinners: pick a protein, add sturdy vegetables and a sauce, then stage everything on one pan.

    One pan, one formula, and far less to wash afterward. That is the appeal of sheet pan cooking, and it works especially well without meat. This guide gives you a repeatable method rather than a single recipe, so you can swap ingredients all month without starting over.

    The Quick Answer: The Basic Sheet Pan Formula

    Choose one protein (chickpeas, tofu, or tempeh), one or two sturdy vegetables, and one sauce. Cut everything to suit its cook time, start the slower-cooking items first, and add quicker items later so everything finishes together.

    Formula at a glance: Protein + Sturdy Veg + Sauce + Oil/Seasoning = Dinner

    Key Takeaways

    • Pair one protein with one or two sturdy vegetables and a sauce.
    • Dry ingredients roast; wet ingredients steam. Pat everything dry.
    • Denser foods get cut smaller; quicker-cooking foods get cut larger.
    • Stage the pan: dense vegetables first, protein and medium vegetables next, delicate items and sugary sauces last.
    • Don't crowd the pan. Use two if needed.
    • Treat all temperatures and times here as starting points, not guarantees.

    What You Need

    Equipment

    • Rimmed sheet pan. The rim keeps oil and juices from dripping into the oven. If you're shopping for one, you can compare rimmed sheet pans before choosing.
    • Parchment or foil (optional), for easier cleanup.
    • Spatula for flipping and stirring.
    • A large bowl for tossing.

    Pantry Basics

    • Neutral oil
    • Salt and pepper
    • Spices you enjoy, such as paprika, cumin, garlic powder, or curry powder
    • Acid: lemon, lime, or vinegar
    • A sauce base: soy sauce, tahini, peanut butter, mustard, maple syrup, or similar

    Step 1: Choose Your Protein

    Each of the three proteins behaves a little differently on a hot pan.

    Chickpeas

    Drain, rinse, and pat them dry thoroughly. Surface moisture is the main reason chickpeas steam instead of roast. Spread them on a clean towel and blot, or let them air-dry for a few minutes before tossing with oil.

    Tofu

    Use firm or extra-firm tofu. Press it or blot it dry with a clean towel, then cut it into cubes or slabs. The drier the surface, the better it browns.

    Tempeh

    Cut tempeh into cubes, strips, or triangles. Some cooks like to steam or simmer it for a few minutes first to soften any bitterness. This step is optional and purely a matter of preference. Many people skip it and go straight to the pan.

    Quick Comparison

    Prep effort Texture when roasted How it takes sauce
    Chickpeas Low: drain, rinse, dry Crisp edges, tender centers Sauce clings lightly; best added late or drizzled after
    Tofu Medium: press or blot, then cut Chewy outside, softer inside Absorbs marinades well; thick sauces added late glaze nicely
    Tempeh Low to medium (optional pre-steam) Dense, firm, nutty Soaks up marinades readily; sturdy enough for glazes

    Step 2: Pick Sturdy Vegetables

    "Sturdy" means vegetables that hold their shape in a hot oven rather than collapsing into mush. Good options include:

    • Broccoli
    • Cauliflower
    • Carrots
    • Sweet potatoes
    • Brussels sprouts
    • Red onion
    • Bell peppers
    • Cabbage wedges

    Tip: Choose one dense vegetable (like sweet potato or carrot) and one quicker-cooking vegetable (like broccoli or bell pepper). The difference in cook time makes staging easy because you already have a natural "first in" and "last in."

    Step 3: Cut Sizes That Cook Evenly

    The principle is simple: denser food gets smaller or thinner pieces, and quicker-cooking food gets larger pieces. This narrows the gap in cook times so everything finishes around the same moment.

    Starting-Point Size Guide

    These sizes are approximate. Adjust for your oven and your preferences.

    Ingredient Suggested cut
    Sweet potatoes, carrots About ½-inch pieces
    Broccoli, cauliflower Medium florets
    Brussels sprouts Halved
    Bell peppers, onions 1-inch pieces or wedges
    Tofu, tempeh About ¾- to 1-inch cubes
    Chickpeas Whole

    Tip: Keep pieces within each category similar in size. A mix of tiny and huge carrot chunks will always cook unevenly, no matter how well you stage the pan.

    Step 4: Choose a Sauce and Decide When to Add It

    Easy Sauce Ideas

    • Peanut-soy-lime: peanut butter, soy sauce, lime juice, and a little warm water to thin
    • Lemon-tahini: tahini, lemon juice, garlic, salt, and water
    • Maple-mustard: Dijon or whole-grain mustard with maple syrup and a splash of vinegar
    • Garlic-paprika: oil, garlic powder, smoked or sweet paprika, salt
    • Curry-style: curry powder or paste, oil, and a squeeze of lemon

    Sauce Timing

    Sauces don't all behave the same way in a hot oven:

    • Before roasting: Toss ingredients with oil and dry seasoning. Oil-based mixtures and spice rubs handle long roasting well.
    • Last few minutes: Add sugary or thick sauces (maple glazes, peanut sauces) near the end. Sugar can scorch under extended high heat.
    • After roasting: A fresh drizzle of tahini sauce, lime juice, or herbs adds brightness that long cooking can dull.

    Step 5: Stage the Oven Time

    General Timing Approach

    Preheat the oven. Many sheet pan recipes use roughly 400–425°F, but follow your recipe and know your oven. Then work in stages:

    1. Stage 1: Dense vegetables (sweet potatoes, carrots, Brussels sprouts) go in first. 2. Stage 2: Add the protein and medium-density vegetables (cauliflower, onions) partway through. 3. Stage 3: Add quick-cooking vegetables (broccoli, bell peppers) or sauce near the end. 4. Finish: Look for browned edges and tender vegetables. Cook time varies with oven and cut size, so use visual cues over the clock.

    As a rough starting point, you might give dense vegetables a 10- to 15-minute head start, then add the protein for the remainder of roasting. Treat that as a guide, not a rule.

    Pan-Setup Tips

    • Avoid crowding. Use two pans if needed. Crowded food steams.
    • Spread in a single layer with a little space between pieces.
    • Flip or stir once midway. Constant stirring prevents browning, especially for tofu.

    Step-by-Step Method

    1. Heat the oven and prep the pan. Line with parchment or foil if you like. 2. Dry and cut the protein and vegetables. 3. Toss separately with oil and seasoning, so each group gets coated without crowding the bowl. 4. Roast dense vegetables first. 5. Add the protein and other vegetables to the pan. 6. Add sauce at the right time, with thick or sugary sauces near the end. 7. Finish with acid, herbs, or a drizzle. Serve over grains or greens if desired.

    Quick Checklist Before Roasting

    • [ ] Protein is dry
    • [ ] Vegetables are cut to size by category
    • [ ] Oil and salt are on everything
    • [ ] Pan isn't crowded
    • [ ] Sauce is mixed and waiting

    Example Combinations

    Use these as templates. Times are starting points, so adjust for your oven.

    1. Chickpeas + broccoli + red onion with lemon-tahini sauce

    • Cuts: whole chickpeas, medium broccoli florets, red onion in 1-inch wedges
    • Stage: onion first, then chickpeas, then broccoli for the final stretch
    • Sauce: whisk lemon-tahini and drizzle after roasting

    2. Tofu + carrots + bell pepper with peanut-soy-lime sauce

    • Cuts: carrots in ½-inch pieces, tofu in ¾- to 1-inch cubes, pepper in 1-inch pieces
    • Stage: carrots first, tofu next, pepper last
    • Sauce: toss with the peanut-soy-lime sauce in the last few minutes, then add extra lime at the end

    3. Tempeh + sweet potato + Brussels sprouts with maple-mustard glaze

    • Cuts: sweet potato in ½-inch pieces, halved sprouts, tempeh in cubes or triangles
    • Stage: sweet potato and sprouts first, tempeh added partway through
    • Sauce: brush on the glaze in the last few minutes to reduce burning risk

    4. Chickpeas + cauliflower + sweet potato with curry-style seasoning

    • Cuts: sweet potato in ½-inch pieces, medium cauliflower florets, whole chickpeas
    • Stage: sweet potato first, cauliflower next, chickpeas after
    • Sauce: toss with curry-style oil and spices before roasting; finish with lemon

    For more ideas to rotate through your week, you can browse more plant-based dinner ideas.

    Common Mistakes and Quick Fixes

    Problem Likely cause Fix
    Soggy results Crowded pan or damp ingredients Dry everything well; use two pans
    Burnt sauce Sugary sauce added too early Add it in the last few minutes
    Uneven cooking Inconsistent cut sizes or no staging Cut uniformly and add items in stages
    Bland flavor Under-seasoning Season generously; add acid at the end

    Minimal Cleanup Tips

    • Line the pan with parchment or foil.
    • Use one mixing bowl. Toss the vegetables first, then the protein, then use the same bowl for the sauce.
    • Prep the sauce in the tossing bowl once you've emptied it, rather than dirtying another dish.
    • Soak or wipe the pan while it's still warm. Be careful: it will be hot. Let it cool enough to handle safely first.

    FAQs

    Can I cook tofu, chickpeas, or tempeh and vegetables on the same pan at the same time?

    Yes, if you adjust cut sizes and start times. Start slower-cooking vegetables first, then add the protein and quicker vegetables later.

    How do I keep tofu from sticking or turning soggy on a sheet pan?

    Blot or press it dry, use enough oil, and give it space. Avoid moving it too early, since it releases more easily once a crust forms.

    Can I prep a plant-based sheet pan dinner ahead of time?

    Yes. Cut the vegetables and proteins and mix the sauces in advance, storing each separately. Combine and roast when you're ready to eat.

    Conclusion

    The formula is simple: a protein, one or two sturdy vegetables, and a sauce, cut to size and staged in the oven. Once you've got it down, mix and match freely. Save this formula, or try one of the combinations above this week.

  • Easy Plant-Based Tacos and Burritos for Beginners: Cheap Fillings That Work

    Easy Plant-Based Tacos and Burritos for Beginners: Cheap Fillings That Work

    This article contains affiliate links. We may earn a commission if you buy through them, at no extra cost to you.

    Easy Plant-Based Tacos and Burritos for Beginners: Cheap Fillings That Work

    Title tag: Easy Plant-Based Tacos for Beginners: Cheap Fillings That Work Meta description: Learn a simple build-your-own formula for plant-based tacos and burritos, with three budget fillings, seasoning basics, a shopping list, and easy swaps.

    Plant-based tacos and burritos are flexible, inexpensive, and forgiving, which makes them a good fit for new cooks. This guide gives you a repeatable formula, three low-cost fillings, and a short shopping list, so you can build a tasty dinner without following a strict recipe.

    Key Takeaways

    • Every taco or burrito is built from the same parts: filling, tortilla, fresh topping, creamy or saucy element, and acid or heat.
    • Start with seasoned beans. They are the simplest of the three fillings.
    • Season in the pan, then taste and adjust the salt and acid.
    • Warm your tortillas. It prevents cracking and improves flavor.
    • Pick two or three toppings instead of all of them.

    The Short Answer: A Build-Your-Own Formula

    Easy plant based tacos for beginners come together with five parts: one filling, one tortilla, one fresh topping, one creamy or saucy element, and one acid (like lime). Season the filling well, warm the tortillas, and add something crunchy. Mix and match from the options below.

    The formula:

    Filling + Tortilla + Fresh topping + Creamy/saucy element + Acid/heat

    Burritos use the same parts. Add rice or another starch for bulk, and use a larger tortilla.

    Step 1: Pick a Budget Filling

    Choose one filling to start. Once you're comfortable, rotate through the others. The table below compares them at a glance.

    Filling Effort Texture Best in
    Seasoned beans Lowest Soft, hearty Burritos and tacos
    Sautéed veggies Low to medium Tender, browned Tacos
    Crumbled tofu Medium Crumbly, savory Tacos and burritos
    Lentils Medium Soft, saucy Tacos and burritos

    Seasoned Beans (Easiest Starting Point)

    Black or pinto beans work well, canned or home-cooked.

    1. If using canned beans, drain and rinse them. 2. Warm a little oil in a pan over medium heat. Add chopped onion and garlic if you like, and cook until softened. 3. Add the beans, your spices (see Step 2), and a splash of water. 4. Simmer a few minutes until the liquid thickens. 5. For burritos, mash the beans lightly with a fork or spoon so they hold together inside the tortilla.

    Sautéed Veggies

    Good choices include onion, bell pepper, zucchini, mushrooms, corn, and sweet potato (diced small).

    1. Cut the vegetables into similar-sized pieces so they cook evenly. 2. Heat a pan until hot and add a little oil. 3. Cook the vegetables until they are browned in spots. Avoid crowding the pan, or they will steam instead of brown. 4. Season at the end, then finish with a squeeze of lime.

    Tip: Cook sturdier vegetables first. Sweet potato and onion go in early, while zucchini, mushrooms, and corn can go in later.

    Crumbled Tofu or Lentils

    Pick based on the texture you prefer and what you already have.

    Tofu: 1. Use firm or extra-firm tofu. Drain it and pat it dry. 2. Crumble it into bite-size pieces with your hands. 3. Brown it in an oiled pan, stirring occasionally. 4. Add your seasoning and cook a minute or two longer.

    Lentils: 1. Cook brown or green lentils until tender, or use canned lentils. 2. Simmer them with spices and a little canned tomato or water until saucy. 3. Mash a few with a spoon if you want a thicker filling.

    Step 2: Seasoning Basics

    You don't need a long spice cabinet. These building blocks cover most taco flavors:

    • Chili powder
    • Cumin
    • Garlic powder
    • Onion powder
    • Smoked paprika (optional)
    • Oregano
    • Salt and pepper

    A starting point for one can of beans (or a similar amount of filling): about 1 teaspoon chili powder, ½ teaspoon cumin, ¼ teaspoon each of garlic powder, onion powder, and oregano, plus a pinch of salt. Treat these amounts as a guide, since spice blends vary in strength.

    Simple method: Season in the pan while the filling cooks, then taste. Adjust the salt first, then the acid, such as lime juice or a little vinegar.

    Flavor balance checklist:

    • [ ] Salty: does it taste flat? Add a pinch of salt.
    • [ ] Acidic: does it need brightness? Add lime.
    • [ ] A little heat: add hot sauce, jalapeño, or chili flakes.
    • [ ] Something fresh: finish with cilantro, onion, or tomato.

    Store-bought taco seasoning: It's a convenient option. Check the label for salt content and any ingredients you want to avoid.

    Step 3: Choose Your Tortilla

    Corn vs. Flour

    • Corn tortillas are smaller and well suited to tacos. If you need gluten-free, check the package ingredients rather than assuming.
    • Flour tortillas are larger and more flexible, which makes them better for burritos.

    How to Warm Tortillas

    Warm tortillas fold with fewer cracks. Pick whichever method suits your kitchen:

    • Dry skillet: heat for a short time on each side.
    • Microwave: wrap in a damp towel and heat briefly.
    • Open flame or oven: works well if you're warming several at once.

    Keep warmed tortillas covered with a towel so they stay soft.

    Burrito Folding Basics

    1. Place the filling low and center on the tortilla. 2. Fold in the sides. 3. Pull the bottom edge up over the filling and roll tightly.

    Don't overfill. A slightly smaller portion rolls more neatly and is less likely to tear.

    Step 4: Toppings and Sauces

    Toppings supply the freshness and contrast that make a simple filling taste complete.

    • Fresh: shredded lettuce or cabbage, tomato, onion, cilantro, avocado
    • Creamy: guacamole, plant-based sour cream or yogurt, tahini-lime drizzle
    • Saucy or spicy: salsa, hot sauce, pickled onions or jalapeños
    • Crunch: cabbage, radish, tortilla strips

    Budget tip: Pick two or three toppings rather than all of them. For example, cabbage, salsa, and lime is a low-effort combination that covers crunch, sauce, and acid.

    Simple Shopping List

    Buy just one filling's worth of ingredients to start. If you want more ideas after that, you can browse plant-based dinners for other meals that use similar pantry staples.

    Pantry

    • Canned black or pinto beans
    • Dry or canned lentils
    • Rice
    • Tortillas (corn, flour, or both)
    • Canned tomatoes or salsa
    • Cooking oil

    Spices

    • Chili powder
    • Cumin
    • Garlic powder
    • Onion powder
    • Oregano
    • Salt

    Produce

    • Onions and garlic
    • Bell peppers or other vegetables
    • Limes
    • Cilantro
    • Cabbage or lettuce
    • Avocado (optional)

    Refrigerated

    • Firm or extra-firm tofu

    Note: Frozen vegetables or corn can be a cheaper, convenient substitute for fresh. If you'd rather shop for ingredients in one place, you can find plant-based dinner ingredients and compare options. Check current prices yourself, since they vary by store and region.

    Easy Swaps and Substitutions

    • Beans: Any canned bean works, including kidney beans and chickpeas.
    • Tofu, lentils, and beans: These are interchangeable in most of the fillings above. Adjust the cooking time and liquid as needed.
    • Veggies: Use what is in season, on sale, or frozen.
    • Tortillas: Use lettuce wraps, or skip the tortilla and serve the filling as a bowl over rice.
    • No lime: Use vinegar or lemon juice. Add a little at a time and taste.
    • Allergy and diet notes: Check labels for gluten, soy, and added ingredients, especially in tortillas, seasoning blends, sauces, and plant-based dairy alternatives.

    Quick Weeknight Build Examples

    Bean-and-rice burrito Warm a flour tortilla. Add mashed seasoned beans and cooked rice low and center, plus salsa and shredded lettuce. Fold in the sides and roll tightly.

    Veggie tacos with corn and lime Sauté onion, bell pepper, and corn until browned. Season at the end and finish with lime. Serve in warm corn tortillas with cilantro and a creamy drizzle.

    Tofu or lentil tacos with cabbage and salsa Brown crumbled tofu with chili powder, cumin, and garlic powder, or simmer lentils with spices and tomato. Spoon into tortillas and top with shredded cabbage and salsa.

    Meal-prep tip: Cook one filling, store it in the fridge, and use it in different ways during the week. For example, beans can go in a burrito one night and over rice the next. Follow safe food storage guidelines for cooling, covering, and reheating.

    FAQ

    What are the cheapest fillings for plant-based tacos?

    Beans and lentils are typically among the lowest-cost options. Vegetable prices vary by season, and tofu is moderately priced. Compare prices at your local stores.

    How do I keep tortillas from breaking?

    Warm them first, avoid overfilling, and keep them covered after heating.

    Can I make the fillings ahead of time?

    Yes. Cook the filling, cool it, and refrigerate it in covered containers, then reheat when needed. Add fresh toppings just before serving.

    Conclusion

    The formula is simple. Pick a filling, season it well, warm the tortilla, add a few toppings, and serve. Once you know the pattern, you can change the ingredients without changing the method.

    If you're new to cooking, start with seasoned beans. They're quick, forgiving, and easy to adjust. Next time, try sautéed veggies or crumbled tofu or lentils. For more meal ideas, see these plant-based dinner ideas, or turn the shopping list above into a printable checklist for your next trip.

  • Common Beginner Mistakes When Cooking Plant-Based Dinners (and How to Fix Them)

    Common Beginner Mistakes When Cooking Plant-Based Dinners (and How to Fix Them)

    This article contains affiliate links. We may earn a commission if you buy through them, at no extra cost to you.

    Common Beginner Mistakes When Cooking Plant-Based Dinners (and How to Fix Them)

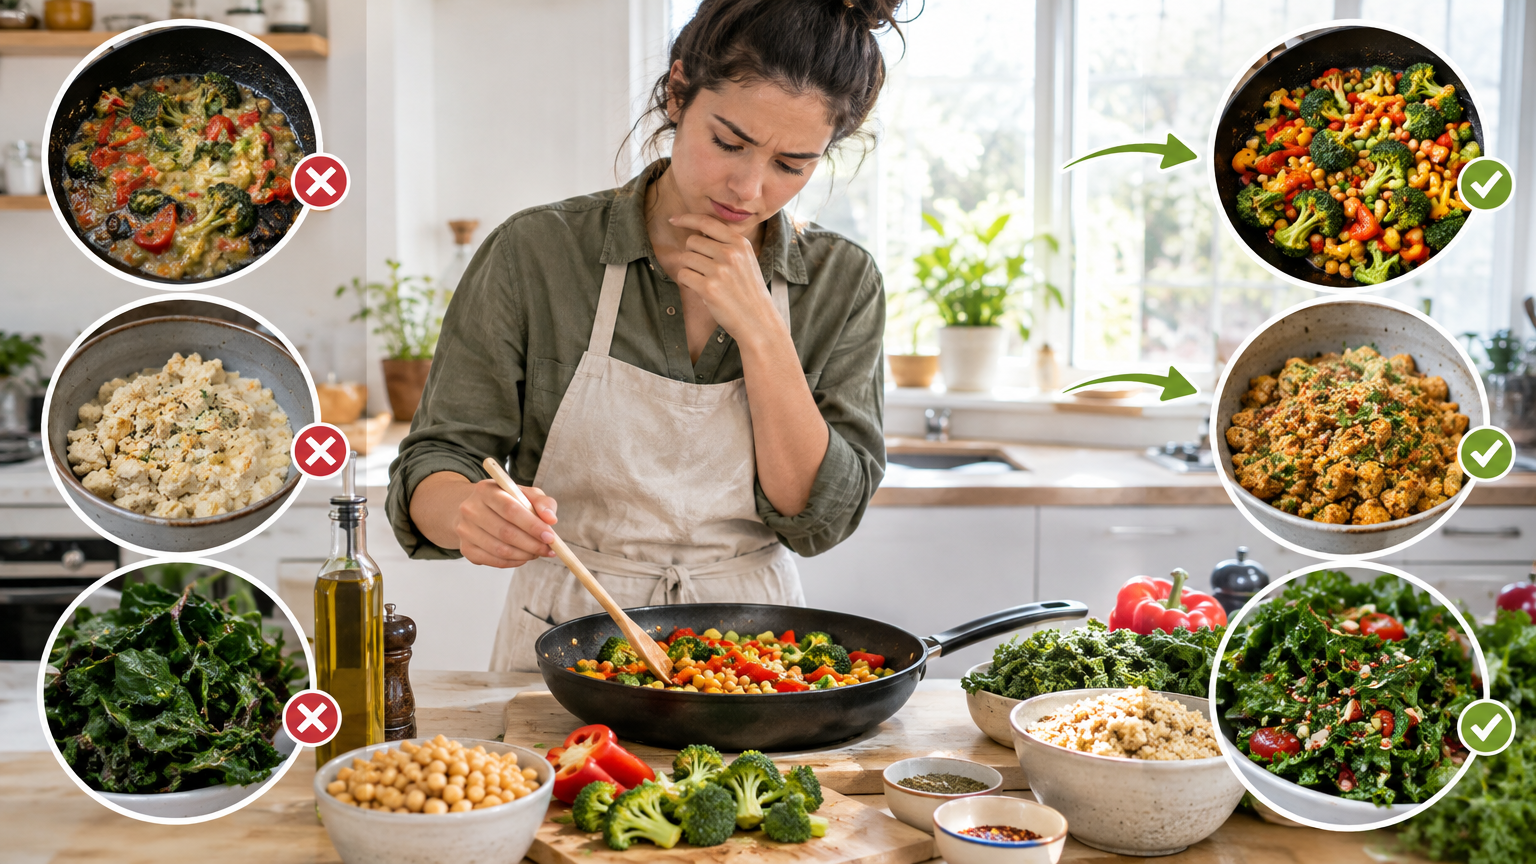
    The most common plant based cooking mistakes beginners make are under-seasoning, overcooking vegetables, skipping prep for tofu, not cooking beans fully, choosing recipes that are too complex, and wasting ingredients. Each has a simple fix: season in layers, control heat and timing, press and sear tofu, taste-test beans, simplify your recipes, and plan around what you already have.

    Disclosure: This article contains affiliate links. They don't change the advice here.

    Key takeaways

    • Most "bad" plant-based dinners come down to technique, not the ingredients.
    • Salt, acid, fat, and umami fix most flavor problems.
    • Heat, space in the pan, and uniform cuts keep vegetables from turning mushy.
    • Tofu and beans need a little prep, but not much.
    • Simple, repeatable recipes beat ambitious ones when you're learning.

    Quick Troubleshooting Overview

    Use this table to find your problem fast. Details for each follow below.

    Problem Quick fix Prevention habit
    Bland flavor Taste, then add salt, acid, fat, and an umami ingredient Season in layers and taste at every stage
    Mushy vegetables Single layer, higher heat, cook in batches Cut uniform pieces and set a timer
    Dry or bland tofu Press, season well, sear or bake, toss in sauce Press and marinate while you prep the rest
    Undercooked beans Keep simmering until creamy throughout, or use canned Cook a batch ahead; follow package directions
    Overly complicated recipes One protein, one vegetable, one starch, one sauce Keep a rotation of 3-5 reliable recipes
    Food waste Use leftovers in stir-fries, soups, or bowls; freeze extras Plan 3-4 dinners, shop with a list, check the fridge weekly

    Mistake 1: Bland Flavor

    Why it happens

    Beginners often use too little salt, acid, or fat. Many also season only once, at the very end, so the flavor sits on the surface instead of building through the dish. Without meat or dairy, there's less built-in richness, so these basics matter more.

    Quick fix

    Taste the dish first, then adjust one element at a time:

    • Salt: Add a pinch, stir, and taste again.
    • Acid: A splash of lemon juice or vinegar brightens flat-tasting food.
    • Fat: Drizzle in olive oil, or stir in a spoonful of nut butter or tahini for body.
    • Umami: Add soy sauce, miso, tomato paste, or mushrooms for savory depth.

    Example: A pot of lentil soup tastes dull. Stir in a spoonful of tomato paste and a splash of soy sauce, then finish with a squeeze of lemon and a little olive oil. Taste after each addition so you learn what each one does.

    Prevention habit

    Season in layers: salt your aromatics (onion, garlic, ginger) as they cook, season the main ingredients as they go in, and adjust again at the finish. Taste at every stage. A clean spoon by the stove makes this easy.

    Mistake 2: Mushy Vegetables

    Why it happens

    The usual causes are overcooking, a crowded pan, too little heat, or pieces cut in uneven sizes. A crowded pan traps steam, so vegetables simmer in their own moisture instead of browning.

    Quick fix

    • Spread vegetables in a single layer with a little space between pieces.
    • Use higher heat so moisture evaporates quickly.
    • Cook in batches if everything won't fit.
    • Add dense vegetables (carrots, potatoes, broccoli stems) first and quick-cooking ones (zucchini, spinach, snow peas) later.

    Example: For a stir-fry, start carrots and broccoli, then add bell pepper a couple of minutes later, and finish with leafy greens just before serving.

    Prevention habit

    Cut pieces to a uniform size so they cook at the same rate. Set a timer and start checking early. You can always cook something longer, but you can't undo mush.

    Mistake 3: Dry or Bland Tofu

    Why it happens

    Common causes include skipping the pressing step, using no marinade or seasoning, and cooking with too little fat or heat. Tofu is mild on its own and holds a lot of water, which blocks browning and dilutes flavor.

    Quick fix

    1. Press out excess moisture. Wrap the block in a clean towel, set a heavy pan or plate on top, and wait while you prep other ingredients. If you cook tofu often, a tofu press is one option, though a towel and a heavy pan work too. 2. Cut it into cubes or slabs. 3. Season well with salt, spices, or a marinade. 4. Sear or bake until the edges are browned. 5. Toss in a sauce at the end so it clings to the surface.

    Prevention habit

    Press and marinate the tofu while you chop vegetables and start the grain. Also match the firmness to the dish: firm or extra-firm for searing and baking, softer tofu for sauces and scrambles.

    Mistake 4: Undercooked Beans

    Why it happens

    Beginners may skip soaking, cut the cooking time short, or never test for doneness. Beans that are firm, chalky, or grainy in the center aren't finished.

    Quick fix

    • Keep simmering until the beans are creamy and tender all the way through. Taste several, since beans in one pot can cook unevenly.
    • If you're short on time, use canned beans, drained and rinsed.

    Prevention habit

    Cook a batch ahead and store it for the week, following the package directions. Having cooked beans ready makes weeknight dinners faster.

    Safety note: Red kidney beans need thorough boiling. Follow the package safety guidance and don't shortcut it. [VERIFY: confirm the exact boiling time and method against the specific package or a trusted food-safety source before publishing any specifics.]

    Mistake 5: Overly Complicated Recipes

    Why it happens

    Long ingredient lists, unfamiliar techniques, and too many components make a recipe harder to execute. Beginners often pick impressive-looking dishes, then feel discouraged when the result is stressful or inconsistent.

    Quick fix

    Simplify to four parts:

    • One protein (beans, lentils, tofu, or tempeh)
    • One vegetable
    • One grain or starch
    • One sauce

    Swap hard-to-find items for pantry staples. If a recipe calls for an unusual ingredient, ask what role it plays (acid? heat? creaminess?) and use something you already own that does the same job.

    Example: Instead of a recipe with 20 ingredients and three sub-recipes, make rice, roasted broccoli, and chickpeas with a simple tahini-lemon sauce.

    Prevention habit

    Build a short rotation of three to five reliable recipes and repeat them before trying new ones. Repetition builds confidence, and you'll start making small adjustments by instinct. If you want structured ideas, plant-based cooking basics can help you choose beginner-friendly dishes to add to your rotation.

    Mistake 6: Food Waste

    Why it happens

    Buying without a plan, forgetting produce at the back of the fridge, and cooking too much or too little all lead to waste. Fresh produce is the usual casualty.

    Quick fix

    • Turn leftover vegetables into stir-fries, soups, or grain bowls.
    • Freeze extras, such as cooked beans, cooked grains, or chopped vegetables, before they spoil.
    • Use wilting greens in soups or sauces, where texture matters less.

    Prevention habit

    • Plan three or four dinners for the week rather than seven.
    • Shop with a list.
    • Do a weekly "use it first" fridge check and build one meal around whatever needs eating soonest.

    A Simple Beginner Dinner Formula

    When you don't have a recipe, or you feel overwhelmed, use this five-step formula:

    1. Pick a base: rice, pasta, potatoes, or quinoa. 2. Pick a protein: beans, lentils, tofu, or tempeh. 3. Pick vegetables: whatever is fresh, frozen, or about to expire. 4. Add a sauce or seasoning with salt, acid, and fat. A mix of soy sauce, lemon juice, and olive oil is one easy option. 5. Taste and adjust before serving.

    Example combinations:

    • Rice + black beans + sautéed peppers + lime, olive oil, and salt
    • Pasta + white beans + spinach + garlic, lemon, and olive oil
    • Quinoa + seared tofu + roasted broccoli + soy-tahini sauce

    FAQ

    How do I make plant-based meals taste better without a lot of extra ingredients?

    Focus on salt, acid, fat, and one umami ingredient such as soy sauce, miso, or tomato paste. Toast spices briefly in a dry pan or oil, and brown your ingredients rather than just boiling or steaming them. Browning adds flavor without adding anything to your shopping list.

    Do I have to soak dried beans?

    Not always. Soaking can shorten cooking time, but check the package instructions and cook until the beans are fully tender. Canned beans are a convenient alternative: drain and rinse them before using.

    How can I keep plant-based cooking affordable and low-waste?

    Rely on pantry staples like beans, lentils, grains, and frozen vegetables. Plan your meals, shop with a list, and reuse leftovers in new dishes. [VERIFY: no price or savings claims are made here, since none were supplied.]

    Conclusion

    Learning to cook plant-based dinners doesn't require perfection, just a few reliable habits. Bland food, mushy vegetables, dry tofu, hard beans, overcomplicated recipes, and wasted produce all have simple fixes, and most come down to seasoning, heat, prep, and planning.

    Don't try to fix everything at once. Fix one mistake at a time, and choose one habit to practice this week. That might be tasting at every stage, cutting vegetables evenly, pressing tofu while you prep, cooking a batch of beans, repeating a favorite recipe, or doing a weekly fridge check. Small changes like these add up quickly.

  • 15 Plant-Based Breakfast Ideas for Busy Mornings

    15 Plant-Based Breakfast Ideas for Busy Mornings

    This article contains affiliate links. We may earn a commission if you buy through them, at no extra cost to you.

    15 Plant-Based Breakfast Ideas for Busy Mornings

    Meta description: Try 15 quick plant based breakfast ideas, grouped by prep time: 5-minute, make-ahead and weekend. Includes simple methods and why each works.

    Busy mornings call for breakfasts that are fast, filling and need almost no thought. These plant based breakfast ideas are grouped by prep time: 5-minute options, make-ahead recipes and weekend projects that set up the week. Each comes with a short method and a reason it suits a packed schedule.

    The Quick Answer: Best Plant-Based Breakfasts for Busy Mornings

    The easiest plant based breakfast ideas fall into three groups. Choose 5-minute options like smoothies and savory toast on rushed days. Choose make-ahead options like overnight oats, chia pudding and freezer burritos for grab-and-go mornings. Save weekend recipes for batch cooking.

    Top pick per group:

    • 5-minute: Green smoothie
    • Make-ahead: Overnight oats
    • Weekend: Tofu scramble (leftovers work in burritos and on toast)

    Key takeaways

    • Match the breakfast to your morning: assemble on rushed days, grab-and-go on routine days, cook on weekends.
    • Build in a protein and fiber source, such as oats, beans, tofu, nut butter or seeds.
    • Cook once on the weekend and reuse the results all week.

    How to Choose a Plant-Based Breakfast That Works for You

    Use this checklist before you commit to a recipe:

    • Prep time: Do you have 5 minutes, or can you prep the night before?
    • Portability: Will you eat at a desk, in the car or on a train? Jars, wraps and cups travel well.
    • Protein or fiber source: Look for oats, beans, tofu, nut butter, soy yogurt or seeds.
    • Prep-ahead potential: Can it be made in a batch, refrigerated or frozen?
    Group Typical effort Best for
    5-minute Assembly or blending Rushed, unplanned mornings
    Make-ahead Prep the night before or on a weekend Grab-and-go routines
    Weekend 30+ minutes of cooking, in batches Stocking the fridge and freezer

    Note: This guide only describes general ingredient benefits and makes no specific nutrition claims. Check product labels for details.

    5-Minute Plant-Based Breakfasts

    1. Green Smoothie

    Method: Blend a handful of spinach, a banana, a splash of plant milk and a spoonful of nut butter until smooth. Why it works: It uses one blender and is drinkable on the go.

    2. Peanut Butter Banana Toast

    Method: Toast bread, spread on peanut butter, top with sliced banana and sprinkle with seeds. Why it works: It needs no cooking and relies on pantry staples.

    3. Avocado Toast with Lemon and Chili Flakes

    Method: Mash avocado with a squeeze of lemon and a pinch of salt. Spread it on toast and finish with chili flakes. Why it works: It's fast and easy to customize with whatever toppings you have.

    4. Smashed White Bean and Tomato Toast

    Method: Mash canned white beans with olive oil and salt. Spread on toast and top with sliced tomato. Why it works: Beans add substance, so this savory toast keeps you full longer than a plain slice would.

    5. Coconut Yogurt Parfait

    Method: Layer unsweetened plant yogurt, fresh or frozen fruit and granola in a glass or jar. Why it works: It's assembly only, and you can pack it to go.

    Make-Ahead Plant-Based Breakfasts

    Make-ahead breakfasts are easier with a stack of matching containers. If you don't have any, reusable glass jars for overnight oats and chia pudding make portioning and carrying simple.

    6. Overnight Oats

    Method: Combine rolled oats and plant milk, plus chia seeds if you like. Refrigerate overnight and add toppings in the morning. Why it works: There's zero morning prep.

    7. Chia Pudding

    Method: Stir chia seeds into plant milk, then chill until thick. Stir once after a few minutes to prevent clumps. Why it works: It's hands-off and portions neatly into jars.

    8. Freezer Breakfast Burritos

    Method: Fill tortillas with tofu scramble or black beans, cooked potatoes and salsa. Wrap, freeze, then reheat as needed. Why it works: Each one is a complete meal you can eat with one hand.

    9. Baked Oatmeal Cups

    Method: Mix oats, mashed banana, plant milk and fruit. Spoon into a muffin tin and bake. Why it works: They're portable and reheat quickly.

    10. Freezer Smoothie Packs

    Method: Portion fruit and greens into freezer bags. In the morning, tip one into the blender with plant milk. Why it works: It skips the chopping and measuring on weekday mornings.

    Weekend Plant-Based Breakfasts (Cook Once, Eat Well)

    11. Tofu Scramble

    Method: Crumble firm tofu and sauté with vegetables and spices until heated through and lightly golden. Why it works: Leftovers fill burritos or top toast during the week.

    12. Chickpea Flour Omelet

    Method: Whisk chickpea flour with water and seasoning into a batter. Cook it in a pan like a pancake and fill as desired. Why it works: It's an egg-free savory option that cooks in minutes once you have the batter.

    13. Fluffy Vegan Pancakes

    Method: Make a batch with your preferred recipe, then freeze the extras in a single layer before bagging. Why it works: Weekday reheating takes minutes.

    14. Sheet-Pan Breakfast Hash

    Method: Toss potatoes, peppers and chickpeas with oil and spices. Roast on a sheet pan until crisp at the edges. Why it works: It's mostly hands-off and makes several servings.

    15. Homemade Granola

    Method: Mix oats, nuts and seeds with a little sweetener and oil, then bake until golden. Cool completely before storing. Why it works: One batch covers many parfaits and bowls.

    How to Plan a Week of Plant-Based Breakfasts (Practical Steps)

    1. Pick one item from each group. For example, a smoothie, overnight oats and a tofu scramble. 2. Shop for shared ingredients. Oats, plant milk, bananas, beans, tortillas and nut butter cover most of this list. 3. Prep on the weekend. Make granola, scramble, burritos and jars in one session. 4. Set up grab-and-go spots. Keep jars at eye level in the fridge and burritos or smoothie packs in one freezer zone. 5. Keep two 5-minute backups. Peanut butter banana toast and a smoothie work well for chaotic days.

    If you'd like a printable layout, a weekly plant-based breakfast planner can help you map these steps to your calendar.

    Tips for Making Plant-Based Breakfasts More Filling

    • Add a protein source: tofu, beans, soy yogurt, nut butter or seeds.
    • Add fiber: oats, fruit, vegetables and chia all contribute.
    • Season savory options well: salt, acid, spice and herbs make beans and tofu taste like a real meal.
    • Check labels: if you want to limit added sugar, read the labels on plant milks and yogurts.

    FAQs

    What are easy plant based breakfast ideas with no cooking?

    Overnight oats, chia pudding, parfaits, smoothies and toast with toppings all need no stove or oven.

    How can I get enough protein at a plant-based breakfast?

    Include foods like tofu, beans, soy-based yogurt, nut butter or seeds. Check product labels for specifics.

    Which plant-based breakfasts can I make ahead and store?

    Overnight oats, chia pudding, baked oatmeal cups and burritos all work. Follow standard food-safety storage guidance and freeze extras.

    Conclusion

    Plant based breakfast ideas get easier when you sort them by time: 5-minute assemblies for rushed days, make-ahead jars and freezer items for routine mornings, and weekend cooking to stock the week. Start with one recipe from each group and adjust based on what you actually eat. Save this list so you can come back to it when you plan next week's groceries.

  • Easy Plant-Based Soups and Stews for Beginners: Cheap Dinners That Make Leftovers

    Easy Plant-Based Soups and Stews for Beginners: Cheap Dinners That Make Leftovers

    This article contains affiliate links. We may earn a commission if you buy through them, at no extra cost to you.

    Easy Plant-Based Soups and Stews for Beginners: Cheap Dinners That Make Leftovers

    The short answer: The easiest plant-based soups follow one pattern. Soften aromatics in a little oil, add broth or water plus legumes or vegetables, simmer until tender, then adjust the seasoning. Pantry staples like onions, canned or dried beans, lentils, frozen vegetables, and canned tomatoes keep costs low, and one pot is all you need. Most batches make several servings, so they work well for leftovers.

    If you're looking for easy plant based soup recipes for beginners, this guide covers a repeatable base method, five simple ideas, ways to fix common seasoning problems, and how to store and reuse what you don't eat. For more starting points, see these beginner-friendly plant-based dinner ideas.

    —

    Why Soups and Stews Work for Beginners on a Budget

    Soup is one of the more forgiving places to start cooking. A few reasons it works well:

    • Low-cost staples. Dried or canned beans, lentils, potatoes, carrots, cabbage, rice, oats, canned tomatoes, and frozen vegetables can all anchor a pot of soup.
    • Minimal equipment. You need one pot with a lid, a knife, a cutting board, and a spoon. A blender or potato masher is optional, not required.
    • Forgiving technique. Substitutions are easy, and timing is flexible. If the carrots cook five minutes longer than planned, dinner is usually fine.
    • Built-in leftovers. Soups are often easier to reheat than many other dishes, and the flavors often taste more developed the next day.

    —

    The Base-Building Method (Master Formula)

    Once you learn this five-step pattern, you can make dozens of variations without a written recipe.

    Step 1: Build the Aromatics

    Start with onion, garlic, celery, and carrot. Use whatever you have; an onion alone is enough to begin.

    • Chop the vegetables into fairly even pieces so they cook at the same pace.
    • Cook them in a small amount of oil, or a splash of water, over medium heat until softened.
    • Optional: stir in tomato paste or ground spices and cook for a minute or so. This brief cooking deepens the flavor before the liquid goes in.

    Step 2: Add Liquid

    You have a few options:

    • Store-bought broth
    • Bouillon or paste dissolved in water
    • Plain water with extra seasoning

    Check labels to confirm the broth or bouillon is plant-based, since some contain animal-derived ingredients. Bouillon and broth can also be quite salty, so hold back on added salt until you've tasted the soup.

    Step 3: Add Legumes or Vegetables

    • Canned beans: drain and rinse them. They're the fastest route to a filling soup.
    • Lentils: these cook relatively quickly and make a good starting point for beginners.
    • Dried beans: these cost less per serving but take longer. Follow the package directions for soaking and cooking times.
    • Vegetables: hearty ones such as potatoes, carrots, and squash go in early. Leafy greens and frozen peas go in near the end so they don't turn dull and mushy.

    Step 4: Simmer

    Bring the pot to a boil, then reduce the heat to a gentle simmer. Cover it partly or fully, and cook until everything is tender. If the soup gets too thick, add water.

    Step 5: Finish and Taste

    Taste before serving. Adjust salt, acid, and heat as needed (see the seasoning section below). This final step often separates a bland soup from a satisfying one.

    —

    Five Simple Soup and Stew Ideas

    Each idea uses the master formula, so the method stays the same while the ingredients change.

    1. Red Lentil Soup

    • Key ingredients: onion, garlic, red lentils, carrot, cumin, broth
    • Quick method: Soften the onion, garlic, and carrot. Stir in the cumin for a moment, add rinsed lentils and broth, and simmer until the lentils are soft and starting to break down.
    • Cost-saving tip: Lentils need no soaking. For a creamier texture, blend part of the soup, either with a blender or by mashing it in the pot.

    2. White Bean and Vegetable Soup

    • Key ingredients: canned white beans, celery, carrot, canned tomatoes, dried Italian herbs, greens
    • Quick method: Cook the celery and carrot, add the tomatoes, herbs, beans, and broth, and simmer. Stir in the greens at the end until wilted.
    • Cost-saving tip: Use frozen greens or whatever vegetables are on hand. This is a good "clean out the fridge" soup.

    3. Black Bean Soup

    • Key ingredients: black beans, onion, garlic, cumin, chili powder, lime
    • Quick method: Cook the onion and garlic with the cumin and chili powder. Add beans and liquid, simmer, then finish with lime juice.
    • Cost-saving tip: Mash some of the beans against the side of the pot to thicken the soup without extra ingredients.

    4. Potato and Cabbage Stew

    • Key ingredients: potatoes, cabbage, onion, paprika, broth
    • Quick method: Soften the onion with the paprika, add cubed potatoes and broth, and simmer until the potatoes are nearly tender. Add chopped cabbage and cook until soft.
    • Cost-saving tip: Cabbage and potatoes are typically inexpensive and stretch far, which makes this a good option for feeding several people.

    5. Chickpea and Tomato Stew

    • Key ingredients: chickpeas, canned tomatoes, onion, garlic, spices, spinach
    • Quick method: Cook the onion and garlic with your chosen spices, add the tomatoes and drained chickpeas, and simmer until the flavors come together. Stir in spinach at the end.
    • Cost-saving tip: Serve it over rice, bread, or potatoes to stretch the servings.

    —

    Seasoning Adjustments

    Seasoning is where many beginners feel unsure. This quick reference covers the most common problems.

    Fixing Common Problems

    Problem Try this
    Tastes flat Add salt gradually, then a splash of acid (lemon juice or vinegar)
    Too salty Add water or unsalted broth, or add more vegetables or potatoes
    Too acidic (tomato-based) Add a pinch of sugar or more cooked vegetables
    Too thin Simmer uncovered, or mash some beans or potatoes
    Too thick Add water or broth
    Lacking depth Add tomato paste, soy sauce, herbs, or spices

    Seasoning Tips

    • Season in layers. Add some seasoning at the start, then make final adjustments at the end. Seasoning only at the end can leave the flavor sitting on the surface.
    • Add salt in small amounts. It's easy to add more and hard to remove it.
    • Taste again after reheating. Leftovers may need a refresh, whether that's a bit more salt, acid, or spice.

    —

    Storage and Leftover Tips

    A pot of soup often makes more than one meal, so a little storage know-how pays off.

    Cooling and Refrigerating

    • Cool the soup promptly rather than leaving it out for long stretches.
    • Store it in covered, shallow containers, which help it cool faster than one deep container.
    • For how long leftovers keep, follow current food safety guidance from sources such as the USDA rather than relying on rules of thumb.

    Freezing

    • Use freezer-safe containers and leave room at the top for expansion.
    • Label each container with the name and date.
    • Potatoes and some other vegetables may change texture after freezing, so soups built on beans, lentils, and tomatoes are often easier to freeze than potato-heavy stews.
    • Freezing in portion-sized containers makes it easy to thaw only what you need. If you plan to batch-cook often, a set of reusable storage containers can be a practical addition.

    Reheating

    • Reheat until steaming hot. Add water or broth to loosen soup that has thickened in storage.
    • Refresh the flavor with lemon juice, fresh herbs, or black pepper.

    Turning Leftovers into New Meals

    • Serve soup over rice or pasta.
    • Use a thick stew as a baked potato topping.
    • Thicken leftover bean soup into a spread or filling.
    • Add extra vegetables or a handful of greens to stretch a small portion into a full meal.

    —

    Budget and Equipment Checklist

    Pantry basics

    • [ ] Oil
    • [ ] Onions and garlic
    • [ ] Salt and pepper
    • [ ] Dried herbs
    • [ ] Cumin and paprika
    • [ ] Bouillon (confirm it's plant-based)

    Shopping tips

    • Buy dried legumes, frozen vegetables, and store brands when possible.
    • Use seasonal produce.
    • Build meals around ingredients you already have before buying new ones.

    Equipment

    • [ ] One pot with a lid
    • [ ] Knife and cutting board
    • [ ] Spoon
    • [ ] Can opener
    • [ ] Optional: blender or potato masher

    —

    FAQ

    1. Can I make plant-based soup without store-bought broth?

    Yes. Use water and build flavor with well-cooked aromatics, herbs, spices, tomato paste, or a splash of soy sauce. Season carefully and taste as you go, since water adds no flavor of its own.

    2. Do I need to soak dried beans first?

    Not always. Soaking can shorten cooking time, and lentils generally do not need it. Follow the package instructions, and use canned beans if you want the easiest option.

    3. How do I make soup more filling without meat?

    Add beans, lentils, potatoes, rice, pasta, or oats, and serve with bread or a grain. Blending part of the soup can also add body.

    —

    Key Takeaways and Next Step

    • Remember the formula: aromatics, liquid, legumes or vegetables, simmer, adjust.
    • Start with one recipe, then swap ingredients based on what you have.
    • Season in layers, and taste again after reheating.
    • Cook once, store properly, and enjoy leftovers throughout the week.

    For your first pot, pick the recipe whose ingredients you mostly have already. Red lentil soup or black bean soup are straightforward choices, and once the pattern feels familiar, the other ideas follow the same steps.