Author: latinino

  • Snack Meal Prep: How to Make a Week of Plant-Based Afternoon Snack Boxes

    Snack Meal Prep: How to Make a Week of Plant-Based Afternoon Snack Boxes

    This article contains affiliate links. We may earn a commission if you buy through them, at no extra cost to you.

    Snack Meal Prep Ideas: How to Make a Week of Plant-Based Afternoon Snack Boxes

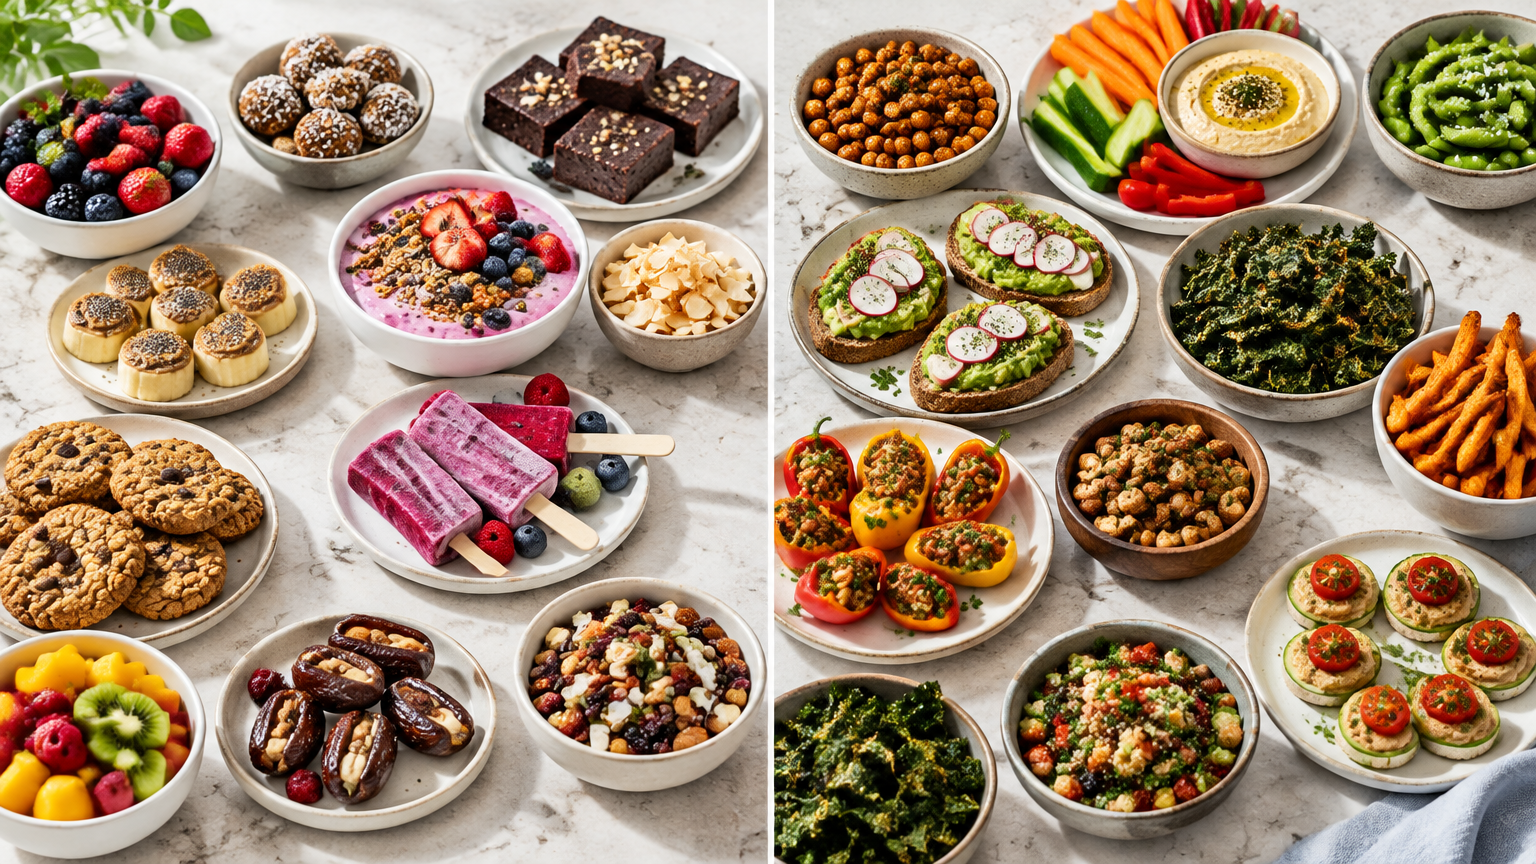
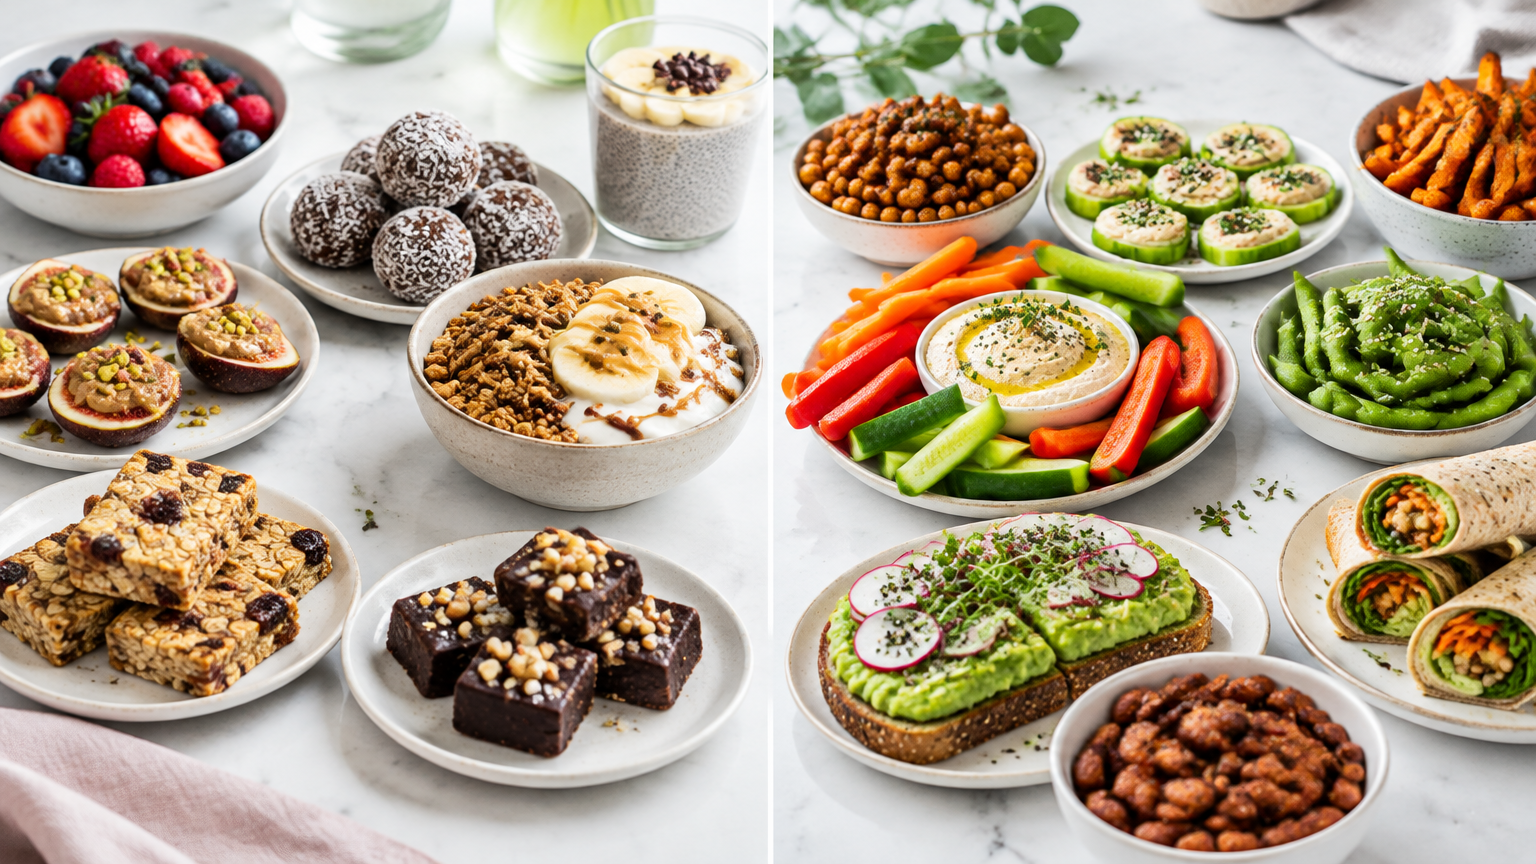
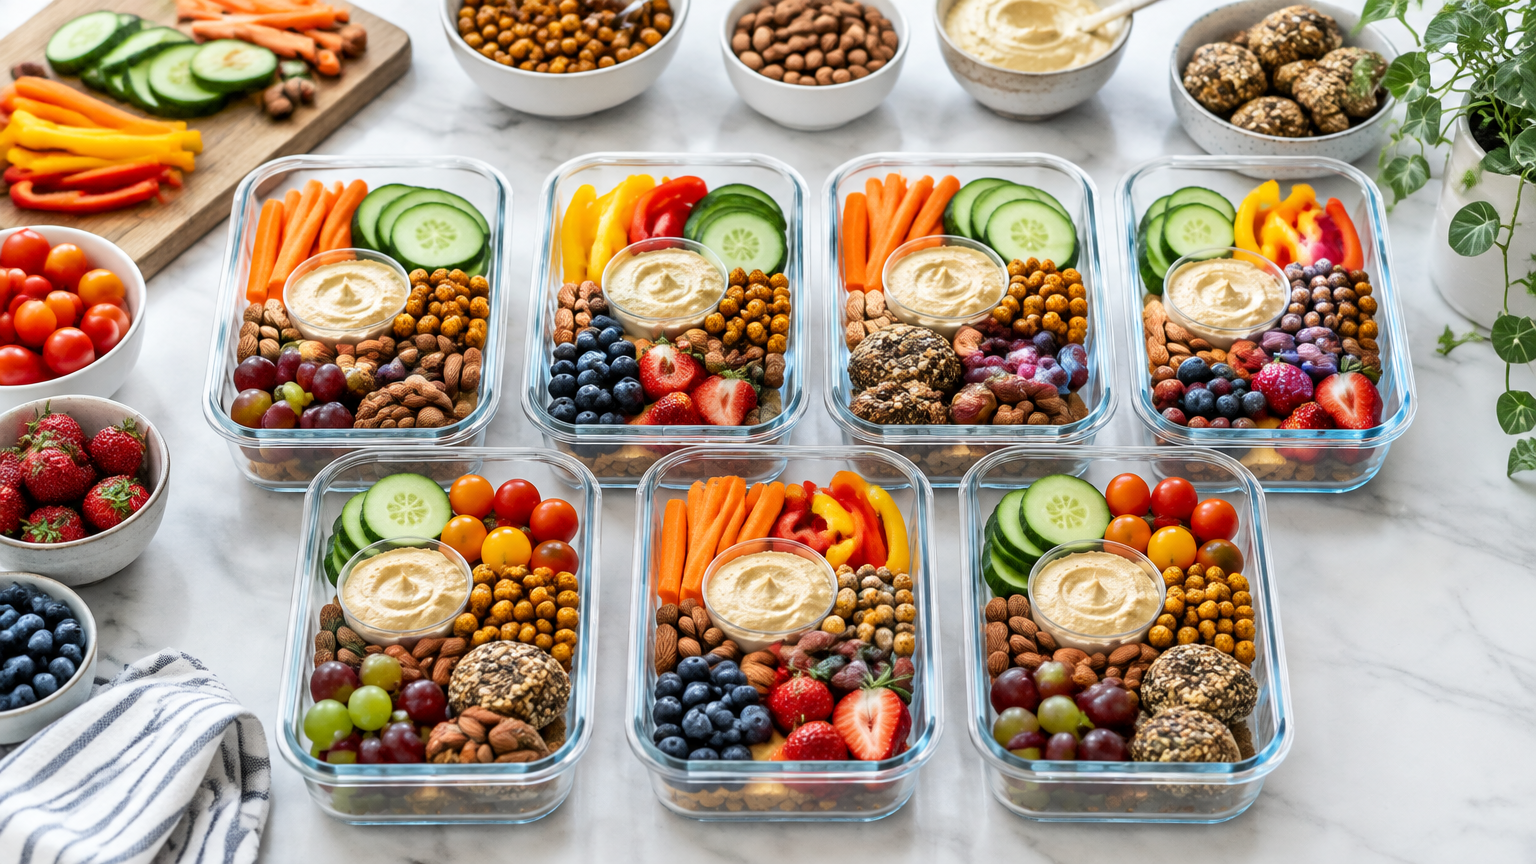
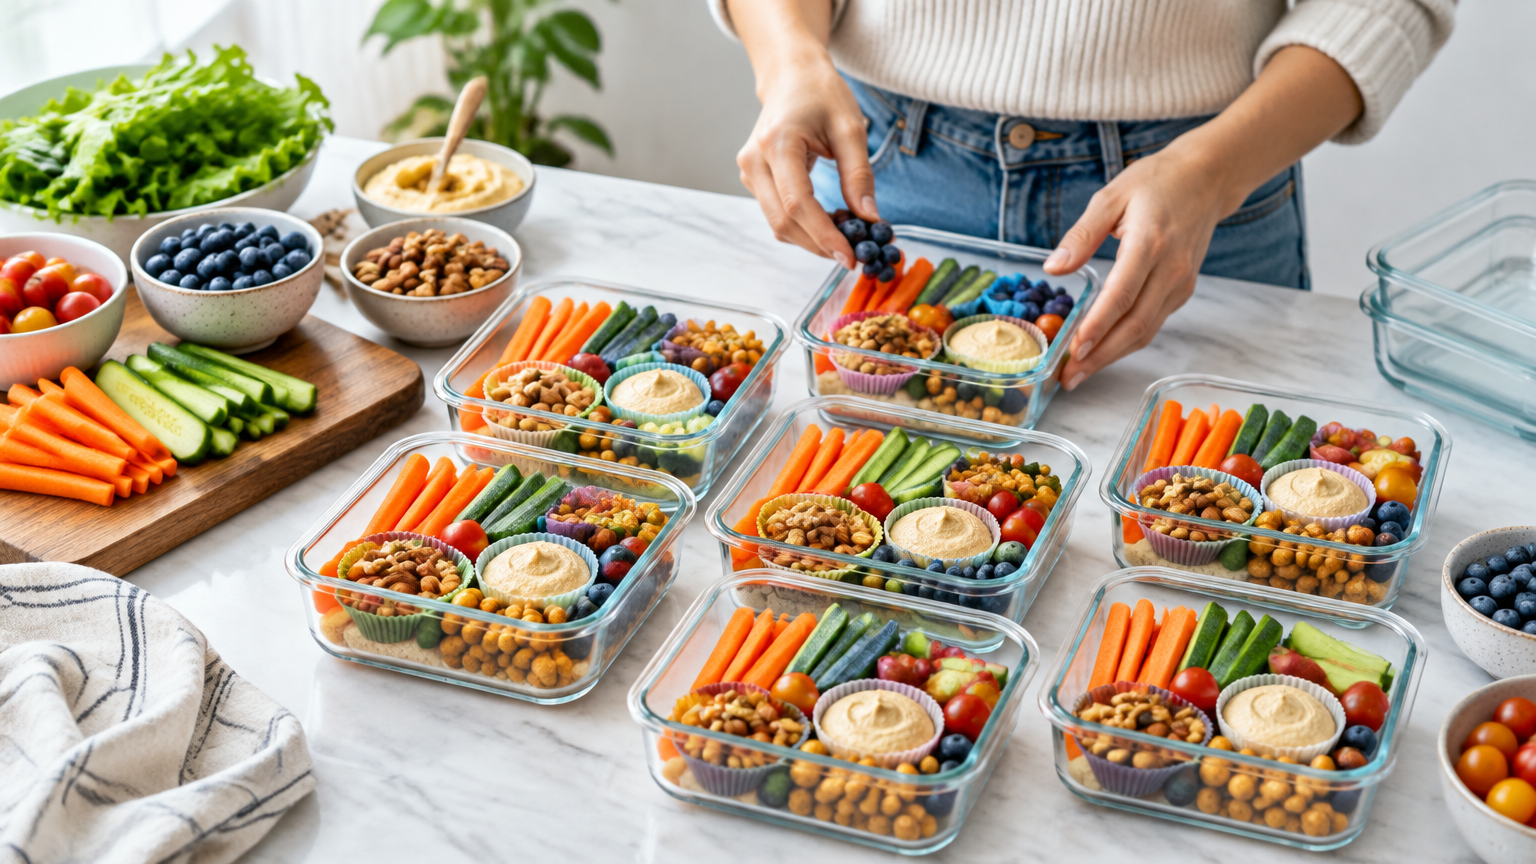
    By 3 p.m. the energy dip hits, and without a plan the vending machine starts to look good. These snack meal prep ideas fit into one Sunday session and give you five grab-and-go plant-based boxes, with enough variety that you won't eat the same snack all week.

    Key Takeaways

    • Build each box from four parts: something crunchy, creamy, fresh, and filling.
    • Start with the longest-cooking items, then no-cook items, then cutting and portioning.
    • Eat 3-day items early in the week and save 5-day items for Thursday and Friday.
    • Rotate three box templates (2 + 2 + 1) to avoid boredom.

    Quick Answer: How to Meal Prep Five Plant-Based Snack Boxes

    Pick one crunchy, one creamy, one fresh, and one filling item per box. Prep the longest-lasting items first, then the 3-day items. Store dips separately, and pack the most perishable fruit and veggies last. Use the 3-day vs. 5-day guide below to decide what to eat early in the week.

    Step 1: Plan Your Five Boxes

    The Simple Box Formula

    Aim for protein or fiber + crunch + fresh produce + something creamy or sweet. For example: roasted chickpeas (protein), whole-grain crackers (crunch), cucumber slices (fresh), and hummus (creamy). If a box covers all four, it will probably hold you until dinner.

    Choose Three Templates and Repeat Them

    You don't need five different recipes. Pick three templates (see below) and repeat them across the week. This keeps your shopping list short and your prep manageable.

    Step 2: Shopping List

    Tip: Shop your pantry first, then adjust quantities to match five boxes.

    Fresh Produce

    • Carrots
    • Cucumbers
    • Bell peppers
    • Grapes
    • Apples
    • Berries
    • Lemon (for apples and homemade hummus)

    Pantry and Protein

    • Chickpeas (canned or dried)
    • Nuts and seeds
    • Whole-grain crackers
    • Dried fruit
    • Oats (for energy bites)
    • Nut or seed butter
    • Dark chocolate, if desired

    Refrigerated

    • Hummus, or the ingredients to make your own
    • Plant-based yogurt
    • Baked or marinated tofu, if using

    Step 3: Sunday Prep Order

    Working in this order saves time because the oven does the slow work while you handle everything else.

    1. Start anything that cooks unattended. Roasted chickpeas and baked tofu go in first. 2. Make no-cook items while that cooks. Mix energy bites and blend hummus or another dip. 3. Wash and cut sturdy produce. Carrots, cucumbers, and peppers are good candidates. 4. Portion dry items. Divide nuts, crackers, dried fruit, and seeds into small containers or cups. 5. Cool everything fully before packing. Warm food in a closed lid creates condensation and sogginess. 6. Assemble the boxes. Leave the most perishable items, such as cut apples and berries, for last, or pack them the day you eat them.

    Simple Prep Timeline (Approx. 60–90 Minutes, Adjust to Your Pace)

    Time Task
    0:00–0:10 Set out ingredients, preheat oven, wash produce
    0:10–0:20 Season and start roasting chickpeas or tofu
    0:20–0:40 Make dip and energy bites while the oven runs
    0:40–0:55 Cut veggies and fruit, portion dry items
    0:55–1:10 Cool, pack, label with dates
    1:10–1:20 Clean up, then refrigerate

    What Keeps 3 Days vs. 5 Days

    These are general guidelines. Freshness varies with ingredients, fridge temperature, and handling. Check store-bought labels, and discard anything that looks, smells, or tastes off.

    Better for Up to 5 Days

    • Nuts, seeds, dried fruit, and crackers (room temperature, airtight)
    • Energy bites (refrigerated)
    • Whole carrots or sturdy veggie sticks
    • Whole fruit such as apples or oranges, packed uncut

    Best Within 3 Days

    • Homemade hummus or dips
    • Cut fruit and berries
    • Cooked tofu or chickpeas
    • Plant-based yogurt portions
    • Cut cucumbers

    Strategy

    Eat 3-day items Monday through Wednesday. Save 5-day items for Thursday and Friday, or prep a mini second batch midweek. Freezing some items is another option; test a small portion first to see how it holds up.

    Container Tips

    Good containers do a lot of the work. A bento-style container set with dividers is one option, and silicone cups work well inside any box.

    • Use boxes with dividers or silicone cups to keep crunchy items from getting soggy.
    • Pack dips in small leakproof containers.
    • Keep crackers and roasted chickpeas separate from wet items.
    • Cool food completely before closing lids to limit condensation.
    • Pat produce dry after washing.
    • Label each box with the prep date.
    • Pack an ice pack if the box won't be refrigerated at work.

    Three Mix-and-Match Box Templates

    Template 1: Crunch and Dip Box

    Veggie sticks, hummus, whole-grain crackers, and olives or seeds. This is the best choice for early in the week, since the hummus and cut veggies are at their freshest.

    Template 2: Sweet and Satisfying Box

    Energy bites, apple slices or grapes, nut butter or nuts, and a square of dark chocolate. Pack whole apples and slice them the day you eat them, with a squeeze of lemon.

    Template 3: Protein Power Box

    Roasted chickpeas or baked tofu cubes, cherry tomatoes or pepper strips, a handful of nuts, and a piece of fruit. Eat the tofu version earlier in the week.

    Tip: Rotate templates across the week, for example 2 + 2 + 1 (two Crunch and Dip, two Sweet and Satisfying, one Protein Power), to avoid boredom.

    Sample Week

    Day Box
    Monday Crunch and Dip
    Tuesday Protein Power (tofu)
    Wednesday Crunch and Dip
    Thursday Sweet and Satisfying
    Friday Sweet and Satisfying

    Common Mistakes to Avoid

    • Packing wet and crunchy items together. Use dividers or separate containers.
    • Cutting all fruit on Sunday. Cut fruit is a 3-day item at best, so cut it closer to eating.
    • Skipping labels. A date on the lid removes the guesswork.
    • Making too many new recipes at once. Try one new recipe per session and keep the rest simple.

    Pre-Prep Checklist

    • [ ] Pantry checked before shopping
    • [ ] Three templates chosen
    • [ ] Oven preheated and chickpeas or tofu started
    • [ ] Dip and energy bites made
    • [ ] Produce washed, dried, and cut
    • [ ] Everything cooled before packing
    • [ ] Boxes labeled with the date

    FAQs

    How far ahead can I prep snack boxes?

    Prep most boxes on Sunday, keeping the 3-day vs. 5-day guide in mind. Hold back perishable items or prep them midweek.

    How do I keep cut fruit and veggies from getting soggy or brown?

    Dry produce well, use dividers, and add a squeeze of lemon to apples. Consider cutting the most delicate items the night before.

    Can I make these boxes high in protein without animal products?

    Yes. Use chickpeas, tofu, edamame, nuts, seeds, and hummus. Check labels if you need exact nutrition numbers.

    Related Reading

    • Our plant-based meal prep guide [VERIFY: add pillar URL] covers the full weekly system.
    • For snacks that travel well, see plant-based work snacks [VERIFY: add article URL].
    • Want more recipes? Try the plant-based cookbook guide for more snack recipes [VERIFY: add guide URL].

    Conclusion

    Good snack prep comes down to three habits: pick your templates, prep in the right order, and store everything smartly. Put the sturdy items at the end of the week and the delicate ones at the start. Try one Sunday session, swap in your favorite ingredients, and use the links above to find more recipes for next week's boxes.
  • Common Beginner Mistakes When Cooking Plant-Based Dinners (and How to Fix Them)

    Common Beginner Mistakes When Cooking Plant-Based Dinners (and How to Fix Them)

    This article contains affiliate links. We may earn a commission if you buy through them, at no extra cost to you.

    Common Beginner Mistakes When Cooking Plant-Based Dinners (and How to Fix Them)

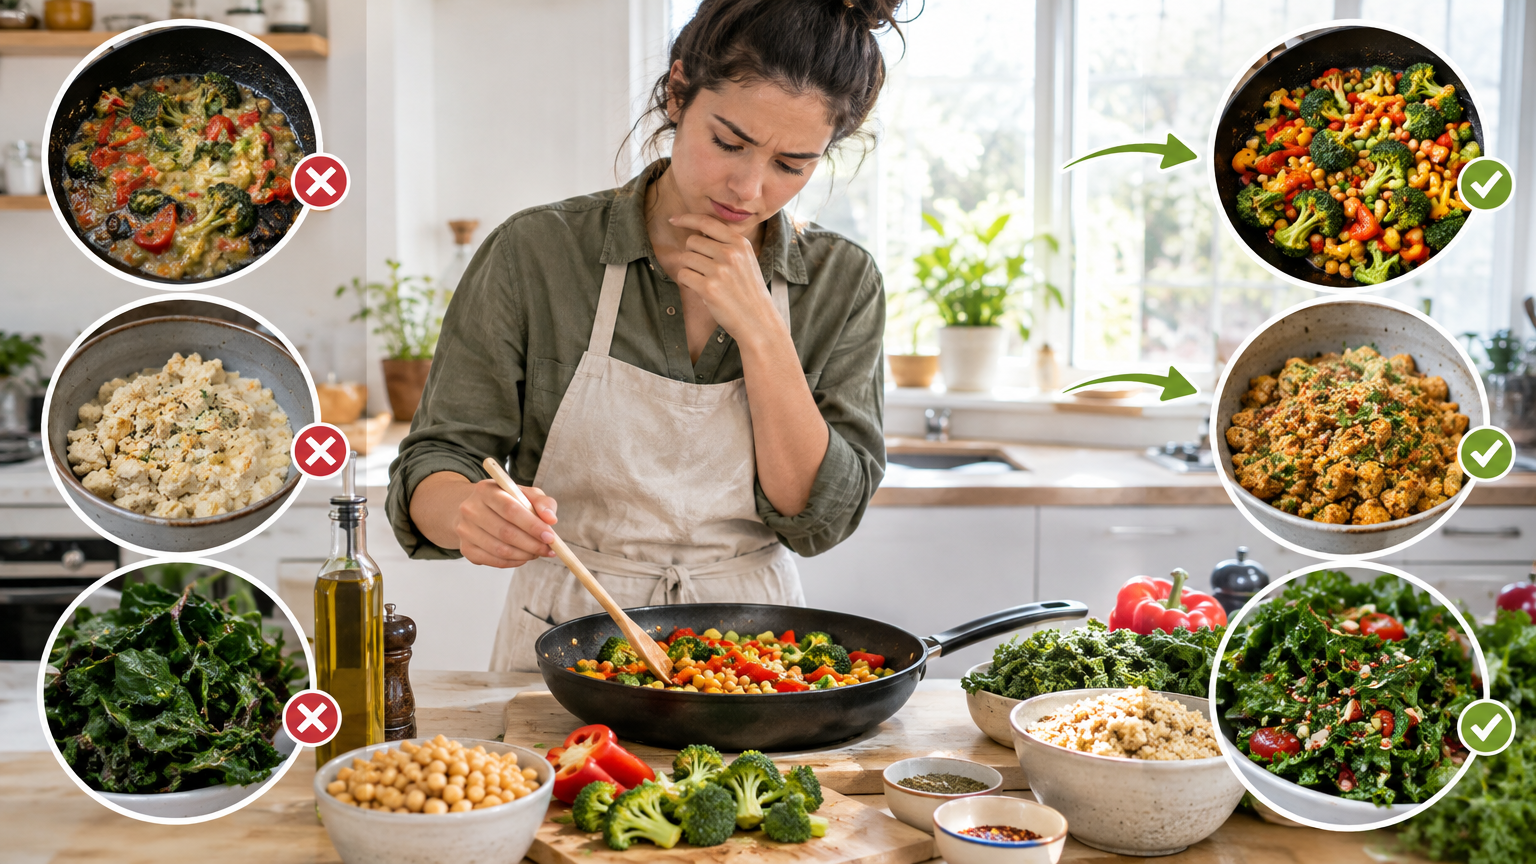
    The most common plant based cooking mistakes beginners make are under-seasoning, overcooking vegetables, skipping prep for tofu, not cooking beans fully, choosing recipes that are too complex, and wasting ingredients. Each has a simple fix: season in layers, control heat and timing, press and sear tofu, taste-test beans, simplify your recipes, and plan around what you already have.

    Disclosure: This article contains affiliate links. They don't change the advice here.

    Key takeaways

    • Most "bad" plant-based dinners come down to technique, not the ingredients.
    • Salt, acid, fat, and umami fix most flavor problems.
    • Heat, space in the pan, and uniform cuts keep vegetables from turning mushy.
    • Tofu and beans need a little prep, but not much.
    • Simple, repeatable recipes beat ambitious ones when you're learning.

    Quick Troubleshooting Overview

    Use this table to find your problem fast. Details for each follow below.

    Problem Quick fix Prevention habit
    Bland flavor Taste, then add salt, acid, fat, and an umami ingredient Season in layers and taste at every stage
    Mushy vegetables Single layer, higher heat, cook in batches Cut uniform pieces and set a timer
    Dry or bland tofu Press, season well, sear or bake, toss in sauce Press and marinate while you prep the rest
    Undercooked beans Keep simmering until creamy throughout, or use canned Cook a batch ahead; follow package directions
    Overly complicated recipes One protein, one vegetable, one starch, one sauce Keep a rotation of 3-5 reliable recipes
    Food waste Use leftovers in stir-fries, soups, or bowls; freeze extras Plan 3-4 dinners, shop with a list, check the fridge weekly

    Mistake 1: Bland Flavor

    Why it happens

    Beginners often use too little salt, acid, or fat. Many also season only once, at the very end, so the flavor sits on the surface instead of building through the dish. Without meat or dairy, there's less built-in richness, so these basics matter more.

    Quick fix

    Taste the dish first, then adjust one element at a time:

    • Salt: Add a pinch, stir, and taste again.
    • Acid: A splash of lemon juice or vinegar brightens flat-tasting food.
    • Fat: Drizzle in olive oil, or stir in a spoonful of nut butter or tahini for body.
    • Umami: Add soy sauce, miso, tomato paste, or mushrooms for savory depth.

    Example: A pot of lentil soup tastes dull. Stir in a spoonful of tomato paste and a splash of soy sauce, then finish with a squeeze of lemon and a little olive oil. Taste after each addition so you learn what each one does.

    Prevention habit

    Season in layers: salt your aromatics (onion, garlic, ginger) as they cook, season the main ingredients as they go in, and adjust again at the finish. Taste at every stage. A clean spoon by the stove makes this easy.

    Mistake 2: Mushy Vegetables

    Why it happens

    The usual causes are overcooking, a crowded pan, too little heat, or pieces cut in uneven sizes. A crowded pan traps steam, so vegetables simmer in their own moisture instead of browning.

    Quick fix

    • Spread vegetables in a single layer with a little space between pieces.
    • Use higher heat so moisture evaporates quickly.
    • Cook in batches if everything won't fit.
    • Add dense vegetables (carrots, potatoes, broccoli stems) first and quick-cooking ones (zucchini, spinach, snow peas) later.

    Example: For a stir-fry, start carrots and broccoli, then add bell pepper a couple of minutes later, and finish with leafy greens just before serving.

    Prevention habit

    Cut pieces to a uniform size so they cook at the same rate. Set a timer and start checking early. You can always cook something longer, but you can't undo mush.

    Mistake 3: Dry or Bland Tofu

    Why it happens

    Common causes include skipping the pressing step, using no marinade or seasoning, and cooking with too little fat or heat. Tofu is mild on its own and holds a lot of water, which blocks browning and dilutes flavor.

    Quick fix

    1. Press out excess moisture. Wrap the block in a clean towel, set a heavy pan or plate on top, and wait while you prep other ingredients. If you cook tofu often, a tofu press is one option, though a towel and a heavy pan work too. 2. Cut it into cubes or slabs. 3. Season well with salt, spices, or a marinade. 4. Sear or bake until the edges are browned. 5. Toss in a sauce at the end so it clings to the surface.

    Prevention habit

    Press and marinate the tofu while you chop vegetables and start the grain. Also match the firmness to the dish: firm or extra-firm for searing and baking, softer tofu for sauces and scrambles.

    Mistake 4: Undercooked Beans

    Why it happens

    Beginners may skip soaking, cut the cooking time short, or never test for doneness. Beans that are firm, chalky, or grainy in the center aren't finished.

    Quick fix

    • Keep simmering until the beans are creamy and tender all the way through. Taste several, since beans in one pot can cook unevenly.
    • If you're short on time, use canned beans, drained and rinsed.

    Prevention habit

    Cook a batch ahead and store it for the week, following the package directions. Having cooked beans ready makes weeknight dinners faster.

    Safety note: Red kidney beans need thorough boiling. Follow the package safety guidance and don't shortcut it. [VERIFY: confirm the exact boiling time and method against the specific package or a trusted food-safety source before publishing any specifics.]

    Mistake 5: Overly Complicated Recipes

    Why it happens

    Long ingredient lists, unfamiliar techniques, and too many components make a recipe harder to execute. Beginners often pick impressive-looking dishes, then feel discouraged when the result is stressful or inconsistent.

    Quick fix

    Simplify to four parts:

    • One protein (beans, lentils, tofu, or tempeh)
    • One vegetable
    • One grain or starch
    • One sauce

    Swap hard-to-find items for pantry staples. If a recipe calls for an unusual ingredient, ask what role it plays (acid? heat? creaminess?) and use something you already own that does the same job.

    Example: Instead of a recipe with 20 ingredients and three sub-recipes, make rice, roasted broccoli, and chickpeas with a simple tahini-lemon sauce.

    Prevention habit

    Build a short rotation of three to five reliable recipes and repeat them before trying new ones. Repetition builds confidence, and you'll start making small adjustments by instinct. If you want structured ideas, plant-based cooking basics can help you choose beginner-friendly dishes to add to your rotation.

    Mistake 6: Food Waste

    Why it happens

    Buying without a plan, forgetting produce at the back of the fridge, and cooking too much or too little all lead to waste. Fresh produce is the usual casualty.

    Quick fix

    • Turn leftover vegetables into stir-fries, soups, or grain bowls.
    • Freeze extras, such as cooked beans, cooked grains, or chopped vegetables, before they spoil.
    • Use wilting greens in soups or sauces, where texture matters less.

    Prevention habit

    • Plan three or four dinners for the week rather than seven.
    • Shop with a list.
    • Do a weekly "use it first" fridge check and build one meal around whatever needs eating soonest.

    A Simple Beginner Dinner Formula

    When you don't have a recipe, or you feel overwhelmed, use this five-step formula:

    1. Pick a base: rice, pasta, potatoes, or quinoa. 2. Pick a protein: beans, lentils, tofu, or tempeh. 3. Pick vegetables: whatever is fresh, frozen, or about to expire. 4. Add a sauce or seasoning with salt, acid, and fat. A mix of soy sauce, lemon juice, and olive oil is one easy option. 5. Taste and adjust before serving.

    Example combinations:

    • Rice + black beans + sautéed peppers + lime, olive oil, and salt
    • Pasta + white beans + spinach + garlic, lemon, and olive oil
    • Quinoa + seared tofu + roasted broccoli + soy-tahini sauce

    FAQ

    How do I make plant-based meals taste better without a lot of extra ingredients?

    Focus on salt, acid, fat, and one umami ingredient such as soy sauce, miso, or tomato paste. Toast spices briefly in a dry pan or oil, and brown your ingredients rather than just boiling or steaming them. Browning adds flavor without adding anything to your shopping list.

    Do I have to soak dried beans?

    Not always. Soaking can shorten cooking time, but check the package instructions and cook until the beans are fully tender. Canned beans are a convenient alternative: drain and rinse them before using.

    How can I keep plant-based cooking affordable and low-waste?

    Rely on pantry staples like beans, lentils, grains, and frozen vegetables. Plan your meals, shop with a list, and reuse leftovers in new dishes. [VERIFY: no price or savings claims are made here, since none were supplied.]

    Conclusion

    Learning to cook plant-based dinners doesn't require perfection, just a few reliable habits. Bland food, mushy vegetables, dry tofu, hard beans, overcomplicated recipes, and wasted produce all have simple fixes, and most come down to seasoning, heat, prep, and planning.

    Don't try to fix everything at once. Fix one mistake at a time, and choose one habit to practice this week. That might be tasting at every stage, cutting vegetables evenly, pressing tofu while you prep, cooking a batch of beans, repeating a favorite recipe, or doing a weekly fridge check. Small changes like these add up quickly.

  • Snack Meal Prep: How to Make a Week of Plant-Based Afternoon Snack Boxes

    Snack Meal Prep: How to Make a Week of Plant-Based Afternoon Snack Boxes

    This article contains affiliate links. We may earn a commission if you buy through them, at no extra cost to you.

    Snack Meal Prep Ideas: How to Make a Week of Plant-Based Afternoon Snack Boxes

    SEO title: Snack Meal Prep Ideas: 5 Plant-Based Snack Boxes in One Sunday Session Meta description: Step-by-step Sunday prep for five plant-based afternoon snack boxes, with a shopping list, prep order, storage times, container tips, and three box templates.

    The 3 p.m. slump tends to end with a scramble for whatever the vending machine offers. These snack meal prep ideas fix that: one Sunday session produces five grab-and-go, plant-based boxes for the week.

    Quick Answer

    To prep a week of plant-based snack boxes, choose a template (crunchy, creamy, sweet), shop once, and prep in order: bake or roast first, make dips and bites while it cooks, chop produce last, then assemble. Store sturdier items for five days and cut produce, dips, and soft items for about three.

    Key Takeaways

    • Use one formula per box: 1 crunch + 1 fresh + 1 creamy or protein + 1 sweet or extra.
    • Start with the oven, fill the waiting time with no-bake tasks, and cut produce last.
    • Eat the three-day items early in the week and save sturdier boxes for Thursday and Friday.
    • Keep wet and crunchy items in separate compartments.

    What You Need Before You Start

    Pick Your Five Boxes

    Choose from the three templates below. You can repeat one template all week or rotate all three. Repeating one simplifies shopping, while rotating keeps things interesting and spreads out the perishable items.

    Equipment Checklist

    • [ ] Sheet pan
    • [ ] Mixing bowls
    • [ ] Knife and cutting board
    • [ ] Small food processor (or a fork and some patience for mashing)
    • [ ] Five compartment containers, or standard containers plus silicone cups
    • [ ] Small lidded dip containers
    • [ ] Paper towels, labels, and a marker

    Shopping List for Five Snack Boxes

    Quantities depend on the templates you pick, so start with the per-box formula: one crunch, one fresh item, one creamy or protein item, and one sweet or extra. Multiply by five and adjust for appetite.

    Crunchy and Shelf-Stable

    • Canned or dried chickpeas
    • Nuts and seeds
    • Whole-grain crackers or rice cakes
    • Popcorn kernels

    Fresh Produce

    • Carrots, cucumber, bell pepper, celery
    • Apples or grapes
    • Berries
    • Citrus (lemons for hummus, or oranges for snacking)

    Creamy and Protein

    • Hummus ingredients (chickpeas, tahini, lemon, garlic) or store-bought hummus
    • Nut or seed butter
    • Edamame
    • Tofu or tempeh, if you want them

    Sweet and Extras

    • Dates and dried fruit
    • Rolled oats
    • Dark chocolate or cocoa
    • Cinnamon
    • Olives, if you like them in your Crunch and Dip box

    Prep Order: What to Make First

    1. Start the oven items. Toss drained, dried chickpeas (or edamame) with oil and seasoning, spread them on the sheet pan, and roast according to your recipe. 2. Make dips and no-bake items while the oven runs. Blend hummus and roll energy bites, for example dates, oats, nut butter, and cocoa. 3. Wash and cut produce, then dry it thoroughly. Moisture shortens the life of cut vegetables and fruit. 4. Portion dry items. Divide nuts, crackers, seeds, and dried fruit into small containers or silicone cups. 5. Cool everything fully, then assemble. Warm food creates condensation, which leads to sogginess. 6. Label each box with the day or an "eat by" date.

    Simple Sunday Prep Timeline

    This is a sample. Adjust it to your pace and recipes.

    Time Task
    0:00–0:10 Set up, wash produce, preheat oven
    0:10–0:20 Prep chickpeas and start roasting
    0:20–0:45 Make hummus and energy bites
    0:45–1:00 Cut and dry vegetables and fruit
    1:00–1:15 Portion dry items; cool roasted items
    1:15–1:30 Assemble boxes, label, refrigerate

    Total time is an estimate and varies with skill level and the recipes you choose.

    What Keeps 3 Days vs. 5 Days

    These are general guidelines only. Follow your recipe's storage guidance, and when in doubt, eat sooner.

    Best for About 5 Days (Sturdier Items)

    • Nuts, seeds, dried fruit, and crackers
    • Whole fruit such as apples or grapes (cut just before eating if possible)
    • Firm veggies such as carrots and celery
    • Energy bites, refrigerated

    Best for About 3 Days (More Perishable)

    • Hummus and other fresh dips
    • Cut cucumber and bell pepper
    • Cut fruit and berries
    • Tofu or tempeh and cooked edamame

    Make Day-Of or Add Late

    • Avocado or guacamole, banana, and anything that browns or softens
    • Roasted chickpeas, if you want them crisp. Keep them separate from moist items.

    Strategy

    Eat the three-day items Monday through Wednesday and save the five-day boxes for Thursday and Friday. You can also freeze energy bites (check your recipe) and thaw them later in the week.

    Container Tips for Fresh, Crunchy Snack Boxes

    • Separate wet from dry. Compartment containers or silicone cups keep dips and fruit away from crackers.
    • Dry produce well. Add a folded paper towel to absorb stray moisture.
    • Pack dips in small lidded containers so they don't migrate.
    • Give crunchy items their own airtight compartment.
    • Choose the right material. Look for leak-resistant, reusable options, and glass or microwave-safe versions if you plan to reheat anything.
    • Use an ice pack if the box travels.
    • Cool food completely before closing lids.

    Three Mix-and-Match Snack Box Templates

    Template 1: Crunch and Dip Box

    Veggie sticks (carrot, celery, bell pepper), hummus, whole-grain crackers, and olives or seeds.

    Template 2: Sweet and Energizing Box

    Apple slices or grapes, nut butter, an energy bite or two, and a small handful of nuts.

    Template 3: Savory Protein Box

    Roasted chickpeas, edamame, cherry tomatoes or cucumber, and a small portion of fruit or dried fruit.

    Formula reminder: 1 crunch + 1 fresh + 1 creamy or protein + 1 sweet or extra.

    Optional swaps for allergies: Use sunflower or pumpkin seeds in place of nuts, and seed butter in place of nut butter. Check labels on crackers, dried fruit, and chocolate for allergens.

    Sample Week

    Day Box Why
    Monday Template 1 Fresh veggies and hummus are at their best
    Tuesday Template 3 Edamame and cut cucumber are still within three days
    Wednesday Template 1 Last day for dips and cut produce
    Thursday Template 2 Whole fruit, nut butter, and bites hold up
    Friday Template 2 Sturdy ingredients carry through

    Common Mistakes to Avoid

    • Packing wet items with crunchy ones. Crackers and roasted chickpeas go soft quickly.
    • Skipping the drying step. Damp produce spoils faster.
    • Assembling while food is warm. Steam turns into condensation.
    • Prepping all five days of delicate items. Cut cucumber, berries, and fresh dips are better kept to the first half of the week.

    FAQ

    How far ahead can I prep plant-based snack boxes?

    Plan on about three days for fresh items and up to five for sturdier ones. Follow your recipe's storage guidance.

    How do I keep roasted chickpeas and crackers from getting soggy?

    Cool them fully, store them in separate airtight compartments, and keep them away from dips and cut produce.

    Can I freeze any snack box components?

    Some, such as energy bites, can be frozen. Check your recipes, and skip freezing fresh cut produce.

    Keep Going: More Snack Ideas

    • Zoom out with our plant-based meal prep guide for the full weekly system.
    • Packing for the office? See plant-based work snacks for desk-friendly options.
    • Want new fillings and flavors? Browse this plant-based cookbook guide for more recipes.

    Conclusion

    Pick your templates, prep in order, and eat the shorter-life items first. Print the shopping list and timeline above, or explore the linked guides to build out your snack rotation.

    [VERIFY: replace PILLAR_LINK and WORK_SNACKS_LINK with the live internal URLs before publishing.]

  • Sweet vs Savory Afternoon Snacks: 20 Plant-Based Ideas for Every Craving

    Sweet vs Savory Afternoon Snacks: 20 Plant-Based Ideas for Every Craving

    This article contains affiliate links. We may earn a commission if you buy through them, at no extra cost to you.

    Sweet vs Savory Afternoon Snacks: 20 Plant-Based Ideas for Every Craving

    Meta description (draft): Browse 20 sweet and savory vegan snacks sorted by craving (crunchy, creamy, chocolatey, salty, fresh), plus simple fiber-and-protein pairing tips.

    The easiest way to choose among sweet and savory vegan snacks is to start with the texture or flavor you want. Then pair a fiber-rich food (fruit, vegetables, whole grains, legumes) with a protein-rich one (nuts, seeds, soy, legumes) so the snack feels more substantial. Below you'll find 10 sweet and 10 savory ideas, plus pairing tips. For more background, see our [plant-based snacking guide]([URL placeholder]).

    Key Takeaways

    • Pick the craving first (crunchy, creamy, chocolatey, salty, or fresh), then choose the snack.
    • Pair a fiber-rich base with a protein-rich add-on for a more satisfying, filling-feeling snack.
    • A little fat, a pinch of salt or spice, and something fresh round out the flavor.
    • Check labels on crackers, chocolate, bread, and pita to confirm they're vegan.

    How to Choose Between Sweet and Savory

    Start with the craving: crunchy, creamy, chocolatey, salty, or fresh

    Texture often decides what sounds good at 3 p.m. Crunchy snacks give you something to bite into. Creamy ones feel soft and comforting. Chocolatey snacks scratch a dessert-like itch. Salty snacks lean toward savory seasoning, and fresh snacks are juicy and bright. Once you know which one you want, the sweet-or-savory choice gets easier.

    Quick decision guide

    • Want something cold and spoonable? Go creamy: coconut yogurt or chia pudding on the sweet side, hummus on the savory side.
    • Want something to crunch on while you work? Choose roasted chickpeas, veggie sticks, or oat-and-almond clusters.
    • Want something light and juicy? Reach for fresh: watermelon, orange segments, cucumber, or cherry tomatoes.
    Craving Sweet idea Savory idea
    Crunchy Cinnamon-roasted chickpeas Smoked paprika chickpeas
    Creamy Coconut yogurt with berries Hummus with carrots
    Chocolatey Cocoa almond butter on rice cakes n/a
    Salty n/a Edamame with flaky sea salt
    Fresh Apple slices with seed butter Cucumber rounds with white bean mash

    10 Sweet Vegan Snacks by Craving

    Crunchy

    1. Cinnamon-roasted chickpeas with a few raisins. Crisp, lightly sweet chickpeas (fiber and protein) with raisins for chewy contrast. 2. Oat-and-almond clusters with sliced pear. Whole-grain oats and almonds (fiber and protein) with juicy pear (fiber).

    Creamy

    3. Coconut yogurt with berries and hemp seeds. Berries bring fiber, and hemp seeds add protein and a nutty crunch. Choose an unsweetened yogurt if you want to control sweetness. 4. Chia pudding with mango and pumpkin seeds. Chia seeds and mango supply fiber, and pumpkin seeds add protein and texture.

    Chocolatey

    5. Frozen banana blended with cocoa powder and peanut butter. A thick, soft-serve-style treat. Banana provides fiber and peanut butter provides protein. 6. Whole-grain rice cakes with cocoa almond butter. A crisp base (whole grain) with a chocolatey almond spread (protein). 7. Dark chocolate squares (dairy-free) with roasted almonds. Check the label to confirm the chocolate contains no milk ingredients. Almonds add protein and fiber. If you'd like to compare options, browse dairy-free dark chocolate choices.

    Fresh

    8. Apple slices with sunflower seed butter. Crunchy apple (fiber) with seed butter (protein), which is also nut-free. 9. Orange segments with pistachios. Juicy citrus (fiber) with shelled pistachios (protein). 10. Watermelon cubes with mint and a sprinkle of sesame seeds. Very refreshing. Sesame seeds add a little protein and crunch.

    10 Savory Vegan Snacks by Craving

    Vegan check: read labels on crackers, bread, and pita, since some contain dairy, eggs, or honey.

    Crunchy

    1. Oven-roasted chickpeas with smoked paprika. Legumes supply both fiber and protein in one crunchy handful. 2. Raw veggie sticks with a handful of tamari almonds. Vegetables bring fiber, and almonds bring protein and salty depth. Check that the tamari is vegan-friendly and, if needed, gluten-free. 3. Baked kale chips with pumpkin seeds. Light, crisp greens (fiber) with pumpkin seeds (protein).

    Creamy

    4. Hummus with carrots and whole-grain pita. Chickpea-based hummus (protein and fiber) with crunchy carrots and a whole-grain scoop. 5. Smashed avocado on seeded toast with white beans. Creamy avocado, seeded bread (fiber), and white beans (protein) on top.

    Salty

    6. Edamame with flaky sea salt. Soybeans provide protein and fiber, and they're easy to eat by the handful. 7. Popcorn with nutritional yeast and a few roasted peanuts. Popcorn is a whole grain (fiber), nutritional yeast adds a savory, cheesy flavor, and peanuts add protein. 8. Olives with whole-grain crackers and cubed baked tofu. Briny olives, whole-grain crackers (fiber), and tofu (protein).

    Fresh

    9. Cucumber rounds topped with white bean mash and dill. Mash beans with lemon juice and a little olive oil for a simple spread. 10. Cherry tomatoes and basil with marinated tofu cubes. Bright, juicy tomatoes (fiber) with tofu (protein) for a light, protein-forward plate.

    Pairing Tips: Combine Fiber and Protein

    A simple formula

    Use a fiber-rich base + protein-rich add-on:

    • Fruit + nut or seed butter
    • Veggies + hummus
    • Whole-grain crackers + tofu or beans

    Pairing this way tends to make a snack feel more satisfying and filling-feeling than either part alone.

    Easy swaps

    • Swap nut butter for sunflower or pumpkin seed butter for nut-free needs.
    • Swap coconut yogurt for soy yogurt if you'd like more protein in a creamy snack.
    • Swap pita for veggie sticks, or crackers for rice cakes, depending on the crunch you want.

    Portion and flavor balance

    Aim for a modest portion of each component. Add a little fat (nuts, seeds, avocado, olive oil), a pinch of salt or spice, and something fresh (citrus, herbs, crisp produce). That combination makes a snack taste complete.

    How to Build Your Own Afternoon Snack (Practical Steps)

    1. Pick your craving. Crunchy, creamy, chocolatey, salty, or fresh. 2. Choose a fiber-rich base. Fruit, raw vegetables, whole-grain crackers, popcorn, or oats. 3. Add a protein-rich partner. Nuts, seeds, tofu, edamame, beans, or soy yogurt. 4. Add flavor or texture. Cinnamon, smoked paprika, lemon or orange zest, herbs, sesame seeds, or a drizzle of tahini. 5. Prep ahead. Wash fruit, portion nuts into small containers, and keep a dip in the fridge. A set of airtight containers for snack prep can make grab-and-go portions easier.

    Quick checklist:

    • [ ] One craving chosen
    • [ ] One fiber-rich food
    • [ ] One protein-rich food
    • [ ] One flavor boost
    • [ ] Labels checked for vegan ingredients

    When you're short on time, try these [vegan snacks you can make in five minutes]([URL placeholder]).

    FAQs

    What are some easy sweet and savory vegan snacks for work?

    Portable options work best: fruit with nut or seed butter, roasted chickpeas, and veggie sticks with hummus.

    How can I make a vegan snack more filling?

    Pair something fiber-rich with something protein-rich, and add a little fat, such as nuts, seeds, or avocado.

    Can I prep these snacks ahead of time?

    Yes. Chia pudding, roasted chickpeas, and dips keep well in the fridge or an airtight container. Cut fruit and avocado are best fresh. Follow standard food-storage guidelines for how long prepared foods should be kept. [VERIFY exact storage times against your local food-safety guidance.]

    Final Thoughts

    Choose a craving, pair fiber with protein, and rotate sweet and savory options so snack time stays interesting. For more ideas, revisit our [plant-based snacking guide]([URL placeholder]) and our list of [vegan snacks you can make in five minutes]([URL placeholder]).

  • Sweet vs Savory Afternoon Snacks: 20 Plant-Based Ideas for Every Craving

    Sweet vs Savory Afternoon Snacks: 20 Plant-Based Ideas for Every Craving

    This article contains affiliate links. We may earn a commission if you buy through them, at no extra cost to you.

    Sweet vs Savory Afternoon Snacks: 20 Plant-Based Ideas for Every Craving

    It's mid-afternoon, your focus is fading, and you're staring into the pantry. Some days you want something sweet. The next day, only something salty and crunchy will do.

    The best sweet and savory vegan snacks combine a fiber source (fruit, vegetables, whole grains, beans, seeds) with a protein source (soy yogurt, nuts, nut butter, chickpeas, edamame, tofu) so the snack feels filling and satisfying. Pick the texture you want, then pair.

    This list builds on our [plant-based snacking guide](PILLAR URL) with 20 ideas sorted by craving.

    Key Takeaways

    • Start with a texture (crunchy, creamy, chocolatey, salty, or fresh), then decide sweet or savory.
    • Pair a fiber-rich base with a plant protein for a more satisfying snack.
    • Chickpeas, nut butters, yogurt alternatives, and fruit work in either direction.
    • Prep a few components ahead so snacking is easy.
    • Check labels and allergens, especially nuts, soy, and sesame.

    How to Choose Your Snack by Craving

    Cravings are often about texture as much as flavor. This guide uses five categories: crunchy, creamy, chocolatey, salty, and fresh. Chocolatey leans sweet and salty leans savory. Crunchy, creamy, and fresh work both ways, so you can season the same base differently depending on your mood.

    Craving Sweet option Savory option
    Crunchy Cinnamon-roasted chickpeas Smoky paprika roasted chickpeas
    Creamy Soy or coconut yogurt parfait Hummus with vegetable sticks
    Chocolatey Chocolate hummus with pear slices Leans sweet
    Salty Leans savory Lightly salted edamame
    Fresh Orange segments with pistachios Cucumber rounds with cashew cream cheese

    10 Sweet Vegan Snack Ideas

    Crunchy

    1. Cinnamon-roasted chickpeas: Toss with cinnamon and roast until crisp. Pair with a few dried apricots for chew. 2. Apple slices with almond butter: Sprinkle with oats or granola for extra crunch.

    Creamy

    3. Soy or coconut yogurt parfait: Layer with berries and chia seeds. Soy yogurt adds more protein than most coconut versions, so check the label. 4. Soy milk chia pudding: Stir chia into soy milk, chill, and top with sliced fruit. 5. Frozen banana "nice cream": Blend frozen banana until smooth and swirl in peanut butter.

    Chocolatey

    6. Cocoa-oat energy bites: Combine dates, nuts, oats, and cocoa, then roll into balls. 7. Dark chocolate squares with roasted almonds: Check that the chocolate is dairy-free. 8. Chocolate hummus: Serve with pear slices or whole-grain crackers.

    Fresh

    9. Orange segments with pistachios: Juicy and crunchy in one bite. 10. Mango-lime cup with pumpkin seeds: Squeeze lime over cubed mango and top with seeds.

    10 Savory Vegan Snack Ideas

    Crunchy

    1. Smoky paprika roasted chickpeas: Season with paprika and a pinch of salt. Pack them in a small container for the afternoon. 2. Seed crackers with white bean spread: Mash white beans with lemon and garlic. 3. Air-popped popcorn with nutritional yeast: Add a handful of edamame on the side.

    Creamy

    4. Hummus with carrot, cucumber, and bell pepper sticks: Cut the vegetables ahead of time. 5. Smashed avocado and white beans on whole-grain toast: Add lemon juice and black pepper.

    Salty

    6. Lightly salted edamame in the pod: Quick to steam, and fun to eat slowly. 7. Olive tapenade on whole-grain toast: Add tofu cubes on the side. 8. Tamari-roasted pumpkin seeds or almonds: Check the tamari label if you avoid gluten.

    Fresh

    9. Cucumber rounds with cashew cream cheese: Top with chopped herbs. 10. Rice paper rolls with crunchy vegetables: Serve with peanut sauce.

    Allergen note: Many of these ideas include nuts, soy, or sesame (hummus often contains tahini). Check every label and swap ingredients as needed, such as seeds for nuts or chickpea-based options for soy.

    Pairing Tips: Fiber + Protein for a Satisfying Snack

    A Simple Formula

    Fiber base + protein partner + optional flavor boost.

    • Fiber base: fruit, vegetables, whole grains, beans, or seeds
    • Protein partner: soy yogurt, nuts, nut butter, chickpeas, edamame, or tofu
    • Flavor boost: spices, citrus, herbs, or cocoa

    Quick Pairing Examples

    • Fruit + nut or seed butter: apple with almond butter, banana with peanut butter
    • Raw vegetables + bean dip: bell pepper strips with white bean spread
    • Whole-grain crackers + tofu or hummus: add cucumber for crunch
    • Yogurt alternative + fruit + seeds: berries with chia or pumpkin seeds

    Portion and Prep Tips

    • Pre-portion dips and roasted snacks into small containers so they're ready to grab.
    • Keep a mix of shelf-stable items (nuts, crackers, canned beans) and fresh items (fruit, cut vegetables).
    • Treat these as lifestyle ideas for variety and enjoyment, not medical or dietary advice. For individual needs, talk with a qualified professional.

    How to Build Your Own Afternoon Snack (Practical Steps)

    1. Pick your craving: crunchy, creamy, chocolatey, salty, or fresh. 2. Choose sweet or savory. 3. Start with a fiber-rich base, such as fruit, vegetables, whole-grain crackers, or beans. 4. Add a plant protein, such as yogurt alternative, nut butter, edamame, tofu, or chickpeas. 5. Add flavor and texture: cinnamon, citrus, cocoa, herbs, or crunchy toppings like seeds. 6. Prep a few components ahead: roast a tray of chickpeas, mix a batch of energy bites, or wash and cut vegetables.

    Quick checklist: fiber source? protein source? something crunchy or creamy? allergens checked?

    When time is short, try our [five-minute vegan snacks](FIVE-MINUTE SNACKS URL).

    FAQ

    What are easy sweet and savory vegan snacks I can make ahead?

    Roasted chickpeas (cinnamon or paprika), energy bites, chia pudding, and hummus with cut vegetables all hold up well in the fridge or pantry. Store them in small containers for grab-and-go snacking.

    How do I make a vegan snack more filling?

    Pair a fiber source with a protein source and include some texture, such as apple with almond butter or hummus with vegetables. Many people find this combination more satisfying, though preferences vary.

    Can I find vegan snacks that work for both sweet and savory cravings?

    Yes. Chickpeas, yogurt alternatives, nut butters, and fruit adapt to either direction. Cinnamon or cocoa takes them sweet, while paprika, herbs, or tamari takes them savory.

    Conclusion

    Choose a craving, pick sweet or savory, and pair fiber with protein. Rotate through the ideas above and adjust for allergens and taste. For more, explore our [plant-based snacking guide](PILLAR URL) and [five-minute vegan snacks](FIVE-MINUTE SNACKS URL). If you're also planning the evening meal, here are some plant-based dinner ideas.

    [VERIFY: add affiliate disclosure wording per site policy, since the dinner link is an affiliate link.]

  • Daily Routine to Curb Chewing: Balancing Walks, Play, and Training

    Daily Routine to Curb Chewing: Balancing Walks, Play, and Training

    This article contains affiliate links. We may earn a commission if you buy through them, at no extra cost to you.

    Daily Routine to Curb Chewing: Balancing Walks, Play, and Training

    Direct answer: A dog daily routine to reduce chewing usually combines four things: physical exercise, sniffing time, short training sessions, and plenty of rest, plus appropriate chew items. Chewing is normal dog behavior and can stem from teething, boredom, excess energy, stress, or lack of guidance. A predictable routine can help meet these needs, but results vary by your dog's age, breed, history, and health, so treat the schedules below as adjustable templates.

    Why Routine Can Help With Chewing

    Common reasons dogs chew

    Dogs explore with their mouths. Typical drivers include:

    • Teething: Puppies chew to relieve gum discomfort.
    • Boredom or under-stimulation: A dog with nothing to do will invent a job.
    • Anxiety or stress: Chewing can be a way to self-soothe.
    • Curiosity: New textures and smells are interesting.
    • Habit: If shoe-chewing worked out well once, it may happen again.

    What a routine does and doesn't do

    A routine meets your dog's needs on a predictable schedule and reduces the number of moments when chewing the wrong thing is possible. It won't guarantee that your dog never chews a table leg again. Think of it as one tool alongside management, training, and patience.

    When to check with a vet or behavior professional

    Reach out for help if chewing starts suddenly, your dog swallows non-food items, you see signs of distress (drooling, panting, pacing, injured gums or teeth), or the chewing happens mainly when you leave and looks panicked. These can point to medical or anxiety issues that a schedule alone can't solve.

    The Four Building Blocks of a Chew-Friendly Day

    Physical exercise

    Walks, fetch, tug, and play burn energy. Adjust for age, breed, and fitness. A young retriever and a senior bulldog need very different amounts, and your vet can help you calibrate.

    Sniffing time

    Sniffing is mentally tiring in a useful way. Try slow "decompression" walks where your dog sets the pace, scatter feeding part of a meal in the grass or on a mat, or play simple hide-and-find games.

    Short training sessions

    A few minutes at a time works well. Useful skills for chewers include "leave it," "drop it," settling on a mat, and trading an item for a chew or treat.

    Rest and downtime

    Naps in a crate, pen, or quiet area matter more than many owners expect. Puppies in particular need a lot of sleep, and an overtired dog can get wound up and mouthy.

    Appropriate chew outlets

    Offer durable chews and food-stuffed toys suited to your dog's size and chew style, and supervise, especially with new items. Rotate them so they stay interesting.

    Where Short Brain-Training Sessions Fit

    Brain work doesn't need a big time block. Slot it in at these points:

    • Early morning, before work begins or before the dog is left.
    • Midday break: a 2–5 minute session.
    • Before an enforced rest period, to help settle the mind.
    • Evening, as a wind-down activity.

    Easy examples include name recognition, hand targeting, "find it" scent games, puzzle feeders, and teaching the names of toys. If you'd like a structured set of games to draw from, you could look at a program such as Brain Training for Dogs as one option among many.

    Tip: Keep sessions brief and end on a success, even if that means asking for something easy at the finish.

    Sample Daily Schedule: Work-From-Home Household

    Template (times are flexible)

    Time of day Activity
    Morning Potty, sniff-focused walk, breakfast in a puzzle feeder
    Mid-morning 3–5 minute training burst, then rest in a designated spot
    Midday Play session, chew time, nap
    Afternoon Another short brain game and potty break
    Evening Walk or play, dinner, calm chew, wind-down

    Tips for WFH pitfalls

    • Avoid constant attention. A dog who gets nonstop interaction may struggle to settle on their own.
    • Practice settling even when you're home. Use a mat, pen, or crate for planned rest periods.
    • Rotate toys. Offer a few at a time and swap them out.
    • Manage access to tempting items. Keep shoes, laundry, and remotes out of reach, and use gates or closed doors.

    Sample Daily Schedule: Away-All-Day Household

    Template (times are flexible)

    Time of day Activity
    Before work Potty, brisk walk or play, short training or sniff game, food toy
    During the day Safe confinement area; midday dog walker, sitter, neighbor, or daycare if feasible
    After work Potty, decompression walk, play, training
    Evening Dinner, chew time, calm rest

    Safety and setup notes

    • Dog-proof the space. Remove cords, shoes, and anything swallowable.
    • Leave only chew items you've already seen your dog handle safely.
    • Don't leave items that could be hazardous when unsupervised.
    • Consider age-appropriate limits on alone time. Young puppies can't wait as long between potty breaks or manage long stretches alone.

    When long absences are a problem

    Puppies and anxious dogs may struggle with long hours alone. If chewing is intense or looks panic-driven, explore breaks during the day, such as a walker or daycare, and talk with a vet or qualified behavior professional about support.

    Adjusting the Routine by Life Stage and Energy Level

    Puppies

    Expect frequent naps, very short sessions, more potty breaks, and teething support through appropriate chews. Their days are mostly sleep punctuated by brief bursts of activity.

    Adolescents

    Adolescent dogs often have high energy and test boundaries. Consistency matters most here: the same rules, the same cues, and a steady schedule. Mix exercise with mental work so you don't just build a fitter, more energetic dog.

    Adult and senior dogs

    Consider health and mobility. Older dogs may prefer shorter, gentler walks, with more emphasis on sniffing and mental enrichment. A sudden change in chewing in an adult or senior dog is worth a vet visit.

    Practical Steps to Build Your Own Routine

    1. Note when and what your dog chews. Track patterns for a week. 2. Pick consistent anchor times for meals, walks, and rest. 3. Add one sniffing activity and one short training session daily. 4. Provide approved chews and rotate them. 5. Manage the environment. Put away shoes, close doors, and use gates or pens. 6. Redirect and reward chewing on appropriate items rather than only scolding. 7. Schedule rest, since overtired dogs may chew more. 8. Review after 1–2 weeks and tweak.

    Quick daily checklist

    • [ ] Physical exercise suited to my dog
    • [ ] At least one sniffing activity
    • [ ] One or more short training sessions
    • [ ] Planned rest periods
    • [ ] Approved chews available and rotated
    • [ ] Tempting items put away

    Common Mistakes to Avoid

    • Relying only on more exercise. It can lead to an overly amped dog who needs even more to settle.
    • Skipping rest. Tired, overstimulated dogs often get mouthier.
    • Inconsistent rules. If socks are sometimes allowed, your dog can't know better.
    • Punishing after the fact. Dogs rarely connect a scolding to something chewed earlier, and it can add stress.
    • Unsupervised access to risky chews or items. Choose chews carefully and supervise.

    FAQs

    1. How much exercise does my dog need to stop chewing? It varies by age, breed, and health. Focus on a mix of activity, sniffing, mental work, and rest rather than exercise alone, and ask your vet for individual guidance.

    2. Can I leave my dog alone all day and still reduce chewing? Chewing may improve with structure, a safe setup, and breaks, but long absences are hard for some dogs. Consider midday help, and consult a professional if problems persist.

    3. How long should training sessions be for a chewing-prone dog? Short sessions of a few minutes, a few times per day, are generally easier to maintain. Adjust to your dog's focus and stop while they're still engaged.

    Conclusion: Key Takeaways and Next Steps

    A dog daily routine to reduce chewing is a flexible framework, not a guaranteed fix. Start with one of the templates above, watch how your dog responds, and adjust.

    Key takeaways:

    • Routines are flexible tools, not guarantees.
    • Combine exercise, sniffing, brief training, rest, and proper chews.
    • Place short brain-training sessions at natural transition points in the day.
    • Seek professional help for persistent, intense, or anxiety-driven chewing.

    For next steps, track your dog's chewing for a week, pick your anchor times, and review after two weeks. If you want additional brain-game ideas, Brain Training for Dogs is one resource you could explore alongside your vet's or trainer's advice.

  • Crate Training a Dog Who Chews: How to Make It a Safe Space, Not a Punishment

    Crate Training a Dog Who Chews: How to Make It a Safe Space, Not a Punishment

    This article contains affiliate links. We may earn a commission if you buy through them, at no extra cost to you.

    Crate Training a Dog Who Chews: How to Make It a Safe Space, Not a Punishment

    Chewing is normal dog behavior, and a crate can help manage it when you can't supervise your dog. This guide covers sizing, setup, pacing, common mistakes, and the situations where you should skip the crate.

    Quick Answer: Can You Crate Train a Dog That Chews?

    Yes. Introduce the crate gradually and pair it with positive experiences like food, calm rest, and safe chews, so it becomes a comfortable place to settle. The crate manages chewing by limiting access to forbidden items such as shoes, cords, and furniture. It doesn't teach your dog what is okay to chew, so you'll still need appropriate chew outlets and supervision.

    A crate is a management tool. It is not a cure for chewing, and it should never be a punishment.

    Key takeaways

    • Go slowly and let your dog's comfort set the pace.
    • Make the crate a place where good things happen.
    • Provide safe, size-appropriate chews, and supervise new ones.
    • Never use the crate when you're angry.
    • Some dogs shouldn't be crated, and that's okay.

    Before You Start

    Why Dogs Chew

    Dogs chew for several common reasons: teething, boredom, excess energy, stress, and plain curiosity. If chewing is persistent, suddenly worse, or very destructive, have a veterinarian or qualified trainer check for medical or behavioral causes.

    Choosing the Right Crate Size

    Your dog should be able to stand up, turn around, and lie down comfortably.

    • Growing puppies: Use a crate with a divider, or plan to size up as your puppy grows.
    • Too large: The crate loses its cozy, den-like feel.
    • Too small: The dog will be uncomfortable, which works against everything else you're doing.

    Crate Types

    Crates come in wire, plastic, and soft-sided versions. For strong chewers, avoid soft-sided crates. They can be chewed through, and pieces of fabric or mesh can be swallowed. Check any crate regularly for damage, sharp edges, or weakened spots.

    What to Put Inside the Crate

    What goes in the crate matters as much as the crate itself.

    • Bedding or a mat: Use it only if your dog doesn't shred or swallow fabric. If it gets chewed up, remove it.
    • Chews: Offer size-appropriate, durable chew toys or food-stuffed toys recommended for your dog's size and chewing style.
    • Safety first: Avoid anything that could break into pieces or cause choking. Supervise the first few times you try a new chew.
    • Collars: Skip collars with dangling tags, and remove anything that could snag on the crate.
    Item Include? Notes
    Thin mat or bed Maybe Only if your dog doesn't shred or swallow fabric
    Durable chew toy Yes Match it to your dog's size and chewing style
    Food-stuffed toy Yes Good for early, positive sessions
    Dangling tags or loose accessories No Snag risk
    Brittle or splintering items No Choking and breakage risk

    Step-by-Step: Introducing the Crate

    Step 1: Make It Inviting

    Place the crate in a family area where your dog already spends time. Leave the door open and toss treats or part of a meal near it and inside. Let your dog explore without any pressure.

    Step 2: Feed Meals in the Crate

    Start with the bowl near the door. Over several meals, move it farther inside. Your dog should walk in willingly, without hesitation.

    Step 3: Add Short Door-Closed Sessions

    Once your dog is comfortable going in, close the door briefly while they enjoy a chew or stuffed toy. Open it before any sign of distress. For example, you might close the door for a minute or two while your dog works on a stuffed toy, then open it calmly and let them out.

    Step 4: Build Duration Gradually

    Extend the time slowly. Stay nearby at first, then step out of sight for a moment, then leave the room briefly. If your dog stays relaxed, add a little more time. If not, shorten it.

    Step 5: Practice Short Absences

    Add brief departures only after your dog is relaxed with you out of sight. Start with a quick trip to another part of the house, then work up to short errands as your dog shows they're comfortable.

    Step 6: Keep Routines Predictable

    Before crating, provide exercise and a bathroom break. When you let your dog out, keep the release calm, with no big excitement. Predictable routines help your dog understand that crate time is ordinary and safe.

    Pacing Tips

    • Follow your dog, not a calendar. A fixed schedule matters less than how your dog responds.
    • Back up when needed. If your dog whines or panics, return to an easier step.
    • Keep early expectations modest. Puppies in particular need frequent breaks.
    • Balance the day. Crate time should sit alongside exercise, play, and training.

    Quick checklist before each crate session

    • [ ] Exercise and bathroom break done
    • [ ] Safe chew or stuffed toy ready
    • [ ] Collar tags and snag hazards removed
    • [ ] Session length matches your dog's current comfort level
    • [ ] Calm tone for entry and release

    Common Mistakes to Avoid

    Using the Crate as Punishment

    Sending your dog to the crate when you're angry creates a negative association. If your dog finds a shoe, calmly trade or redirect, and save the crate for planned, positive rest.

    Leaving the Dog Crated Too Long

    A crate doesn't replace exercise, companionship, or bathroom breaks. Long stretches of confinement can undermine both your dog's comfort and your training.

    Moving Too Fast

    Long confinement before your dog is comfortable can create stress. Skipping steps often means going back to the beginning.

    Skipping Chew Alternatives

    Crating without outlets for chewing means your dog won't learn what is acceptable. Pair crate time with appropriate chews and, when you're home, supervised practice with them.

    Making Big Departures or Reunions

    Dramatic goodbyes and excited greetings can build anxiety. Keep both low-key.

    Ignoring Signs of Distress

    Heavy panting, drooling, frantic escape attempts, or any injury are signals to stop and reassess. Don't push through them.

    When a Crate Is Not the Right Tool

    A crate isn't right for every dog or every situation:

    • Separation anxiety or confinement panic: These dogs may injure themselves trying to escape.
    • Medical issues: Some dogs can't be crated safely. Follow your veterinarian's advice.
    • Long hours alone: A crate isn't a good solution for extended absences. Consider a dog-proofed room, an exercise pen, a sitter, or daycare.
    • Ongoing distress: If your dog stays distressed despite gradual training, consult a veterinarian or qualified trainer or behavior professional.

    Optional Support: Structured Training Programs

    If you'd like step-by-step guidance, a structured training program or a certified trainer can help you build a plan around your dog's needs. Some owners find programs such as Brain Training for Dogs useful as one option to explore. Results vary by dog and owner, so compare options and choose what fits your situation.

    FAQ

    How long does it take to crate train a dog that chews?

    It varies with your dog's age, temperament, and history. Progress depends on gradual steps and consistency, so let your dog's comfort guide the timeline.

    What should I do if my dog chews or destroys things in the crate?

    Check for stress or boredom, increase exercise, and reassess the bedding and toys. Offer safe chews and remove any hazardous items. If you see panic or self-injury, seek professional help.

    Should I crate my dog when I'm not home?

    It can be appropriate for dogs who are comfortable in the crate, for reasonable durations. It isn't suitable for dogs who panic, and it's not a substitute for care, exercise, and bathroom breaks.

    Conclusion

    Crate training a dog that chews works best when you go slowly, keep experiences positive, and provide safe chews. Avoid using the crate as punishment, and watch your dog for signs of stress. If the crate isn't working for your dog, try another approach, such as a dog-proofed room or an exercise pen, or ask a veterinarian or qualified trainer for guidance. The goal is a dog who rests easily in the crate and learns what is okay to chew.

  • 15 Plant-Based Breakfast Ideas for Busy Mornings

    15 Plant-Based Breakfast Ideas for Busy Mornings

    This article contains affiliate links. We may earn a commission if you buy through them, at no extra cost to you.

    15 Plant-Based Breakfast Ideas for Busy Mornings

    Meta description: Try 15 quick plant based breakfast ideas, grouped by prep time: 5-minute, make-ahead and weekend. Includes simple methods and why each works.

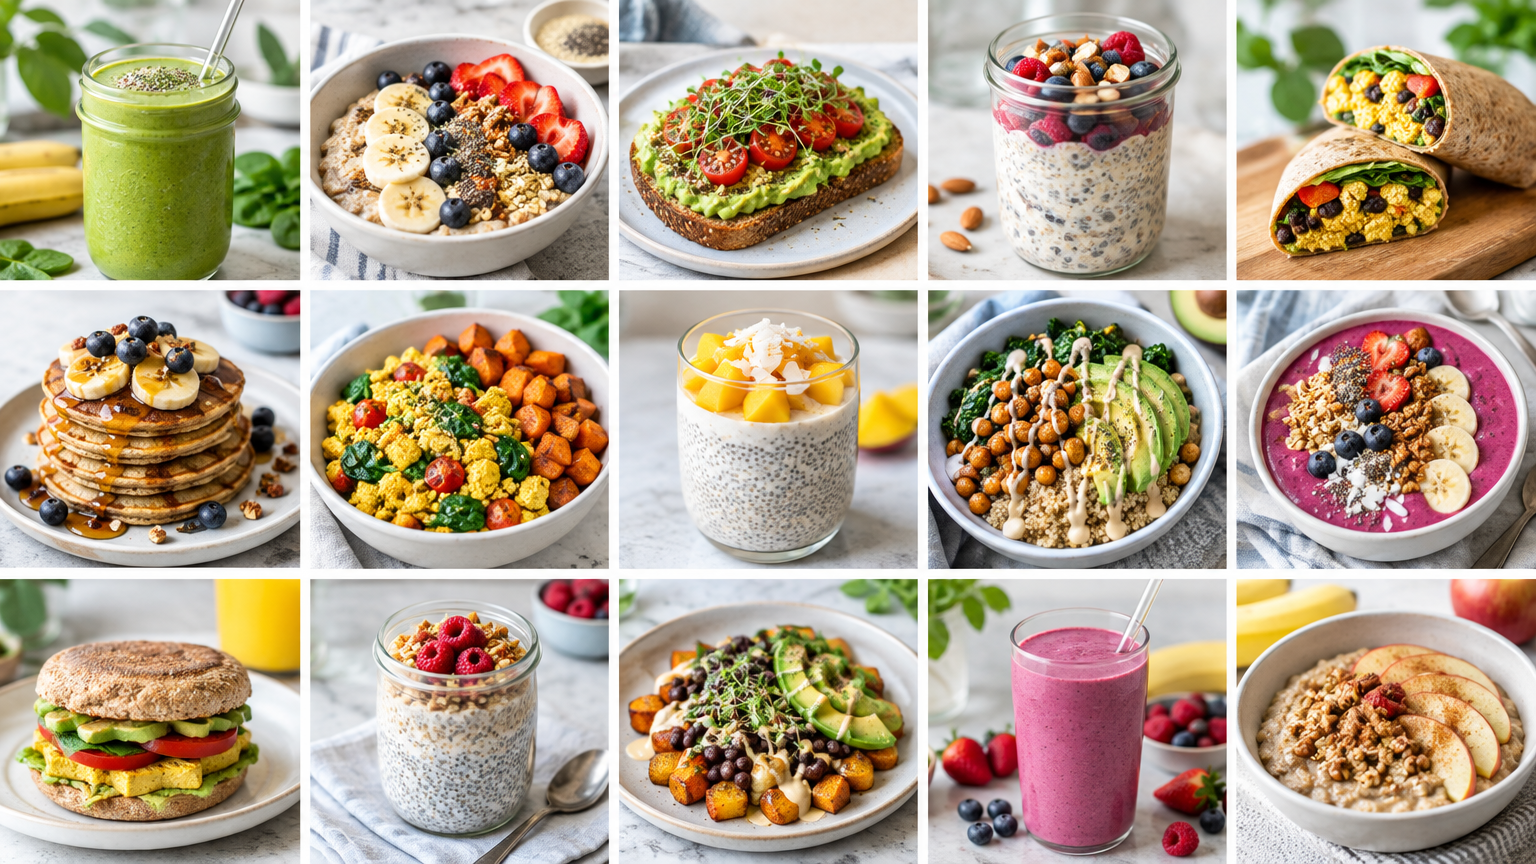
    Busy mornings call for breakfasts that are fast, filling and need almost no thought. These plant based breakfast ideas are grouped by prep time: 5-minute options, make-ahead recipes and weekend projects that set up the week. Each comes with a short method and a reason it suits a packed schedule.

    The Quick Answer: Best Plant-Based Breakfasts for Busy Mornings

    The easiest plant based breakfast ideas fall into three groups. Choose 5-minute options like smoothies and savory toast on rushed days. Choose make-ahead options like overnight oats, chia pudding and freezer burritos for grab-and-go mornings. Save weekend recipes for batch cooking.

    Top pick per group:

    • 5-minute: Green smoothie
    • Make-ahead: Overnight oats
    • Weekend: Tofu scramble (leftovers work in burritos and on toast)

    Key takeaways

    • Match the breakfast to your morning: assemble on rushed days, grab-and-go on routine days, cook on weekends.
    • Build in a protein and fiber source, such as oats, beans, tofu, nut butter or seeds.
    • Cook once on the weekend and reuse the results all week.

    How to Choose a Plant-Based Breakfast That Works for You

    Use this checklist before you commit to a recipe:

    • Prep time: Do you have 5 minutes, or can you prep the night before?
    • Portability: Will you eat at a desk, in the car or on a train? Jars, wraps and cups travel well.
    • Protein or fiber source: Look for oats, beans, tofu, nut butter, soy yogurt or seeds.
    • Prep-ahead potential: Can it be made in a batch, refrigerated or frozen?
    Group Typical effort Best for
    5-minute Assembly or blending Rushed, unplanned mornings
    Make-ahead Prep the night before or on a weekend Grab-and-go routines
    Weekend 30+ minutes of cooking, in batches Stocking the fridge and freezer

    Note: This guide only describes general ingredient benefits and makes no specific nutrition claims. Check product labels for details.

    5-Minute Plant-Based Breakfasts

    1. Green Smoothie

    Method: Blend a handful of spinach, a banana, a splash of plant milk and a spoonful of nut butter until smooth. Why it works: It uses one blender and is drinkable on the go.

    2. Peanut Butter Banana Toast

    Method: Toast bread, spread on peanut butter, top with sliced banana and sprinkle with seeds. Why it works: It needs no cooking and relies on pantry staples.

    3. Avocado Toast with Lemon and Chili Flakes

    Method: Mash avocado with a squeeze of lemon and a pinch of salt. Spread it on toast and finish with chili flakes. Why it works: It's fast and easy to customize with whatever toppings you have.

    4. Smashed White Bean and Tomato Toast

    Method: Mash canned white beans with olive oil and salt. Spread on toast and top with sliced tomato. Why it works: Beans add substance, so this savory toast keeps you full longer than a plain slice would.

    5. Coconut Yogurt Parfait

    Method: Layer unsweetened plant yogurt, fresh or frozen fruit and granola in a glass or jar. Why it works: It's assembly only, and you can pack it to go.

    Make-Ahead Plant-Based Breakfasts

    Make-ahead breakfasts are easier with a stack of matching containers. If you don't have any, reusable glass jars for overnight oats and chia pudding make portioning and carrying simple.

    6. Overnight Oats

    Method: Combine rolled oats and plant milk, plus chia seeds if you like. Refrigerate overnight and add toppings in the morning. Why it works: There's zero morning prep.

    7. Chia Pudding

    Method: Stir chia seeds into plant milk, then chill until thick. Stir once after a few minutes to prevent clumps. Why it works: It's hands-off and portions neatly into jars.

    8. Freezer Breakfast Burritos

    Method: Fill tortillas with tofu scramble or black beans, cooked potatoes and salsa. Wrap, freeze, then reheat as needed. Why it works: Each one is a complete meal you can eat with one hand.

    9. Baked Oatmeal Cups

    Method: Mix oats, mashed banana, plant milk and fruit. Spoon into a muffin tin and bake. Why it works: They're portable and reheat quickly.

    10. Freezer Smoothie Packs

    Method: Portion fruit and greens into freezer bags. In the morning, tip one into the blender with plant milk. Why it works: It skips the chopping and measuring on weekday mornings.

    Weekend Plant-Based Breakfasts (Cook Once, Eat Well)

    11. Tofu Scramble

    Method: Crumble firm tofu and sauté with vegetables and spices until heated through and lightly golden. Why it works: Leftovers fill burritos or top toast during the week.

    12. Chickpea Flour Omelet

    Method: Whisk chickpea flour with water and seasoning into a batter. Cook it in a pan like a pancake and fill as desired. Why it works: It's an egg-free savory option that cooks in minutes once you have the batter.

    13. Fluffy Vegan Pancakes

    Method: Make a batch with your preferred recipe, then freeze the extras in a single layer before bagging. Why it works: Weekday reheating takes minutes.

    14. Sheet-Pan Breakfast Hash

    Method: Toss potatoes, peppers and chickpeas with oil and spices. Roast on a sheet pan until crisp at the edges. Why it works: It's mostly hands-off and makes several servings.

    15. Homemade Granola

    Method: Mix oats, nuts and seeds with a little sweetener and oil, then bake until golden. Cool completely before storing. Why it works: One batch covers many parfaits and bowls.

    How to Plan a Week of Plant-Based Breakfasts (Practical Steps)

    1. Pick one item from each group. For example, a smoothie, overnight oats and a tofu scramble. 2. Shop for shared ingredients. Oats, plant milk, bananas, beans, tortillas and nut butter cover most of this list. 3. Prep on the weekend. Make granola, scramble, burritos and jars in one session. 4. Set up grab-and-go spots. Keep jars at eye level in the fridge and burritos or smoothie packs in one freezer zone. 5. Keep two 5-minute backups. Peanut butter banana toast and a smoothie work well for chaotic days.

    If you'd like a printable layout, a weekly plant-based breakfast planner can help you map these steps to your calendar.

    Tips for Making Plant-Based Breakfasts More Filling

    • Add a protein source: tofu, beans, soy yogurt, nut butter or seeds.
    • Add fiber: oats, fruit, vegetables and chia all contribute.
    • Season savory options well: salt, acid, spice and herbs make beans and tofu taste like a real meal.
    • Check labels: if you want to limit added sugar, read the labels on plant milks and yogurts.

    FAQs

    What are easy plant based breakfast ideas with no cooking?

    Overnight oats, chia pudding, parfaits, smoothies and toast with toppings all need no stove or oven.

    How can I get enough protein at a plant-based breakfast?

    Include foods like tofu, beans, soy-based yogurt, nut butter or seeds. Check product labels for specifics.

    Which plant-based breakfasts can I make ahead and store?

    Overnight oats, chia pudding, baked oatmeal cups and burritos all work. Follow standard food-safety storage guidance and freeze extras.

    Conclusion

    Plant based breakfast ideas get easier when you sort them by time: 5-minute assemblies for rushed days, make-ahead jars and freezer items for routine mornings, and weekend cooking to stock the week. Start with one recipe from each group and adjust based on what you actually eat. Save this list so you can come back to it when you plan next week's groceries.

  • Easy Plant-Based Soups and Stews for Beginners: Cheap Dinners That Make Leftovers

    Easy Plant-Based Soups and Stews for Beginners: Cheap Dinners That Make Leftovers

    This article contains affiliate links. We may earn a commission if you buy through them, at no extra cost to you.

    Easy Plant-Based Soups and Stews for Beginners: Cheap Dinners That Make Leftovers

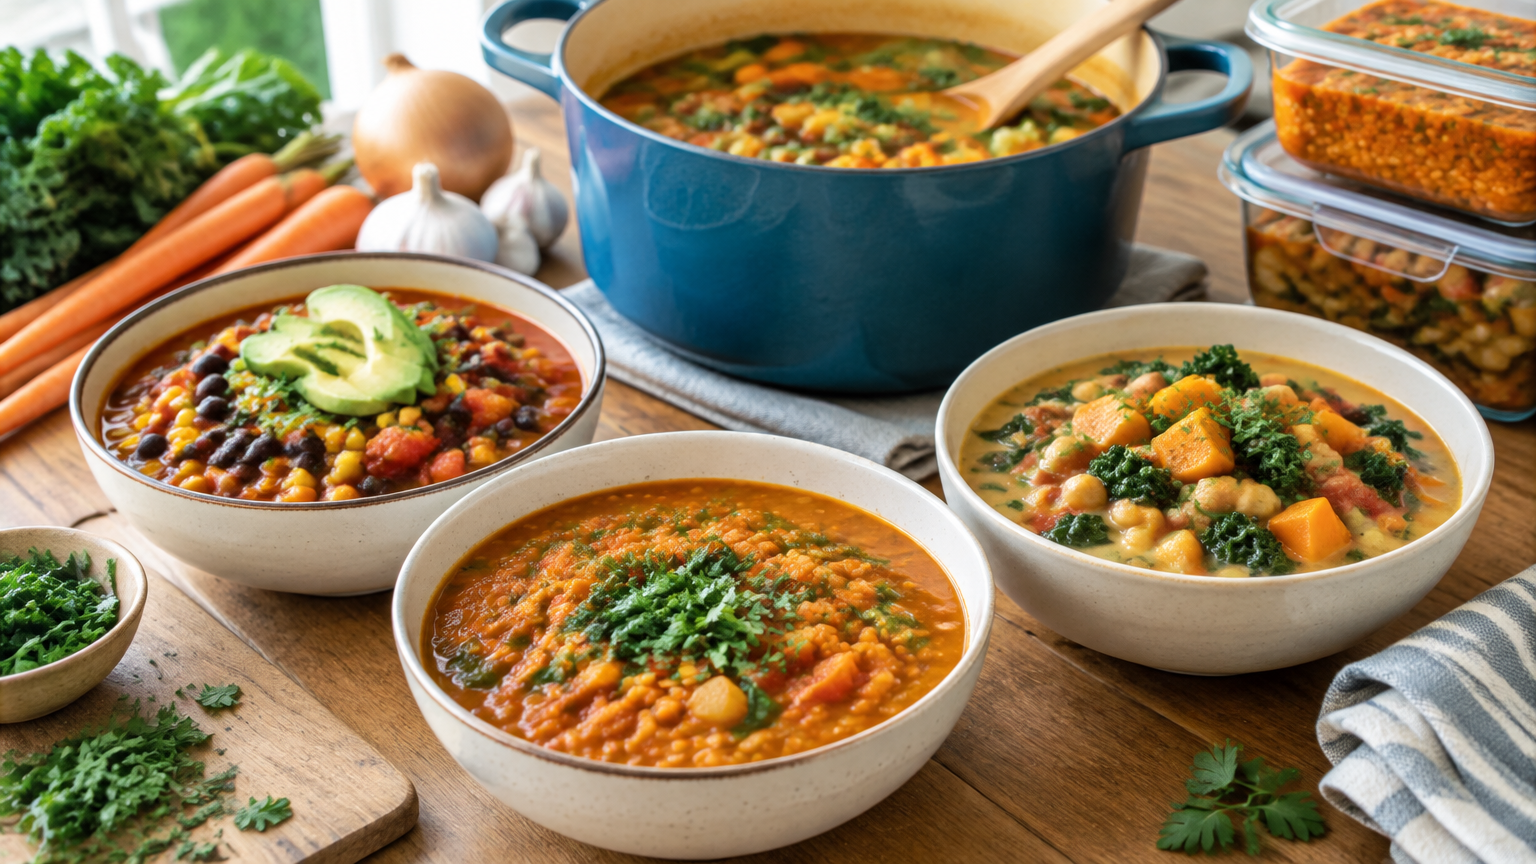
    The short answer: The easiest plant-based soups follow one pattern. Soften aromatics in a little oil, add broth or water plus legumes or vegetables, simmer until tender, then adjust the seasoning. Pantry staples like onions, canned or dried beans, lentils, frozen vegetables, and canned tomatoes keep costs low, and one pot is all you need. Most batches make several servings, so they work well for leftovers.

    If you're looking for easy plant based soup recipes for beginners, this guide covers a repeatable base method, five simple ideas, ways to fix common seasoning problems, and how to store and reuse what you don't eat. For more starting points, see these beginner-friendly plant-based dinner ideas.

    —

    Why Soups and Stews Work for Beginners on a Budget

    Soup is one of the more forgiving places to start cooking. A few reasons it works well:

    • Low-cost staples. Dried or canned beans, lentils, potatoes, carrots, cabbage, rice, oats, canned tomatoes, and frozen vegetables can all anchor a pot of soup.
    • Minimal equipment. You need one pot with a lid, a knife, a cutting board, and a spoon. A blender or potato masher is optional, not required.
    • Forgiving technique. Substitutions are easy, and timing is flexible. If the carrots cook five minutes longer than planned, dinner is usually fine.
    • Built-in leftovers. Soups are often easier to reheat than many other dishes, and the flavors often taste more developed the next day.

    —

    The Base-Building Method (Master Formula)

    Once you learn this five-step pattern, you can make dozens of variations without a written recipe.

    Step 1: Build the Aromatics

    Start with onion, garlic, celery, and carrot. Use whatever you have; an onion alone is enough to begin.

    • Chop the vegetables into fairly even pieces so they cook at the same pace.
    • Cook them in a small amount of oil, or a splash of water, over medium heat until softened.
    • Optional: stir in tomato paste or ground spices and cook for a minute or so. This brief cooking deepens the flavor before the liquid goes in.

    Step 2: Add Liquid

    You have a few options:

    • Store-bought broth
    • Bouillon or paste dissolved in water
    • Plain water with extra seasoning

    Check labels to confirm the broth or bouillon is plant-based, since some contain animal-derived ingredients. Bouillon and broth can also be quite salty, so hold back on added salt until you've tasted the soup.

    Step 3: Add Legumes or Vegetables

    • Canned beans: drain and rinse them. They're the fastest route to a filling soup.
    • Lentils: these cook relatively quickly and make a good starting point for beginners.
    • Dried beans: these cost less per serving but take longer. Follow the package directions for soaking and cooking times.
    • Vegetables: hearty ones such as potatoes, carrots, and squash go in early. Leafy greens and frozen peas go in near the end so they don't turn dull and mushy.

    Step 4: Simmer

    Bring the pot to a boil, then reduce the heat to a gentle simmer. Cover it partly or fully, and cook until everything is tender. If the soup gets too thick, add water.

    Step 5: Finish and Taste

    Taste before serving. Adjust salt, acid, and heat as needed (see the seasoning section below). This final step often separates a bland soup from a satisfying one.

    —

    Five Simple Soup and Stew Ideas

    Each idea uses the master formula, so the method stays the same while the ingredients change.

    1. Red Lentil Soup

    • Key ingredients: onion, garlic, red lentils, carrot, cumin, broth
    • Quick method: Soften the onion, garlic, and carrot. Stir in the cumin for a moment, add rinsed lentils and broth, and simmer until the lentils are soft and starting to break down.
    • Cost-saving tip: Lentils need no soaking. For a creamier texture, blend part of the soup, either with a blender or by mashing it in the pot.

    2. White Bean and Vegetable Soup

    • Key ingredients: canned white beans, celery, carrot, canned tomatoes, dried Italian herbs, greens
    • Quick method: Cook the celery and carrot, add the tomatoes, herbs, beans, and broth, and simmer. Stir in the greens at the end until wilted.
    • Cost-saving tip: Use frozen greens or whatever vegetables are on hand. This is a good "clean out the fridge" soup.

    3. Black Bean Soup

    • Key ingredients: black beans, onion, garlic, cumin, chili powder, lime
    • Quick method: Cook the onion and garlic with the cumin and chili powder. Add beans and liquid, simmer, then finish with lime juice.
    • Cost-saving tip: Mash some of the beans against the side of the pot to thicken the soup without extra ingredients.

    4. Potato and Cabbage Stew

    • Key ingredients: potatoes, cabbage, onion, paprika, broth
    • Quick method: Soften the onion with the paprika, add cubed potatoes and broth, and simmer until the potatoes are nearly tender. Add chopped cabbage and cook until soft.
    • Cost-saving tip: Cabbage and potatoes are typically inexpensive and stretch far, which makes this a good option for feeding several people.

    5. Chickpea and Tomato Stew

    • Key ingredients: chickpeas, canned tomatoes, onion, garlic, spices, spinach
    • Quick method: Cook the onion and garlic with your chosen spices, add the tomatoes and drained chickpeas, and simmer until the flavors come together. Stir in spinach at the end.
    • Cost-saving tip: Serve it over rice, bread, or potatoes to stretch the servings.

    —

    Seasoning Adjustments

    Seasoning is where many beginners feel unsure. This quick reference covers the most common problems.

    Fixing Common Problems

    Problem Try this
    Tastes flat Add salt gradually, then a splash of acid (lemon juice or vinegar)
    Too salty Add water or unsalted broth, or add more vegetables or potatoes
    Too acidic (tomato-based) Add a pinch of sugar or more cooked vegetables
    Too thin Simmer uncovered, or mash some beans or potatoes
    Too thick Add water or broth
    Lacking depth Add tomato paste, soy sauce, herbs, or spices

    Seasoning Tips

    • Season in layers. Add some seasoning at the start, then make final adjustments at the end. Seasoning only at the end can leave the flavor sitting on the surface.
    • Add salt in small amounts. It's easy to add more and hard to remove it.
    • Taste again after reheating. Leftovers may need a refresh, whether that's a bit more salt, acid, or spice.

    —

    Storage and Leftover Tips

    A pot of soup often makes more than one meal, so a little storage know-how pays off.

    Cooling and Refrigerating

    • Cool the soup promptly rather than leaving it out for long stretches.
    • Store it in covered, shallow containers, which help it cool faster than one deep container.
    • For how long leftovers keep, follow current food safety guidance from sources such as the USDA rather than relying on rules of thumb.

    Freezing

    • Use freezer-safe containers and leave room at the top for expansion.
    • Label each container with the name and date.
    • Potatoes and some other vegetables may change texture after freezing, so soups built on beans, lentils, and tomatoes are often easier to freeze than potato-heavy stews.
    • Freezing in portion-sized containers makes it easy to thaw only what you need. If you plan to batch-cook often, a set of reusable storage containers can be a practical addition.

    Reheating

    • Reheat until steaming hot. Add water or broth to loosen soup that has thickened in storage.
    • Refresh the flavor with lemon juice, fresh herbs, or black pepper.

    Turning Leftovers into New Meals

    • Serve soup over rice or pasta.
    • Use a thick stew as a baked potato topping.
    • Thicken leftover bean soup into a spread or filling.
    • Add extra vegetables or a handful of greens to stretch a small portion into a full meal.

    —

    Budget and Equipment Checklist

    Pantry basics

    • [ ] Oil
    • [ ] Onions and garlic
    • [ ] Salt and pepper
    • [ ] Dried herbs
    • [ ] Cumin and paprika
    • [ ] Bouillon (confirm it's plant-based)

    Shopping tips

    • Buy dried legumes, frozen vegetables, and store brands when possible.
    • Use seasonal produce.
    • Build meals around ingredients you already have before buying new ones.

    Equipment

    • [ ] One pot with a lid
    • [ ] Knife and cutting board
    • [ ] Spoon
    • [ ] Can opener
    • [ ] Optional: blender or potato masher

    —

    FAQ

    1. Can I make plant-based soup without store-bought broth?

    Yes. Use water and build flavor with well-cooked aromatics, herbs, spices, tomato paste, or a splash of soy sauce. Season carefully and taste as you go, since water adds no flavor of its own.

    2. Do I need to soak dried beans first?

    Not always. Soaking can shorten cooking time, and lentils generally do not need it. Follow the package instructions, and use canned beans if you want the easiest option.

    3. How do I make soup more filling without meat?

    Add beans, lentils, potatoes, rice, pasta, or oats, and serve with bread or a grain. Blending part of the soup can also add body.

    —

    Key Takeaways and Next Step

    • Remember the formula: aromatics, liquid, legumes or vegetables, simmer, adjust.
    • Start with one recipe, then swap ingredients based on what you have.
    • Season in layers, and taste again after reheating.
    • Cook once, store properly, and enjoy leftovers throughout the week.

    For your first pot, pick the recipe whose ingredients you mostly have already. Red lentil soup or black bean soup are straightforward choices, and once the pattern feels familiar, the other ideas follow the same steps.

  • Best Plant-Based Cookbooks for Beginners on a Budget: What to Look for Before You Buy

    Best Plant-Based Cookbooks for Beginners on a Budget: What to Look for Before You Buy

    This article contains affiliate links. We may earn a commission if you buy through them, at no extra cost to you.

    Best Plant-Based Cookbooks for Beginners on a Budget: What to Look for Before You Buy

    Title tag: Best Plant-Based Cookbooks for Beginners on a Budget: Buyer's Guide Meta description: Learn how to choose the best plant based cookbooks for beginners on a budget. Compare cookbook types, evaluation criteria, and a quick preview checklist before you buy.

    New plant-based cooks often buy a cookbook with long ingredient lists, unfamiliar items, or complicated techniques, then cook from it once or twice. That is an expensive way to learn what doesn't work for you. This guide gives you a simple framework to judge any cookbook before you spend money. It uses criteria, not rankings, so you can evaluate any title yourself, whether you're holding it in a store or reading a preview online.

    Disclosure: Some links in this article may be affiliate links. They don't change the criteria below.

    —

    Quick Answer: What Makes a Plant-Based Cookbook Good for Beginners?

    The best plant based cookbooks for beginners use ingredients you can find at a regular grocery store, keep recipes short, and build on pantry staples. They also offer realistic weeknight timing and give clear step-by-step instructions. Budget-friendly options reuse ingredients across recipes to reduce waste.

    Key takeaways: the five criteria

    • Ingredient accessibility: most items are available at a standard supermarket.
    • Recipe length: short ingredient lists and few steps.
    • Pantry-based cooking: recipes rely on repeatable staples.
    • Weeknight timing: stated times that seem realistic for your skill level.
    • Clear instructions: plain language, numbered steps, and visual cues.

    —

    How to Evaluate a Beginner Plant-Based Cookbook

    1. Ingredient Accessibility

    A cookbook is only useful if you can buy what it calls for. Flip through and note whether most recipes rely on common produce, beans, grains, canned goods, and frozen items such as vegetables and fruit.

    Watch for specialty items that appear in many recipes: specific flours, fermented products, niche meat or dairy substitutes, or unusual spice blends. One or two in a book is manageable. If nearly every recipe needs one, your grocery bill and your number of store trips will climb.

    Also look for substitution notes. A book that says "use any canned bean" or "swap spinach for kale" teaches flexibility and helps you cook with what you already have.

    2. Recipe Length

    Short ingredient lists and few steps are easier for new cooks. Check whether recipes fit on one page or span several. A recipe that sprawls across multiple pages often has more components to manage at once, which is stressful when you're still learning.

    Pay attention to sub-recipes. If a dinner requires a homemade sauce, a homemade "cheese," and a separate topping before you can assemble the main dish, the real time and effort are much higher than the title suggests. A few such recipes are fine for weekend projects. A book full of them is not beginner-friendly.

    3. Pantry-Based Cooking

    Pantry-based cooking is one of the biggest levers for budget-conscious cooks. Look for a pantry-stocking guide or starter shopping list near the front of the book. Then check whether recipes reuse the same staples, such as lentils, rice, oats, canned tomatoes, and a core set of spices.

    Reuse matters because it reduces waste. If a recipe calls for a small amount of an ingredient you'll never use again, you've paid for a full package to use a spoonful. Favor books that explain storage and leftovers, such as how long cooked grains keep or how to freeze a batch of soup.

    If you're still building your foundation, this introduction to plant-based cooking basics can help you decide which staples to stock first.

    4. Weeknight Timing

    Look for stated prep and cook times, then judge whether they seem realistic for you. A recipe listing "15 minutes" may assume fast knife skills and pre-chopped vegetables. As a beginner, you may want to mentally add some buffer.

    Check for one-pot, sheet-pan, or batch-cooking options, which reduce both active time and cleanup. Meal-prep or make-ahead guidance is also a good sign, since it helps you plan around a busy schedule instead of cooking from scratch every night.

    5. Clear Instructions

    Good instructions are the difference between a confident first attempt and a frustrating one. Look for:

    • Numbered steps written in plain language
    • Visual cues such as "until golden" or "until the onions are soft" instead of time alone
    • Explained techniques, such as how to cook dried beans or press tofu, and a glossary for unfamiliar terms
    • Both US and metric measurements, if you need them

    Photos are helpful but not essential. Test whether the text can stand alone: could you cook the recipe if the photo weren't there?

    —

    Cookbook Types to Consider

    Different books serve different goals. Matching the type to your situation is as important as judging an individual title.

    Beginner Basics and Foundations Books

    These teach techniques and core recipes, such as cooking grains, building a basic soup, and roasting vegetables. They're good for building skills you'll use for years.

    Budget and Pantry-Focused Books

    These emphasize inexpensive staples and minimal waste. They often include shopping lists and ways to reuse leftovers.

    Quick and Easy / Weeknight Books

    These prioritize short timelines and minimal equipment. They suit people who mostly need dinner on the table fast.

    One-Pot, Sheet-Pan, or Slow-Cooker Books

    These reduce cleanup and active time. Check equipment requirements first, since a slow cooker or large sheet pans may be an added cost.

    Meal-Prep and Batch-Cooking Books

    These are useful for planning and for saving money by cooking in bulk. Check that they give clear storage and reheating guidance.

    Cuisine-Specific Plant-Based Books

    Some culinary traditions are naturally plant-forward, such as those built around beans, lentils, and vegetables. These can be flavorful and economical, but verify that the key ingredients are available where you live.

    Quick Comparison

    Type Best for Watch out for
    Beginner basics Learning techniques Slower, project-style recipes
    Budget/pantry Saving money, reducing waste Repetitive flavors if you cook often
    Quick and easy Busy weeknights Reliance on pre-made products
    One-pot/sheet-pan/slow-cooker Less cleanup Required equipment
    Meal-prep/batch Planning ahead Storage space, unclear storage notes
    Cuisine-specific Flavor variety Local ingredient availability

    —

    Preview Checklist: What to Check Before You Buy

    Use this list with a "Look Inside" preview, a sample chapter, or a library copy.

    • [ ] Read the table of contents. Are recipes organized by meal, time, or ingredient? Which fits how you plan?
    • [ ] View 3–5 sample recipes from different sections, not just the showcase ones.
    • [ ] Count the ingredients in each sample recipe.
    • [ ] Highlight anything you can't find locally. If that's more than one item per recipe, consider another book.
    • [ ] Look for a pantry list or basics chapter.
    • [ ] Confirm prep and cook times are listed.
    • [ ] Read the instructions. Could you follow them without prior experience?
    • [ ] Look for substitutions, storage notes, and nutrition information if you need them.
    • [ ] Check the publication date and edition for updates. [VERIFY edition details at time of purchase.]
    • [ ] Read a range of reviews for comments on clarity and ingredient access, without relying on any single rating.

    Practical example: Say you preview three dinner recipes. The first has 8 ingredients, all from the produce aisle and canned goods. The second needs 14 ingredients, including two you've never seen in your store. The third has a homemade sauce as a separate recipe. Only the first is a clear fit. If the other two are typical of the book, keep looking.

    —

    How to Shop on a Budget

    • Borrow first. A library copy lets you cook a few recipes at no cost.
    • Consider used copies or e-book editions, which often cost less than new print.
    • Look for free sample chapters or publisher previews to check style and clarity.
    • Choose one focused book instead of several general ones. A single book that matches your goal beats a shelf of unused ones.
    • Test two or three recipes before buying more titles.

    —

    Practical Steps: Choose Your Cookbook in 15 Minutes

    1. Define your goal: weeknight meals, saving money, or learning basics. 2. Shortlist 2–3 books by type using the categories above. If dinners are your priority, you could browse plant-based dinner cookbooks to build a shortlist, then judge each one with the checklist rather than by its cover or title. 3. Preview sample recipes using the checklist. 4. Compare each book against the five criteria: ingredient accessibility, recipe length, pantry-based cooking, weeknight timing, and clear instructions. 5. Pick one and cook a few recipes before expanding your collection.

    —

    Red Flags to Avoid

    • Long ingredient lists in most sample recipes
    • Frequent specialty ingredients without alternatives
    • Missing times or vague directions
    • Heavy reliance on pre-made specialty products, which can raise costs and limit flexibility
    • Claims of guaranteed results, whether for health, weight loss, or savings, without support

    —

    FAQs

    What should a beginner look for in a plant-based cookbook?

    Look for short recipes, common ingredients, clear steps, realistic times, and pantry-friendly meals. A basics chapter or starter shopping list is a bonus.

    Are plant-based cookbooks cheaper to cook from?

    It depends on the recipes and ingredients you choose. Staples like beans, grains, and seasonal produce can be economical, but specialty products may raise costs. Check the ingredient lists in the sample recipes to estimate what you'd actually spend.

    Should I buy a print book or an e-book?

    Choose based on how you cook. Print is easy to reference in the kitchen, while e-books may cost less and are searchable. Preview either format first.

    —

    Conclusion

    Finding the best plant based cookbooks for beginners comes down to applying the same five criteria every time: accessible ingredients, short recipes, pantry-based cooking, realistic weeknight timing, and clear instructions. Combine those with the preview checklist and you can judge any book on its merits, without relying on hype or rankings.

    Next step: Build a shortlist of two or three books, run the checklist on each, and choose the one that fits your budget and schedule. Cook a few recipes before buying another. A cookbook only earns its price if you actually use it.