Author: latinino

  • Healthy Afternoon Snacks for Kids That Are Plant-Based and Lunchbox-Friendly

    Healthy Afternoon Snacks for Kids That Are Plant-Based and Lunchbox-Friendly

    This article contains affiliate links. We may earn a commission if you buy through them, at no extra cost to you.

    Healthy Afternoon Snacks for Kids That Are Plant-Based and Lunchbox-Friendly

    Meta description: Easy plant-based after-school snacks kids can help make, with allergy notes, nut-free swaps, and portion and prep tips for parents.

    The after-school hunger window is real: kids walk in the door ready to eat, and you want something simple, plant-based, and portable. This guide shares five healthy afternoon snacks for kids that they can help make, plus allergy guidance and practical prep tips.

    Key Takeaways

    • Pair a fruit or vegetable with something filling, like whole grains, seeds, beans, or seed butter.
    • Nuts, sesame, and soy turn up in many plant-based foods, so read labels every time.
    • Kids can do real jobs in each recipe, such as stirring, spreading, and decorating.
    • Batch-prep on the weekend and portion snacks ahead to make weekdays easier.

    Quick Answer: What Are Good Healthy Afternoon Snacks for Kids?

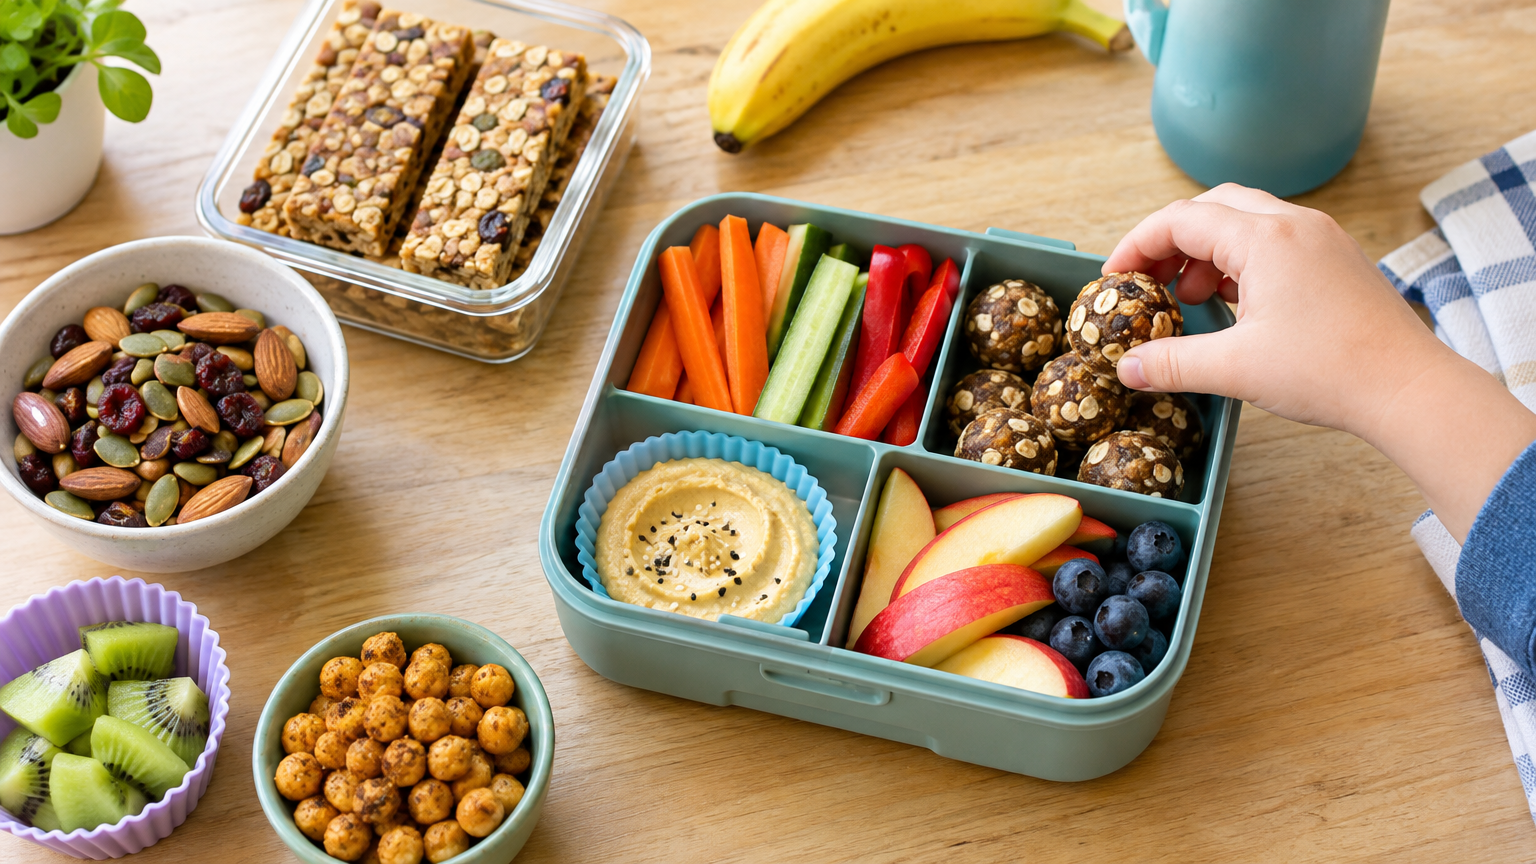
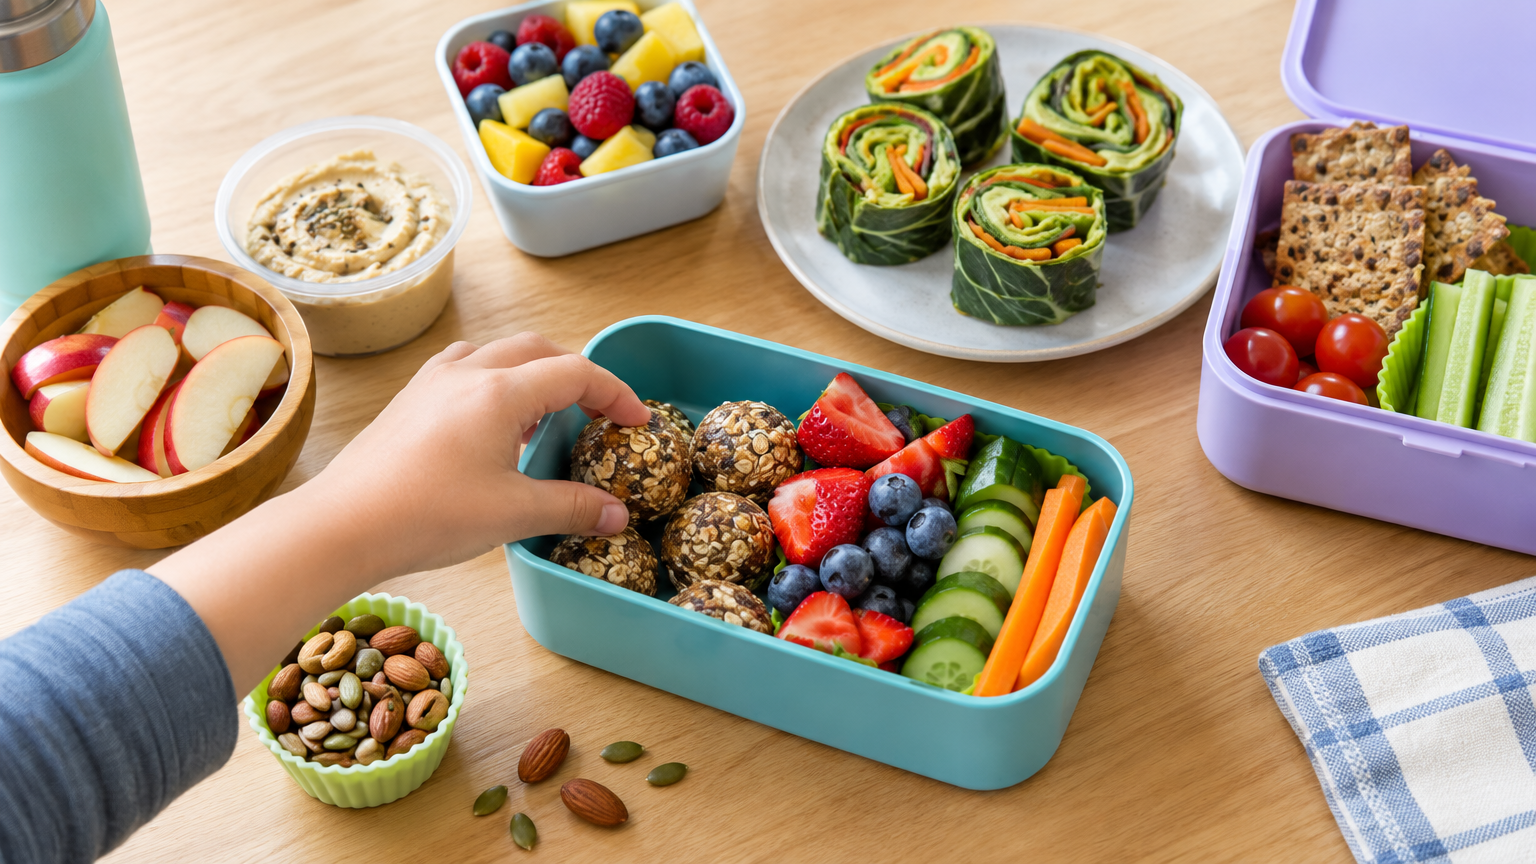
    Good plant-based snacks pair a fruit or vegetable with something filling, like whole grains, seeds, beans, or nut or seed butter. Fruit with seed butter, veggie muffins, popcorn mixes, mini pita pizzas, and plant-based yogurt bark are easy to make with kids and pack well.

    The five ideas at a glance:

    1. Fruit and nut-butter (or seed-butter) dippers 2. Veggie muffins 3. Popcorn mixes 4. Mini pita pizzas 5. Frozen yogurt bark

    Before You Start: Allergy and School Safety Notes

    Common allergens in these snacks

    • Nuts: nut butters and trail-style mixes.
    • Sesame: some pita breads, hummus and tahini, and seed toppings.
    • Soy: plant-based yogurts and cheeses, some breads, and some granola bars.

    Nut-free and allergy-friendly swaps

    • Use sunflower seed butter or pumpkin seed butter instead of nut butter. Check the label for cross-contact warnings.
    • Choose oat, coconut, or pea-based yogurt if you're avoiding soy.
    • Look for sesame-free pita or flatbread.
    • Always read labels. School policies differ, so check your school's rules before packing anything.

    Choking safety

    Whole nuts, whole grapes, and popcorn are choking hazards for young children. Popcorn is generally advised against for children under 4. Adjust for your child's age, and consult your pediatrician if you're unsure.

    5 Plant-Based Afternoon Snacks Kids Can Help Make

    1. Fruit and Nut-Butter Dippers

    Apple slices, banana, pear, or strawberries served with nut or seed butter for dipping.

    • Kid job: stirring the butter (thin it with a little water if it's stiff), spreading, and dipping.
    • Lunchbox tip: pack the dip in a small container. A squeeze of lemon juice or a quick toss can limit browning on apples and pears.
    • Allergy swap: sunflower seed butter.

    2. Veggie Muffins

    Muffins made with grated zucchini or carrot, a plant-based milk, and ground flax or another egg replacer.

    • Kid job: grating (with supervision), mixing, and filling the liners.
    • Lunchbox tip: bake ahead and freeze, then move one or two to the lunchbox in the morning.
    • Allergy swap: check the plant milk for soy and use oat or another milk instead.

    3. Popcorn Mixes

    Air-popped popcorn tossed with seeds, dried fruit, or whole-grain cereal.

    • Kid job: shaking and mixing everything in a bag.
    • Lunchbox tip: pack it in a separate container so it stays crisp.
    • Allergy swap: use seeds instead of nuts. Keep the age and choking caution above in mind.

    4. Mini Pita Pizzas

    Mini pitas topped with tomato sauce, vegetables, and plant-based cheese or mashed white beans.

    • Kid job: spreading the sauce and arranging toppings.
    • Lunchbox tip: serve cold or at room temperature, or reheat at home.
    • Allergy swap: choose sesame-free pita and a soy-free or nut-free cheese alternative. Check labels.

    5. Frozen Yogurt Bark

    Plant-based yogurt spread on a lined tray, topped with fruit and seeds, frozen, and broken into pieces.

    • Kid job: spreading and decorating.
    • Lunchbox tip: pack with an ice pack, or serve at home as an after-school treat.
    • Allergy swap: use a soy-free or nut-free yogurt base. Check labels.

    Snack Comparison Table

    Snack Best kid job Lunchbox-ready? Watch for
    Fruit and seed-butter dippers Dipping, spreading Yes, with a small dip container Nuts, browning fruit
    Veggie muffins Mixing, filling liners Yes Soy in plant milk, flax or egg replacer labels
    Popcorn mixes Shaking the bag Yes, packed separately Choking risk for young children, nuts
    Mini pita pizzas Topping assembly Cold or room temperature Sesame, soy cheese
    Frozen yogurt bark Spreading, decorating Needs an ice pack Soy, nuts

    If you're building a lunchbox routine, reusable containers with small dip compartments can make packing dippers and popcorn mixes easier.

    Practical Portion Tips for Parents

    • Keep it small and balanced. An afternoon snack isn't a full meal, especially if dinner is close.
    • Pair a produce item with a filling item. Fiber, healthy fat, or plant protein all work, such as apple slices with seed butter or a veggie muffin with fruit.
    • Pre-portion. Containers or reusable bags make grab-and-go easier and help you avoid eating straight from a big bag.
    • Follow hunger cues. Portions vary by age and appetite, so let your child's hunger and fullness guide how much they eat.

    Simple Prep and Lunchbox Steps

    Step-by-step weekly routine

    1. Choose 2–3 snacks for the week with your child. Choice builds buy-in. 2. Check labels for allergens and school rules. 3. Batch-prep on the weekend. Bake muffins, freeze bark, and mix a popcorn base. 4. Portion into containers so snacks are ready to grab. 5. Pack with an ice pack if the snack needs to stay cold.

    Quick Prep Checklist

    • [ ] Labels checked for nuts, sesame, and soy
    • [ ] School snack rules reviewed
    • [ ] Muffins baked and cooled before freezing
    • [ ] Popcorn base and add-ins stored separately
    • [ ] Dips in small, leakproof containers
    • [ ] Ice pack ready for yogurt bark or other perishables

    Storage notes

    Refrigerate or freeze anything that needs it, and follow general food-safety guidance for perishables. Cool baked goods fully before freezing, and keep cold items cold until snack time. For a simple way to keep things cold, an insulated lunchbox with an ice pack can help.

    Frequently Asked Questions

    What are healthy afternoon snacks for kids with a nut allergy?

    Use seed butters such as sunflower, fruit, nut-free veggie muffins, and popcorn mixes made with seeds. Check labels for cross-contact warnings, and follow your allergist's and school's guidance.

    How can I make plant-based snacks without soy?

    Choose oat, coconut, or pea-based yogurts and milks. Check the labels on breads, cheeses, and bars too, since soy appears in many processed foods.

    Which of these snacks work best in a lunchbox?

    Veggie muffins, popcorn mixes, and fruit with a small dip container travel well. Yogurt bark and pita pizzas need cold packing or are better served at home.

    Conclusion

    You don't need to overhaul your pantry. Start with one or two of these healthy afternoon snacks for kids, let your child take on a simple job in the kitchen, and build from there. Every family's needs differ, so talk with your pediatrician or allergist about allergies, choking risk, or nutrition questions specific to your child.

    For more plant-based eating guidance for families, see our [VERIFY: pillar page title and URL].
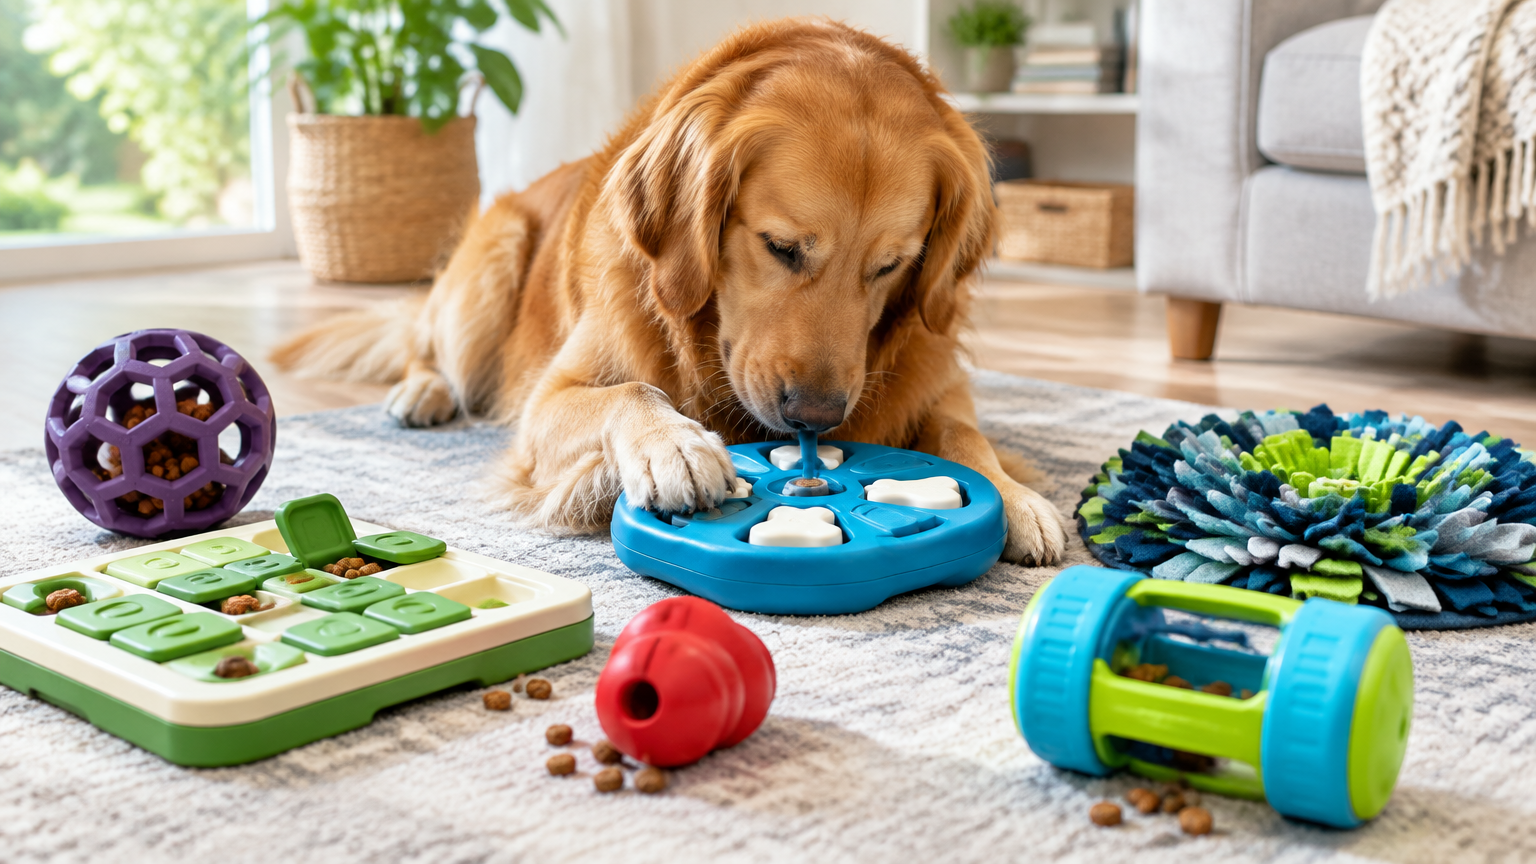
  • Puzzle Feeders and Enrichment Toys: How to Choose the Right Type for Your Dog

    Puzzle Feeders and Enrichment Toys: How to Choose the Right Type for Your Dog

    This article contains affiliate links. We may earn a commission if you buy through them, at no extra cost to you.

    Puzzle Feeders and Enrichment Toys: How to Choose the Right Type for Your Dog

    Meta description: Compare puzzle feeders for dogs, including snuffle mats, treat-dispensing toys, lick mats, and sliding puzzles, with a checklist to match the right type to your dog's experience level.

    Shopping for puzzle feeders for dogs means sorting through formats that look very different and work in different ways. This guide compares four common categories and explains how to match each to your dog's experience, chewing habits, and eating style. It also covers supervision and cleaning.

    Quick Answer: Which Type of Puzzle Feeder Fits Your Dog?

    Match the feeder to your dog's experience level, chewing habits, and eating style. Beginners often do well with simpler formats, such as snuffle mats or lick mats. Dogs already familiar with puzzles may suit treat-dispensing toys or sliding puzzles. Always supervise, and choose a size and material suited to your dog.

    Key takeaways

    • Start easy. A simple format helps you see how your dog approaches food puzzles.
    • Chewing habits matter as much as experience. A dog that tears fabric or cracks hard toys needs a different pick than a gentle eater.
    • Cleaning ease is part of the purchase decision, not an afterthought.
    • Supervision applies to every category.
    Type Best starting level Key consideration
    Snuffle mat Beginner Fabric chewing risk, washability
    Lick mat Beginner Food compatibility, hard-to-clean grooves
    Treat-dispensing toy Beginner to intermediate Size, durability, how pieces separate
    Sliding puzzle Intermediate to advanced Small removable parts, floor stability

    Puzzle Feeders for Dogs: Category Comparison

    Snuffle Mats

    What it is: A fabric mat with strips or folds where you hide food for your dog to find.

    Good fit: First-time puzzle users and dogs that eat kibble. Scattering a few pieces in the folds is an easy setup to explain to a new dog.

    Consider:

    • Fabric chewing risk. If your dog tends to chew or swallow fabric, a mat may not be a good match. Supervise closely and stop the session if your dog starts tearing pieces off.
    • Washability. Check whether the mat is machine-washable or hand-wash only, and how long it takes to dry.
    • Mat size. A larger mat gives a bigger dog room to work. A small mat can be easier to store and clean.

    Treat-Dispensing Toys

    What it is: Toys that release food as the dog rolls, nudges, or manipulates them.

    Good fit: Beginner to intermediate dogs, depending on how adjustable the opening is. A wide opening releases food readily. A narrow one asks more of the dog.

    Consider:

    • Size. The toy should be large enough that your dog can't swallow it or get it stuck on a jaw or paw.
    • Durability. Compare the material to your dog's chewing style.
    • Cleaning. Look at whether parts are dishwasher-safe or hand-wash only. Many dispensing toys have internal channels that trap residue.
    • Separable pieces. Toys that twist apart are easier to clean but can come apart in play. Check how easily the pieces separate.

    If you're comparing options, you can browse treat-dispensing toys and other puzzle feeders by category and check size and material details for each.

    Lick Mats

    What it is: A textured surface for spreading soft food, such as a thin layer of a spreadable food your dog already eats.

    Good fit: Beginners and dogs that enjoy licking. Lick mats involve little movement or problem-solving, so they suit dogs that are hesitant about more active puzzles.

    Consider:

    • Food compatibility. Lick mats work with soft or spreadable foods, not dry kibble. Confirm that the food you plan to use fits.
    • Grooves that are hard to clean. Deep patterns can hold residue. Look at the texture before buying.
    • Non-slip base. A mat that slides around the floor can frustrate a dog. Check whether it has a grip or suction base, and whether that suits your flooring.

    Sliding Puzzles

    What it is: Boards with compartments covered by sliding pieces or lids. The dog moves the covers with a paw or nose to reach the food.

    Good fit: Intermediate to advanced dogs comfortable with pawing or nosing objects.

    Consider:

    • Small removable parts. Sliders, lids, or knobs can come loose. Check them before each use.
    • Stability. A lightweight board may skid. Check whether the base has a non-slip surface.
    • Adjustable difficulty. Some puzzles let you leave compartments open or partially covered. This helps a dog that is still learning.

    Fit by Experience Level

    First-Time Puzzle Dogs

    Start with open or easy formats: a snuffle mat, a lick mat, or a toy with a wide opening. The aim is for your dog to understand that food is available in the object. Use a familiar food and an easy setup.

    Dogs With Some Experience

    If your dog handles simple formats comfortably, try treat-dispensing toys or beginner sliding puzzles. For a sliding puzzle, begin with most compartments open and cover them gradually.

    Experienced Problem-Solvers

    Look for adjustable or multi-step puzzles. These let you change the challenge without buying a new product each time. Check how easy it is to reset and clean between sessions.

    Special Considerations

    Some dogs need extra thought:

    • Puppies: Check the manufacturer's age and size guidance. Small parts and developing chewing habits both matter.
    • Seniors and dogs with mobility concerns: Choose low-effort formats that don't require much bending, pawing, or rolling.
    • Dogs with dental concerns: Hard materials may not be comfortable. Soft formats may be easier.
    • Heavy chewers: Avoid fabric and lightweight parts unless the product is labeled for your dog's chewing style.
    • Fast eaters: Some feeders slow down eating, but results vary by dog. Supervise and see how your dog handles it.

    For questions about diet, feeding amounts, or health concerns, check with your veterinarian.

    Decision Checklist

    Work through these questions before you buy:

    • [ ] Is my dog new to puzzles?
    • [ ] Does my dog chew or tear objects?
    • [ ] What food will I use (kibble, soft food, treats), and does it fit the feeder?
    • [ ] What are my dog's size and breed type, and is the product appropriately sized?
    • [ ] Does the product have small parts that could detach?
    • [ ] How will I clean it, and is it dishwasher-safe or hand-wash only?
    • [ ] Do I have space and a non-slip surface?
    • [ ] Can I supervise during use?
    • [ ] Do the product's material information and care instructions meet my needs?
    • [ ] Does the price fit my budget, and are replacement parts available?

    Practical example: Say your dog is new to puzzles, eats kibble, and doesn't chew fabric. A snuffle mat in a size that suits your dog is a reasonable starting point. If your dog tears fabric, a toy with a wide opening and durable material may fit better.

    How to Introduce a Puzzle Feeder (Practical Steps)

    1. Choose the easiest option for your dog's level. 2. Use a small amount of familiar food. 3. Let your dog watch you load it, and start with the easiest setup. 4. Supervise the first sessions. 5. Increase difficulty gradually. 6. Adjust food portions to account for what's used in the puzzle. 7. Stop and switch if your dog seems frustrated or damages the item.

    If you want background on how dogs learn new tasks, a dog enrichment and training resource can help you plan the next steps.

    Supervision and Safety Notes

    • Supervise use, especially with new products and dogs that chew.
    • Inspect for wear, loose pieces, or damage, and retire damaged items.
    • Follow the manufacturer's age, size, and use guidance.
    • Separate dogs in multi-dog homes during use.
    • Don't give feeders as unsupervised chew toys unless they're designed and labeled for that.

    Cleaning and Maintenance

    • Follow the manufacturer's care instructions.
    • Empty leftover food promptly.
    • Wash after each use, especially with wet or soft foods.
    • Dry thoroughly, particularly fabric mats.
    • Check crevices and textured areas.
    • Replace items that are cracked, frayed, or hard to clean.

    FAQs

    What are the best puzzle feeders for dogs just starting out?

    Simple formats such as snuffle mats, lick mats, or wide-opening dispensing toys are common starting points. Match the choice to your dog's habits. A dog that chews fabric may do better with a lick mat or a sturdy toy than with a snuffle mat.

    Can I use my dog's regular food in a puzzle feeder?

    Often yes, depending on the feeder type and the food's form (dry or soft). Check the product instructions and adjust meal portions to account for food used in the puzzle. Ask your veterinarian about any dietary concerns.

    How do I know when to move to a harder puzzle?

    When your dog completes the current one easily and stays interested, increase the difficulty gradually. If your dog loses interest, go back to an easier level.

    Next Step

    Ready to compare options? Shop puzzle feeders by category to look at snuffle mats, lick mats, treat-dispensing toys, and sliding puzzles side by side. Before you buy, check the size, materials, and care instructions, and make sure they fit your dog and your cleaning routine.

    Conclusion

    The right puzzle feeder depends on your dog's experience, chewing habits, and eating style, and on how easy the product is for you to clean. Start with a simple format, supervise early sessions, and raise the difficulty gradually. Use the checklist above to narrow your options, and consult your veterinarian on diet and health questions.

  • Medicinal Garden Kit vs. Buying Seeds and Supplies Separately: Which Fits Your Situation?

    Medicinal Garden Kit vs. Buying Seeds and Supplies Separately: Which Fits Your Situation?

    This article contains affiliate links. We may earn a commission if you buy through them, at no extra cost to you.

    Medicinal Garden Kit vs. Buying Seeds and Supplies Separately: Which Fits Your Situation?

    Starting a medicinal herb garden means choosing between a packaged kit and assembling your own supplies. This article gives you a framework for matching that choice to your space, skill, budget, and goals. "Medicinal" here refers to traditionally grown herbs such as chamomile, calendula, and mint. Growing guidance is not medical advice.

    Note: This article uses general reasoning only. It contains no specific prices, statistics, or product claims. Check current listings for actual costs and contents. Some links below are affiliate links, which means the site may earn a commission at no extra cost to you.

    —

    Direct Answer

    When weighing a garden kit vs. buying seeds separately, the short version is:

    • Kits usually suit beginners, apartment gardeners, gift buyers, and anyone who values convenience over choice.
    • Buying separately usually suits experienced gardeners, people with specific plant goals, and those who already own tools, containers, or soil.
    • Many people land in the middle: a small kit to start, then separate purchases to expand.

    Key Takeaways

    • Kits trade choice for simplicity. Separate purchases trade simplicity for control.
    • Neither option is automatically cheaper. Compare components item by item.
    • Your light, space, and existing equipment matter more than any general rule.
    • Starting small and expanding after one season lowers the risk of wasted money and plants.

    —

    What You Get With Each Option

    What a typical medicinal garden kit includes

    Kits in this category commonly bundle some combination of:

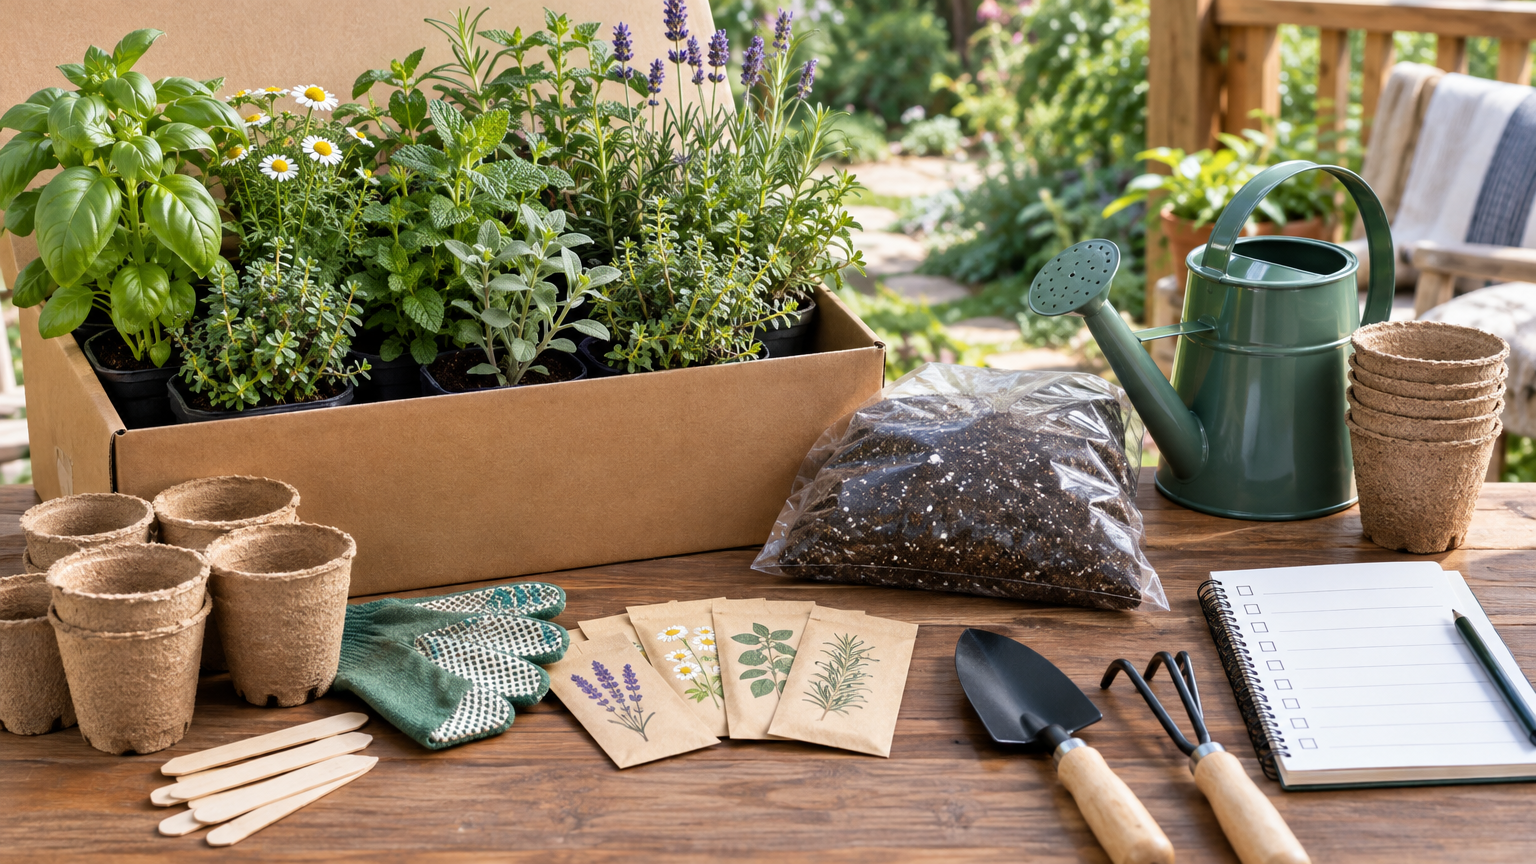
    • Seeds, often a curated herb selection
    • Containers or trays
    • Growing medium
    • Labels
    • Instructions

    Contents vary widely by seller, so verify the list before buying. No specific kit details were supplied for this article, so treat everything above as a general pattern rather than a description of any particular product. [VERIFY: confirm the exact contents, herb varieties, and container sizes on the listing you're considering.]

    What buying separately involves

    Buying separately means you choose each variety, container, soil, and tool yourself. You might source everything from one garden retailer or piece it together from several vendors, such as a seed company for varieties, a local store for soil, and a hardware store for containers. This gives you control, but it also means more decisions and more coordination.

    —

    Comparison Framework: Five Factors

    1. Convenience

    • Kits: One purchase, fewer decisions, and a clear starting point. You open the box and follow the instructions.
    • Separate: More research and shopping time. Orders from multiple sources may also arrive at different times, which can delay planting.

    2. Flexibility

    • Kits: Varieties and quantities are fixed. You may not need or want everything in the box.
    • Separate: You pick only what you'll use and can replace items individually when something fails or runs out.

    3. Customization

    • Kits: Limited choice of cultivars, container sizes, and soil types.
    • Separate: You can tailor choices to your climate, light, and intended uses, whether that's tea herbs, topical herbs, or culinary-medicinal overlap (mint, for example, is often grown for both kitchen and tea use).

    4. Space

    • Kits: Often designed for windowsills or small spaces, but the included containers may not fit your setup.
    • Separate: You can match containers to the exact dimensions of your balcony, window, or yard.

    5. Budget

    • Kits: Bundled convenience can reduce the risk of overbuying, but you may pay for items you already own or won't use.
    • Separate: Potentially better value per item, with reuse over time. Costs can add up quickly if you buy without a plan.
    • Tip: List each kit component and what it would cost alone, using current listings. This shows whether the bundle is saving you money or just saving you effort.

    Quick Comparison Table (Qualitative)

    Factor Kit Buying Separately
    Convenience Strong Limited to Moderate
    Flexibility Limited Strong
    Customization Limited Strong
    Space fit Moderate (depends on design) Strong (you match your space)
    Budget Moderate (varies by what you already own) Moderate to Strong (with a plan); Limited (without one)

    These ratings are general tendencies, not measurements. A well-chosen kit can outperform a poorly planned shopping list, and the reverse is also true.

    —

    Which Option Fits Your Gardener Type?

    Apartment gardeners

    Priorities: Compact size, drainage trays, and realistic light limits.

    Lean toward: Kits designed for indoor use, or a custom mix of small containers and compact herbs.

    Watch for: Light. Many herbs want a good amount of sun, and a weak window can lead to leggy, struggling plants. If your windows are limited, consider adding a grow light to either approach. Also confirm that any included trays actually contain water, since leaks on a windowsill or floor are a common apartment frustration.

    Example: Someone with a single east-facing window and no outdoor space may prefer an indoor-oriented kit for simplicity. If they later find they use mostly mint and chamomile, they can buy those seeds separately and reuse the containers.

    Beginners

    Priorities: Simplicity, clear instructions, and a low risk of mistakes.

    Lean toward: A kit with easy herbs and guidance. A first season is as much about learning light, watering, and timing as it is about harvesting.

    Watch for: Kits with too many varieties, which can overwhelm a first-timer. Three or four herbs you can actually keep track of beat a dozen you can't. If you want a starting point, you can browse a medicinal garden kit option and compare its listed contents against your own checklist before deciding. [VERIFY: confirm what the listing includes.]

    Experienced gardeners

    Priorities: Variety selection, seed quality, soil control, and scaling up.

    Lean toward: Buying separately and using what you already own. If you have pots, soil amendments, and tools, a kit's bundled items may duplicate your supplies.

    Consider a kit only for a specific purpose, such as a gift, a trial of unfamiliar species, or a themed bed where the curation saves planning time.

    Other situations

    • Gifting: Kits are usually more giftable because everything arrives together.
    • Gardening with kids or classrooms: Kits simplify setup and make it easier to give every participant the same materials.
    • Larger outdoor plots: Separate purchases typically scale better, since kit quantities and containers are usually sized for small spaces.

    —

    How to Decide: Practical Steps

    1. Define your goal. Are you after a few herbs for tea, a themed collection, or a long-term garden? 2. Inventory what you own. Check containers, soil, tools, and any light source. 3. Check your space and light. Measure the area and note how many hours of sun it gets. 4. List the herbs you actually want, and confirm they suit your climate and conditions. 5. Compare kit contents to your list. Note what's missing, extra, or redundant. 6. Estimate the separate-purchase cost using current listings for the same items. 7. Check seed details. Look for labeled varieties, sourcing information, and any germination guidance. 8. Review return policies and customer reviews for any kit you're considering. 9. Choose and start small. Expand after your first season.

    If you're still at the research stage, a general guide to starting a medicinal herb garden can help you work through steps 1 through 4 before you spend anything.

    Quick Pre-Purchase Checklist

    • [ ] I know which herbs I want and why
    • [ ] I've measured my space and noted sun hours
    • [ ] I've listed the containers, soil, and tools I already own
    • [ ] I've compared the kit's contents to my list
    • [ ] I've priced the same items separately from current listings
    • [ ] I've checked the return policy

    —

    Common Pitfalls to Avoid

    • Assuming a kit is cheaper or better without comparing components. Convenience has value, but verify what you're paying for.
    • Buying many seed varieties with no plan for space or care. Unused seeds and crowded containers are a common waste.
    • Ignoring light and drainage needs. These cause more failures than almost any other factor, regardless of how you source your supplies.
    • Treating growing instructions as medical guidance. Instructions for growing herbs are not instructions for using them for health purposes. Consult a qualified professional before using any herb medicinally.

    —

    FAQ

    Is a medicinal garden kit worth it for a beginner?

    Often yes, because it reduces decisions and includes matched components. Confirm that the herbs suit your light and space, and check the listing to see exactly what's included.

    Can I save money by buying seeds and supplies separately?

    Possibly, especially if you already own containers, soil, or tools. Compare the kit's component list to current prices for the same items rather than assuming either option is cheaper.

    Can I start with a kit and expand later with separate purchases?

    Yes. Reuse the containers and tools, then add the varieties you find you use most. This hybrid approach is a practical way to learn what you actually need before investing in a larger setup.

    —

    Conclusion

    Kits favor convenience, and buying separately favors control. Apartment gardeners and beginners often benefit from a kit's built-in structure, while experienced gardeners and those with larger plots usually gain more from choosing each item themselves. If you fall somewhere in between, starting with a small kit and expanding later is a sensible path.

    Match your gardener type and your checklist results to the option that fits. Before you buy, compare a kit's contents with your own shopping list. If a medicinal garden kit covers most of what you need, it may be a good fit. If it leaves you with mostly duplicates or unwanted extras, building your own set may serve you better.

    This article is for general gardening information only and is not medical advice.

  • Healthy Afternoon Snacks for Kids That Are Plant-Based and Lunchbox-Friendly

    Healthy Afternoon Snacks for Kids That Are Plant-Based and Lunchbox-Friendly

    This article contains affiliate links. We may earn a commission if you buy through them, at no extra cost to you.

    Healthy Afternoon Snacks for Kids That Are Plant-Based and Lunchbox-Friendly

    Meta description: Plant-based after-school snack ideas kids can help make, with allergy notes, nut-free swaps, and simple portion and prep tips for parents.

    Between the last school bell and dinner, many kids arrive home hungry and ready to raid the pantry. A few easy, plant-based snacks on hand make that window calmer for everyone. Below are five kid-friendly ideas children can help make, plus allergy guidance and lunchbox tips.

    Disclosure: Some links below may be affiliate links. They don't change our recommendations.

    Key Takeaways

    • Pair produce with a protein, healthy fat, or whole grain.
    • Give kids a safe, age-appropriate job in the kitchen.
    • Nuts, sesame, and soy can hide in plant-based foods, so read every label.
    • Batch-prep and freeze to make weekday snacks easier.

    Quick Answer: What Makes a Good Healthy Afternoon Snack for Kids?

    A good plant-based afternoon snack combines two or more food groups, such as fruit or veggies with a source of protein or healthy fat, to keep kids satisfied until dinner. Keep portions small, use whole-food ingredients when possible, and check every label for allergens. For more ideas beyond snacks, see our guide to plant-based meals for kids [VERIFY: insert pillar page URL].

    Mini checklist:

    • ✅ Produce plus protein, fat, or whole grain
    • ✅ Easy for kids to help make
    • ✅ Packs and travels well
    • ✅ Fits your school's allergy rules

    5 Plant-Based Snacks Kids Can Help Make

    1. Fruit and Nut-Butter Dippers

    Ingredients: Apple, pear, or banana slices with nut or seed butter.

    • Kid job: Spread or dip.
    • Parent job: Slice the fruit.
    • Lunchbox tip: Pack the dip in a small leak-proof container. A squeeze of lemon on apple slices limits browning. A set of small leak-proof containers with dividers makes this easier.
    • Nut-free swap: Sunflower seed butter or another school-approved seed butter.

    2. Veggie Muffins

    Ingredients: Grated zucchini or carrot, oats or whole-grain flour, plant-based milk, and flax or another egg replacer.

    • Kid job: Stir, scoop, and fill muffin cups.
    • Parent job: Grate the veggies and bake.
    • Lunchbox tip: Cool completely before packing, and freeze extras.
    • Allergy note: These contain wheat if you use wheat flour. Check plant milk for nuts or soy.

    3. Popcorn Mixes

    Ingredients: Air-popped popcorn with cinnamon or nutritional yeast, plus optional add-ins like raisins or pumpkin seeds.

    • Kid job: Measure and shake the mix in a large container.
    • Safety note: Popcorn is a choking hazard for young children. Check age guidance and skip it for toddlers and preschoolers.
    • Nut-free note: Use seeds instead of nuts, and check packaged mixes for cross-contact.

    4. Mini Pita Pizzas

    Ingredients: Mini whole-wheat pitas, tomato sauce, veggies, and plant-based cheese or mashed white beans.

    • Kid job: Add sauce and toppings.
    • Parent job: Use the oven or toaster oven.
    • Lunchbox tip: Pack the components separately, or serve at room temperature.
    • Allergy note: Pitas contain wheat. Plant-based cheeses may contain nuts or soy, so check labels.

    5. Frozen Yogurt Bark

    Ingredients: Plant-based yogurt spread on a lined tray, topped with berries and seeds, frozen, then broken into pieces.

    • Kid job: Spread the yogurt and sprinkle the toppings.
    • Lunchbox tip: Pack with an ice pack in an insulated container. It softens as it thaws, so it works best as an at-home snack or a thaw-and-eat item.
    • Allergy note: Choose a yogurt base that fits your family. Soy, coconut, oat, and almond bases differ.

    At-a-Glance Comparison

    Snack Kid job Lunchbox-friendly? Main allergens to check
    Fruit dippers Spread, dip Yes, with separate dip Nuts or seeds
    Veggie muffins Stir, scoop Yes, once cooled Wheat, plant milk (nuts/soy)
    Popcorn mixes Measure, shake Yes (age-appropriate) Nuts, cross-contact
    Mini pita pizzas Sauce, top Yes, packed separately Wheat, soy, nuts
    Frozen yogurt bark Spread, sprinkle With ice pack; best at home Soy, coconut, nuts, depending on base

    Common Allergies: Nuts, Sesame, and Soy

    Plant-based snacks often rely on nuts, sesame, and soy, which are also common allergens. A little planning helps keep snacks safe.

    Where These Allergens Hide

    • Nuts: Nut butters, some granolas, plant-based milks, yogurts, and cheeses.
    • Sesame: Tahini, hummus, and some breads and crackers.
    • Soy: Soy yogurt, some plant-based cheeses, and some baked goods.

    Always read labels, since ingredients and manufacturing practices can change.

    Nut-Free and School-Friendly Swaps

    Instead of Try
    Nut butter Seed butter (check your school's rules)
    Nut-based yogurt or milk Oat, coconut, or another option that fits your child's allergies
    Hummus with tahini A bean dip made without tahini

    Confirm your school's policy, since some schools restrict specific seeds or ingredients. Talk with your child's doctor or allergist about specific allergies.

    Portion and Prep Tips for Parents

    Portion Basics

    Aim for a small snack, not a mini meal. Adjust to your child's age, appetite, and activity, and follow your pediatrician's guidance. Pair a fruit or veggie with a protein or fat source, such as apple slices with seed butter or a veggie muffin with a piece of fruit.

    Make-Ahead Steps

    1. Pick one or two snacks for the week. 2. Batch-bake muffins and freeze bark. 3. Pre-portion dry mixes in containers. 4. Wash and cut produce, and store it in the fridge. 5. Label allergen-safe items.

    A silicone muffin liner set can make batch baking and freezing simpler.

    Lunchbox Packing Tips

    • Use small containers and dividers.
    • Add an ice pack for perishable items.
    • Keep sauces and dips separate.

    Getting Kids Involved Safely

    • Assign age-appropriate tasks such as washing produce, stirring, and sprinkling. Keep knives and hot items for adults.
    • Wash hands and clean surfaces to avoid allergen cross-contact.

    FAQs

    What are healthy afternoon snacks for kids that are nut-free and plant-based?

    Good options include seed butter with fruit, veggie muffins made with a nut-free milk, pita pizzas with bean spread, and seed-based popcorn mixes (for age-appropriate kids). Check all labels.

    How do I keep plant-based snacks fresh in a lunchbox?

    Cool baked items before packing, use ice packs, keep wet and dry items separate, and add lemon juice to cut fruit if needed.

    Can kids with a soy or sesame allergy eat these snacks?

    Often yes, with substitutions such as soy-free yogurt and tahini-free dips. Always check labels and consult your child's allergist.

    Conclusion

    Start small: pick one snack this week, let your child take on a safe kitchen job, and check every label for allergens. Batch-prepping a couple of options makes the after-school rush easier. For more family-friendly ideas, explore our pillar guide to plant-based meals for kids [VERIFY: insert pillar page URL].

    Internal link ideas: a lunchbox ideas post and an allergy-friendly swaps post [VERIFY: add URLs if available].

  • Plant-Based Bowl Dinners: How to Build a Cheap Grain Bowl Without a Recipe

    Plant-Based Bowl Dinners: How to Build a Cheap Grain Bowl Without a Recipe

    This article contains affiliate links. We may earn a commission if you buy through them, at no extra cost to you.

    Plant-Based Bowl Dinners: How to Build a Cheap Grain Bowl Without a Recipe

    Meta description: Learn a simple build-your-own formula for cheap plant based grain bowl ideas: pick a grain, protein, vegetables, sauce, and crunchy topping, then reuse leftovers all week.

    Bowl dinners work because they're a formula, not a recipe. Once you know the five building blocks, you can shop sales, use what's in the fridge, and still end up with a satisfying meal. This guide covers a five-part framework, budget-friendly combinations, ways to reuse leftovers, and a simple one-week rotation. These cheap plant based grain bowl ideas will help you cook with less planning and less waste.

    Key Takeaways

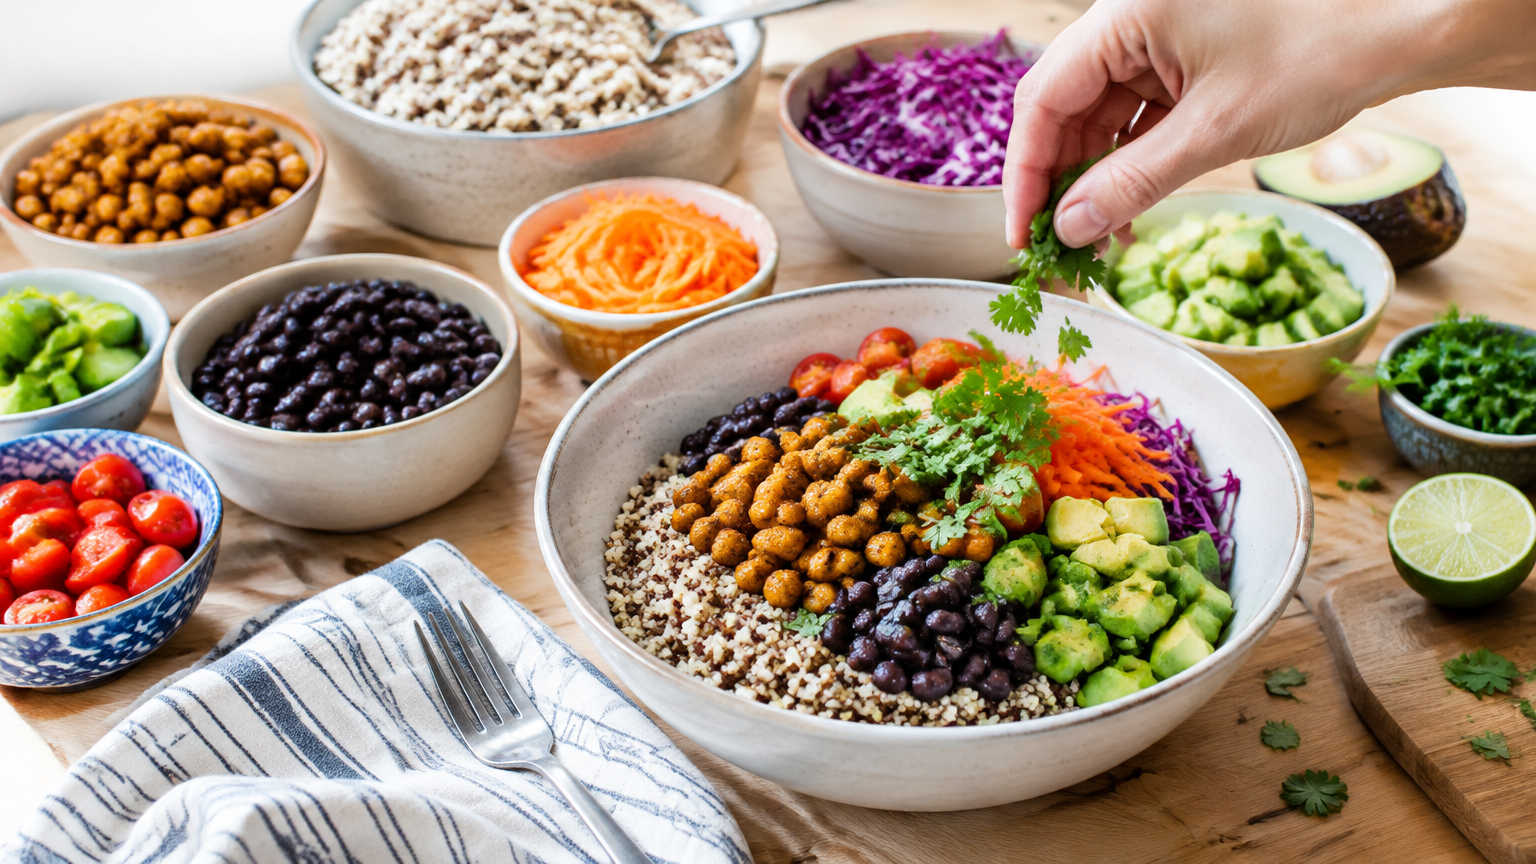
    • Every bowl is Grain + Protein + Veg + Sauce + Crunch.
    • Swap freely within each category based on what's cheap or already in your kitchen.
    • Cook grains, beans, and one tray of vegetables once, then vary the sauce and topping through the week.
    • Season each component separately so the bowl doesn't taste flat.
    • Add acid (lemon, lime, vinegar) and something crunchy to make simple ingredients taste finished.

    The Short Answer: The 5-Part Cheap Grain Bowl Formula

    Build a bowl from a grain base, a plant protein, roasted or raw vegetables, a sauce, and a crunchy topping. Choose inexpensive staples for each part, cook in batches, and mix and match through the week.

    Formula: Grain + Protein + Veg + Sauce + Crunch

    Use what you have. If a recipe-free approach feels loose, remember that each category is interchangeable: no barley, use rice; no chickpeas, use lentils; no tahini, use peanut butter.

    Step-by-Step: Build Your Bowl Without a Recipe

    Step 1: Choose a Grain Base

    Budget-friendly options include:

    • Rice (brown or white)
    • Barley
    • Bulgur
    • Couscous
    • Pasta
    • Savory oats
    • Quinoa, if you find it on sale
    • Leftover cooked grains from other meals

    Tip: Cook a big batch and season it lightly. A pinch of salt, a splash of vinegar, or cooking in broth instead of water gives the base some flavor of its own.

    Rough ratio: Aim for about half the bowl to be grain and vegetables combined, then adjust to your appetite. Hungrier? Add more grain and protein. Want something lighter? Add more vegetables.

    Step 2: Add a Plant Protein

    Affordable choices include:

    • Canned or dried beans
    • Lentils
    • Chickpeas
    • Tofu
    • Tempeh
    • Peanuts
    • Frozen edamame

    Tip: Dried beans and lentils are typically the lowest cost per serving, while canned beans save time. If you're new to dried beans, a beginner's guide to cooking dried beans from scratch can walk you through soaking and simmering.

    Flavor tip: Season the protein separately. Toss chickpeas with smoked paprika and salt, marinate tofu in soy sauce, or simmer lentils with garlic and bay leaf. Unseasoned beans dumped on top are the fastest route to a bland bowl.

    Step 3: Pick Roasted or Raw Vegetables

    Roasted: carrots, sweet potatoes, cabbage, cauliflower, broccoli, onions, squash

    Raw: shredded cabbage, cucumber, carrots, tomatoes, greens

    Frozen vegetables are a low-waste option. You use only what you need, and nothing wilts in the crisper drawer.

    Basic roasting method: Toss chopped vegetables with oil and salt, spread them on a pan without crowding, and roast until browned at the edges. Timing varies by vegetable, so check often. Dense vegetables like squash take longer than broccoli.

    Tip: Use one roasted and one raw vegetable in each bowl. Warm, caramelized sweet potato next to cool, crisp cabbage gives you contrast without extra effort.

    Step 4: Make a Simple Sauce

    Sauce does the most to make a bowl taste like a meal. You don't need exact recipes, just templates:

    • Creamy: peanut butter or tahini + lemon or vinegar + water + salt
    • Tangy: oil + vinegar or citrus + mustard or herbs
    • Savory: soy sauce + garlic + a little sweetener + water
    • Spicy: hot sauce or chili flakes stirred into any base
    • Yogurt-style: plant-based yogurt + lemon + garlic

    Tip: Thin the sauce with water until it's pourable, then taste and adjust. Too flat? Add salt or acid. Too sharp? Add a little sweetener or oil. Too thick? More water.

    Step 5: Finish With a Crunchy Topping

    Crunch makes the difference between a pile of soft food and a bowl you want to finish. Options include:

    • Toasted seeds (sunflower, pumpkin, sesame)
    • Chopped nuts
    • Crushed crackers or tortilla chips
    • Toasted breadcrumbs
    • Crispy chickpeas
    • Thinly sliced raw onion

    Tip: Add the topping just before eating so it stays crunchy.

    Cheap Plant Based Grain Bowl Ideas (Budget Combinations)

    Here are five combinations built from common pantry staples. Treat them as starting points.

    Grain Protein Vegetables Sauce Crunch
    Rice Black beans Roasted sweet potato + shredded cabbage Lime-chili sauce Crushed tortilla chips
    Barley Chickpeas Roasted carrots + cucumber Lemon-tahini sauce Sunflower seeds
    Brown rice Tofu Frozen broccoli + shredded carrots Peanut-soy sauce Peanuts
    Lentils + rice Lentils (built in) Roasted cabbage + onion Mustard vinaigrette Toasted breadcrumbs
    Couscous or bulgur White beans Tomatoes + greens Garlic-yogurt sauce Chopped nuts

    What each one offers:

    • Rice + black beans + sweet potato: A sweet, smoky, bright bowl with a taco-night feel.
    • Barley + chickpeas + carrots: Chewy, earthy, and lemony, with a Mediterranean tilt.
    • Brown rice + tofu + broccoli: A takeout-style bowl using frozen vegetables and a quick peanut sauce.
    • Lentils + rice + roasted cabbage: A rustic, hearty combination where the mustard vinaigrette cuts through the richness.
    • Couscous or bulgur + white beans + tomatoes: The quickest option, since couscous and bulgur need little cooking.

    Budget-Saving Tips

    • Buy grains and dried beans in bulk when you have storage space.
    • Choose seasonal or frozen vegetables. Frozen are handy when fresh produce is pricey.
    • Make sauces at home from pantry basics rather than buying several bottled dressings.
    • Stick to one flavor profile per bowl (say, lime and chili, or lemon and tahini) so you aren't buying a dozen ingredients for one meal.

    Prices vary by store and region, so compare unit prices rather than assuming any one item is cheapest.

    How to Reuse Leftovers in Bowls

    Bowls are one of the easiest ways to use leftovers because every component is flexible.

    • Leftover grains: Reheat with a splash of water, or crisp them in a hot pan for a toasty, fried-rice-style base.
    • Leftover roasted vegetables: Serve them cold over greens, or blend them with a little oil, lemon, and salt into a sauce or spread.
    • Leftover beans or lentils: Mash them into a spread for toast or wraps, or season them and add them to a new bowl.
    • Odds and ends: Vegetable scraps and stray produce go into a "clean-out" bowl. Half an onion, a lone carrot, and a handful of greens all work.
    • Leftover sauce: Use it as a salad dressing, sandwich spread, or dip.

    Storage note: Refrigerate cooked food promptly in airtight containers, and follow standard food safety guidance (such as from your national or local food safety agency) for how long to keep leftovers. A set of stackable airtight containers for meal prep makes it easier to store each component separately.

    A Simple Weekly Rotation

    Prep once (about an hour, flexible): Cook one grain, one pot of beans or lentils, and one tray of roasted vegetables, and make one or two sauces. That's the base for the whole week.

    Sample week (adjust to what you have):

    • Monday: Rice + beans + roasted vegetables + chili-lime sauce
    • Tuesday: Same grain + tofu or chickpeas + raw slaw + peanut sauce
    • Wednesday: Leftover vegetables + lentils + vinaigrette + seeds
    • Thursday: Fresh grain or pasta + beans + greens + tahini sauce
    • Friday: Clean-out bowl with all leftovers + favorite sauce + crunch
    • Weekend: Try a new grain, sauce, or topping

    Tip: Change the sauce and topping to make repeated bases feel different. The same rice and beans taste like three different dinners with lime-chili sauce and tortilla chips, then peanut sauce and peanuts, then tahini and seeds. For more on sheet-pan technique, a guide to roasting vegetables without a recipe can help you vary the vegetables too.

    Quick Build-Your-Bowl Checklist

    • [ ] One grain, cooked and lightly seasoned
    • [ ] One protein, seasoned separately
    • [ ] One roasted vegetable
    • [ ] One raw vegetable or handful of greens
    • [ ] One sauce, tasted and adjusted
    • [ ] One crunchy topping, added last

    Common Mistakes to Avoid

    • Bland grains. Season the cooking water or toss cooked grains with salt and a splash of vinegar.
    • Skipping acid. A squeeze of lemon or lime, or a splash of vinegar, brightens the whole bowl.
    • Too many ingredients. Stick to the five parts. More items mean more cost and more cleanup, not necessarily better flavor.
    • No texture contrast. If everything is soft, add crunch.
    • Dressing too early. Sauce a bowl right before eating, especially if the toppings should stay crisp.

    FAQs

    How do I make a plant-based grain bowl filling?

    Include a solid portion of protein (beans, lentils, or tofu), a whole grain, and some healthy fat from the sauce, seeds, or nuts. Plenty of vegetables add volume, and a well-seasoned sauce makes the bowl more satisfying.

    What is the cheapest base for a grain bowl?

    Rice, barley, oats, and bulgur are often inexpensive, especially in bulk. Prices vary by store and region, so compare unit prices at your own market.

    Can I meal prep grain bowls for the week?

    Yes. Store the components separately and assemble the bowls when you eat. Keep sauces and crunchy toppings apart until serving, and follow food safety guidelines for storage times.

    Conclusion

    The best cheap plant based grain bowl ideas aren't recipes at all. They're a repeatable system: Grain + Protein + Veg + Sauce + Crunch. Cook a few staples once, keep your sauces simple, and rotate toppings to keep dinners interesting without extra spending.

    This week, pick one item from each category and build your first bowl. Taste, adjust, and see what you'd change next time. That's the whole method.

  • High-Protein Plant-Based Snacks for Work (Desk-Friendly and No Microwave)

    High-Protein Plant-Based Snacks for Work (Desk-Friendly and No Microwave)

    This article contains affiliate links. We may earn a commission if you buy through them, at no extra cost to you.

    High Protein Vegan Snacks for Work: Desk-Friendly, No Microwave Needed

    Meta description: Find high protein vegan snacks for work that need no microwave: edamame, chickpeas, tofu bites, energy balls, dips, and soy yogurt.

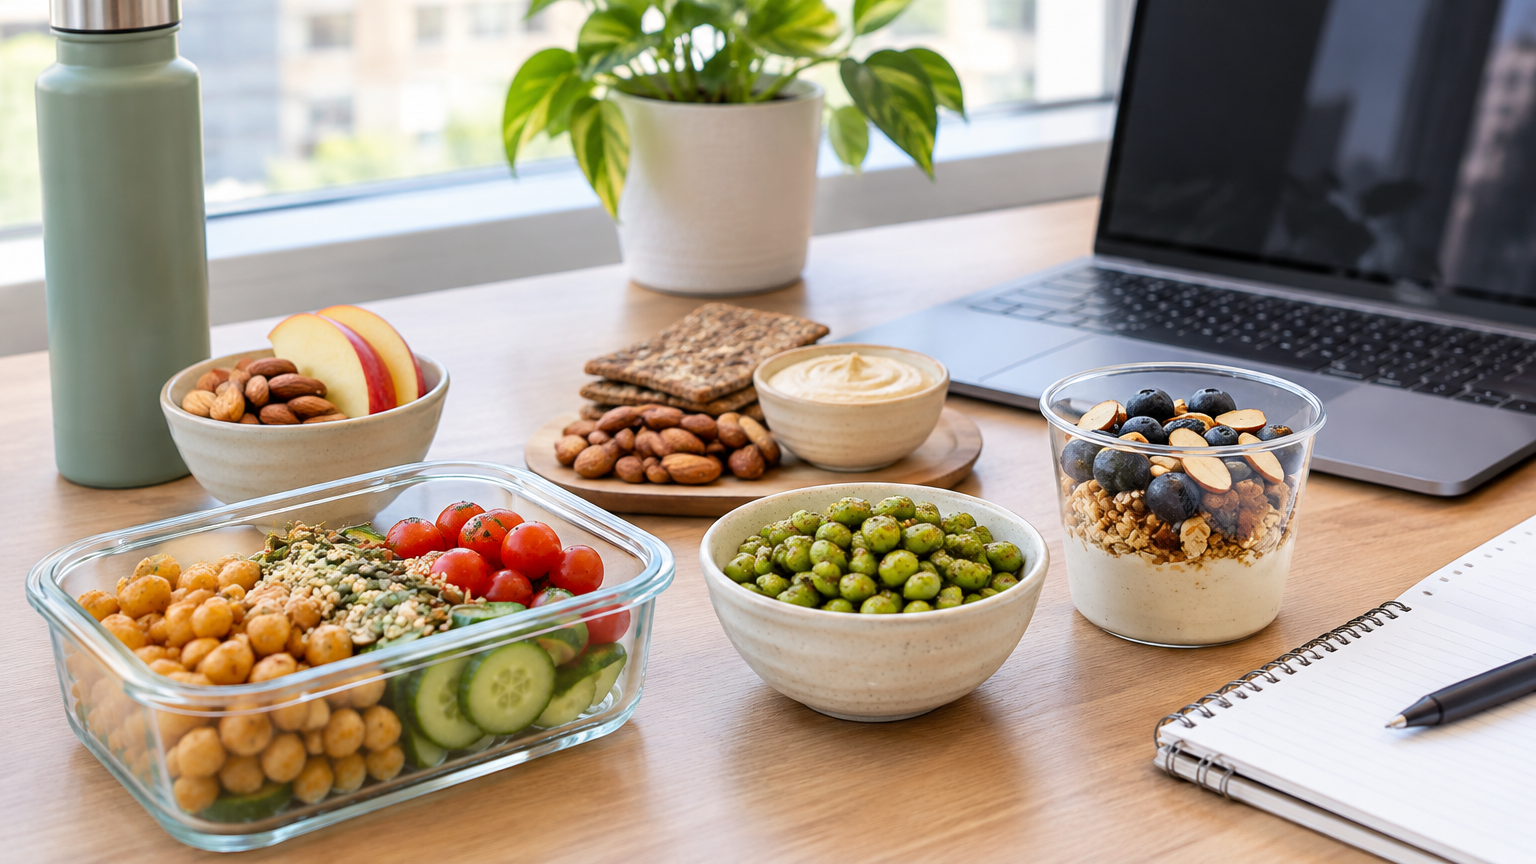
    This guide is for office, hybrid, and remote workers who want filling snacks with no reheating. It covers six options that travel well: edamame, roasted chickpeas, tofu bites, protein energy balls, bean dips, and soy yogurt cups.

    Key takeaways

    • All six snacks can be eaten cold or at room temperature.
    • Soy-based options (edamame, tofu, soy yogurt) are typically the highest in protein per serving.
    • Protein figures below are approximate and vary by brand, so check your label.
    • Keep perishables at 40°F or below, and don't leave them out more than 2 hours.

    Quick Answer: Best High Protein Vegan Snacks for Work

    Edamame, roasted chickpeas, baked tofu bites, protein energy balls, bean dips with veggies or crackers, and soy yogurt cups all travel well and are eaten cold or at room temperature. Soy-based options (edamame, tofu, soy yogurt) are typically the highest in protein per serving.

    • Edamame: Salty, snackable green soybeans.
    • Roasted chickpeas: Crunchy and shelf-stable.
    • Tofu bites: Savory cubes you can eat with a toothpick.
    • Protein energy balls: Sweet, make-ahead bites.
    • Bean dips: Creamy spreads for veggies and crackers.
    • Soy yogurt cups: Grab-and-go and spoonable.

    Approximate Protein per Serving

    Figures are approximate, based on standard nutrition data (e.g., USDA FoodData Central). Values vary by brand, recipe, and portion size, so check your label.

    Snack-by-snack ranges

    Snack Serving Approx. protein
    Edamame, shelled, cooked 1/2 cup about 9 g
    Edamame, shelled, cooked 1 cup about 17 g
    Roasted chickpeas 1 oz about 5–7 g (brand-dependent)
    Tofu bites (firm or baked tofu) 3 oz about 8–12 g
    Bean dips (hummus, black bean dip) 2 tbsp about 2–3 g
    Soy yogurt cup 5–6 oz about 5–8 g (varies widely)
    Protein energy balls 1 ball Depends on ingredients (nut butter, oats, protein powder); calculate from your recipe or label

    For soy yogurt, unsweetened and flavored versions can differ, so compare labels.

    How to read labels

    • Serving size: Many packages hold more than one serving, so the protein number on the front may cover only a small portion.
    • Added sugar: Flavored soy yogurts and some energy balls can contain more than you'd expect.
    • Sodium: Roasted chickpeas, marinated tofu, and dips can add up quickly, especially if you snack on them daily.

    Desk-Friendly Snack Ideas (No Microwave)

    Edamame

    Buy shelled edamame or pods, and portion them into a small container. Sprinkle with salt or chili flakes. Cooked edamame is perishable, so keep it cold until you eat it. Shelled edamame is the easiest to eat at a keyboard, and pods take a bit more time and need a spot for the empties.

    Roasted Chickpeas

    Shelf-stable store-bought bags or homemade batches both work. They're crunchy, portable, and need no fridge. Check the sodium on the label, and keep them in an airtight container so they stay crisp.

    Tofu Bites

    Choose pre-baked or marinated tofu, cut it into cubes, and eat it cold with toothpicks. A tamari, lemon, or spice-rub marinade adds flavor without reheating. Because tofu is perishable, pack it with a cold source.

    Protein Energy Balls

    Energy balls are a sweet option made from ingredients like nut butter, oats, and protein powder. Because protein varies so much by recipe, calculate it from your ingredients. For a make-ahead option, see our [high-protein vegan energy balls recipe]([insert energy balls article URL]) [VERIFY URL].

    Bean Dips with Veggies or Crackers

    Hummus or black bean dip is modest in protein on its own, at about 2–3 g per 2 tablespoons. Pairing it with veggies, whole-grain crackers, or both adds fiber and makes it more filling. Single-serve dip cups are convenient for the office.

    Soy Yogurt Cups

    Soy yogurt is spoonable and easy to stash in an office fridge. Stir in nuts, seeds, or hemp seeds for extra protein and crunch. Check labels for added sugar, especially in flavored cups.

    How to Build a Protein-Rich Desk Snack (Practical Steps)

    1. Pick a base protein: edamame, tofu, chickpeas, or soy yogurt. 2. Add fiber or crunch: veggies, whole-grain crackers, or fruit. 3. Add a flavor boost: a spice blend, lemon, salsa, or tamari. 4. Portion into containers the night before so you can grab and go. 5. Pack with a cold source if the snack is perishable.

    Practical examples

    • Shelled edamame + chili flakes + cucumber slices
    • Baked tofu cubes + tamari dipping cup + carrot sticks
    • Soy yogurt + hemp seeds + berries
    • Black bean dip + whole-grain crackers + bell pepper strips

    Packing and Storage Tips

    Keeping perishables safe

    Use an insulated bag with an ice pack for tofu, soy yogurt, dips, and cooked edamame. Refrigerate at 40°F or below. Per USDA guidance, discard perishables left out more than 2 hours (1 hour if the temperature is above 90°F). An insulated lunch bag with an ice pack makes this easier on commute days.

    Shelf-stable picks

    Roasted chickpeas, single-serve nut butter, and shelf-stable dip cups don't need refrigeration, which makes them good desk-drawer options. Check each package for storage directions.

    Containers and layout

    • Use small, leakproof containers for dips and marinated tofu.
    • Keep dips separate from crackers to prevent sogginess.
    • Store crunchy items in airtight containers. A set of leakproof snack containers can help with portioning.

    Office fridge tips

    Label your items with your name and the date, and portion everything into single servings. That makes snacks easy to grab and easy to toss on schedule.

    Energy ball storage

    Refrigerate energy balls in an airtight container, and follow your recipe's storage guidance.

    Quick desk-snack checklist

    • ☐ Protein base chosen
    • ☐ Fiber or crunch added
    • ☐ Sodium and added sugar checked
    • ☐ Perishables packed with a cold source
    • ☐ Dips and crackers packed separately
    • ☐ Containers labeled

    FAQs

    1. What are the best high protein vegan snacks for work without refrigeration? Roasted chickpeas, shelf-stable single-serve nut butter, and energy balls for short periods work best. Keep tofu, soy yogurt, and dips cold.

    2. How much protein should a vegan work snack have? There is no single rule. Many people aim for a snack with some protein plus fiber to feel full. Individual needs vary, so consult a registered dietitian for personal targets.

    3. Can I prep these snacks ahead for the week? Yes for roasted chickpeas, energy balls, and portioned dips and tofu. Follow safe refrigeration times and check for spoilage before eating.

    Related Reading / Next Steps

    • Pillar guide: [Complete Guide to Vegan Protein]([insert pillar URL]) [VERIFY URL]
    • Recipe: [high-protein vegan energy balls recipe]([insert energy balls article URL]) [VERIFY URL]

    Conclusion

    The best high protein vegan snacks for work are simple, portable, and need no microwave. Pair a protein base with fiber, portion it ahead of time, and keep perishables cold. Pick two snacks from this list and prep them this week to see what fits your workday.

    Protein values are approximate and drawn from standard nutrition data such as USDA FoodData Central. Always check product labels for your specific brand. This article offers general nutrition information, not personal medical advice.

  • Best Chew Toys for Aggressive Chewers: What to Look For Before You Buy

    Best Chew Toys for Aggressive Chewers: What to Look For Before You Buy

    This article contains affiliate links. We may earn a commission if you buy through them, at no extra cost to you.

    Best Chew Toys for Aggressive Chewers: What to Look For Before You Buy

    Disclosure: This article contains affiliate links. If you buy through them, we may earn a commission at no extra cost to you. This content is informational and not a substitute for veterinary advice.

    Heavy chewers can get through toys fast, so how you choose matters more than any brand's claims. The best chew toys for aggressive chewers fit your dog's size and chewing style, are made from a material suited to how your dog chews, and are used under supervision. No toy is indestructible, so inspect often and replace at the first signs of wear.

    This guide covers selection criteria, not product rankings. Durability claims should be verified through the manufacturer, independent testing, or your own observation.

    Key Takeaways

    • Size matters: a toy that's too small can be a choking or swallowing hazard.
    • Every material has trade-offs, and none is risk-free for every dog.
    • Be skeptical of "indestructible" claims unless you can see how and by whom they were tested.
    • Supervise, inspect regularly, and replace worn toys promptly.
    • Toys work best alongside training and enrichment.

    What Counts as an "Aggressive Chewer"?

    In plain terms, an aggressive chewer is a dog that chews intensely and persistently. These dogs often tear or break pieces off toys and can destroy soft toys within minutes.

    Chewing intensity varies from dog to dog and isn't determined by breed alone. Two dogs of the same breed and size can chew very differently, so your own observation counts for more than a label.

    If chewing starts suddenly, becomes excessive, or comes with other behavior changes, check with your veterinarian. Dental pain, anxiety, or other issues can be involved.

    Quick Answer: Key Criteria Before You Buy

    Use this checklist while browsing:

    • [ ] Correct size for your dog's mouth and weight
    • [ ] Material suited to your dog's chewing style
    • [ ] No small parts that can detach
    • [ ] Clear manufacturer guidance on size and use
    • [ ] Easy to inspect and clean
    • [ ] A plan for supervision and replacement

    Step 1 – Match the Toy Size to Your Dog

    Why size matters

    A toy that's too small may become a choking or swallowing hazard. One that's too large may be ignored or be hard for your dog to hold and chew comfortably.

    How to check fit

    • Follow the manufacturer's size and weight guidance.
    • Consider mouth and muzzle size, not just body weight. A dog with a large frame and a narrow muzzle may need different proportions than a stocky dog of the same weight.
    • Choose a toy that cannot fit entirely in the mouth or reach the back of the throat.

    When to size up

    If your dog falls between sizes, ask the manufacturer or your vet for guidance. Puppies outgrow toys quickly, so re-evaluate fit as your dog grows.

    Practical example: If your dog's weight sits at the top of a "medium" range and the toy can be gripped fully at the back of the mouth, consider the next size up or contact the brand before buying.

    Step 2 – Compare Material Types

    Each material has trade-offs, and no material is risk-free for every dog. Here's how the common categories compare.

    Rubber and rubber-like toys

    These are often marketed for tougher chewing. Check for thickness and solid construction, and look for any manufacturer testing claims along with details on who did the testing.

    Nylon chews

    Nylon chews are designed to be gnawed rather than shredded. In some dogs, pieces may wear off or splinter, so read the labeling and watch how your dog chews.

    Rope and fabric toys

    Fibers can be swallowed. These are typically better suited to supervised tug play than unsupervised chewing.

    Plush toys

    Plush toys are usually not suited to heavy chewers. Stuffing and squeakers can be ingested.

    Edible chews and natural options

    This group includes antlers, bones, rawhide, and bully sticks. Considerations include hardness, tooth fracture concerns, digestibility, calories, and choking risk. Ask your veterinarian before offering any of them.

    Material comparison table

    This table is general and unranked.

    Material Typical use Watch-outs Questions to ask the brand
    Rubber / rubber-like Gnawing, sometimes treat stuffing Thin or hollow sections, chunks tearing off Is it solid or hollow? What testing supports durability claims?
    Nylon Long gnawing sessions Wear or splintering in some dogs Is it designed for my dog's size and chew style?
    Rope / fabric Supervised tug Swallowed fibers, fraying Is it intended for chewing or only tug play?
    Plush Gentle carrying, light play Stuffing, squeakers, quick destruction Does it have reinforced seams, and is it meant for heavy chewers?
    Edible / natural Occasional chewing Hardness, tooth fracture, digestibility, calories, choking What are the ingredients and sourcing? What does my vet advise?

    Step 3 – Evaluate Safety and Quality Signals

    Look for:

    • Clear age and size labeling
    • Material disclosure
    • Country of manufacture
    • Contact information for the company
    • A return policy

    Check the toy itself for detachable parts, hollow areas that could trap a jaw or tongue, and sharp edges.

    Treat "indestructible" or "unbreakable" claims with caution. Look for how the claim was tested and by whom. If that information isn't available, treat the claim as unverified.

    Read customer feedback critically. Focus on reviewers whose dogs are similar in size and chew style to yours, and pay attention to reports of breakage.

    If you're ready to compare options, you can browse chew toys by size and material and apply the checklist above to each listing. [VERIFY: confirm the merchant destination and the available size and material filters before publishing.]

    Step 4 – Plan for Supervision

    • Introduce any new toy while watching your dog.
    • Observe how your dog chews: gnawing, ripping, or swallowing pieces.
    • Remove the toy if chunks break off.
    • Supervise especially with new materials and edible chews.
    • Take toys away when your dog is overexcited or guarding.

    Most manufacturer guidance recommends supervision, even for toys marketed as tough.

    Step 5 – Inspect and Replace When Worn

    Inspection routine

    Check toys before and after each session, or at regular intervals if your dog has constant access to them. Run your hands over the surface and look at the seams, ends, and any hollow areas.

    Signs it's time to replace

    • Cracks, splits, or exposed inner material
    • Missing pieces or chunks
    • Frayed fibers or loose threads
    • Sharp edges
    • A size now small enough to swallow

    Safe disposal and rotation

    Discard damaged toys rather than keeping them for "light" use. Keep a small rotation of toys to reduce wear on any single one and to hold your dog's interest.

    Toys Are One Tool, Not the Whole Plan

    Training

    Teach "drop it" and "leave it," and reward your dog for trading a toy for a treat. This makes it easier to safely remove a toy when it starts to break down. If you'd like a structured approach, a program such as Brain Training for Dogs may be worth exploring. [VERIFY: no product details were supplied, so review the program's content and claims yourself before recommending it.]

    Enrichment

    Add food puzzles, sniff walks, play sessions, and appropriate exercise. A dog with other outlets for mental and physical energy may rely less on chewing for stimulation.

    Address the cause

    Boredom, teething, anxiety, or lack of exercise can all drive chewing. If destructive chewing persists, consult a veterinarian or certified trainer.

    How to Shop: Questions to Ask Before You Buy

    • What size and weight range is this toy designed for?
    • What is it made of, and is that information clear?
    • Is there any testing behind durability claims, and who performed it?
    • Is it intended for unsupervised use? (Most guidance recommends supervision.)
    • What is the return or replacement policy?
    • Does my vet have concerns about this material for my dog?

    FAQs

    How do I know what size chew toy to buy for my dog?

    Use the manufacturer's size guidance, consider your dog's mouth and muzzle, and avoid toys small enough to be swallowed. If you're between sizes, ask the brand or your vet.

    Are "indestructible" chew toys really indestructible?

    Treat such claims cautiously. Verify what testing was done and by whom, and monitor wear yourself. Any toy can break down with enough chewing.

    How often should I replace a chew toy?

    There is no universal timeline. Replace a toy when you see damage, missing pieces, or changes that create a hazard.

    Conclusion

    Choosing among the best chew toys for aggressive chewers comes down to four things: size, material, supervision, and timely replacement. Pair toys with training and enrichment so chewing isn't your dog's only outlet.

    Use the checklist when you shop, and ask your veterinarian about any specific material, especially edible chews.

    This content is informational and not a substitute for veterinary advice.

  • What Comes in a Medicinal Garden Kit? A Buyer’s Checklist for First-Time Gardeners

    What Comes in a Medicinal Garden Kit? A Buyer’s Checklist for First-Time Gardeners

    This article contains affiliate links. We may earn a commission if you buy through them, at no extra cost to you.

    What Comes in a Medicinal Garden Kit? A Buyer's Checklist for First-Time Gardeners

    Meta description: Wondering what a medicinal garden kit should include? Use this checklist to evaluate seeds, containers, soil, markers, and instructions before you buy.

    Disclosure: This article contains affiliate links. If you buy through them, we may earn a commission at no extra cost to you. We have not tested any specific kit, and nothing here describes the contents of a particular product.

    Choosing a medicinal garden kit can be confusing because the listings often lean on marketing language instead of specifics. This guide helps you compare kits by what's actually in the box. Kits vary widely, so we focus on what to look for, what to ask, and what to verify on any listing before you buy.

    Quick Answer: What Should a Medicinal Garden Kit Include?

    A good medicinal garden kit should include clearly identified seeds or plants, suitable containers with drainage, a starter soil or growing mix, plant markers, and written growing instructions. Look for a specific plant list (common and botanical names) and guidance on sowing, watering, light, and harvesting.

    Key takeaways

    • Seeds: Every plant should be named, ideally with its botanical name.
    • Containers: They need drainage and should suit the plants' mature size.
    • Soil or starter mix: Check what's included and whether it's enough.
    • Markers: They should match the plant list and hold up to watering or weather.
    • Instructions: Plant-specific, beginner-friendly guidance matters more than extras.

    "Medicinal" is a category label. A kit maker's wording does not guarantee any health benefit, and kits supply plants to grow, not health advice (see the FAQs).

    Before You Shop: Define What You Need

    A kit that suits a sunny patio may fail on a dim windowsill. Settle these basics first.

    Your Growing Space

    Note whether you have a windowsill, balcony, patio, or yard, and how many hours of direct light each gets. Indoor-oriented kits and outdoor kits often assume very different conditions, so check which one the listing describes. If it doesn't say, ask. [VERIFY on each listing]

    Your Experience Level and Time Commitment

    If you've never grown anything from seed, favor kits with detailed, step-by-step guidance. Seeds need consistent attention early on, so be honest about how often you can water and check seedlings.

    Your Goal

    Are you after herbs for tea, plants that overlap with the kitchen, a learning project, or a gift? A gift kit may emphasize packaging, while a learning kit should emphasize instructions and plant information.

    Safety Considerations

    Think about pets, children, pregnancy, and any medications in your household. Some plants are unsuitable for certain people or animals. Consult a qualified health professional before using any plant medicinally, and rely on reputable sources for plant identification and safe use.

    The Buyer's Checklist: What to Evaluate Inside the Kit

    1. Seeds (or Starter Plants)

    Seeds are the heart of the kit, so scrutinize them first.

    • Names: Is every plant listed by common and botanical (Latin) name? Common names overlap and mislead. "Mint," for instance, covers many different plants.
    • Variety and quantity: How many varieties are included, and does the listing state quantities per packet?
    • Packaging: Are seeds in separate, labeled packets, or loose in one bag?
    • Dates: Is there a packed-on, tested-for, or "use by" date? If it isn't shown, ask the seller.
    • Claims: Terms like organic, non-GMO, or heirloom are claims. Ask the seller for certification details rather than assuming.
    • Fit: Are the plants realistic for your climate and space? Check whether each is an annual or perennial and whether it suits indoor or outdoor growing.

    Practical example: Suppose a listing says "6 healing herbs." That tells you nothing. A stronger listing might read "Calendula (Calendula officinalis), 1 packet" for each plant, so you can research each one before buying.

    2. Growing Containers

    • Material: Plastic, fiber, ceramic, or fabric. Does the listing describe it clearly?
    • Drainage: Look for drainage holes and a tray or saucer, especially for windowsills.
    • Size: Compare container size against each plant's mature size. A small pot may suit a seedling stage but not a full-grown plant.
    • Location: Is it suitable for indoor use, outdoor use, or both?
    • Reuse: Can you reuse the containers beyond one season?

    3. Soil or Starter Mix

    • Format: Is loose mix included, or compressed pellets or discs that expand with water?
    • Description: Does the listing say what's in the mix?
    • Quantity: Is there enough for the container sizes provided?
    • Transplanting: Does the kit say whether you'll need to buy extra soil when seedlings outgrow their starting containers?

    Starter mixes are often designed for germination, not long-term growth. Ask what the kit expects you to do after the seedling stage. [VERIFY with seller]

    4. Plant Markers and Labels

    Markers sound minor, but once seedlings sprout, many look alike.

    • Are markers included, and do they match the plant list?
    • Are they weather-resistant if you'll be outdoors?
    • Is a pen or write-on surface provided?

    5. Instructions and Guidance

    This is where weak kits often fall short. Look for:

    • Plant-specific details: sowing depth, spacing, light, watering, germination timing, transplanting, and harvesting.
    • Beginner-friendly language: clear numbered steps, not dense paragraphs.
    • Troubleshooting: tips on overwatering, leggy seedlings, and pests.
    • Safety information: a reminder that plants should be correctly identified and used with caution.
    • Support: online help, QR-linked guides, or a customer service contact.

    If the listing offers a preview, PDF, or photos of the instruction booklet, read them. If not, ask what the guide covers.

    If you're new to all of this, a beginner herb growing guide can fill gaps that a thin instruction sheet leaves.

    6. Extras (Nice to Have)

    Tools, plant food, a humidity dome, a grow light, or gift packaging can add convenience. Treat them as secondary to seed quality and guidance. A kit with ten accessories but vague seeds is a worse buy than a simpler kit with named plants and clear instructions.

    Questions to Ask Before Buying

    If the listing doesn't answer these, message the seller:

    1. Which exact plants are included (common and botanical names)? 2. Are seeds, live plants, or both included? 3. When were the seeds packed, and how should I store them? 4. What do I need to supply (water, soil, light, tools)? 5. Is the kit suited to indoor or outdoor growing in my area? 6. What is the return, replacement, or germination policy? 7. Does the kit explain safe use of the plants, and does it avoid health claims it can't support? 8. Are there reviews from verified buyers describing germination and instruction quality?

    A seller who answers clearly and specifically is showing you something about the kit's quality, too.

    Red Flags to Watch For

    • Vague plant lists such as "assorted herbs" or "healing plants" with no names
    • Missing botanical names
    • No growing guidance, or instructions that amount to "add water"
    • Unsupported health claims using words like cure, treat, or prevent
    • Stock photos of mature plants with no indication of what you'll actually receive
    • No information on seed source, date, or storage
    • Containers without drainage
    • Too many plants for the container size or included soil
    • No seller contact, return policy, or support
    • Generic reviews that say "great kit!" but give no detail about results

    One red flag may be explainable. Several together suggest you should keep looking.

    How to Compare Two or More Kits

    1. List the plants in each kit using botanical names. 2. Confirm which plants fit your light and space. 3. Check what's missing (soil, markers, tools) and estimate the added cost. 4. Compare instruction quality using any preview, PDF, or photos. 5. Read return and support policies. 6. Scan verified reviews for comments on germination, clarity, and packaging. 7. Choose the kit with the clearest contents and guidance, not necessarily the most items.

    When you're ready to compare options, you can browse medicinal garden kit listings and run each one through the steps above. Confirm every detail on the specific listing, since contents can change.

    Simple Comparison Table (Template)

    Copy this into a notes app or spreadsheet and fill it in for each kit.

    Kit name Plants listed (botanical names?) Containers (drainage?) Soil included? Markers Instructions Return policy Notes
    Kit A
    Kit B
    Kit C

    Leave a cell blank if the listing doesn't say. A blank cell is a question for the seller.

    After You Buy: First Steps

    • Inspect the contents against the listing and note anything missing.
    • Read all instructions before opening seed packets.
    • Verify plant identification and note any safety information.
    • Start with the easiest plants first, following the kit's guide.
    • Keep the packaging for seed details and the support contact.

    FAQs

    Are medicinal garden kits good for beginners?

    They can be, if the kit includes a clear plant list, simple instructions, and suitable containers. Beginners should favor kits with detailed, plant-specific guidance and avoid those with vague contents.

    Can I use the plants from a medicinal garden kit as medicine?

    Kits supply plants to grow. They don't replace professional medical advice. Consult a qualified health professional before using any plant for health purposes, especially if you're pregnant, nursing, taking medication, or giving it to children. Rely on reputable sources for identification and safe use.

    Do I need to buy anything else besides the kit?

    It depends on the kit. Check whether you'll need a water source, extra soil, tools, supplemental light, or larger pots for transplanting. If the listing is unclear, ask the seller.

    Conclusion

    The best medicinal garden kit isn't the one with the most items or the boldest claims. It has named plants (with botanical names), usable containers with drainage, a soil or starter mix, markers that match the plant list, and real instructions you can follow as a beginner.

    Use this checklist to compare kits side by side, and contact sellers about anything the listing leaves unanswered before you purchase. When you're ready to compare, see current medicinal garden kit options and check each against the criteria above.

  • Best Budget Plant-Based Protein Sources for Dinner: What to Buy and How to Use Them

    Best Budget Plant-Based Protein Sources for Dinner: What to Buy and How to Use Them

    This article contains affiliate links. We may earn a commission if you buy through them, at no extra cost to you.

    Best Budget Plant-Based Protein Sources for Dinner: What to Buy and How to Use Them

    Meta description: Looking for cheap plant based protein sources for dinner? Compare beans, lentils, tofu, tempeh, chickpeas, peanut butter, and TVP, and learn to calculate cost per serving from shelf tags.

    Dried or canned beans, lentils, chickpeas, and textured vegetable protein (TVP) are usually the lowest-cost cheap plant based protein sources for dinner. Tofu, tempeh, and peanut butter often cost more per serving, but they save prep time or add variety. Check this against the unit prices on your own store's shelf tags.

    This guide gives you a side-by-side comparison, a step-by-step cost-per-serving method, and practical dinner ideas.

    Disclosure: This article may contain affiliate links. Nutrition information here is general and not medical advice.

    Key Takeaways

    • Dried legumes and TVP are the most likely low-cost picks, but local prices decide.
    • Canned legumes and pressed tofu trade a little extra cost for much less effort.
    • Compare products using cost per serving and cost per 10 g of protein, taken from the label.
    • Pick two or three staples that fit your cooking time rather than buying one of everything.

    Quick Answer: Which Cheap Plant Based Protein Sources for Dinner Are Worth Buying?

    Choose by goal:

    • Lowest likely cost: dried beans, lentils, dried chickpeas, TVP
    • Lowest effort: canned beans, canned chickpeas, pressed or pre-cooked tofu
    • Most meat-like texture: TVP, tempeh, extra-firm tofu
    • Pantry backup: peanut butter, canned legumes

    Prices vary by store and region, so use the method below instead of relying on a fixed price.

    Comparison Table: Format, Storage, Prep Effort, Best Dinner Uses

    Protein Common formats Storage Prep effort Best dinner uses
    Beans Dried, canned, sometimes frozen or pouched Dried: cool, dry pantry. Canned: pantry. Cooked leftovers: refrigerator or freezer Dried: soak and simmer. Canned: rinse and heat Chili, burritos, soups, rice bowls
    Lentils Dried, canned, pouched Dried: pantry Dried: usually no soak, simmer (check package) Dal, soups, stews, lentil "bolognese"
    Tofu Shelf-stable, refrigerated blocks (soft to extra-firm), pre-baked Check package. Refrigerate after opening Low to moderate: drain, press (optional), season Stir-fries, scrambles, baked cubes, curries
    Tempeh Refrigerated or frozen blocks Follow package. Refrigerate or freeze Moderate: slice, sometimes steam, then sear or bake Sandwiches, grain bowls, crumbles, stir-fries
    Chickpeas Dried, canned Same as beans Dried: soak and simmer. Canned: rinse Curries, roasted chickpeas, salads, pasta
    Peanut butter Jars Pantry (check label) Very low Peanut sauces, noodles, stews, dressings
    TVP Dry granules or chunks Dry pantry. Rehydrated: refrigerate Low: rehydrate in hot liquid and season Tacos, chili, sloppy joes, pasta sauce

    Always confirm storage and cook times against the package label, since brands differ.

    How to Compare Cost Per Serving Using Shelf Tags and Package Weights

    Shelf prices change often, so a method is more useful than a number. This one takes a few minutes in the store.

    What You Need

    • Shelf tag: the price and the unit price (per ounce, pound, or count)
    • Package net weight and servings per container from the Nutrition Facts panel
    • Serving size and protein grams per serving from the same panel

    Step-by-Step

    1. Find the shelf price and the servings per container on the label. 2. Calculate cost per serving: shelf price ÷ servings per container. 3. Calculate cost per protein: cost per serving ÷ protein grams per serving. Multiply by 10 or 20 to compare per 10 g or 20 g of protein. 4. Use the shelf tag's unit price to compare sizes within the same product type, such as two sizes of the same lentils. 5. Compare the same state of product: dry against dry, canned against canned. Dried beans and lentils expand when cooked, so judge them by the label's serving, not by raw package weight. 6. Record your numbers in a notes app or spreadsheet.

    Fill-in Worksheet (no prices quoted)

    Item Shelf price Package weight Servings Protein per serving Cost per serving Cost per 10 g protein
    Example: dried lentils ___ ___ ___ ___ ___ ___
    Example: canned chickpeas ___ ___ ___ ___ ___ ___
    Example: extra-firm tofu ___ ___ ___ ___ ___ ___
    Example: TVP ___ ___ ___ ___ ___ ___

    Want a printable version? Get a printable cost-per-serving worksheet and shopping checklist.

    Common Pitfalls

    • Comparing different serving sizes. One product's serving may be a different weight than another's, so always normalize with cost per 10 g of protein.
    • Ignoring drained weight on canned goods. Liquid is part of the can's weight but not the food you eat. Use the label's serving information.
    • Forgetting add-ins. Oil, spices, sauces, and grains add to the real cost of dinner. A cheap protein with expensive seasoning may not stay cheap.
    • Assuming store brand or bulk is cheaper. Check the unit price. Sometimes it is, sometimes it isn't.

    What to Buy: Best Picks by Dinner Need

    Lowest Cost Per Serving (verify with your shelf tags)

    Dried beans, lentils, dried chickpeas, and TVP are the usual front-runners because you pay for the food itself rather than water, packaging, or refrigeration. Confirm with your own math. A sale on canned beans can beat an unsold dried bag.

    Fastest Weeknight Options

    Canned beans or chickpeas need only a rinse and a heat-through. Pre-pressed or pre-baked tofu skips the draining step. TVP rehydrates quickly in hot liquid. These cost a bit more in some stores but can cut dinner prep sharply.

    Best for Meal Prep

    Cook dried legumes in a big batch and portion them for the week. Baked tofu or tempeh also holds up well in lunch and dinner containers. Follow the package guidance on how long opened or cooked items keep.

    Best Pantry Backups

    Canned legumes, peanut butter, and TVP keep well in the pantry, so they rescue dinner when fresh groceries run out. If you are stocking up, browse pantry-friendly plant-based protein staples and compare the unit prices against your local store using the worksheet above.

    Buying Tips

    • Compare store brand and name brand unit prices.
    • Check sodium and ingredients on canned goods. Rinsing canned beans is a common way to reduce surface sodium.
    • Consider frozen options or bulk bins where available.
    • Buy only what you can store and use. Cheap food that gets thrown away isn't cheap.

    How to Use Each Protein for Dinner

    Beans and Chickpeas

    Rinse canned versions. Simmer with spices, tomatoes, or broth so they absorb flavor. Dried versions need soaking and simmering per the package. Mash some beans into the pot to thicken chili or soup. Chickpeas also roast well for bowls and salads.

    Lentils

    Cook lentils directly into soups, stews, or curries. Many varieties don't need soaking, but check the package. Red lentils tend to break down into a creamy texture, while firmer varieties hold their shape for salads and bowls.

    Tofu and Tempeh

    Press and sear tofu so it browns instead of steaming. Slice and brown tempeh, and steam it first if the package suggests that to soften any bitterness. Both take on flavor from marinades, so use bold sauces such as soy-ginger, barbecue, or curry paste.

    Peanut Butter

    Whisk peanut butter into a sauce with soy sauce, an acid like lime juice or vinegar, and hot water until smooth. Toss it with noodles and vegetables, or stir a spoonful into a stew. Check the label for added sugar and salt.

    TVP

    Rehydrate TVP in hot broth, then season well, since it is mild on its own. Cook it in a sauce so it absorbs flavor and develops a ground-meat-like texture. It suits tacos, chili, sloppy joes, and pasta sauce.

    Sample Budget Dinner Combos

    These are ideas only, with no cost claims. Run your own numbers with the worksheet.

    • Lentil and rice bowl with vegetables: simmer lentils with garlic and cumin, then serve over rice with whatever vegetables are on hand.
    • Chickpea and tomato curry: simmer chickpeas in canned tomatoes with curry spices and serve with rice or flatbread.
    • TVP tacos with beans: season rehydrated TVP with taco spices, then add warmed beans, salsa, and shredded cabbage.
    • Tofu stir-fry with peanut sauce: sear pressed tofu, add frozen or fresh vegetables, and finish with a whisked peanut sauce.
    • Tempeh grain bowl: brown sliced tempeh and pile it over cooked grains with greens and a sauce of your choice.

    Storage and Waste-Reduction Tips

    • Store dried goods airtight in a cool, dry place.
    • Freeze cooked beans in meal-size portions so you can thaw only what you need.
    • Use opened tofu or tempeh within the time stated on the package.
    • Label rehydrated TVP with the date and refrigerate promptly. [VERIFY: check the TVP package for its recommended refrigerated storage time.]
    • Plan two or three dinners around the same cooked batch, such as lentils in a bowl one night and soup the next.

    FAQs

    What is the cheapest plant-based protein for dinner?

    Usually dried beans, lentils, or TVP, but it depends on local prices. Use the cost-per-serving and cost-per-protein steps to check at your own store.

    Are canned beans or dried beans the better value?

    Dried often has a lower cost per serving, but canned saves time. Compare shelf-tag unit prices and factor in your prep time.

    How do I compare tofu, tempeh, and TVP fairly?

    Use the label's serving size and protein grams, calculate cost per serving and per 10 g of protein, and compare in the same prepared state when possible. TVP is sold dry and expands when rehydrated, so rely on the label's serving rather than package weight.

    Conclusion and Next Step

    The cheapest option is the one your own shelf tags support, and the cost-per-serving method lets you check that in minutes. Choose two or three staples, such as one dried legume, one quick canned or pressed option, and one pantry backup, and match them to how much time you have to cook.

    Ready to start? Download or print the worksheet and take it on your next grocery run, or shop the staples list and compare unit prices before you buy.

    This article offers general nutrition and shopping information and is not medical advice. For dietary needs or health conditions, consult a qualified professional.

  • 15 Five-Minute Vegan Afternoon Snacks You Can Make With Pantry Staples

    15 Five-Minute Vegan Afternoon Snacks You Can Make With Pantry Staples

    This article contains affiliate links. We may earn a commission if you buy through them, at no extra cost to you.

    Meta title: 5 Minute Vegan Snacks: 15 Easy Ideas From Pantry Staples Meta description: Make 5 minute vegan snacks from pantry and fridge basics. Short ingredient lists, exact steps, allergy swaps, and a printable checklist.

    15 Five-Minute Vegan Afternoon Snacks You Can Make With Pantry Staples

    It's 3 p.m., your energy dips, and the kitchen is only half stocked. These 5 minute vegan snacks use cans, jars, and a few fresh items you likely already own. You'll get 15 easy vegan snacks with short ingredient lists, exact steps, and allergy swaps. For more plant-based ideas, see our [PILLAR PAGE TITLE](insert pillar URL).

    Quick Answer: What Are Good 5 Minute Vegan Snacks?

    Good 5 minute vegan snacks combine a base (rice cakes, apple slices, crackers, toast) with a spread or topper (hummus, nut or seed butter, mashed beans, avocado) and a crunch or seasoning (seeds, spices, dried fruit). Most need only a knife, a bowl, or a skillet.

    Note: Times assume ingredients are already on hand. Check labels, since some chocolate, sweeteners, and crackers may contain animal-derived ingredients.

    Key Takeaways

    • Every snack follows one pattern: base, spread, crunch, seasoning.
    • Canned chickpeas, white beans, and a jar of nut or seed butter cover many of these vegan pantry snacks.
    • Each recipe includes a swap for common allergies, but always read labels.

    Before You Start: Tools and Pantry Checklist

    Basic Tools

    Knife, cutting board, small bowl, fork, skillet, measuring spoons. If you're replacing a worn-out pan, you can compare basic kitchen tools and pantry staples before buying.

    Printable Pantry Checklist

    Pantry ☐ Canned chickpeas ☐ Canned white beans ☐ Rice cakes ☐ Whole-grain crackers or tortillas ☐ Peanut butter or other nut/seed butter ☐ Tahini ☐ Nuts and seeds ☐ Raisins or dried fruit ☐ Dairy-free chocolate chips ☐ Popcorn kernels or plain popcorn ☐ Olive oil ☐ Salt, pepper, cinnamon, paprika, garlic powder, cumin

    Fridge/Counter ☐ Hummus ☐ Apples ☐ Bananas ☐ Avocado ☐ Tomatoes ☐ Cucumber or carrots ☐ Lemons or limes ☐ Jam ☐ Pickles

    Allergy-Friendly Extras ☐ Sunflower seed butter ☐ Pumpkin or sunflower seeds ☐ Gluten-free rice cakes or crackers

    Hummus Plates and Spreads (Snacks 1-3)

    1. Classic Hummus Plate

    Ingredients: hummus, cucumber, carrots, crackers, olive oil, paprika Steps: Spoon hummus onto a plate and make a shallow well. Drizzle with oil and dust with paprika. Slice the vegetables and arrange them with crackers. Swap: For a sesame allergy, use mashed white beans with lemon and olive oil. For gluten-free, use GF crackers or only vegetables.

    2. Hummus Veggie Roll-Up

    Ingredients: tortilla, hummus, spinach or shredded carrot Steps: Spread hummus edge to edge, add veggies, roll tightly, and slice in half. Swap: Use a GF wrap or a large lettuce leaf.

    3. Tomato Hummus Toast

    Ingredients: toast, hummus, sliced tomato, pepper Steps: Toast the bread, spread with hummus, then top with tomato, salt, and pepper. Swap: Use mashed white beans instead of hummus.

    Peanut Butter Apple and Fruit Snacks (Snacks 4-6)

    4. Peanut Butter Apple Stacks

    Ingredients: 1 apple, 2 tbsp peanut butter, cinnamon Steps: Cut the apple into rounds and remove the seeds. Spread peanut butter on one round, top with another, and dust with cinnamon. Swap: Use sunflower seed butter for a peanut allergy.

    5. Apple "Nacho" Plate

    Ingredients: sliced apple, nut or seed butter, raisins, seeds, dairy-free chocolate chips Steps: Fan the slices on a plate. Warm the nut butter for 10 seconds if stiff, drizzle it over the apples, then sprinkle on the toppings. Swap: Omit nuts and use seed butter and seeds.

    6. Banana Peanut Butter Bites

    Ingredients: banana, nut butter, cocoa or cinnamon Steps: Slice the banana into rounds. Top half with nut butter, cover with the remaining rounds, and dust with cocoa. Swap: Use seed butter.

    Skillet-Crisped Chickpeas From a Can (Snacks 7-9)

    Quick Method (applies to 7 and 8)

    Drain and rinse one can, then pat very dry. Heat 1 tbsp oil in a skillet over medium-high heat. Cook, shaking often, until lightly browned and crisp-edged. Season off the heat.

    Note: Texture varies. These are crunchy-chewy, not oven-roasted, and may take a few minutes over the target time.

    7. Smoky Chickpeas

    Add smoked paprika, garlic powder, and salt.

    8. Cinnamon Chickpeas

    Add cinnamon and a pinch of sugar or maple syrup.

    9. Chickpea Smash Crackers

    Ingredients: chickpeas, lemon juice, mustard or tahini, crackers Steps: Mash the chickpeas with a fork, stir in lemon and mustard, and spoon onto crackers. Swap: Use mustard instead of tahini for a sesame allergy.

    Rice Cake Toppings (Snacks 10-12)

    10. Avocado Lime Rice Cake

    Ingredients: rice cake, ½ avocado, lime, salt, chili flakes Steps: Mash the avocado with a squeeze of lime and a pinch of salt. Spread it on the rice cake and top with chili flakes.

    11. Almond Butter Banana Rice Cake

    Ingredients: rice cake, almond butter, banana, cinnamon Steps: Spread almond butter on the rice cake, layer banana slices, and dust with cinnamon. Swap: Use sunflower seed butter for a tree nut allergy.

    12. White Bean Lemon Rice Cake

    Ingredients: rice cake, canned white beans, lemon, olive oil, black pepper Steps: Mash the beans with lemon and oil, spread on the rice cake, and finish with pepper.

    Quick Trail Mix Combos (Snacks 13-15)

    13. Classic Trail Mix

    Stir nuts or seeds, raisins, and dairy-free chocolate chips together in a bowl.

    14. Sweet-and-Salty Popcorn Mix

    Toss popcorn with peanuts or pumpkin seeds, dried fruit, and a pinch of salt.

    15. Cocoa-Cinnamon Seed Mix

    Toss pumpkin and sunflower seeds with cocoa, cinnamon, and maple syrup. Eat as is, or toast briefly in a skillet.

    Swap note for all mixes: Make them nut-free by using seeds, and check labels for cross-contact warnings.

    Allergy Swap Cheat Sheet

    If you avoid… Try…
    Peanut Sunflower seed butter
    Tree nuts Pumpkin or sunflower seeds
    Sesame/tahini Mashed white beans or mustard
    Gluten GF rice cakes, crackers, or wraps
    Soy Check labels on breads and crackers

    How to Build Your Own 5 Minute Vegan Snack (Formula)

    Use this formula: base + spread + crunch + seasoning.

    • Rice cake + mashed white beans + pumpkin seeds + lemon and pepper
    • Apple rounds + sunflower seed butter + raisins + cinnamon
    • Cracker + hummus + shredded carrot + paprika

    FAQ

    Are 5 minute vegan snacks filling enough for an afternoon?

    Pairing a base with beans, hummus, or nut/seed butter adds substance. Adjust portions to your needs.

    Can I prep these snacks ahead?

    Trail mixes and seasoned chickpeas can be made ahead and stored airtight. Cut apples, bananas, and avocado are best assembled just before eating.

    How do I make these snacks nut-free or gluten-free?

    Use seed butters and seeds, and choose certified gluten-free crackers or rice cakes. Read labels.

    Conclusion

    Pick two or three favorites from these 5 minute vegan snacks, then stock the checklist so the next 3 p.m. slump is easy. Print the pantry list and keep it on the fridge. Explore more in our [PILLAR PAGE TITLE](insert pillar URL).

    Disclosure: Some links on this page may be affiliate links.