Author: latinino

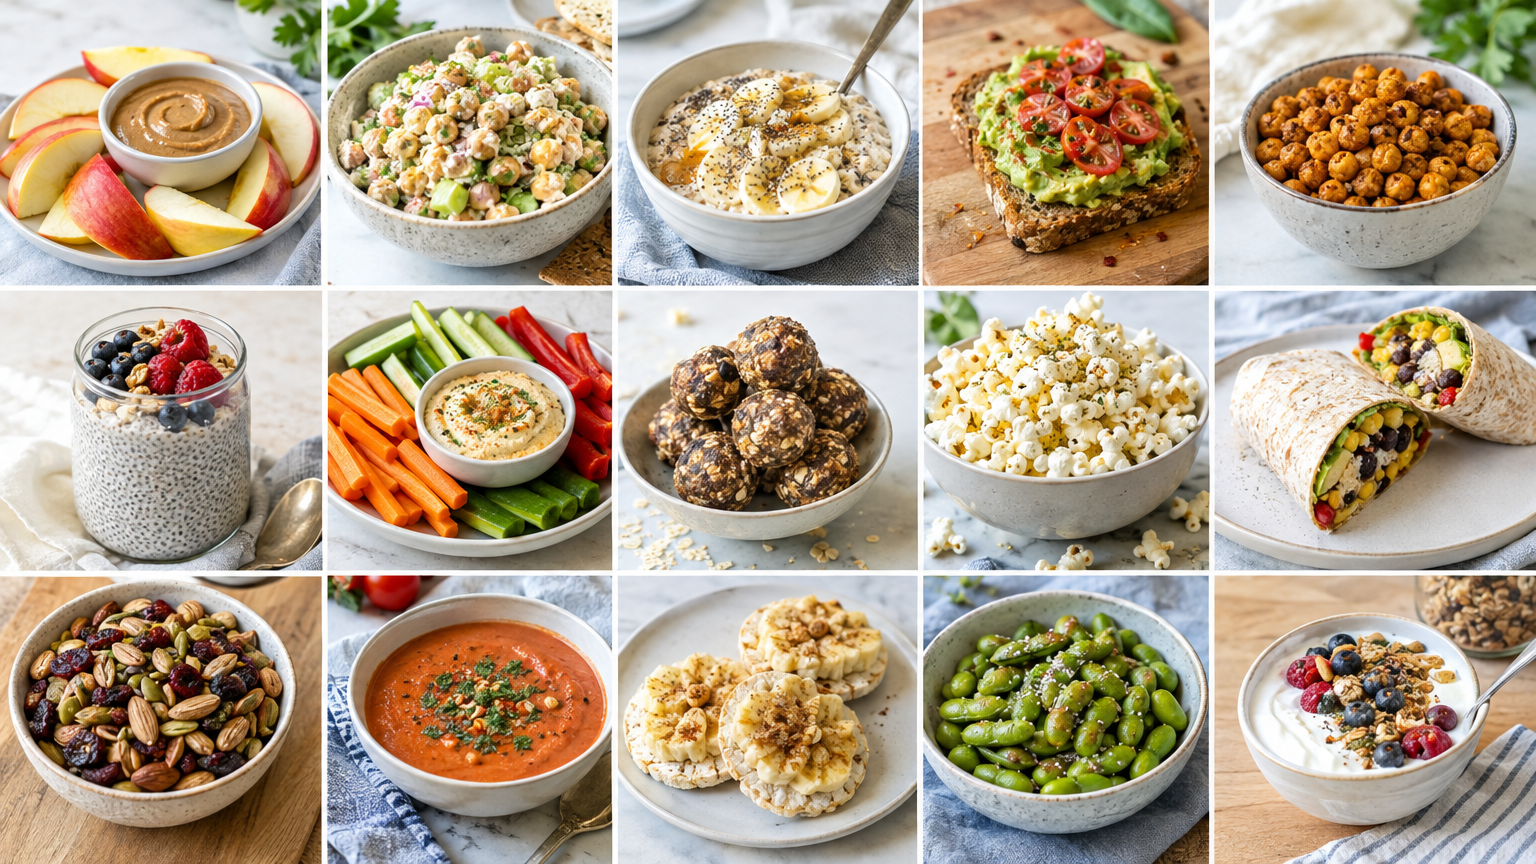
  • 15 Five-Minute Vegan Afternoon Snacks You Can Make With Pantry Staples

    15 Five-Minute Vegan Afternoon Snacks You Can Make With Pantry Staples

    This article contains affiliate links. We may earn a commission if you buy through them, at no extra cost to you.

    15 Five-Minute Vegan Afternoon Snacks You Can Make With Pantry Staples

    Slug: /5-minute-vegan-snacks Meta description: Fast, filling 5 minute vegan snacks made from pantry and fridge basics, with exact steps, allergy swaps, and a printable checklist.

    The 3 p.m. slump rarely comes with spare time or energy to cook. Here are 15 five-minute vegan snacks with short ingredient lists, exact steps, and allergy swaps. For more ideas, see our Vegan Snack Ideas guide [VERIFY: insert real pillar URL].

    Quick Answer: What Are the Easiest 5 Minute Vegan Snacks?

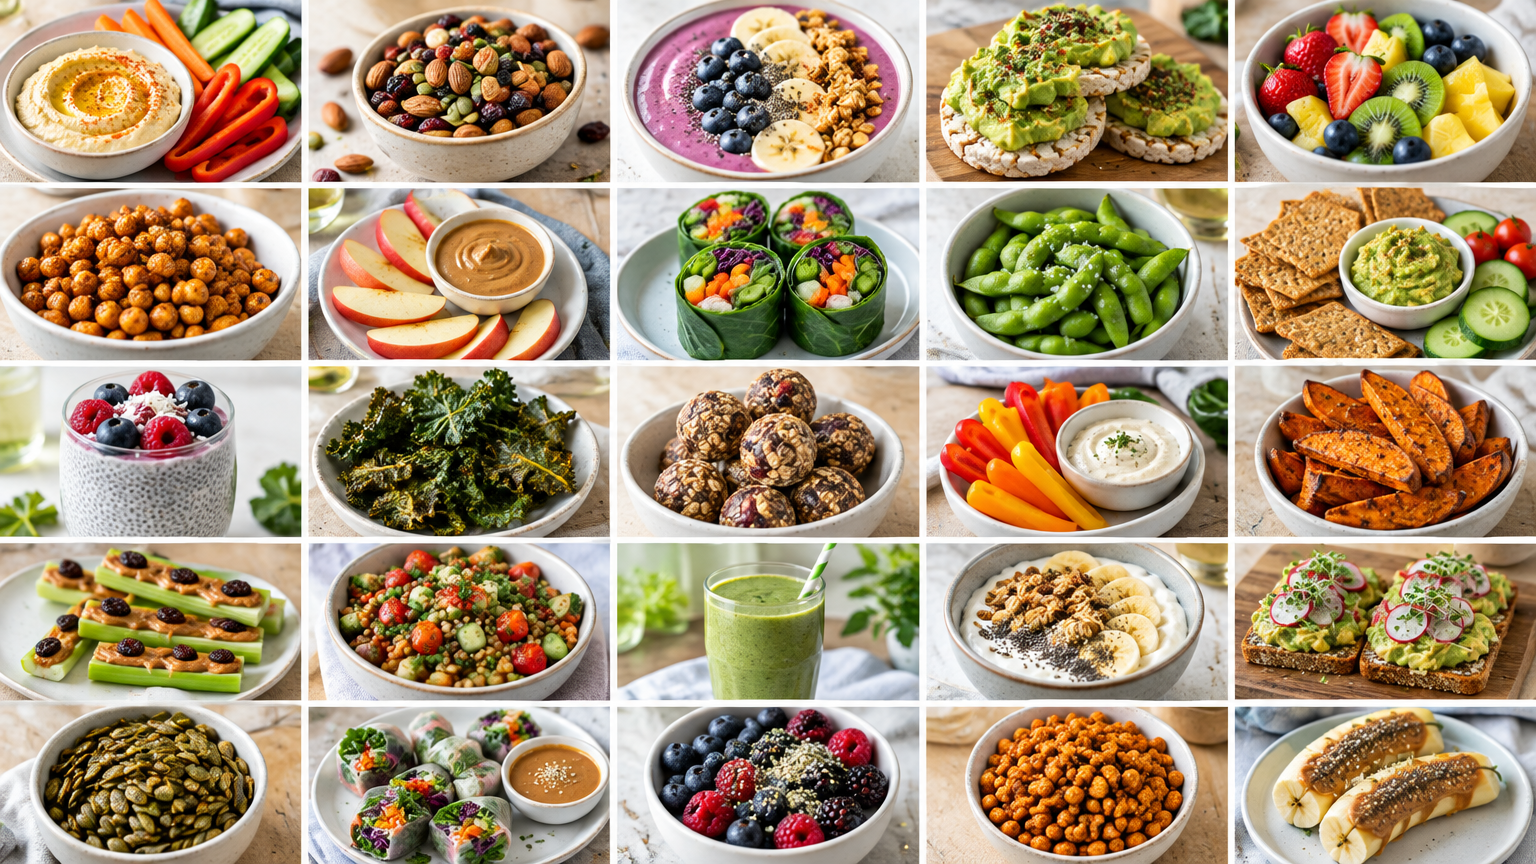
    The easiest 5 minute vegan snacks need no cooking or only a skillet or microwave. Good options are hummus with vegetables, peanut butter apple stacks, rice cakes with toppings, quick trail mix, and canned chickpeas crisped in a skillet. Each uses common pantry or fridge items.

    Times are approximate and assume ingredients are on hand. Check labels on chips, chocolate, and bread for hidden animal-derived ingredients.

    Key takeaways

    • Most snacks need three or four ingredients and no more than one pan or plate.
    • Every snack lists a swap for common allergens where relevant.
    • Stock the checklist below and you can make any of these without a shopping trip.

    Before You Start

    Basic Kit

    Knife, cutting board, skillet, microwave-safe plate, mixing bowl, and measuring spoons.

    How to Use the Swaps

    Each snack lists a swap for common allergens (peanut, tree nut, soy, gluten, sesame). Always verify packaging for cross-contamination warnings.

    Hummus Plates (Snacks 1–3)

    1. Classic Hummus Veggie Plate

    Ingredients: hummus, carrots, cucumber, bell pepper Steps: Slice vegetables into sticks. Spoon 3–4 tablespoons hummus onto a plate. Drizzle with olive oil if desired. Swap: Sesame-free: use a sunflower seed or white bean dip.

    2. Mediterranean Pita Wedges

    Ingredients: pita, hummus, olives, cherry tomatoes Steps: Cut pita into wedges. Warm in a skillet or microwave 20–30 seconds. Top or serve with hummus, olives, and halved tomatoes. Swap: Gluten-free: use gluten-free pita or crackers.

    3. Hummus Cucumber Bites

    Ingredients: cucumber, hummus, paprika or everything seasoning Steps: Cut cucumber into thick rounds. Top each with 1 teaspoon hummus. Sprinkle seasoning. Swap: Sesame-free: mashed avocado with lemon.

    Peanut Butter Apple and Fruit Snacks (Snacks 4–6)

    4. Peanut Butter Apple Stacks

    Ingredients: apple, peanut butter, granola or chopped nuts Steps: Core and slice apple into rings. Spread peanut butter on one ring. Sprinkle granola and top with a second ring. Swap: Peanut-free: sunflower seed butter. Nut-free granola: use seeds or oats.

    5. Peanut Butter Banana Roll-Up

    Ingredients: tortilla, peanut butter, banana Steps: Spread peanut butter on tortilla. Place banana at one edge. Roll tightly and slice into rounds. Swap: Gluten-free tortilla or a large rice paper alternative.

    6. Stuffed Dates

    Ingredients: pitted dates, nut or seed butter, pinch of salt Steps: Split dates open. Fill each with 1 teaspoon nut butter. Add a pinch of salt. Swap: Use sunflower seed butter for nut-free.

    Skillet Chickpea Snacks from a Can (Snacks 7–8)

    These are skillet-crisped, not oven-roasted. Expect crisp-edged and tender inside, not fully crunchy. Dry the chickpeas well.

    7. Smoky Skillet Chickpeas

    Ingredients: 1 can chickpeas, 1 tablespoon oil, 1/2 teaspoon smoked paprika, salt Steps: Drain, rinse, and pat dry with a towel. Heat oil over medium-high. Cook chickpeas 5–7 minutes, shaking often. Season off heat. Swap: Oil-free: use a nonstick pan with a splash of water, expecting less crispness.

    8. Cinnamon Skillet Chickpeas

    Ingredients: 1 can chickpeas, 1 tablespoon oil, 1 teaspoon cinnamon, 1 tablespoon sugar or maple syrup Steps: Cook as above. Toss with cinnamon and sweetener off heat. Swap: Check that sugar is vegan-friendly if that matters to you.

    Rice Cake Toppings (Snacks 9–11)

    9. Smashed Avocado and Chili Flakes

    Ingredients: rice cake, avocado, lemon juice, salt, chili flakes Steps: Mash avocado with lemon and salt. Spread on rice cake. Add chili flakes.

    10. Almond Butter, Banana, and Cinnamon

    Ingredients: rice cake, almond butter, banana, cinnamon Steps: Spread almond butter. Layer banana slices. Dust with cinnamon. Swap: Tree-nut-free: sunflower seed butter.

    11. White Bean and Lemon Mash

    Ingredients: rice cake, canned white beans, lemon juice, olive oil, salt, pepper Steps: Mash 1/4 cup beans with lemon, oil, salt, and pepper. Spread on rice cake. Swap: Check rice cake labels for gluten cross-contact if needed.

    Quick Trail Mix (Snacks 12–13)

    12. Classic Pantry Trail Mix

    Ingredients: 1/4 cup nuts or seeds, 2 tablespoons raisins, 2 tablespoons dairy-free chocolate chips Steps: Combine in a bowl or bag and shake. Swap: Nut-free: pumpkin and sunflower seeds. Check chocolate chips for dairy.

    13. Savory Trail Mix

    Ingredients: popcorn or pretzels, roasted seeds, dried fruit or savory crackers Steps: Toss with a pinch of salt and optional nutritional yeast. Swap: Gluten-free: skip pretzels, use popcorn.

    More Fast Favorites (Snacks 14–15)

    14. Black Bean Nacho Plate

    Ingredients: tortilla chips, canned black beans, salsa, optional avocado Steps: Spread chips on a microwave-safe plate. Top with drained beans. Microwave 45–60 seconds. Add salsa and avocado.

    15. Nutritional Yeast Popcorn

    Ingredients: popcorn kernels or microwave popcorn, oil, nutritional yeast, salt Steps: Pop popcorn. Toss with a little oil, nutritional yeast, and salt. Swap: Check microwave popcorn labels for butter flavoring.

    Quick Swap Reference

    Concern Easy swap
    Peanut / tree nut Sunflower seed butter, seed-based trail mix
    Sesame Sunflower seed or white bean dip, mashed avocado
    Gluten Gluten-free pita, tortillas, or crackers; popcorn instead of pretzels
    Oil-free Nonstick pan with a splash of water

    Printable Pantry Checklist

    Pantry

    • ☐ Canned chickpeas
    • ☐ Canned white beans
    • ☐ Canned black beans
    • ☐ Peanut or sunflower seed butter
    • ☐ Almond butter
    • ☐ Rice cakes
    • ☐ Tortillas or pita
    • ☐ Popcorn
    • ☐ Oats or granola
    • ☐ Nuts and seeds
    • ☐ Raisins or dried fruit
    • ☐ Dairy-free chocolate chips
    • ☐ Dates
    • ☐ Olive oil
    • ☐ Nutritional yeast

    Spices

    • ☐ Salt
    • ☐ Cinnamon
    • ☐ Smoked paprika
    • ☐ Chili flakes
    • ☐ Everything seasoning

    Fridge

    • ☐ Hummus
    • ☐ Apples
    • ☐ Bananas
    • ☐ Carrots
    • ☐ Cucumbers
    • ☐ Bell peppers
    • ☐ Lemons
    • ☐ Avocados
    • ☐ Salsa
    • ☐ Olives

    Optional

    • ☐ Tahini
    • ☐ Maple syrup

    Note: Check labels for vegan status and allergens. [Downloadable PDF version: VERIFY file/link before publishing.]

    Tips for Fast Prep

    • Pre-cut vegetables and store them in containers.
    • Keep a trail mix jar ready.
    • Rinse and dry chickpeas before cooking.
    • Prevent apple browning with a little lemon juice.

    FAQs

    What are good 5 minute vegan snacks without nuts?

    Hummus with vegetables, sunflower seed butter on apples, nut-free trail mix with seeds, popcorn, and bean-topped rice cakes. Check labels for nut warnings.

    Can I make these snacks ahead?

    Cut vegetables, trail mix, and stuffed dates keep well in containers in the fridge or pantry. Add toppings to rice cakes and apple stacks right before eating to avoid sogginess.

    Are canned chickpeas okay for skillet snacks?

    Yes. Drain, rinse, and dry them thoroughly, then cook in a hot skillet until browned. They are best eaten the same day and will soften as they sit.

    Next Steps

    Pick two or three snacks, stock the checklist, and rotate them through the week. Once your pantry is set up, the same staples can carry into evening meals; you can browse plant-based dinner ideas when you're ready. Explore more ideas in our Vegan Snack Ideas guide [VERIFY: insert real pillar URL].

    Editor notes: Add a photo and descriptive alt text for each snack (for example, "Hummus plate with carrot, cucumber, and bell pepper sticks"). Some links may be affiliate links; add a disclosure per site policy.

  • Dog-Proofing Your Home: A Room-by-Room Checklist for Chewers

    Dog-Proofing Your Home: A Room-by-Room Checklist for Chewers

    This article contains affiliate links. We may earn a commission if you buy through them, at no extra cost to you.

    Dog-Proofing Your Home: A Room-by-Room Checklist for Chewers

    Title tag: Dog Proof Home for Chewers: Room-by-Room Checklist Meta description: Use this room-by-room checklist to dog proof your home for chewers. Cover cords, shoes, trash, plants, and garden items in every space.

    Chewing is normal dog behavior, but it can wreck your belongings and put your dog at risk. This guide shows you how to dog proof your home for chewers, room by room, with a focus on cords, shoes, trash, plants, and garden items.

    Quick Answer: How to Dog Proof a Home for Chewers

    Remove or block access to anything chewable and risky. Secure cords, store shoes, use lidded or hidden trash, and keep plants and garden supplies out of reach. Offer approved chew toys, supervise or confine your dog when you can't watch, and confirm the safety of any plant or product with your vet or a poison-control resource.

    Key takeaways: the five priorities

    • Cords: cover, hide, or unplug them
    • Shoes: closed storage, closed doors
    • Trash: latched or hidden
    • Plants: out of reach and verified by a professional
    • Garden items: locked away or sealed

    Before You Start: Think Like a Chewer

    Get down to dog level

    Walk each room at your dog's eye level and reach height. Include what your dog can reach by jumping, stretching, or counter-surfing. Dangling cords, low shelves, and open bins show up fast from down there.

    Sort items into three groups

    • Remove: anything not worth the risk, such as small items your dog keeps stealing.
    • Block or secure: cords, trash, and cabinets.
    • Replace: swap in appropriate chews where your dog usually chews.

    Set up a safe space

    Pick a crate, pen, or gated room for times you can't supervise. Introduce it gradually so your dog sees it as a comfortable spot, not a punishment.

    Room-by-Room Checklist

    Living Room

    • Cords and cables: Tuck them behind furniture, use cord covers or channels, and unplug devices when not in use.
    • Remotes, controllers, and small electronics: Store them out of reach.
    • Shoes, socks, and kids' toys: Use a closed shoe cabinet or a high shelf.
    • Houseplants: Move them out of reach and verify each one with your vet or poison control.
    • Furniture and décor: Block access to table legs, pillows, and throws if your dog targets them.

    Kitchen

    • Trash and recycling: Use a lidded can inside a closed cabinet, or a latch-secured bin.
    • Countertops: Clear off food, wrappers, and utensils.
    • Cabinets: Add child-proof latches for cleaning supplies and food storage.
    • Pantry: Keep the door closed or latched.
    • Reminder: Check unfamiliar foods and household products with your vet before assuming they're safe.

    Bedroom

    • Shoes and clothing: Keep closets closed and use a hamper with a secure lid.
    • Cords: Manage charger cables and bedside lamp cords.
    • Small items: Store jewelry, hair ties, medications, and cosmetics in closed drawers or cabinets.
    • Bedding: Monitor chewing, and remove bedding if your dog tears it up.
    • Plants: Keep them out of reach and verify with a vet or poison-control resource.

    Garage

    • Chemicals and tools: Store them in closed, latched cabinets or on high shelves.
    • Cords, hoses, and small hardware: Keep them off the floor.
    • Garden supplies: Store fertilizers, pest products, and soil amendments in sealed containers out of reach. Read the labels, and ask your vet or poison control about risks.
    • Access: Keep the door closed or gate the area.

    Yard and Garden

    • Fencing: Inspect for gaps, loose boards, and chewed spots.
    • Plants: Review every plant, including shrubs, bulbs, and mulch, with your vet or a poison-control resource before allowing access.
    • Garden items: Secure tools, hoses, sprinkler parts, plant ties, stakes, and pots.
    • Compost and trash bins: Use tightly closed lids or a locked area.
    • Supervision: Check the yard for hazards before each outing and watch your dog while outside.

    Cords, Shoes, Trash, Plants, and Garden Items: Fast Fixes

    Problem area Fast fixes
    Cords Cord covers, cord organizers, furniture placement, unplugging when not in use
    Shoes Closed storage, closed bedroom and closet doors, a designated chew toy as a swap
    Trash Latching bins, cabinet storage, taking trash out promptly
    Plants Hanging planters, closed rooms, a vet-verified plant list
    Garden items Locked shed, sealed containers, raised storage

    Practical example: If your dog goes for the shoes by the front door, move them into a closed cabinet. Then put an approved chew toy where the shoes used to be. When your dog picks up the toy, praise them. That teaches your dog where chewing is welcome.

    Give Chewers Better Options

    Choose appropriate chew toys

    Match size and durability to your dog. Inspect toys often and replace any that are cracked, shredded, or breaking apart. If your dog is a heavy chewer, ask your vet for recommendations.

    Rotate toys and provide exercise

    Rotating toys keeps them interesting. Physical and mental activity can also help reduce boredom chewing. If you want structured mental-enrichment ideas, you could look into a training program such as Brain Training for Dogs and review the details yourself to see whether it suits your dog and routine.

    Redirect, don't punish

    Trade the forbidden item for an approved chew, then reward the switch. Punishment after the fact rarely teaches a dog what to do instead.

    How to Check Plant and Household-Item Safety

    This guide does not list toxic or safe items. Lists online can be incomplete, outdated, or wrong, so verify each plant and product with a professional.

    • Contact your veterinarian for guidance on specific plants and products.
    • Use a reputable animal poison-control resource, such as the ASPCA Animal Poison Control Center or Pet Poison Helpline. Confirm current contact details and any fees on their official sites.
    • Keep product labels and plant names handy. Photos of plant tags and product packaging work well.
    • Treat unknowns as off-limits until a professional confirms otherwise.

    What to Do If Your Dog Chews Something Risky

    1. Remove your dog from the item. Keep the packaging or a sample of the plant. 2. Call right away. Contact your vet, an emergency clinic, or a poison-control hotline. 3. Follow professional instructions. Do not give home remedies unless a professional advises it.

    Save your vet's number, the nearest emergency clinic's number, and your chosen poison-control contact in your phone before you need them.

    Printable Checklist Summary

    • ☐ Living room: Cords covered or hidden, electronics and shoes stored, plants moved and verified, chew targets blocked
    • ☐ Kitchen: Trash latched or in a cabinet, counters cleared, cabinets and pantry latched
    • ☐ Bedroom: Closet and hamper closed, chargers managed, small items and medications in drawers, bedding monitored
    • ☐ Garage: Chemicals and tools latched away, garden supplies sealed, cords and hardware off the floor, door closed or gated
    • ☐ Yard: Fence inspected, plants reviewed with a professional, tools and pots secured, bins closed, outings supervised

    Re-check your home regularly, especially after rearranging furniture, hosting guests, or seasonal changes.

    Frequently Asked Questions

    1. What is the best way to dog proof a home for chewers?

    Remove or secure tempting items, manage cords, and store shoes and trash. Limit access to plants and garden supplies, and provide appropriate chews. Supervise your dog or confine them to a safe space when you can't watch.

    2. How do I know if a plant or household item is safe for my dog?

    Don't rely on unverified lists. Check with your veterinarian or a poison-control resource, and keep unknown items out of reach until a professional confirms them.

    3. How can I stop my dog from chewing cords and shoes?

    Make them inaccessible with cord covers and closed storage. Offer approved chew toys, and redirect and reward your dog for choosing them. If chewing is persistent or suddenly gets worse, talk with your vet or a qualified trainer.

    Conclusion

    To dog proof your home for chewers, focus on prevention, supervision, and giving your dog better things to chew. Start with the five priorities (cords, shoes, trash, plants, and garden items), then work through each room and the yard. Walk through your home with this checklist today, and schedule a vet check-in for any questions about plants and products.

    Related reading ideas: best chew toys for heavy chewers, puppy-proofing basics, a crate training guide, and safe gardening with pets.

    Editor notes: Add FAQ schema for the three questions. Add internal link URLs once the pages are confirmed. the current ASPCA and Pet Poison Helpline contact details and fees before publishing. No details were supplied for Brain Training for Dogs, so the article makes no claims about its features or results.

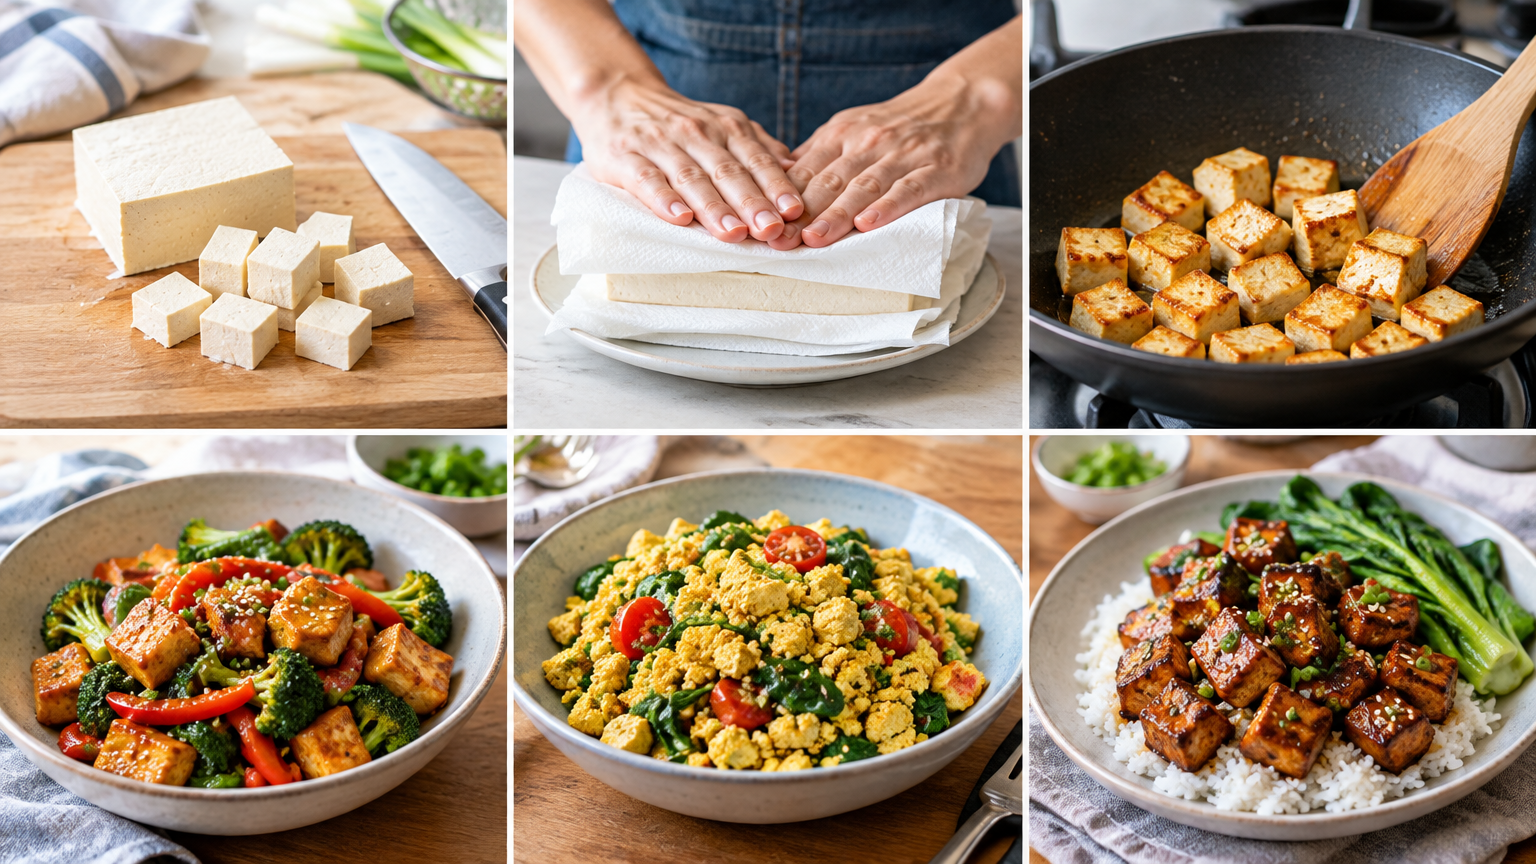
  • How to Cook Tofu for Beginners: Simple Methods for Easy Weeknight Dinners

    How to Cook Tofu for Beginners: Simple Methods for Easy Weeknight Dinners

    This article contains affiliate links. We may earn a commission if you buy through them, at no extra cost to you.

    How to Cook Tofu for Beginners: Simple Methods for Easy Weeknight Dinners

    Tofu is mild on its own, which is its biggest advantage: it takes on the flavor of whatever you cook it with. This guide covers which tofu to buy, whether you need to press it, and four easy methods tied to quick weeknight dinners.

    Key takeaways

    • Start with extra-firm or firm tofu. It's the easiest to handle.
    • Pressing helps with crisping, but you can skip it for scrambles, crumbles, and soups.
    • Dry tofu, a hot pan, and patience are what make the surface golden.
    • Add wet sauces near the end so the crisp surface doesn't steam away.
    • Pick one method and one dinner idea to try this week.

    The Short Answer: How to Cook Tofu for Beginners

    Buy firm or extra-firm tofu, pat it dry (press it if you have time), cut it into cubes or crumble it, and season it well. Then pan-fry it for crisp edges, bake it for a hands-off option, or scramble or crumble it for a soft, savory filling. Cook until the surface is golden.

    Tofu Types: Which One to Buy

    Tofu is sold in several textures, and the right one depends on what you're making. Here's a quick comparison before the details.

    Tofu type Texture Best for
    Silken / soft Delicate, custard-like Blending, soups, sauces
    Medium / firm Holds together, still tender Scrambles, gentle pan-frying
    Extra-firm Dense, easy to cut Pan-frying, baking, crumbling
    Pre-seasoned / baked Already firm Slicing into bowls or sandwiches

    Silken and soft tofu

    Silken and soft tofu are delicate. They work well blended into sauces or added to soups, but they tend to fall apart in a hot pan or on a sheet pan. Save them for recipes that call for them specifically.

    Medium and firm tofu

    These hold together well enough for scrambles and gentle pan-frying. Firm tofu is a good all-purpose choice if your store doesn't carry extra-firm. It's a bit softer, so handle it more carefully when you flip it.

    Extra-firm tofu

    For most beginners, extra-firm is the easiest starting point. It's simple to cut into even pieces, it browns well, and it crumbles into a ground-style texture. If you're only going to buy one type to learn on, this is it.

    Pre-seasoned or baked tofu (optional)

    Some stores sell tofu that's already seasoned or baked. It's firm and ready to slice into rice bowls, salads, or sandwiches. It's a handy shortcut on busy nights, though you can also cook plain tofu yourself and control the flavor.

    Tip: Check the package label. Texture names vary by brand, so one company's "firm" may feel different from another's.

    Do You Need to Press Tofu?

    Not always. Whether pressing is worth the time depends on what you're making.

    When pressing helps: Pan-frying and baking. Less surface moisture means better browning and a crisper exterior.

    When you can skip it: Scrambles, crumbles, soups, and sauces, or any night you're short on time. In these dishes, the tofu is broken up or simmered, so extra moisture matters less. For scrambles and crumbles, you can simply pat the tofu dry or let it cook off in the pan.

    Quick pressing steps

    1. Drain the tofu and wrap it in a clean towel or paper towels. 2. Set a heavy pan or plate with a weight on top. 3. Wait 15–30 minutes, then pat dry.

    A heavy skillet with a can or two on top works fine. If you find yourself pressing tofu often, a dedicated tofu press is an option, but it isn't required to get started.

    Note: Silken tofu should not be pressed. It's too delicate and will break apart.

    Basic Prep Before Cooking

    A few simple habits make every method work better:

    • Cut evenly. Cubes, slabs, or triangles of similar size cook at the same rate. Pieces around three-quarters of an inch to an inch are a comfortable size for beginners.
    • Season it. Tofu needs more seasoning than you might expect. Use salt, pepper, and spices, or toss it with a little soy sauce. For a crisper surface, you can toss the pieces with a small amount of cornstarch. This step is optional.
    • Use enough oil. A thin, even coat in the pan helps prevent sticking and encourages browning.

    Prep checklist

    • [ ] Tofu drained and patted dry (or pressed)
    • [ ] Pieces cut to an even size
    • [ ] Seasoning ready
    • [ ] Oil measured out
    • [ ] Sauce mixed and set aside for the end

    Four Easy Ways to Cook Tofu (with Dinner Ideas)

    Each method below pairs with a simple weeknight dinner, so you can go from technique to meal without much planning.

    Pan-Fry

    Pan-frying gives you crisp edges and a chewy bite, and it's quick.

    Steps:

    1. Heat oil in a nonstick or cast-iron skillet over medium-high heat. 2. Add dry tofu in a single layer. 3. Cook without moving it until the underside is golden, usually several minutes. 4. Flip and repeat on the other sides. 5. Add sauce at the end and toss to coat.

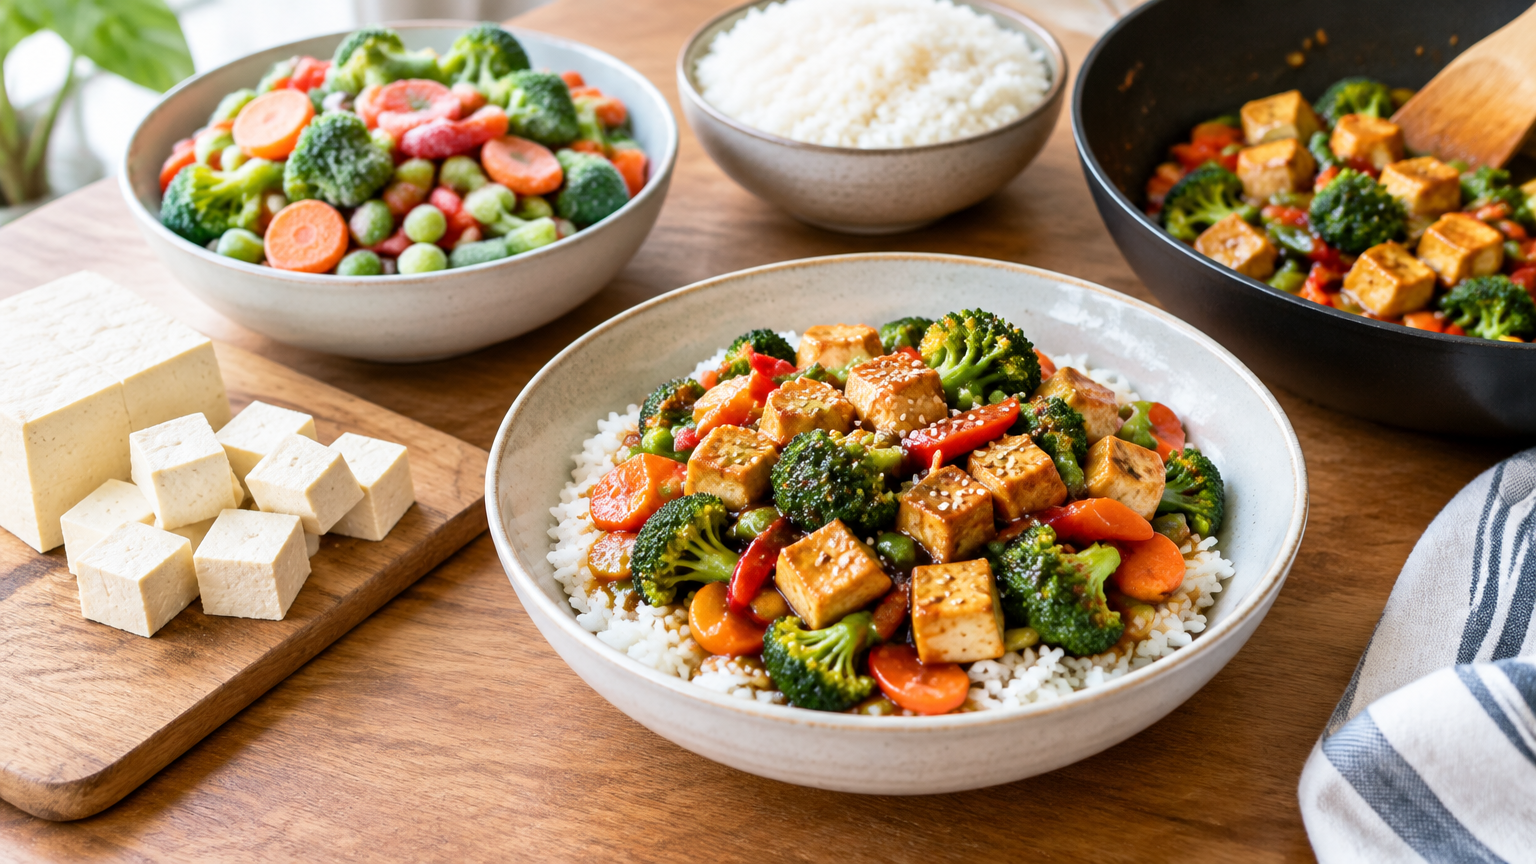
    Easy dinner: A stir-fry or rice bowl. Cook the tofu first and set it aside. Then heat frozen vegetables in the same pan, add a store-bought stir-fry sauce, and return the tofu. Serve over rice. For more ideas along these lines, browse these easy plant-based dinner ideas.

    Bake

    Baking is the most hands-off option. It's useful when you want to prep something else while dinner cooks.

    Steps:

    1. Heat the oven to about 400°F. 2. Toss cubed tofu with oil and seasoning. 3. Spread it on a lined sheet pan, leaving space between pieces. 4. Bake, flipping halfway, until browned and firm at the edges.

    Oven times vary, so start checking early and adjust to your oven.

    Easy dinner: Sheet-pan tofu with chopped vegetables. Put the vegetables on the same pan (cut them to a size that cooks in a similar time), then serve everything over rice or noodles with a drizzle of sauce.

    Scramble

    A tofu scramble is soft, savory, and forgiving. It's the best method for medium or firm tofu, and it doesn't require pressing.

    Steps:

    1. Heat a little oil in a pan over medium heat. 2. Crumble firm or medium tofu into the hot pan. 3. Season with salt, pepper, and spices of your choice. 4. Stir until heated through and lightly golden.

    Easy dinner: Breakfast-for-dinner burritos or tacos. Fill warm tortillas with the scramble, beans, and salsa. It comes together in about the time it takes to warm the tortillas.

    Crumble

    Crumbled tofu is browned a bit longer than a scramble, so the pieces turn slightly crisp. Extra-firm tofu works best.

    Steps:

    1. Break extra-firm tofu into small pieces with your hands or a fork. 2. Cook in a skillet with oil until browned and slightly crisp, stirring occasionally. 3. Add seasoning or sauce at the end.

    Easy dinner: Use it as taco filling, stir it into a pasta sauce, or add it to fried rice. Because it's already in small pieces, it mixes easily into whatever you're making.

    Method-at-a-glance

    Method Best tofu Press first? Pairs with
    Pan-fry Extra-firm or firm Helpful Stir-fry, rice bowls
    Bake Extra-firm Helpful Sheet-pan dinners
    Scramble Medium or firm Optional Burritos, tacos
    Crumble Extra-firm Optional Tacos, pasta, fried rice

    Simple Flavor Ideas

    Because tofu is mild, almost any familiar flavor works. A few easy combinations:

    • Soy sauce and garlic for stir-fries and rice bowls
    • Taco seasoning for crumbles and scrambles
    • Barbecue sauce for baked tofu in sandwiches or bowls
    • Curry paste or powder for a simple skillet dinner with rice
    • Lemon, herbs, and black pepper for a lighter, fresh flavor

    Add sauces near the end. Wet sauce poured on too early can steam off the crisp surface you worked to build. Brown the tofu first, then add sauce for the last minute or so.

    Common Beginner Mistakes

    • Crowding the pan. Too much tofu at once traps steam and prevents browning. Cook in batches if needed.
    • Moving the tofu too soon. Let it sit until a crust forms. If it sticks, it usually isn't ready to flip.
    • Skipping seasoning. Unseasoned tofu tastes bland. Season before, during, or after cooking.
    • Using silken tofu for frying. It's too delicate and will fall apart.
    • Adding wet sauce too early. This softens the surface. Save it for the end.

    Storing Leftovers

    Refrigerate cooked tofu in an airtight container. For unused raw tofu, follow the directions on the package, and eat leftovers within a few days. If you're unsure how long a particular product keeps, check the label

    FAQ

    Can I cook tofu without pressing it? Yes. Pressing is optional for scrambles, crumbles, and soups. It mainly helps with crisping when you're pan-frying or baking.

    What type of tofu is best for beginners? Extra-firm is the easiest to cut, brown, and handle. Firm tofu also works well.

    How do I keep tofu from sticking to the pan? Use a nonstick or well-oiled pan, preheat it, pat the tofu dry, and let it form a crust before flipping.

    Conclusion

    Learning how to cook tofu for beginners comes down to a few choices: pick firm or extra-firm tofu, press it if you have time, and choose one method for tonight. Pan-fry it for a stir-fry, bake it on a sheet pan, scramble it for tacos, or crumble it into fried rice.

    Try one method this week, and save the dinner idea that works best for you. Once one method feels familiar, the others are easy to add.

  • Budget Plant-Based Stir-Fry for Beginners: A Simple Formula Using Tofu, Frozen Veggies, and Rice

    Budget Plant-Based Stir-Fry for Beginners: A Simple Formula Using Tofu, Frozen Veggies, and Rice

    This article contains affiliate links. We may earn a commission if you buy through them, at no extra cost to you.

    Easy Plant-Based Stir-Fry on a Budget: A Simple Formula Using Tofu, Frozen Veggies, and Rice

    A stir-fry is a template, not a strict recipe. Once you know the pattern, you can cook whatever is on sale this week without hunting for a new recipe. The pattern is four parts: protein + vegetables + sauce + starch.

    Key takeaways

    • Every stir-fry follows the same four parts: protein, vegetables, sauce, and starch.
    • Frozen vegetables go into the pan straight from the freezer. Don't thaw them.
    • Dry tofu and a hot pan are the two biggest factors in browning.
    • A basic sauce of soy sauce, acid, sweetener, cornstarch, and aromatics can be adjusted to taste.
    • Nearly every ingredient can be swapped for something cheaper or more convenient.

    Quick Answer: The Easy Plant-Based Stir-Fry Formula

    For an easy plant based stir fry on a budget, cook pressed tofu until golden, add frozen vegetables straight from the freezer, stir in a simple soy-based sauce, and serve over rice. Use the same pattern each time and swap ingredients based on price.

    The formula at a glance:

    • Protein: extra-firm tofu
    • Vegetables: frozen stir-fry mix or single-vegetable bags
    • Sauce: soy sauce + acid + sweetener + thickener + aromatics
    • Starch: rice (or noodles, or other grains)

    If you're building a bigger rotation of meatless meals, these plant-based dinner ideas can give you more templates to pair with this one.

    What You Need (Budget Pantry and Equipment)

    You likely own most of this already, and everything here has many other uses.

    Pantry staples

    • Soy sauce: the salty, savory base of the sauce.
    • Vinegar: rice vinegar or any mild vinegar. This adds brightness.
    • Sugar or another sweetener: it balances the salt and acid.
    • Cornstarch: it thickens the sauce so it clings to the food.
    • Neutral oil: any high-heat-friendly cooking oil works.
    • Garlic: fresh, or jarred if that's cheaper or more convenient.
    • Ginger: fresh, jarred, or ground.

    Equipment

    • A large skillet or wok
    • A spatula or wooden spoon
    • A small bowl for mixing the sauce

    If you don't own a large, sturdy pan yet, a large skillet or wok is the one piece of equipment worth considering. A pan with plenty of surface area makes it easier to avoid crowding.

    Money-saving shopping tips

    • Buy frozen vegetables in larger bags. You can use what you need and return the rest to the freezer.
    • Choose store brands. For plain frozen vegetables, rice, soy sauce, and cornstarch, store brands are usually a sensible choice.
    • Buy tofu in standard blocks. Plain extra-firm blocks are generally a simple, low-cost option compared with flavored or pre-cut versions.
    • Cook rice in bulk. A large batch covers several meals.
    • Check the freezer aisle for single-vegetable bags. Mixing your own blend can sometimes be more flexible than a premade mix.

    Step-by-Step: How to Make a Beginner Stir-Fry

    Step 1: Prep everything first

    Stir-frying moves fast. Before you turn on the heat:

    • Cook the rice (or reheat leftovers).
    • Mix the sauce in a small bowl.
    • Press and cube the tofu.
    • Open the bag of vegetables and set it near the stove.
    • Mince the garlic and ginger.

    Step 2: Press and dry the tofu

    Drain the tofu, wrap it in clean towels or paper towels, and blot gently. Pressing it under a weight for a while is optional but helps with browning. Either way, cut it into bite-size cubes and pat the cubes dry. Surface moisture creates steam, and steam prevents browning.

    Step 3: Brown the tofu

    Heat a tablespoon or two of oil in your pan over medium-high heat. Add the tofu in a single layer and leave it alone. When the pieces release easily from the pan, flip them. Keep cooking until most sides are golden, then remove the tofu to a plate.

    Step 4: Cook the frozen vegetables

    Add the vegetables straight from frozen. Don't thaw them. Cook over high heat, stirring regularly, until they're heated through and the extra water has evaporated. If your pan is small, cook in batches. Overcrowding traps steam and leaves the vegetables soft and watery.

    Step 5: Add aromatics and sauce

    Push the vegetables aside, or lower the heat slightly, and add the garlic and ginger. Stir them for about 30 seconds, until fragrant. Return the tofu to the pan, stir the sauce once more (the cornstarch settles), and pour it in. Stir until it thickens and coats everything.

    Step 6: Serve over rice

    Taste before serving and adjust:

    • Flat or dull? Add a splash more vinegar or lime juice.
    • Too sharp? Add a pinch more sweetener.
    • Not savory enough? Add a little more soy sauce.

    Spoon the stir-fry over warm rice and serve.

    Basic Pan Technique for Better Results

    A few habits matter more than any specific ingredient:

    • Heat the pan before adding oil. A hot pan helps food sear instead of stick.
    • Use enough heat to sizzle. If the garlic or sauce begins to burn, lower the heat.
    • Don't crowd the pan. Food piled deep steams instead of browning. Cook in batches if needed.
    • Stir often once vegetables are in, but let the tofu sit. Tofu needs undisturbed contact with the pan to form a crust.
    • Add the sauce at the end. Early sauce makes everything soggy and can scorch.

    Common mistakes to avoid:

    Mistake What happens Fix
    Wet tofu Steams, sticks, falls apart Blot and pat dry
    Cold pan Food sticks, no browning Preheat before adding oil
    Sauce added too early Soggy food, burnt sugar Add after vegetables are cooked
    Overcrowded pan Watery, pale vegetables Cook in batches

    A Pantry-Based Stir-Fry Sauce Ratio

    You don't need bottled stir-fry sauce. A handful of pantry items does the job.

    Starter ratio (for about 4 cups of food, 2–3 servings)

    • 3 tbsp soy sauce
    • 1 tbsp vinegar or lime juice
    • 1 tbsp sugar (or maple syrup or agave)
    • 1 tsp cornstarch mixed with ¼ cup cold water
    • 1–2 cloves garlic, minced, and about 1 tsp ginger

    Whisk everything together in a small bowl. Treat this as a flexible starting point and adjust to taste. If you're cooking for more people, scale up the ratio proportionally.

    Easy variations

    • Spicy: add chili flakes or chili sauce.
    • Nutty: stir in a spoonful of peanut butter or a little sesame oil.
    • Sweet-tangy: add a splash of orange or pineapple juice.
    • Salt note: if you're using low-sodium soy sauce, you may need more to get the same savory depth. Add it gradually and taste.

    Ingredient Substitutions: Cook What's on Sale

    The formula works because each part is replaceable. Here's how to adapt.

    Protein swaps

    Tofu can be replaced with tempeh, canned or cooked chickpeas, edamame, or other beans. Cooking times and texture will differ. Canned beans and edamame mainly need heating through, while tempeh benefits from browning like tofu does. Drain and dry canned beans well before cooking.

    Vegetable swaps

    Use frozen stir-fry blends, or single bags of broccoli, peppers, or green beans. Fresh cabbage and carrots also work well and often keep for a long time in the fridge. Hard vegetables like carrots should go in a bit earlier or be cut small so they cook through.

    Starch swaps

    White or brown rice, quinoa, noodles, or other cooked grains all work. Use whatever you already have or can cook in bulk.

    Sauce swaps

    • Soy sauce → tamari (a gluten-free option, but check the label) or coconut aminos (usually milder, so adjust to taste)
    • Sugar → any sweetener
    • Vinegar → lemon or lime juice
    • Cornstarch → arrowroot or potato starch

    Quick swap table

    Component Default Easy alternatives
    Protein Extra-firm tofu Tempeh, chickpeas, edamame, other beans
    Vegetables Frozen stir-fry mix Broccoli, peppers, green beans, cabbage, carrots
    Starch Rice Quinoa, noodles, other cooked grains
    Salty base Soy sauce Tamari, coconut aminos
    Acid Vinegar Lemon or lime juice
    Sweetener Sugar Maple syrup, agave, other sweeteners
    Thickener Cornstarch Arrowroot, potato starch

    Shopping and cooking checklist

    • [ ] Rice cooked or reheated
    • [ ] Sauce mixed in a bowl
    • [ ] Tofu drained, dried, and cubed
    • [ ] Vegetables opened and within reach
    • [ ] Garlic and ginger ready
    • [ ] Pan large enough to avoid crowding

    Make It Last: Meal Prep and Leftovers

    Stir-fry is a good candidate for batch cooking:

    • Cook a big batch of rice and mix a double batch of sauce. You'll have the base for another meal ready to go.
    • Store components separately. Keeping rice, tofu, vegetables, and sauce apart helps preserve texture.
    • Reheat in a skillet. Add a splash of water if the food seems dry.
    • Follow standard food-safety guidance for cooling and storing leftovers. Refrigerate promptly and check official guidance for recommended storage times. [VERIFY exact timeframes before publishing if you plan to state them.]

    FAQs

    Do I need to thaw frozen vegetables before stir-frying?

    Usually no. Cook them from frozen over high heat so excess moisture evaporates. Thawing first can make them watery.

    How do I keep tofu from falling apart or sticking?

    Use extra-firm tofu, pat it dry, preheat the pan, and use enough oil. Let it brown before flipping, since pieces release more easily once a crust forms.

    Can I make this stir-fry without a wok?

    Yes. A large skillet works. Use high heat, avoid overcrowding, and cook in batches if needed.

    Conclusion

    The whole method fits in one line: protein + vegetables + sauce + starch. Brown dry tofu, cook frozen vegetables over high heat, finish with a quick pantry sauce, and serve over rice. Once the pattern feels familiar, you can swap in whatever is on sale this week, whether that's a different bean, another bag of frozen vegetables, or a grain you already have at home.

    Try the template once as written, then change one ingredient the next time. For more ideas, look into rice meal prep, tofu cooking basics, and building a budget pantry list. Those are natural next steps for stretching this formula across a full week of dinners.

  • Easy Plant-Based Pasta Dinners for Beginners: 8 Cheap Ideas With Simple Ingredients

    Easy Plant-Based Pasta Dinners for Beginners: 8 Cheap Ideas With Simple Ingredients

    This article contains affiliate links. We may earn a commission if you buy through them, at no extra cost to you.

    Easy Plant-Based Pasta Dinners for Beginners: 8 Cheap Ideas With Simple Ingredients

    Meta description: Eight easy plant based pasta dinners made with budget staples like canned tomatoes, beans, frozen vegetables, and basic aromatics. Includes ingredient lists, swaps, and tips to stretch your sauce.

    Plant-based pasta night doesn't need specialty products or a long shopping list. Most of what you need is probably in your pantry or freezer already. Below are eight simple dinners built from those staples, with ingredient lists, swaps, and tips for stretching your sauce.

    Quick answer: Easy plant based pasta dinners rely on a few budget staples: dried pasta, canned tomatoes, beans or lentils, frozen vegetables, and aromatics like garlic and onion. Cook the pasta, build a quick sauce in one pan, combine with a splash of pasta water, and season with salt, pepper, and an acid like lemon or vinegar.

    Key Takeaways

    • A handful of staples can make dozens of different dinners.
    • Beans, lentils, and chickpeas add substance to any sauce.
    • Reserved pasta water helps a small amount of sauce coat a lot of pasta.
    • Acid and salt are the quickest fixes for bland pasta.
    • Nearly every recipe here accepts swaps, so use what you have.

    What You Need in a Budget Plant-Based Pasta Pantry

    Core staples

    • Dried pasta (spaghetti, penne, rotini, or whatever shape you like)
    • Canned crushed or diced tomatoes
    • Canned beans, chickpeas, or lentils
    • Frozen spinach, peas, broccoli, or mixed vegetables
    • Olive oil or any neutral oil

    Basic aromatics and flavor boosters

    • Onion and garlic
    • Dried Italian herbs
    • Red pepper flakes
    • Tomato paste
    • Soy sauce
    • Lemon or vinegar

    If you're building a pantry from scratch, a beginner-friendly list of plant-based pantry staples can help you plan a first shopping trip.

    Check labels

    Most dried pasta is made from just wheat and water, but some varieties, especially fresh or egg pastas, contain egg. Read the ingredient list to confirm a pasta is plant-based. The same goes for store-bought sauces and broths.

    How to Make Easy Plant Based Pasta Dinners: The Basic Method

    Every recipe below follows this same pattern.

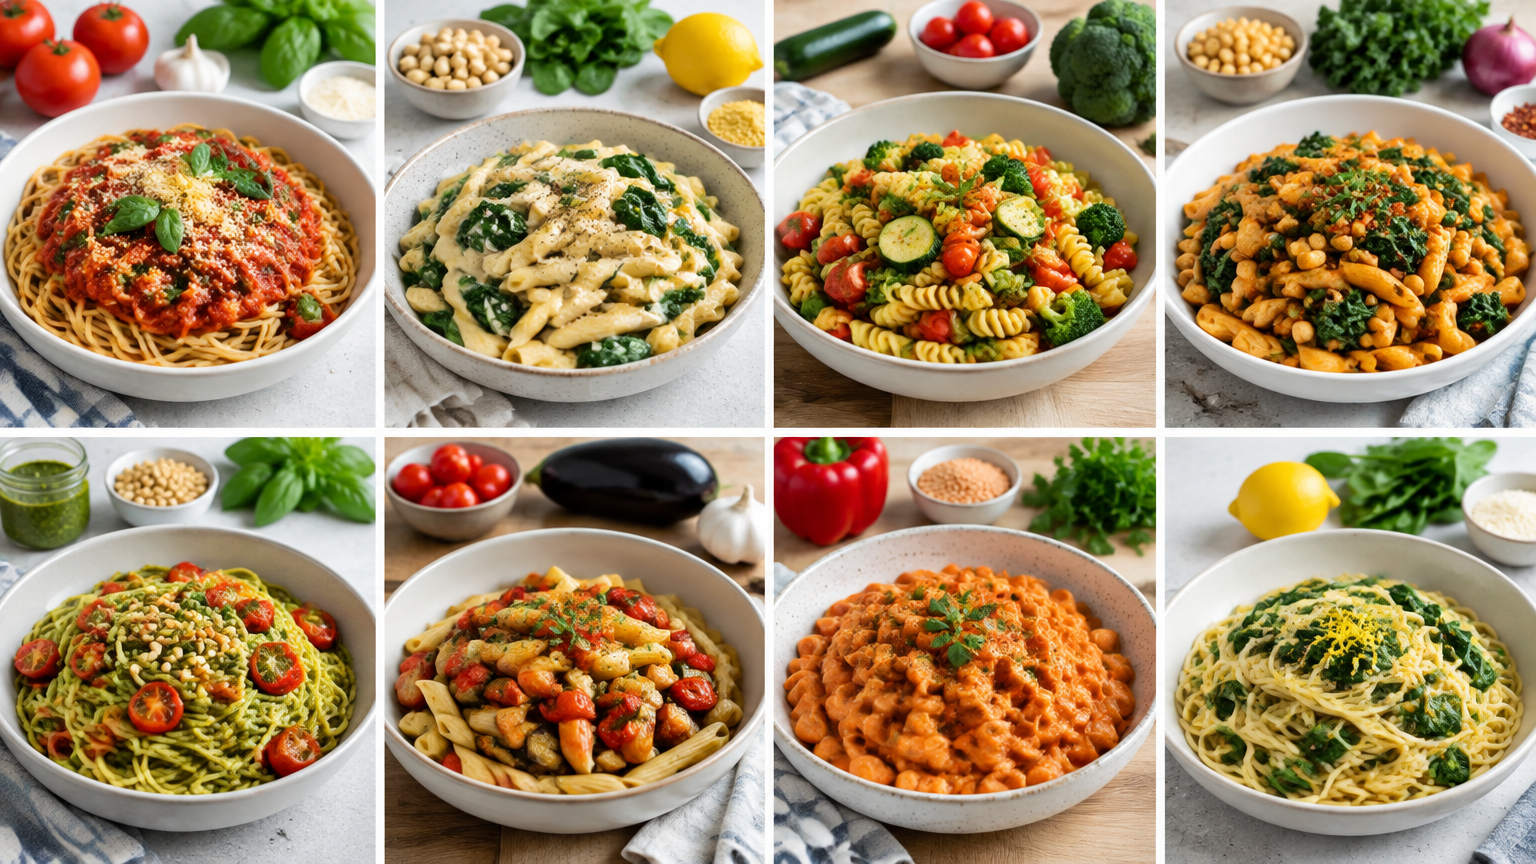
    1. Boil and cook the pasta. Use well-salted water. Before draining, reserve about a cup of the cooking water. 2. Soften the aromatics. Cook chopped onion and garlic in oil over medium heat until fragrant and soft. 3. Build the sauce. Add tomatoes, beans, or vegetables and simmer until everything is hot and slightly thickened. 4. Combine. Toss the pasta into the sauce, adding pasta water a splash at a time until it looks glossy. 5. Taste and adjust. Add salt, acid, or heat until it tastes balanced.

    8 Cheap, Easy Plant-Based Pasta Dinners

    1. Pantry Marinara Pasta

    A basic tomato sauce you can make with almost no planning.

    Ingredients: pasta, 1 can crushed tomatoes, 1 small onion, 2–3 garlic cloves, olive oil, dried Italian herbs, salt

    Method: Soften the onion and garlic in oil, add tomatoes and herbs, and simmer 10–15 minutes. Toss with cooked pasta and a splash of pasta water.

    Swaps: Use diced tomatoes for a chunkier sauce. Add a pinch of red pepper flakes for heat.

    2. White Bean and Garlic Pasta

    A light, savory dish with no tomatoes.

    Ingredients: pasta, 1 can white beans (drained), 3–4 garlic cloves, olive oil, lemon, frozen spinach, salt, pepper

    Method: Gently cook sliced garlic in oil, add beans and spinach, and warm through. Toss with pasta, pasta water, and a squeeze of lemon.

    Swaps: Use chickpeas or any mild bean. Try vinegar instead of lemon.

    3. Chickpea and Tomato Pasta

    Hearty and a little smoky.

    Ingredients: pasta, 1 can chickpeas, 1 can diced tomatoes, 1 onion, olive oil, paprika or chili flakes, salt

    Method: Cook the onion in oil, stir in paprika, then add chickpeas and tomatoes. Simmer 10 minutes and toss with pasta.

    Swaps: Swap in white beans or lentils. Use a small shape like shells or macaroni so the chickpeas nestle in.

    4. Lentil Bolognese-Style Pasta

    A thick, meaty-style sauce without the meat.

    Ingredients: pasta, 1 can lentils (or about 1½ cups cooked), 1 can crushed tomatoes, 1 onion, 1 carrot (if available), 2 tablespoons tomato paste, garlic, oil, dried herbs

    Method: Cook the chopped onion, carrot, and garlic in oil. Stir in tomato paste for a minute, then add tomatoes and lentils and simmer 15–20 minutes. Serve over pasta.

    Swaps: Use brown or green lentils, or crumbled firm tofu. Skip the carrot or use celery.

    5. Garlic and Oil Pasta With Frozen Broccoli

    A minimalist dinner that comes together fast.

    Ingredients: pasta, 2 cups frozen broccoli, 4 garlic cloves, olive oil, red pepper flakes, salt

    Method: Add the broccoli to the pasta water for the last few minutes of cooking. Warm sliced garlic and pepper flakes in oil, then toss everything together with pasta water.

    Swaps: Use frozen peas, green beans, or spinach. Add a squeeze of lemon or a splash of vinegar.

    6. Creamy Tomato Pasta With Peas

    Creamy without dairy.

    Ingredients: pasta, 1 can crushed tomatoes, 1 cup frozen peas, onion, garlic, oil, plant milk or ½ can blended white beans, salt

    Method: Make a simple tomato sauce, then stir in a splash of plant milk or blended beans. Add peas for the last few minutes.

    Swaps: Use any unsweetened plant milk. Spinach or corn can replace the peas.

    7. Peanut-Soy Noodle-Style Pasta

    Pasta with a noodle-bowl twist.

    Ingredients: spaghetti or linguine, 2–3 tablespoons peanut butter, 2 tablespoons soy sauce, 1–2 garlic cloves, frozen mixed vegetables, vinegar or lime, hot water

    Method: Whisk peanut butter, soy sauce, garlic, and vinegar with a little hot pasta water until smooth. Toss with cooked pasta and warmed vegetables.

    Swaps: For a nut-free version, use sunflower seed butter. For gluten-free, use gluten-free pasta and tamari (check the label).

    8. One-Pot Tomato and Bean Pasta

    The easiest cleanup of the bunch.

    Ingredients: short pasta, 1 can diced tomatoes, 1 can kidney or cannellini beans, onion, garlic, water or broth, frozen vegetables, dried herbs, salt

    Method: Cook the onion and garlic, then add tomatoes, beans, herbs, and enough liquid to cover the pasta. Simmer, stirring often, until the pasta is tender, adding vegetables near the end.

    Swaps: Use any bean. Gluten-free pasta may cook faster, so start checking it early.

    How to Make Your Sauce Stretch Across More Servings

    • Add bulk. Beans, lentils, or frozen vegetables increase volume without much extra effort.
    • Use pasta water. Starchy water thins and coats without needing more sauce.
    • Build depth another way. Tomato paste or a splash of soy sauce adds flavor so you don't need extra cans of tomatoes.
    • Blend some beans. Mash or blend part of a can into the sauce for body.
    • Pad the plate. Serve over a generous portion of pasta with a side salad or bread.
    • Store smart. Keep leftover sauce separate from pasta, then refrigerate or freeze it in portions.

    Easy Swaps and Substitutions

    Pasta swaps

    Any shape works with most sauces. Whole wheat and gluten-free pastas are fine substitutes; follow the package times, since they can cook differently.

    Protein swaps

    Canned beans, lentils, and chickpeas are interchangeable in most recipes. Crumbled firm tofu also works in the tomato-based sauces.

    Vegetable swaps

    Frozen spinach, peas, broccoli, and mixed vegetables all work. Stir them in near the end so they don't turn mushy.

    Flavor swaps

    Change the herbs, add spices like paprika or cumin, or finish with lemon or vinegar. Nutritional yeast, if you have it, adds a savory, cheesy note. For a quick reference on ingredient stand-ins, see this plant-based substitution guide.

    Beginner Tips for Better Flavor

    • Salt the pasta water. It seasons the pasta from the inside.
    • Don't skip the acid. Lemon or vinegar brightens flat-tasting sauces.
    • Toast tomato paste. Cook it briefly in oil before adding liquid.
    • Finish well. A drizzle of olive oil, black pepper, or dried herbs makes a simple dish feel complete.

    Frequently Asked Questions

    Are easy plant based pasta dinners filling enough?

    Yes, when you include beans, lentils, or chickpeas and vegetables alongside the pasta. Those additions make the meal more substantial than plain noodles with sauce.

    How can I make plant-based pasta without expensive ingredients?

    Rely on dried pasta, canned tomatoes, beans, frozen vegetables, and basic aromatics. Swap what you have on hand for what a recipe calls for.

    Can I store or freeze leftovers?

    Generally, cooked pasta and sauce can be refrigerated in airtight containers. Sauces freeze well, though pasta texture may soften after freezing. Follow standard food-safety guidance for storage times and reheating.

    Conclusion

    Easy plant based pasta dinners come down to a few reliable staples and a simple method. Pick one or two of these ideas, stock the basics, and rotate in swaps as your pantry changes. Save this list for later, or try one recipe this week and see which becomes your go-to.

  • How to Stop a Dog From Chewing Furniture, Shoes, and Baseboards

    How to Stop a Dog From Chewing Furniture, Shoes, and Baseboards

    This article contains affiliate links. We may earn a commission if you buy through them, at no extra cost to you.

    How to Stop a Dog From Chewing Furniture, Shoes, and Baseboards

    Meta description: Learn how to stop dog chewing furniture, shoes, and baseboards with a step-by-step plan: manage the environment, redirect to approved chews, reward well, and stay consistent.

    Chewing is normal dog behavior, so the goal is to guide it toward appropriate items rather than eliminate it. This article walks through a four-part plan: manage, redirect, reward, and stay consistent.

    Quick Answer: How to Stop a Dog From Chewing Furniture

    To stop a dog from chewing furniture, prevent access to off-limits items, offer appealing alternatives, and redirect your dog the moment the wrong chewing starts.

    Key takeaways:

    • Manage the environment so your dog can't practice the habit.
    • Provide approved chews that are more interesting than your couch.
    • Redirect, then reward the right choice within seconds.
    • Meet exercise and mental stimulation needs every day.
    • Keep everyone consistent, including guests.
    • Persistent, intense, or sudden-onset chewing may warrant a vet or qualified trainer consult.

    Why Dogs Chew (Brief)

    Puppies and Teething/Exploring

    Puppies explore with their mouths, and teething can make chewing feel good. Expect a lot of it.

    Boredom or Under-Exercise

    A dog with unmet physical or mental needs often invents entertainment. Table legs are convenient.

    Stress or Anxiety-Related Chewing

    Some dogs chew to cope with stress. If chewing happens mainly when you leave, separation-related issues may be involved, and that often needs professional help.

    Chewing Is Self-Reinforcing

    Chewing simply feels rewarding. Every successful session of gnawing a baseboard makes the next one more likely, which is why preventing rehearsal matters so much.

    Step 1 – Set Up Management First

    Management means arranging the environment so wrong choices aren't available. It's the fastest way to stop the habit from strengthening.

    Puppy-Proof and Dog-Proof the Space

    • Remove or elevate shoes, remote controls, kids' toys, and laundry.
    • Tidy cords and use cord covers.
    • Do a "dog's-eye" sweep at floor level.

    Use Closed Doors, Baby Gates, and Exercise Pens

    Limit unsupervised access to rooms with tempting items. A gated kitchen or a pen in the living room keeps your dog near you without free run of the house.

    Use a Crate or Safe Room When You Can't Supervise

    • Stock it with approved chews and build positive associations. A crate should never be a punishment.
    • Keep durations appropriate to your dog's age and ability. Young puppies need frequent breaks.

    Consider Taste Deterrents as a Supplement

    Use pet-safe products, test them on a small hidden area first, and treat them as a backup, not a stand-alone fix.

    Step 2 – Provide Approved Chew Items

    Choose Appropriate Chews

    • Offer a variety of textures: rubber, rope, and edible chews as suitable for your dog.
    • Match size and durability to your dog. Supervise, and discard damaged items.
    • Check with your vet if you're unsure about safety.

    Rotate Toys to Keep Them Interesting

    Keep a handful of items out and store the rest. Swap them every few days so old toys feel new.

    Make Approved Items More Appealing

    Stuff a hollow rubber toy with part of your dog's meal, or smear a little dog-safe filling inside. A chew that delivers food will often beat a chair leg.

    Step 3 – Redirect and Reward at the Right Time

    Interrupt Calmly and Redirect

    If you catch your dog chewing something off-limits, use a calm interrupter ("oops" or a light noise), then offer an approved item. Keep your voice neutral so the moment doesn't become exciting.

    Reward Timing

    • Reward within seconds of the desired behavior, which is chewing the approved item.
    • Mark the moment with a word like "yes" or a clicker, then deliver a treat or praise.
    • A reward that arrives a minute later may be linked to something else, like walking away.

    Why Scolding After the Fact Tends to Be Unhelpful

    In general training terms, dogs link consequences to what's happening at that moment. If you find a chewed shoe an hour later and scold, your dog probably can't connect your reaction to the chewing. Instead:

    • It can create confusion or fear around you, or around your return home.
    • It doesn't teach what to do instead.
    • Some dogs show "guilty" body language that is really a response to your tone and posture, not an understanding of the earlier act.

    A better approach is to prevent, interrupt in the moment, and teach an alternative.

    If you'd like structured help with the training side, you could explore a guided program such as Brain Training for Dogs. I haven't verified its contents, so review what it includes before deciding.

    Step 4 – Meet Exercise and Enrichment Needs

    • Provide daily walks, play, and sniffing time.
    • Add puzzle feeders, short training sessions, and scheduled chew time.
    • Tired, mentally satisfied dogs often chew less, though exact needs vary by age, breed, and individual.

    Example: Instead of serving dinner in a bowl, scatter it on a snuffle mat or pack it into a food toy. It takes minutes to set up and gives your dog a legitimate job.

    Step 5 – Stay Consistent

    • Apply the same rules for all family members and guests. If one person lets the dog chew an old slipper, the rule falls apart.
    • Keep management in place until chewing habits improve, then loosen access gradually, one room or one hour at a time.
    • Track problem times and spots, such as evenings by the sofa, and adjust the plan.
    • Expect setbacks, especially during adolescence.

    What to Do by Commonly Chewed Item

    Item Management Redirect/Teach Backup
    Furniture Gates, pens, closed doors Chew at the same spot; designated dog bed Taste deterrent
    Shoes/clothing Closets, high shelves "Trade" for a treat; approved chew Closed doors
    Baseboards/trim Block with furniture, gates, pens Redirect and reward at the spot Temporary covers or deterrents
    Cords/remotes/toys Cord covers, elevate items Offer a chew Supervision

    Furniture (Couches, Chairs, Table Legs)

    • Block access with gates or pens, and supervise in furniture-free zones.
    • When your dog starts chewing, redirect to a chew at the same spot. Consider a designated dog bed nearby.
    • Use a taste deterrent as backup.

    Shoes and Clothing

    • Store them in closets or on high shelves, and close doors.
    • Practice "trade": offer a treat, and when your dog drops the shoe, reward and return the dog's attention to a chew. Never chase.
    • Offer a chew-appropriate alternative, but not old shoes. Dogs can't easily tell old shoes from new ones.

    Baseboards and Trim

    • Block access with furniture, gates, or pens.
    • Redirect and reward at the chew location.
    • Use temporary protective covers or deterrents.
    • If chewing focuses on one area, consider boredom or stress triggers, such as a spot near the door where your dog waits for you.

    Other Household Items

    Cords, remotes, and kids' toys are common targets. Safety note: cords and small items can be hazardous if chewed or swallowed, so keep them out of reach.

    When to Get Professional Help

    Seek help if you see:

    • Chewing with signs of distress when left alone
    • Swallowing non-food items, or damage to the mouth or teeth
    • Little progress despite consistent effort

    Ask your veterinarian first to rule out medical causes, then a certified or qualified trainer or behavior professional for a tailored plan.

    FAQs

    Should I punish my dog if I find a chewed item later?

    No. Dogs usually don't connect later scolding to the earlier act. Clean up, manage better, and reward appropriate chewing going forward.

    How long does it take to stop a dog from chewing furniture?

    It varies by age, history, and consistency. Puppies and adolescents may need ongoing management for months, so avoid expecting a fixed timeline.

    Are bitter sprays enough to stop chewing?

    Often not on their own, and some dogs ignore them. Use them alongside management, redirection, and enrichment.

    Conclusion

    Learning how to stop dog chewing furniture comes down to four habits: manage the environment, redirect to approved items, reward at the right moment, and stay consistent. Expect progress to be uneven, especially in puppyhood and adolescence. Stay patient, and bring in your vet or a qualified trainer if chewing is intense, sudden, or tied to distress.

  • Is It Boredom or Anxiety? How to Read Your Dog’s Chewing Clues

    Is It Boredom or Anxiety? How to Read Your Dog’s Chewing Clues

    This article contains affiliate links. We may earn a commission if you buy through them, at no extra cost to you.

    Is It Boredom or Anxiety? How to Read Your Dog's Chewing Clues

    Chewing is normal dog behavior, but destructive or intense chewing can have different causes. This guide shows you how to observe context (when it happens, what gets chewed, and your dog's body language) before you decide on a next step.

    Direct Answer

    Dog chewing from boredom or anxiety can look alike, so context matters. Boredom chewing often happens when a dog is under-stimulated, with relaxed body language and a variety of targets. Anxiety-related chewing often clusters around specific triggers, such as being left alone, and comes with signs of distress. Pain, teething, or medical issues can also play a role.

    Key Takeaways

    • Look at three things: when the chewing happens, what gets chewed, and how your dog looks while doing it.
    • No single sign is conclusive. Patterns across several observations matter more.
    • Rule out physical causes with a veterinarian first.
    • Avoid punishment, which can increase stress.
    • Separation-related distress, self-injury, or swallowing non-food items calls for professional help.

    Start With the Basics: Why Dogs Chew

    Many reasons for chewing are completely ordinary:

    • Teething in puppies
    • Exploring the world with their mouths
    • Play and general enjoyment

    Other causes are less obvious. Dental discomfort, GI upset, nutritional or medical issues, or a lack of appropriate outlets can all drive chewing. A vet check helps rule out physical causes, and it's especially worthwhile if the behavior appeared suddenly.

    Clue 1: When Does the Chewing Happen?

    Timing patterns

    Start with the simplest question: does it happen only when you're gone, or also when people are home? Chewing that shows up in both situations points away from a purely separation-related cause. Chewing that appears only after you leave deserves a closer look.

    Also note the time of day. Does it follow long stretches without activity, show up in the evening, or begin shortly after a departure?

    Triggers

    Look for what happens just before the chewing starts:

    • Departure cues, such as keys, shoes, or a bag
    • Storms, fireworks, or other loud noises
    • Visitors or changes in routine
    • A day with little exercise or mental stimulation

    Example: A dog who shreds a pillow most afternoons during a quiet workday, but never when the family is home, presents a different picture than a dog who chews only during thunderstorms. The first may be under-stimulated, or it may be reacting to being alone. The second is linked to a specific trigger.

    Clue 2: What Gets Chewed?

    The target can offer hints:

    • Varied household items, toys, or furniture may fit boredom or under-stimulation.
    • Doors, windowsills, crates, or other exit points may suggest distress about confinement or separation.
    • Owner-scented items such as clothing or bedding may suggest comfort-seeking.
    • Non-food items that get swallowed are a safety concern for a vet, regardless of the cause.

    Clue 3: What Is the Body Language?

    Signs that may fit boredom

    • Loose, relaxed posture
    • A playful or investigative approach to the item
    • Settling down after chewing

    Signs that may suggest anxiety

    • Panting, pacing, trembling, or drooling
    • Whining or barking
    • Trouble settling, a tense body, or a fixed focus on exits
    • Not eating or drinking when you're gone
    • House-soiling in an otherwise house-trained dog

    Remember that no single sign is conclusive. A dog may pant because it's warm, or pace because it needs to go out. Look for clusters of signs that repeat in the same situations.

    Quick Comparison: Boredom vs. Anxiety Clues

    Factor Leans toward boredom Leans toward anxiety
    Context Low stimulation, long idle stretches Specific triggers (departures, storms, visitors)
    Targets Varied items, toys, furniture Exits, crates, or owner-scented items
    Body language Relaxed, playful, settles afterward Panting, pacing, trembling, drooling, tense
    Response to enrichment Improves Little change or continued distress

    Use this as a guide, not a diagnosis. Some dogs show a mix of both.

    Observation Log Template

    Track chewing incidents for 1–2 weeks. Copy these fields into a notebook or notes app:

    • Date / time:
    • Where in the home:
    • Owner present? (Y/N; if not, how long gone):
    • What happened just before (departure, noise, visitor, quiet period):
    • Exercise and enrichment in the prior 24 hours:
    • Item chewed:
    • Duration of chewing:
    • Body language before / during / after:
    • Other signs (barking, pacing, drooling, accidents, appetite):
    • How the dog responded to redirection:
    • Notes / video recorded? (Y/N):

    Tip: A pet camera or phone video can reveal what happens while you're away. Footage often shows stress signs you'd never see otherwise, or shows that your dog settles within minutes of your leaving.

    Practical Steps to Take

    1. Rule out medical causes with your vet, especially for sudden changes or dental concerns. 2. Review the log and identify patterns in timing, targets, and body language. 3. Provide safe, appropriate chew items and rotate them to keep them interesting. 4. Add daily physical exercise and mental enrichment, such as sniff walks, food puzzles, and training games, matched to your dog's age and health. If you'd like structured mental games to try, a program like Brain Training for Dogs is one resource to look into. 5. Manage the environment. Remove tempting or unsafe items, and use baby gates or a comfortable, familiar space as appropriate. 6. Keep departures and arrivals low-key. Avoid punishment, which can increase stress. 7. Reassess after a couple of weeks and adjust based on your log.

    Example: Suppose your log shows chewing on weekday afternoons, on a variety of items, with your dog relaxed on camera and no morning exercise. Adding a sniff walk and a food puzzle, then tracking changes for two weeks, is a reasonable first step. If the footage instead shows pacing and drooling by the door, move toward professional guidance sooner.

    When to Consult a Vet or Certified Behavior Professional

    Reach out for help if you see any of the following:

    • Signs of separation-related distress: panic, escape attempts, excessive vocalizing, drooling, or house-soiling when alone
    • Self-injury, such as broken teeth, bleeding gums, or torn nails
    • Swallowing non-food items or signs of GI upset
    • Chewing that is sudden, intense, or not improving with enrichment

    Who to seek: Start with a veterinarian. If medical causes are addressed or unlikely, consult a certified behavior professional, such as a veterinary behaviorist, a certified applied animal behaviorist, or a certified dog behavior consultant. Bring your log and any videos, since they give the professional a much clearer picture.

    FAQs

    1. How can I tell if my dog is chewing because of boredom or anxiety?

    Compare when it happens, what is chewed, and the body language. Chewing only when alone, accompanied by stress signs, points more toward anxiety. Chewing across many situations with relaxed body language fits boredom better.

    2. Will more exercise stop anxiety-related chewing?

    It may help overall, but it may not resolve anxiety triggered by specific situations. A professional can guide a tailored plan.

    3. Should I punish my dog for chewing?

    No. Punishment doesn't address the cause and may increase stress. Redirect to appropriate items and manage the environment instead.

    Conclusion

    Telling dog chewing from boredom or anxiety starts with careful observation: note the timing, the targets, and your dog's body language. Log what you see, adjust enrichment and management, and seek professional help if signs of distress appear.

    Disclosure: This article contains an affiliate link. Product details have not been verified, so check the provider's own information before purchasing.

  • 25 Healthy Plant-Based Afternoon Snacks (Easy, Quick and Satisfying)

    25 Healthy Plant-Based Afternoon Snacks (Easy, Quick and Satisfying)

    This article contains affiliate links. We may earn a commission if you buy through them, at no extra cost to you.

    25 Healthy Plant-Based Afternoon Snacks (Easy, Quick and Satisfying)

    Healthy plant based afternoon snacks are simple combinations of whole plant foods, such as fruit, vegetables, legumes, nuts, seeds and whole grains. Most take 10 minutes or less. The easiest way to build one is to pair fiber with protein and a healthy fat. Below are 25 ideas sorted by situation, plus a build-your-own formula. This is general food inspiration, not medical or nutrition advice.

    Key takeaways

    • Aim for fiber + protein + healthy fat in each snack.
    • Choose a base, add a protein, then finish with a fat or crunch.
    • Prep times are rough estimates, and most ideas take 10 minutes or less.
    • Swap in seed butters or rice cakes for allergies or gluten-free needs.

    How to Build a Balanced Plant-Based Snack

    The simple formula: fiber + protein + healthy fat

    Each part adds something different, such as texture, flavor or a more filling bite. A snack with all three tends to feel more complete.

    Part Examples
    Fiber Fruit, vegetables, whole grains, beans, chia
    Protein Hummus, edamame, tofu, soy yogurt, nuts, seeds, chickpeas
    Healthy fat Avocado, nut and seed butters, olives, nuts, tahini

    Some foods cover more than one column. Chickpeas bring fiber and protein, and peanut butter brings protein and fat.

    Three-step snack builder

    1. Pick a base: apple, cucumber, toast or a rice cake. 2. Add a protein: hummus, white beans or soy yogurt. 3. Finish with a fat or crunch: tahini, seeds or nuts.

    Example: cucumber rounds (base), mashed white beans (protein), pumpkin seeds (crunch).

    Quick swaps and portion tips

    • Nut allergy: use sunflower or pumpkin seed butter in place of nut butters, and check labels for cross-contact.
    • Gluten-free: choose rice cakes or certified gluten-free oats.
    • Portions: keep them flexible and based on your own appetite.

    25 Healthy Plant-Based Afternoon Snacks

    Sweet Snacks

    1. Apple and almond butter: Slice an apple and dip or drizzle with almond butter. (5 min) 2. Stuffed dates: Pit dates and fill with peanut butter and a pinch of sea salt. (5 min) 3. Berry soy-yogurt bowl: Top unsweetened soy yogurt with berries and chopped walnuts. (3 min) 4. Banana "nice cream": Blend frozen banana chunks with a splash of plant milk until creamy. (5 min, bananas pre-frozen) 5. Peanut butter banana toast: Spread toast with peanut butter, add banana slices and cinnamon. (5 min)

    Savory Snacks

    6. Avocado toast with pumpkin seeds: Mash avocado on toast with lemon, salt and seeds. (5 min) 7. Steamed edamame: Microwave or steam frozen edamame and sprinkle with sea salt. (5 min) 8. Hummus-stuffed mini peppers: Halve mini peppers and fill with hummus. (5 min) 9. Pan-crisped tofu bites: Cube pressed tofu, brown in a skillet, and season with soy sauce or smoked paprika. (10–15 min) 10. Smashed chickpea crackers: Mash chickpeas with lemon, mustard and herbs, then spoon onto crackers. (10 min)

    No-Cook Snacks

    11. Cucumber and white bean rounds: Mash white beans with olive oil and lemon and spoon onto cucumber slices. (5 min) 12. Celery, peanut butter and raisins: Fill celery sticks with peanut butter and top with raisins. (5 min) 13. Tahini pear rice cakes: Spread tahini on rice cakes and top with sliced pear. (5 min) 14. Guacamole and pepper strips: Mash avocado with lime and salt, then dip bell pepper strips. (5–7 min) 15. Orange and pistachios: Peel an orange and pair it with a handful of pistachios. (3 min)

    Make-Ahead Snacks

    16. Chia pudding cups: Stir chia seeds into plant milk, then refrigerate overnight. (5 min + chill) 17. Overnight oats: Combine oats, plant milk and fruit in a jar and refrigerate. (5 min + chill) 18. Roasted chickpeas: Toss dried chickpeas with oil and spices and roast until crisp. (30–35 min) 19. No-bake oat bites: Mix oats, nut butter and a sweetener, roll into balls and chill. (15 min + chill) 20. Chickpea-flour mini muffins: Mix batter with chopped vegetables and bake in a muffin tin. (35–40 min)

    On-the-Go Snacks

    21. Peanut butter banana roll-up: Spread a tortilla with peanut butter, add a banana and roll. (5 min) 22. Hummus and veggie jar: Layer hummus on the bottom of a jar and stand carrot and cucumber sticks upright. (5 min) 23. Simple trail mix: Mix nuts, seeds and dried fruit in a pouch. (3 min) 24. Fruit and single-serve nut butter: Pair a banana or apple with a nut butter packet. (2 min) 25. Chickpea-cucumber salad jar: Toss chickpeas, cucumber, tomato, olive oil and lemon in a jar. (10 min)

    Make Snack Time Easier: Practical Steps

    Prep once, snack all week

    Batch one sweet and one savory item, such as oat bites and roasted chickpeas. Wash and cut produce, and portion nuts into small containers so snacks are ready to grab.

    Stock a plant-based snack pantry

    Keep a few staples on hand: canned beans, nut and seed butters, oats, whole-grain crackers, and frozen edamame and fruit. With these, most ideas above need only one or two fresh items.

    Pack for travel

    Keep hummus and yogurt cold with an ice pack. Choose sturdy produce like carrots, peppers and apples, and use small containers to prevent leaks.

    Quick checklist before you snack:

    • ☐ Is there a fiber-rich base?
    • ☐ Did I add a protein?
    • ☐ Is there a fat or crunch on top?

    Explore More Afternoon Snack Guides

    • [Link: Cluster article 1 title] [VERIFY exact title and URL]
    • [Link: Cluster article 2 title] [VERIFY exact title and URL]
    • [Link: Cluster article 3 title] [VERIFY exact title and URL]
    • [Add all remaining cluster articles]

    Want more recipes? A cookbook can help when you'd like more recipes in one place or a structured plan for the week. See our plant-based snack cookbook guide.

    FAQs

    What makes a plant-based snack balanced?

    Combine fiber, protein and healthy fat, such as apple (fiber) with peanut butter (protein and fat). Use the three-step builder above to mix and match.

    What are some quick plant-based snacks with no cooking?

    Hummus with veggies, celery with peanut butter, guacamole with pepper strips, or orange with pistachios. See the no-cook snacks section for more.

    Can I prep plant-based snacks ahead of time?

    Yes. Chia pudding, overnight oats, roasted chickpeas, oat bites and mini muffins all work well. Store them in airtight containers in the fridge, and check recipe-specific storage guidance.

    Conclusion

    Healthy plant based afternoon snacks don't need to be complicated. Start with a base, add a protein, and finish with a fat or crunch. This week, pick one idea from each category (sweet, savory, no-cook, make-ahead and on-the-go) and see which fit your routine. For more recipes and planning help, browse our plant-based snack cookbook guide.

    Editorial notes: Prep times are estimates [VERIFY by testing recipes]. Replace all link placeholders before publishing.

  • Budget Plant-Based Grocery Shopping Guide: Where to Shop and How to Compare Prices

    Budget Plant-Based Grocery Shopping Guide: Where to Shop and How to Compare Prices

    This article contains affiliate links. We may earn a commission if you buy through them, at no extra cost to you.

    Budget Plant-Based Grocery Shopping Guide: Where to Shop and How to Compare Prices

    Plant-based eating can be affordable or expensive, depending on where you shop and what you put in the cart. This guide compares store types in general terms and shows you how to run the price comparisons yourself. Prices vary by region, store, and season, so check local prices before committing to any one store.

    Disclosure: This article contains affiliate links. They don't change the advice here, and no product claims are made about the linked offerings.

    Quick Answer: How to Do Plant-Based Grocery Shopping on a Budget

    Plant based grocery shopping on a budget starts with building meals around staples such as dried or canned beans, lentils, rice, oats, frozen vegetables, and seasonal produce. Compare stores using unit prices rather than package prices, choose store brands where the quality suits you, and use more than one store type if that makes sense in your area.

    Key takeaways:

    • Compare unit prices, not package prices. The shelf tag usually shows the per-ounce, per-pound, or per-count price.
    • Try store brands for staples. Start with one item and expand if you're satisfied.
    • Buy produce in season. Use frozen or canned when fresh is out of season.
    • Match the store type to the item. No single store is cheapest for everything.
    • Verify prices locally. What's true in one city may not hold in another.

    Where to Shop: Comparing Your Options

    No single store type is cheapest for everything. Use the comparisons below as a starting point, then test them against the stores near you.

    Conventional Supermarkets

    Pros: Supermarkets offer a wide selection, including plant-based specialty items, along with weekly sales, loyalty programs, and convenience.

    Cons: Name-brand and specialty products may cost more than comparable items elsewhere.

    Best for: One-stop shopping, weekly sales, and store-brand staples. If you want everything in a single trip, a supermarket is often the practical choice. Loyalty programs and digital coupons can help, but only if the items they discount are things you already buy.

    Discount Grocers

    Pros: Many discount grocers focus on lower-cost private labels and basics.

    Cons: The selection may be smaller or change often, and some specialty plant-based items may be limited or absent.

    Best for: Pantry staples, produce, and store-brand items. If your meals rely on rice, pasta, canned beans, frozen vegetables, and oats, a discount grocer is worth including in your comparison. You may still need another store for specific items you can't find there.

    Ethnic and International Markets

    Pros: These markets are often good sources for spices, legumes, rice, tofu, noodles, and produce. Larger package sizes may also be available.

    Cons: Labels may be in other languages, and selection varies from store to store.

    Best for: Spices, grains, legumes, tofu, and specialty produce. If you cook with many spices or use a lot of legumes, an international market can be a useful second stop. Check unit prices here too, since large packages are not automatically cheaper. A translation app can help with unfamiliar labels, and you can always ask staff about ingredients.

    Warehouse Clubs

    Pros: Bulk sizes can lower the unit cost of shelf-stable and freezer items.

    Cons: You'll need to pay a membership fee, have room to store large packages, and avoid buying more than you can use before it spoils.

    Best for: Households that can store and use larger quantities, such as oats, rice, frozen produce, nuts, and nut butters. Before joining, compare the unit prices of your regular items against other local options, and factor in the membership cost.

    Online Grocery Delivery

    Pros: Online ordering makes price comparison easy, lets you save lists, and tends to reduce impulse buying. It can also give you access to stores you might not otherwise reach.

    Cons: Watch for delivery fees, tips, markups, or order minimums. You also have less control over produce selection.

    Best for: Convenience, mobility or time constraints, and comparing prices before you buy. Even if you shop in person, browsing a store's website can help you check prices and unit costs in advance.

    Quick Comparison Table

    Store type Typical strengths Watch-outs Good for
    Conventional supermarket Wide selection, sales, loyalty programs Name-brand and specialty items may cost more One-stop shopping, store-brand staples
    Discount grocer Private labels and basics Smaller or changing selection Pantry staples, produce
    Ethnic/international market Spices, legumes, rice, tofu, noodles, produce Labels in other languages; selection varies Spices, grains, legumes, tofu
    Warehouse club Bulk sizes on shelf-stable and frozen items Membership fee, storage, potential waste Larger households with storage space
    Online delivery Easy comparison, saved lists, fewer impulse buys Fees, tips, markups, minimums Convenience, limited time or transportation

    How to Compare Prices Accurately

    Use Unit Pricing

    Unit pricing is the most reliable way to compare options when packages come in different sizes.

    • Find the unit price on the shelf tag. It's usually listed per ounce, pound, count, or liter.
    • Compare the same unit across brands and sizes. If one tag lists price per ounce and another lists price per pound, convert them before you decide.
    • Check that the larger package is actually cheaper per unit. Bigger isn't always better value. Also ask whether you'll use it before it spoils.

    Practical example: Say you're choosing between two sizes of rolled oats. Don't compare the sticker prices. Look at each shelf tag's unit price, confirm both use the same unit, and pick the lower one only if you'll finish the larger bag while it's still fresh.

    Choose Store Brands Strategically

    Store brands are often a good place to look for savings on basics, but quality and taste can vary.

    • Compare ingredient lists against the name-brand version, and taste-test with one item first before switching a whole category.
    • Good candidates include canned beans, frozen vegetables, pasta, rice, oats, plant milks, and canned tomatoes.
    • Check labels for dietary needs, such as allergens or fortification, since store-brand and name-brand products can differ.

    If a store brand meets your needs on ingredients and taste, it may be a good value. If you notice a difference you care about, go back to the name brand for that item only.

    Buy Seasonal Produce

    In-season produce is often more plentiful and may cost less, but check local prices, since conditions vary by region.

    • Use frozen or canned produce when fresh is out of season. Check labels for added sugar or sodium if that matters to you.
    • Look for seasonal items at local markets, in store flyers, and on in-store signs.
    • Stay flexible. If your recipe calls for one vegetable and another seasonal one works just as well, swap it.

    Watch for Common Price Traps

    • Specialty convenience foods. Meat and dairy alternatives and other prepared plant-based products may cost more than whole-food staples.
    • Smaller packages and pre-cut produce. These often cost more per unit than whole or larger versions.
    • Sale items you won't use. A sale is only a deal if the food gets eaten.

    Step-by-Step: Build a Budget-Friendly Plant-Based Shopping Routine

    1. Plan meals around staples (grains, legumes, vegetables, fruit) and note what you already have. If you want inspiration, browse plant-based dinner ideas and pick recipes built on ingredients you'll reuse. 2. Write a list organized by store section so you don't wander and impulse-buy. 3. Check local store flyers, apps, or websites for current prices. 4. Compare unit prices for your top 10 to 15 regular items across two or three stores. 5. Assign items to the store that works best. For example, staples at a discount grocer and spices at an international market. 6. Choose store brands for basics, and name brands only where you notice a difference. 7. Buy seasonal produce and stock up on frozen or canned options. 8. Store food properly and plan leftovers to reduce waste. 9. Review your receipts or order history monthly and adjust your routine.

    Quick Checklist Before You Shop

    • [ ] I've checked what I already have at home.
    • [ ] My list is organized by store section.
    • [ ] I've compared unit prices on my regular items.
    • [ ] I know which items are better bought in bulk and which aren't.
    • [ ] I have a plan for using perishable items.

    Which Option Is Right for You?

    • Small household or limited storage: A supermarket or discount grocer, with selective bulk buying, is usually the most practical fit.
    • Large household or good storage: A warehouse club may suit shelf-stable and frozen staples, if the unit prices hold up.
    • Cooking with many spices, legumes, or tofu: Ethnic and international markets are worth a visit.
    • Limited time or transportation: Online delivery can help, after you compare fees and markups.

    Tip: Run a small price test. Buy the same basket of items at two stores, or compare the same basket on their websites, and see how the totals and unit prices compare. If you're ready to put your plan into action, you can also shop plant-based dinner options and compare them with what you'd make from staples.

    Frequently Asked Questions

    Is plant-based grocery shopping always cheaper?

    Not necessarily. Staples like beans, lentils, rice, oats, and seasonal produce are often budget-friendly, while specialty or processed plant-based products can cost more. Compare prices at your local stores.

    Are warehouse clubs worth it for plant-based shoppers?

    They can be if you have storage space, will use the bulk quantities, and the unit prices beat other local options after accounting for membership costs. Compare before joining.

    How do I know if a store brand is a good value?

    Compare unit prices and ingredient lists, then try a small amount. If quality and taste meet your needs, it may be a good value.

    Conclusion and Next Step

    Plant based grocery shopping on a budget comes down to a few habits: compare unit prices, try store brands for staples, buy seasonal produce, and match each store type to the items it handles best. You don't need to commit to a single store. Many households do best with a primary store plus an occasional stop elsewhere for specific items.

    Your next step: Pick five staple items, check their unit prices at two or three local stores this week, and build your routine from the results. Prices and availability vary by location, so verify everything locally before you change how you shop.

  • Puppy Teething vs. Adult Dog Chewing: How to Tell the Difference and What to Do

    Puppy Teething vs. Adult Dog Chewing: How to Tell the Difference and What to Do

    This article contains affiliate links. We may earn a commission if you buy through them, at no extra cost to you.

    Puppy Teething vs. Adult Dog Chewing: How to Tell the Difference and What to Do

    A chewed shoe or a gnawed table leg can come from very different causes depending on a dog's life stage. This guide explains puppy teething vs adult dog chewing, what separates the two, and how to respond to each. It is general guidance only, and your veterinarian can advise on your dog's individual timeline.

    Key Takeaways

    • Puppy chewing is often tied to teething discomfort and exploration. Adult chewing more often points to boredom, stress, habit, or dental or medical issues.
    • Puppies need safe outlets and redirection. Adults need trigger-finding and enrichment.
    • Punishment doesn't help at either stage.
    • A sudden change in chewing at any age deserves a vet check.

    Quick Answer: Puppy Teething vs. Adult Dog Chewing

    Puppy chewing is often linked to teething discomfort and exploration as baby teeth give way to adult teeth. Adult dog chewing is usually not about teething, and more often relates to boredom, excess energy, stress, habit, or dental or medical issues. Puppies need relief and redirection; adults need cause-finding and enrichment.

    Timelines vary by dog, so confirm with your vet rather than relying on a fixed age.

    How Chewing Patterns Differ by Life Stage

    Typical Puppy Teething Behavior

    Teething puppies tend to chew broadly. Hands, furniture legs, cords, shoes, and bedding can all end up in their mouths, partly because they are also exploring the world with their mouths.

    Possible signs of teething include:

    • Sore or red-looking gums
    • Increased mouthing or nibbling on people
    • Small tooth fragments or lost baby teeth found around the home (this may occur, though many are swallowed or go unnoticed)

    Teething puppies often seek out cold or textured items, which may feel soothing on tender gums.

    Typical Adult Dog Chewing Behavior

    Adult chewing is usually more targeted or repetitive. A dog might go after the same pillow, the same pair of slippers, or only chew when left alone or in the evening.

    Common contributors include:

    • Boredom or under-stimulation
    • Anxiety or stress
    • Attention-seeking
    • Learned habit (chewing that was once rewarded by attention or relief)

    Chewing for enjoyment is normal for dogs of any age. Destructive chewing is the real concern.

    Side-by-Side Comparison

    Factor Puppy Teething Adult Dog Chewing
    Likely cause Teething discomfort, exploration Boredom, stress, habit, energy, or dental/medical issues
    Pattern Broad: many items Targeted or repetitive: certain items, times, or situations
    Main goal Soothe and teach what's allowed Identify triggers and enrich
    Supervision level High; puppy-proofed space, frequent checks Moderate to high, depending on the dog's habits; secure valuables
    When to call the vet Retained baby teeth questions, painful gums, not eating Sudden onset, dental signs, vomiting, compulsive chewing

    Why Management Differs

    Puppies: Chewing is developmental. The focus is on safe outlets, prevention, and teaching what's allowed.

    Adults: Chewing is more often behavioral or medical. The focus is on finding the trigger and meeting the dog's needs, whether that means more exercise, more mental work, or treatment for a dental problem.

    Why punishment doesn't help: Scolding after the fact can increase stress, and stress can fuel more chewing. It also doesn't teach your dog what to chew instead. Redirecting to an approved item and rewarding that choice gives your dog something useful to learn.

    Dental pain can occur at any age. If your dog's chewing changes suddenly, a vet check is worthwhile before assuming it's a behavior problem.

    What to Do for a Teething Puppy

    Appropriate Chew Options

    • Puppy-appropriate rubber or nylon chew toys, sized correctly so they can't be swallowed.
    • Chilled (not frozen solid) soft toys or a damp washcloth, offered under supervision. Cool textures may feel soothing.
    • Avoid items that are too hard or that could splinter or break teeth. Ask your vet about specific products.

    Supervision and Environment

    • Puppy-proof the space: remove cords and shoes, and use gates or a crate or pen as appropriate.
    • Supervise chew sessions and remove toys that are worn down or damaged.
    • Rotate toys so they stay interesting. A toy that has been out of sight for a few days often seems new again.

    Redirecting and Teaching

    When your puppy picks up something off-limits, calmly swap it for an approved chew and praise when they take it. For example, if your puppy grabs a sandal, trade it for a rubber toy, then reward the switch. Keep sessions calm and consistent, and make sure everyone in the household responds the same way.

    What to Do for an Adult Dog Who Chews

    Identify the Trigger

    Spend a week tracking when, where, and what your dog chews. Also consider:

    • Daily exercise and mental stimulation
    • How much time your dog spends alone
    • Recent changes such as a move, a new schedule, or a new pet

    Example: If the couch only gets chewed on weekday afternoons, the trigger may be time alone rather than a love of upholstery.

    Appropriate Chew Options and Enrichment

    • Durable chews suited to your dog's size and chewing style.
    • Food puzzles, sniff games, and short training sessions to give the brain a workout. If you want structured mental-enrichment ideas, you might explore a resource like Brain Training for Dogs alongside your vet's or trainer's guidance.
    • Supervision with new chews. Discard pieces that become small enough to swallow or develop sharp edges.

    Management Tools

    • Secure valuables and keep tempting items out of reach.
    • Provide a safe confinement option, such as a pen or a dog-proofed room, when you can't supervise.
    • If anxiety is suspected, use gradual alone-time training, starting with very short absences.

    Practical Step-by-Step Plan

    1. Note your dog's life stage and any recent changes in chewing. 2. Check the mouth for visible concerns only if your dog tolerates it. Don't force it. 3. Remove access to risky items. 4. Offer two or three appropriate chews and rotate them. 5. Supervise and redirect consistently. 6. Increase exercise and mental enrichment. 7. Schedule a vet visit if red flags appear.

    When to Talk to Your Veterinarian

    Contact your vet about:

    • Teething timelines, and whether baby teeth are being retained
    • Signs of dental concern: bad breath, drooling, bleeding gums, reluctance to eat or chew, broken teeth, or pawing at the mouth
    • Sudden onset of chewing in an adult dog
    • Swallowed objects or vomiting, which need prompt veterinary attention
    • Compulsive-seeming chewing or chewing tied to anxiety. Your vet may suggest a behaviorist or trainer.

    FAQs

    How can I tell if my dog is teething or just chewing?

    Consider life stage, gum soreness, and the pattern. Teething chewing tends to be broad, while targeted or repetitive chewing suggests habit or another cause. A vet can confirm what's going on.

    Do adult dogs need chew toys too?

    Yes. Chewing is a natural behavior. Appropriate, supervised options support enrichment and can reduce destructive chewing.

    Should I be worried if my adult dog suddenly starts chewing more?

    A sudden change may reflect stress, boredom, or dental or medical discomfort. Check with your vet, especially if other symptoms appear.

    Conclusion

    Puppy teething vs adult dog chewing comes down to cause, so the response should differ too. Puppies need relief, safe outlets, and gentle teaching. Adults need detective work and enrichment. For both, provide safe chews, supervise, and consult your vet about timelines and dental concerns.

    Disclosure: This article contains an affiliate link. If you use it, we may earn a commission at no extra cost to you.