Author: latinino

  • Easy Plant-Based Sauces and Seasonings That Make Cheap Dinners Taste Better

    Easy Plant-Based Sauces and Seasonings That Make Cheap Dinners Taste Better

    This article contains affiliate links. We may earn a commission if you buy through them, at no extra cost to you.

    Easy Plant-Based Sauces and Seasonings That Make Cheap Dinners Taste Better

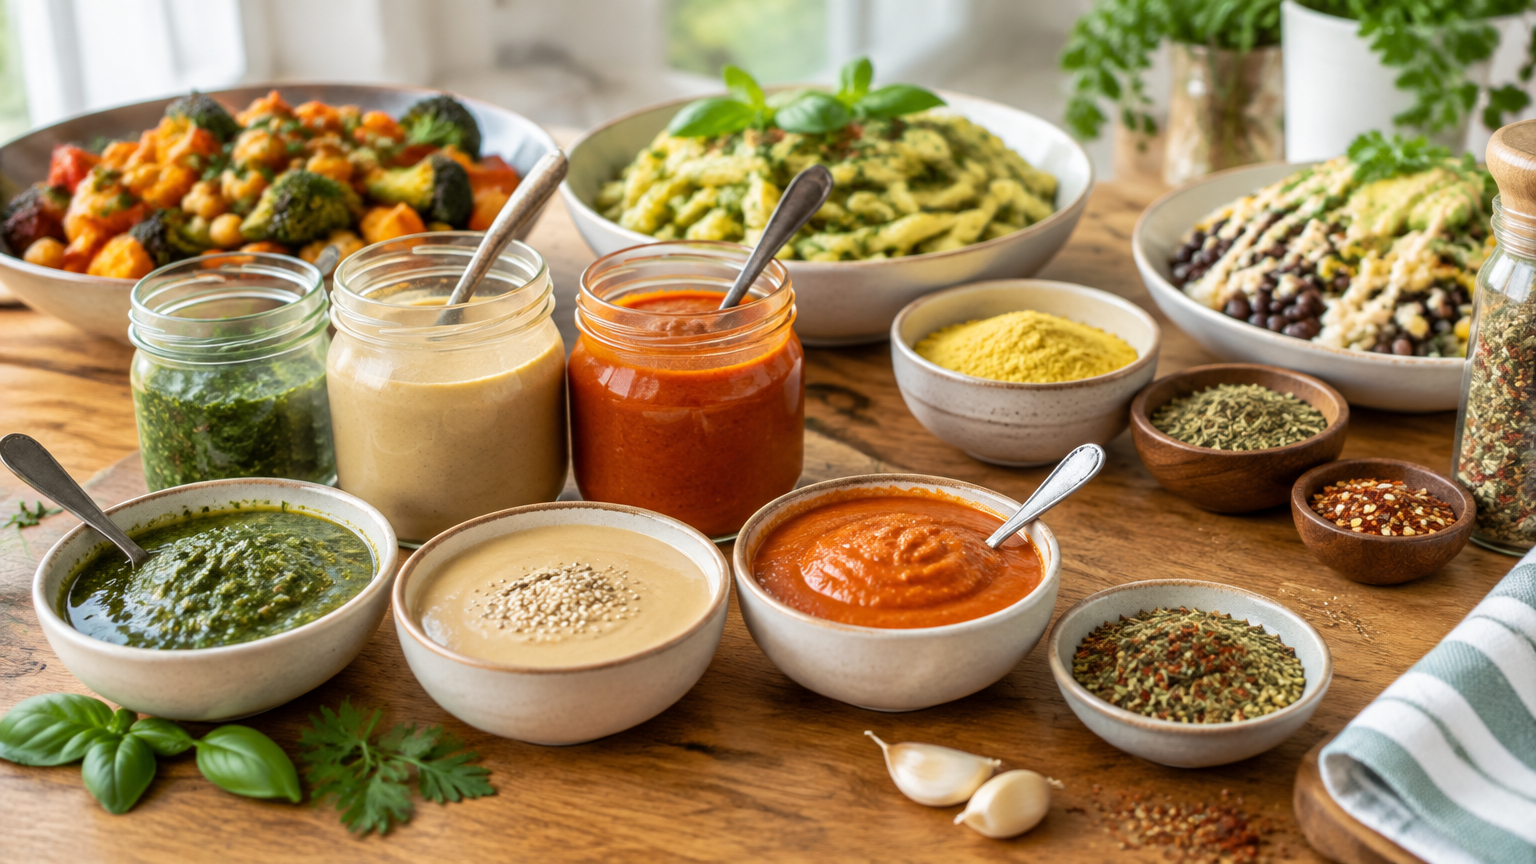
    The easiest plant-based sauces for beginners use pantry staples and need only a bowl and a whisk, or a blender. Start with five: peanut sauce, tahini-lemon, tomato-garlic, a cashew-free creamy sauce, and spicy soy-ginger. Each turns plain rice, beans, or vegetables into a meal. Add a few basic spices and you can vary the flavor all week.

    Key Takeaways

    • Five sauces cover most flavor styles: nutty, tangy, savory-tomato, creamy, and spicy.
    • Three of the five (peanut, tahini-lemon, spicy soy-ginger) need no cooking.
    • Season in this order: salt first, then acid, then spice.
    • One sauce plus a cheap base, a protein, and vegetables makes a complete dinner.
    • Make one sauce in bulk and change the toppings through the week.

    How to Use This Guide

    Each sauce below has an ingredient list, quick steps, and serving ideas. A few ground rules make them easier to follow:

    • Amounts are starting points. Taste, then adjust salt, acid (lemon or vinegar), and heat.
    • Thin with water one tablespoon at a time. It's easy to add more and hard to take it back.
    • Thicken by adding more of the main ingredient, such as more peanut butter, tahini, or beans.

    If you like learning from structured recipes, a beginner-friendly plant-based cookbook or recipe collection can be a useful companion once you've tried these basics.

    Spice-Rack Starter List

    You don't need a full spice wall. A small set covers a wide range of flavors.

    Core spices and seasonings

    • Salt and black pepper
    • Garlic powder
    • Onion powder
    • Smoked paprika
    • Ground cumin
    • Chili flakes or cayenne
    • Dried oregano or Italian seasoning
    • Curry powder or chili powder (pick one to start)

    Flavor boosters to keep on hand

    • Soy sauce or tamari
    • Vinegar (rice or apple cider)
    • Lemons or bottled lemon juice
    • Nutritional yeast
    • Fresh garlic and ginger

    Beginner tip

    Buy small amounts of spices first. Add more only after you use them up. That keeps your spending low and shows you which flavors you actually reach for.

    Five Easy Plant-Based Sauces

    1. Peanut Sauce

    Ingredients:

    • 3 tablespoons peanut butter
    • 1 tablespoon soy sauce or tamari
    • 1 tablespoon lime juice or vinegar
    • 1 small clove garlic, minced (or a pinch of garlic powder)
    • 1 teaspoon sweetener (maple syrup or sugar)
    • 2–4 tablespoons warm water
    • Optional: chili flakes

    Steps: Whisk everything together in a bowl. Add warm water a spoonful at a time until the sauce is pourable.

    Use it on:

    • Rice with steamed broccoli or cabbage
    • Noodles
    • Roasted sweet potatoes
    • As a dip for raw vegetables

    Tip: Warm water blends into peanut butter more easily than cold.

    2. Tahini-Lemon Sauce

    Ingredients:

    • 3 tablespoons tahini
    • 2 tablespoons lemon juice
    • 1 small clove garlic, minced
    • Pinch of salt
    • 2–4 tablespoons water
    • Optional: a pinch of cumin

    Steps: Whisk the tahini and lemon juice. It will thicken and look clumpy at first, which is normal. Add water gradually until smooth, then season to taste.

    Use it on:

    • Chickpeas
    • Roasted carrots or cauliflower
    • Grain bowls
    • Falafel-style patties

    Tip: If it tastes bitter, see the troubleshooting section below.

    3. Tomato-Garlic Sauce

    Ingredients:

    • 1 can (about 14–15 oz) crushed tomatoes
    • 2 tablespoons olive oil
    • 2–3 cloves garlic, sliced or minced
    • 1 teaspoon oregano or Italian seasoning
    • Salt to taste
    • Pinch of sugar, only if the sauce tastes too acidic
    • Optional: chili flakes

    Steps: Gently cook the garlic in the oil over low to medium heat until fragrant, without letting it brown. Add the tomatoes and seasonings. Simmer until slightly thickened.

    Use it on:

    • White beans over rice
    • Pasta
    • Sautéed zucchini or eggplant
    • Baked potatoes

    Tip: This is the one sauce here that needs a stove, but it stays hands-off while it simmers.

    4. Cashew-Free Creamy Sauce

    Many plant-based creamy sauces rely on cashews. White beans make a budget-friendly alternative.

    Ingredients:

    • 1 can white beans (cannellini or great northern), drained and rinsed
    • 2 tablespoons olive oil
    • 2 tablespoons lemon juice
    • 1 clove garlic
    • 2 tablespoons nutritional yeast
    • ½ teaspoon salt, plus more to taste
    • ¼–½ cup water, as needed

    Steps: Blend until smooth, adding water as needed. Warm gently in a small pot if you'd like it hot.

    Use it on:

    • Pasta
    • Steamed or roasted vegetables
    • Rice bowls
    • As a spread or salad dressing

    Note: Sunflower seeds or silken tofu also work as a base. Adjust the liquid to get the texture you want. Sunflower seeds may need soaking or a stronger blender [VERIFY based on your blender and the seeds you use].

    5. Spicy Soy-Ginger Sauce

    Ingredients:

    • 3 tablespoons soy sauce or tamari
    • 1 teaspoon grated fresh ginger
    • 1 clove garlic, minced
    • 1 tablespoon rice vinegar
    • ½ teaspoon chili flakes or 1 teaspoon chili sauce
    • 1 teaspoon sweetener
    • Optional: a splash of water
    • Optional: a few drops of sesame oil, if you have it

    Steps: Stir everything together. For a thicker glaze, simmer briefly with a small cornstarch-and-water mixture (about 1 teaspoon cornstarch mixed into 2 teaspoons cold water).

    Use it on:

    • Stir-fried vegetables over rice
    • Tofu
    • Black beans
    • Roasted broccoli

    Tip: Start with less chili. You can always stir in more.

    Quick Comparison Table

    Sauce Cooking needed? Main flavor Good with
    Peanut No (whisk) Nutty, savory, a little sweet Rice, noodles, sweet potatoes, raw veggies
    Tahini-lemon No (whisk) Tangy, earthy Chickpeas, roasted vegetables, grain bowls
    Tomato-garlic Yes (simmer) Savory, herby White beans, pasta, potatoes
    Cashew-free creamy No cooking (blender) Mild, lemony, creamy Pasta, vegetables, rice bowls
    Spicy soy-ginger No (stir) Salty, sharp, spicy Stir-fries, tofu, black beans

    Simple Formula for Cheap Dinners

    You don't need a recipe for every meal. Use this pattern:

    1. Pick a base: rice, potatoes, pasta, or another grain. 2. Add a protein: beans, lentils, chickpeas, or tofu. 3. Add vegetables: fresh, frozen, roasted, or sautéed. 4. Spoon on one sauce. 5. Finish with something fresh or crunchy, such as herbs, scallions, or seeds.

    Practical examples

    • Rice + black beans + frozen broccoli + spicy soy-ginger sauce + scallions. Heat the beans and broccoli, then drizzle the sauce over the top.
    • Baked potato + white beans + tomato-garlic sauce + chopped parsley. Spoon the warm beans and sauce over a split potato.
    • Quinoa or rice + chickpeas + roasted carrots + tahini-lemon sauce + sesame seeds. Roast the carrots while the grain cooks.
    • Pasta + steamed cauliflower + cashew-free creamy sauce + black pepper. Toss everything in the warm sauce.
    • Noodles + shredded cabbage + peanut sauce + crushed peanuts. Serve warm or cold.

    Make-Ahead and Storage Tips

    • Make a double batch of one sauce at the start of the week.
    • Store in airtight containers in the refrigerator and use within a few days.
    • Stir or whisk before serving, and add a little water if the sauce has thickened.
    • Discard any sauce that smells or looks off.

    Sauces made with beans or tomatoes are perishable, so treat them like leftovers. Label the container with the date so you don't have to guess. If you plan to batch-cook often, a set of airtight glass storage containers makes it easier to keep sauces organized, though any clean lidded container works.

    Beginner Troubleshooting

    • Too thick: add water a spoonful at a time.
    • Too bitter (tahini): add a little more lemon, salt, or sweetener.
    • Too salty: add water, acid, or more of the base ingredient.
    • Bland: add salt first, then acid, then spice.

    A quick tasting checklist

    Before serving any sauce, taste it and ask:

    • [ ] Does it need more salt?
    • [ ] Does it taste flat? Add lemon, lime, or vinegar.
    • [ ] Do you want more heat? Add chili flakes a pinch at a time.
    • [ ] Is it the right thickness for the dish?
    • [ ] Does it need something sweet to soften sharp or bitter notes?

    FAQ

    What are the easiest plant-based sauces for beginners to make?

    Peanut sauce, tahini-lemon, and spicy soy-ginger are the simplest. They need no cooking and just a whisk.

    Can I make creamy sauces without cashews?

    Yes. Blend white beans, silken tofu, or sunflower seeds with lemon, garlic, and a little oil or water.

    How do I use these sauces on a budget?

    Pair a sauce with inexpensive staples like rice, beans, frozen vegetables, or potatoes. Make one sauce in bulk and change the toppings through the week.

    Conclusion

    Plain rice, beans, and vegetables become much more interesting with a good sauce. Start with one this week. Peanut or tahini-lemon is a good first pick because it needs only a bowl and a whisk. Once you're comfortable, add a second sauce, then build out your spice rack gradually. Taste as you go, adjust the salt, acid, and heat, and you'll soon be making these without measuring.

  • Why Does My Dog Chew Everything? 7 Common Reasons Behind Destructive Chewing

    Why Does My Dog Chew Everything? 7 Common Reasons Behind Destructive Chewing

    This article contains affiliate links. We may earn a commission if you buy through them, at no extra cost to you.

    Why Does My Dog Chew Everything? 7 Common Reasons Behind Destructive Chewing

    Chewed shoes, gnawed table legs, and a remote control missing its buttons are a familiar frustration for dog owners. If you keep asking yourself "why does my dog chew everything?", the first thing to know is that chewing is normal dog behavior. The reason behind it varies from dog to dog. This guide covers seven common motivations, a self-check list to match behaviors to likely causes, and practical next steps.

    Key Takeaways

    • Chewing is natural, but the reason for it differs between dogs.
    • Seven common motivations: boredom, teething, anxiety, excess energy, curiosity, attention-seeking, and lack of appropriate outlets.
    • Tracking when and what your dog chews for 1–2 weeks reveals useful patterns.
    • Management, suitable chew items, exercise, and calm redirection are the foundation of change.
    • Persistent, sudden, or unusual chewing is worth a conversation with your vet.

    The Short Answer: Why Does My Dog Chew Everything?

    Dogs chew because it is a natural behavior that serves several purposes. Common motivations include boredom, teething, anxiety, excess energy, curiosity, attention-seeking, and a lack of appropriate outlets. Matching the pattern of chewing to its likely cause is the first step toward redirecting it.

    One note: chewing is not spite or revenge. A dog who chews your shoes while you're at work isn't "getting back at you." Dogs don't plan payback the way people do, and assuming they do can lead to frustration and ineffective responses. It's more useful to ask what need the chewing is meeting.

    Normal Chewing vs. Destructive Chewing

    What Counts as Normal

    Chewing on appropriate items, such as dog toys and chews, is healthy, normal behavior. A dog who settles down with a chew toy for a while is doing what dogs do.

    When It Becomes a Problem

    Chewing becomes a concern when it:

    • Targets household items like furniture, shoes, or cords
    • Happens frequently or seems hard to interrupt
    • Risks harm to the dog (for example, swallowing pieces) or damage to your home

    Destructive chewing in dogs is usually a sign that a need isn't being met or that the dog hasn't learned what is acceptable to chew.

    7 Common Reasons Dogs Chew Everything

    1. Boredom

    With too little mental stimulation, chewing becomes self-made entertainment. This is common when dogs spend long stretches alone or follow an unchanging routine. Example: A dog who gets the same walk and the same kibble bowl every day may start dismantling a couch cushion mid-afternoon.

    2. Teething (Puppies)

    Puppies chew while their adult teeth come in. This reason is typically relevant to young dogs, and timing varies, so ask a vet or trainer about age-specific expectations. If you're raising a puppy, a puppy teething guide can help you plan ahead.

    3. Anxiety or Stress

    Chewing may appear around departures, loud noises, or changes in routine. Look for other signs of stress alongside the chewing, such as pacing, whining, or panting. Example: A dog who chews only near the front door after you leave is giving you a different clue than one who chews all day long.

    4. Excess Energy

    Chewing may spike when exercise needs aren't met. Needs vary by age, breed, and individual dog, so a routine that suits one dog may leave another restless.

    5. Curiosity and Exploration

    Dogs, especially puppies, investigate the world with their mouths. Novel textures and objects are especially tempting, such as a new throw pillow, a houseguest's bag, or a fallen sock.

    6. Attention-Seeking

    If chewing reliably gets a reaction, even scolding, the dog may repeat it. From a dog's perspective, a chase around the living room can be rewarding. Owners often don't realize their reactions are reinforcing the habit.

    7. Lack of Appropriate Outlets

    If there aren't enough suitable chew items, or the ones available don't interest your dog, household objects become the default option. A single rope toy that's been ignored for months isn't much competition for a leather shoe.

    Self-Check List: Match the Behavior to the Likely Cause

    Use this as a rough guide, not a diagnosis. Many dogs have more than one reason for chewing.

    If you notice… Possible cause
    Chewing mostly when left alone, with other distress signs Anxiety or stress
    Chewing while you're home, especially after you react Attention-seeking
    Young puppy chewing many items, with mouth discomfort Teething
    Chewing is worst on low-activity days or in the evening Excess energy
    Chewing occurs during quiet, uneventful stretches Boredom
    Dog mouths and samples new objects Curiosity
    Few or no chew toys available, or toys are ignored Lack of outlets

    Tip: Track the behavior for 1–2 weeks. Note the time of day, what was chewed, where you were, and what happened beforehand. Patterns often emerge quickly, and they'll help if you later talk with a trainer or vet.

    Practical Steps to Reduce Destructive Chewing

    Manage the Environment

    Put tempting items out of reach. Close doors, use baby gates, and stash shoes in a closet. A crate can help if it has been introduced gradually and positively. Management prevents rehearsal of the habit while you work on the underlying cause.

    Provide Appropriate Chew Options

    Offer a variety of textures and sizes. Supervise use, and choose items suited to your dog's size and chewing style. Rotating items keeps them interesting. If your dog ignores a toy, try a different texture rather than assuming chew toys don't work.

    Meet Exercise and Enrichment Needs

    Build in walks, play, sniffing time, food puzzles, and short training sessions. Mental work tends to matter as much as physical activity. Some owners also explore structured training resources, such as Brain Training for Dogs, as one way to add mental engagement to the routine. [VERIFY: program details and suitability before relying on it.] For more ideas, look for a dog enrichment guide for at-home activities.

    Redirect and Reward

    When your dog picks up the wrong item, calmly trade it for an appropriate one. Praise when the dog chews the right thing. Stay calm and avoid punishment, which doesn't teach what to chew instead and can add stress.

    Address Anxiety-Related Chewing

    If the pattern points to stress around departures, practice alone time gradually, starting with very short absences. A trainer or qualified behavior professional can tailor a plan. A separation anxiety basics resource can also help you recognize the signs.

    Be Consistent

    Everyone in the household should follow the same rules. Habits take time to change, so patience matters. Expect progress in small steps rather than overnight.

    When to Talk to Your Vet

    Consider a vet conversation if chewing:

    • Persists despite consistent effort
    • Begins suddenly
    • Changes noticeably from your dog's usual behavior

    Also mention it if your dog swallows non-food items or seems uncomfortable. A vet can help rule out underlying factors and advise on next steps. Bring your tracking notes, since they give useful context.

    Frequently Asked Questions

    Will my dog grow out of chewing?

    Puppy chewing often lessens as dogs mature, but habits can persist if they aren't redirected. Guidance and appropriate outlets help.

    Should I punish my dog for chewing?

    Punishment generally doesn't teach a dog what to chew instead and may add stress. Redirect and reward instead.

    What are safe things for my dog to chew?

    Choose items sized and designed for your dog, supervise use, and replace worn pieces. Ask your vet or trainer for recommendations specific to your dog.

    Conclusion

    So, why does my dog chew everything? There's rarely a single answer. Boredom, teething, anxiety, excess energy, curiosity, attention-seeking, and a lack of outlets all play a role, and a pattern-based approach helps you tell them apart.

    Start with the self-check list and track your dog's habits for a week or two. Then adjust outlets, exercise, and routine based on what you find. If the behavior persists or changes suddenly, consult your vet or a qualified trainer for personalized guidance.

  • Plant-Based Meal Prep Containers and Storage: What to Look For Before You Buy

    Plant-Based Meal Prep Containers and Storage: What to Look For Before You Buy

    This article contains affiliate links. We may earn a commission if you buy through them, at no extra cost to you.

    Plant-Based Meal Prep Containers and Storage: What to Look For Before You Buy

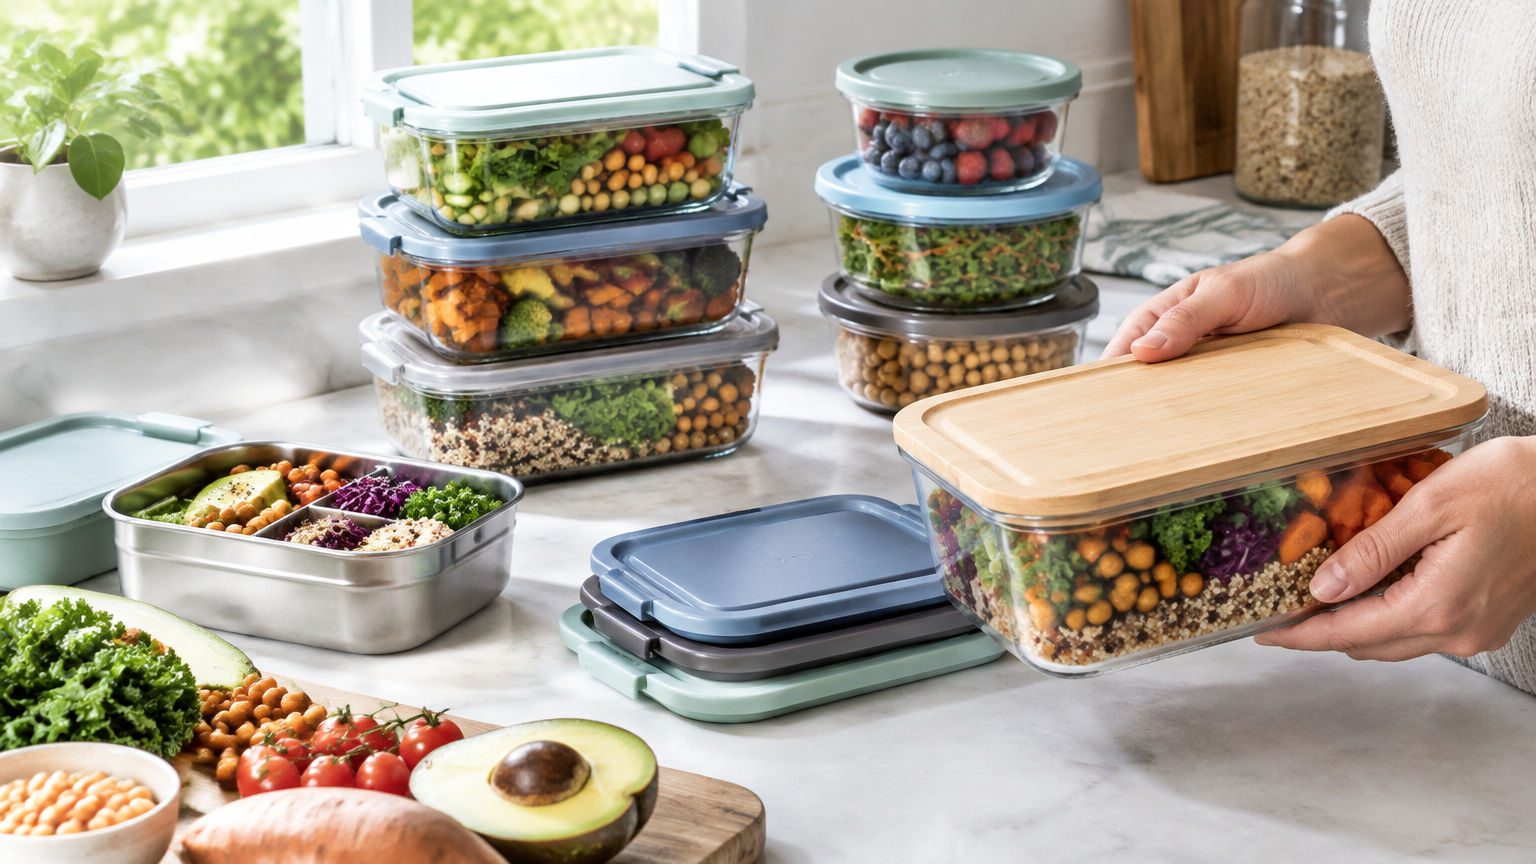
    Direct answer: The best meal prep containers for plant based meals are the ones that match how you cook, reheat, and store your food. Prioritize material (glass or plastic), a size that fits your portions, a lid seal suited to saucy or wet foods, confirmed microwave and freezer compatibility, and a shape that stacks well in your fridge. Then choose container types by component, because grains, beans, sauces, and roasted vegetables each have different needs.

    Key Takeaways

    • Neither glass nor plastic is universally better. Choose based on whether you mostly reheat at home or carry meals daily.
    • Buy a mix of sizes instead of one size for everything.
    • Lid seal quality matters most for sauces, soups, and cooked beans in liquid.
    • Check the label for the base and the lid separately. They often have different ratings.
    • Test one or two containers before committing to a full set.

    Quick Buying Checklist

    Use this table as a starting point. Each row is expanded in the sections below.

    Feature What to check Why it matters
    Material Glass or plastic, based on your routine Affects weight, staining, and durability
    Size and portion fit Capacity and depth versus your typical portions Prevents overfilled or half-empty containers
    Lid type and seal Snap-lock, silicone gasket, vented, or press-on Determines leak resistance and reheating ease
    Compatibility labels Microwave, freezer, dishwasher, oven Avoids damage and misuse
    Stackability Uniform shapes, nesting when empty Saves fridge, freezer, and cabinet space
    Cleaning Stain and odor concerns, removable gaskets Affects long-term use
    Quantity Enough for your prep schedule Avoids running short mid-week

    Material: Glass vs. Plastic

    Glass

    Pros

    • Generally resists staining and odors, which is useful with turmeric, tomato, and curry-based dishes.
    • Easy to see contents at a glance.
    • Often oven-safe, but only if the manufacturer says so.

    Cons

    • Heavier to carry.
    • Can chip or break.
    • The lid may be a different material, such as plastic, so check the lid's ratings separately.

    Plastic

    Pros

    • Lightweight and portable.
    • Usually less breakable, which helps for commuting or travel.

    Cons

    • May stain or hold odors, especially after tomato sauces and spice-heavy dishes.
    • Ratings vary, so check the label for microwave, freezer, and dishwasher use.

    How to Decide

    • Mostly reheating at home or at an office with a microwave: glass may suit you well.
    • Carrying meals daily or packing for travel: lightweight plastic may suit you better.
    • Always check manufacturer labels for temperature limits and care instructions.
    • If BPA-free labeling matters to you, look for it and verify it on the specific product rather than assuming. [VERIFY on each product's packaging or listing]

    If you're leaning toward glass, you can compare glass meal prep container sets and check each listing for lid material and compatibility details.

    Size and Portion Fit

    Common Size Considerations

    • Single-compartment vs. multi-compartment. Single compartments are flexible for bowls and batch storage. Multi-compartment designs keep components separate.
    • Full meal vs. single component. Decide whether each container holds a complete meal or just one prepped ingredient.
    • Depth. Deeper containers suit bowls, stews, and beans. Shallow trays suit roasted vegetables.

    Practical Steps

    1. Decide how many meals you prep per week. This sets your minimum container count. 2. Measure a typical portion of grains, beans, and vegetables. Fill a measuring cup or scoop and pour it into a candidate container to see how it fits. 3. Choose a mix of sizes rather than all one size. A few larger containers and several smaller ones cover most needs. 4. Leave headspace for foods that expand when frozen, such as soups and cooked beans in liquid.

    Practical example: Say you prep four lunches a week, each with a grain, a bean dish, and roasted vegetables. You might choose four medium containers for assembled meals, plus two or three small ones for sauces. If you also batch-cook grains for the freezer, add a few shallow, freezer-labeled containers.

    Lid Seals and Leak Resistance

    Lid Types

    • Snap-lock lids clamp down on all sides and generally suit liquids.
    • Silicone-gasket lids add a flexible seal around the rim.
    • Vented lids let steam escape during reheating.
    • Simple press-on lids are convenient for dry or low-moisture foods but may not suit sauces.

    Match the Lid to the Use

    • Use tight seals for sauces, soups, and dressings.
    • Use vented lids for reheating.
    • Check whether gaskets are removable for cleaning. Trapped residue is a common problem.
    • Test new containers with water before packing sauces. Fill, seal, turn upside down over a sink, and shake gently.
    • Confirm that lids are microwave- and freezer-safe, not just the base.

    Microwave, Freezer, and Dishwasher Compatibility

    What to Verify on the Label

    • Microwave-safe for both base and lid
    • Freezer-safe
    • Dishwasher-safe (top rack only, if specified)
    • Oven-safe, if you plan to bake or reheat in the oven

    Don't assume that one rating covers another. A container can be microwave-safe but not freezer-safe, or the base can be rated for the oven while the lid is not. If a label is unclear or missing, treat the rating as unconfirmed. [VERIFY with the manufacturer]

    Practical Tips

    • Cool food before sealing and freezing. Hot food sealed in a container can create condensation.
    • Avoid sudden temperature changes with glass unless the manufacturer states it's safe.
    • Vent lids when microwaving, by opening a vent or resting the lid loosely on top, as the instructions direct.

    Stackability and Storage

    Containers spend more time in your fridge, freezer, and cabinets than in your hands. Consider the following:

    • Uniform shapes such as square or rectangular tend to use fridge space efficiently.
    • Nesting containers save cabinet space when empty.
    • Lids that fit multiple sizes simplify organization and reduce the hunt for matching pieces.
    • Flat, stackable containers help with freezer organization.
    • Clear sides or lids make contents easy to identify.
    • Label with dates using tape and a marker, or a dry-erase option if the surface allows.

    Before you buy, measure the shelf height and depth in your fridge and freezer. A container that looks compact online may not fit a crowded shelf.

    Match Container Types to Prepped Components

    Different foods behave differently in storage. Here's how to match them.

    Grains (rice, quinoa, farro)

    • Medium, shallow containers cool faster and portion easily.
    • Freezer-safe options work well for batch freezing in meal-sized portions.

    Beans and Legumes

    • Deeper containers with tight lids suit beans, especially when stored with liquid.
    • Leave headspace if you plan to freeze them.

    Sauces, Dressings, and Soups

    • Small leak-resistant containers or jars with secure seals work well.
    • Freezer-safe, with expansion room, if you'll freeze them.

    For sauces and dressings, a set of small leak-resistant sauce containers can be a useful add-on to your main set. Check the lid ratings before buying.

    Roasted Vegetables

    • Shallow, vented or loosely sealed containers help limit sogginess.
    • Separate compartments, or storing them apart from sauces, keeps textures better.

    Fresh Items (greens, cut fruit, toppings)

    • Separate compartments or small containers keep ingredients from getting wet or wilting.

    Assembled Bowls

    • Multi-compartment containers, or layered storage with sauce kept separate, let you build bowls without everything blending together.

    Practical example: For a grain bowl, store the grain in one compartment, roasted vegetables in another, and beans in a third, with a small sauce container alongside. At mealtime, combine them and reheat the parts that need it. Add fresh greens afterward.

    Cleaning, Stains, and Odors

    • Tomato, turmeric, and curry-based foods may stain some plastics.
    • Removable gaskets help prevent trapped residue.
    • Check whether the material is dishwasher-safe, and whether lids and gaskets need hand-washing.

    If you cook with a lot of tomato or spice, this may push you toward glass for those dishes, or toward dedicating certain plastic containers to less-staining foods.

    For more on prepping the components themselves, see this guide to batch-cooking plant-based staples.

    How to Build Your Starter Set

    1. List your weekly prep components. Write down the grains, beans, sauces, and vegetables you prepare most often. 2. Pick a primary material. Choose glass, plastic, or a deliberate mix. 3. Choose 2–3 sizes. Cover assembled meals, single components, and shallow roasting-tray storage. 4. Add small sauce containers. Dressings and sauces benefit from dedicated, leak-resistant options. 5. Verify label claims. Check microwave, freezer, dishwasher, and oven ratings for both bases and lids. 6. Test before buying a full set. Try one or two pieces for sealing, stacking, and reheating, then expand.

    FAQs

    Are glass or plastic meal prep containers better for plant-based meals?

    Neither is universally better. Glass suits home reheating and stain resistance, while plastic suits portability. Base the choice on your routine and the product's labeling.

    Can I freeze beans, grains, and sauces in meal prep containers?

    Many of these foods freeze well, but only in containers labeled freezer-safe. Cool food first and leave headspace for liquids.

    How do I keep roasted vegetables from getting soggy in storage?

    Cool them before sealing, use a shallow container, and store sauces separately. Consider a vented lid for reheating.

    Conclusion: Final Pre-Purchase Checklist

    Choosing meal prep containers for plant based meals comes down to matching features to your actual routine, not to a single "best" option. Before you check out, confirm the following:

    • [ ] Material fits your routine
    • [ ] Sizes match your portions
    • [ ] Lids seal as needed
    • [ ] Microwave, freezer, and dishwasher labels confirmed
    • [ ] Containers stack and fit your fridge
    • [ ] Each component has a suitable container type

    Start small, test the seals and reheating on a couple of pieces, and build out your set once you know what works for your kitchen.

  • Frozen vs. Fresh vs. Canned Produce for Plant-Based Meals on a Budget

    Frozen vs. Fresh vs. Canned Produce for Plant-Based Meals on a Budget

    This article contains affiliate links. We may earn a commission if you buy through them, at no extra cost to you.

    Frozen vs. Fresh vs. Canned Produce for Plant-Based Meals on a Budget

    Meta description: A practical guide to choosing frozen, fresh, or canned vegetables for plant-based dinners on a budget, with tips on storage, food waste, and reading labels.

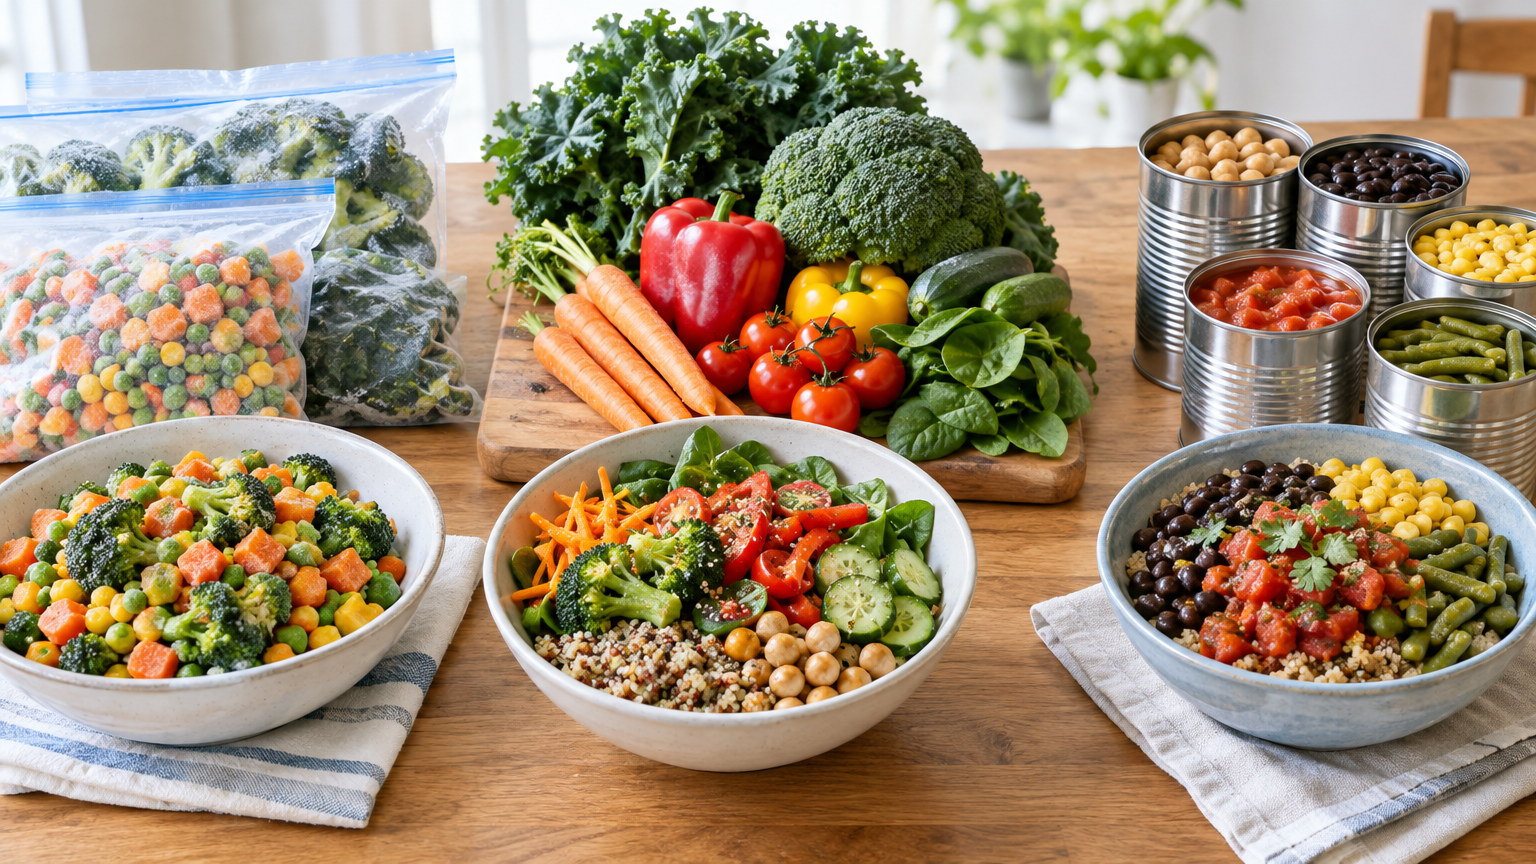
    Plant-based dinners can get expensive, or wasteful, when a crisper drawer full of produce spoils before you cook it. This dinner-by-dinner guide to frozen vs canned vegetables on a plant-based budget shows which form works best for stir-fries, soups, curries, and sheet-pan meals, plus storage, food waste, and label-reading tips. It focuses on cost, texture, convenience, and cooking results, not health outcomes.

    The Short Answer: Which Form Should You Buy?

    No single form wins. Frozen is often the most flexible for stir-fries, curries, and sheet-pan meals. Canned is handy for soups, stews, and pantry backups. Fresh works best when you will use it soon, want a specific texture, or find it in season at a good price.

    Dinner type Best-fit form Why
    Stir-fry Fresh for crisp vegetables; frozen for broccoli, blends, edamame Fresh gives the most crunch; frozen is pre-cut and quick
    Soup or stew Canned tomatoes, beans, corn; frozen added late; fresh aromatics Long simmering suits soft textures
    Curry Canned tomatoes, chickpeas, coconut milk; frozen spinach, cauliflower, peas Sauce-based dishes forgive softer vegetables
    Sheet-pan meal Fresh hardy vegetables; frozen as a backup; canned chickpeas Roasting needs structure and low moisture

    Prices vary by store and region, so compare unit prices locally rather than assuming one form is always cheaper.

    Quick Comparison: Frozen vs. Canned vs. Fresh

    Cost and Unit Pricing

    Shelf tags usually list a unit price, such as price per ounce or per pound. Use it to compare across package sizes and forms. Also think about edible yield. Fresh produce may need trimming, peeling, or coring, so some of what you pay for ends up in the compost. Frozen and canned vegetables are usually ready to use, so the weight you buy is closer to the weight you cook. Fresh can still be the better value when it is in season or sold loose, so you can buy only what you need.

    Texture and Cooking Behavior

    • Frozen: Usually softer after cooking than fresh. Frozen vegetables tend to hold up better in cooked dishes than in raw ones.
    • Canned: Already cooked and soft. They work best when simmered, mashed, or blended.
    • Fresh: Gives you the most control over crispness and browning, which matters in stir-fries and roasting.

    Convenience and Prep Time

    Fresh vegetables need washing, chopping, and more cleanup. Frozen vegetables skip most of that. You open the bag and portion what you need. Canned vegetables and beans are the quickest of all, needing only a can opener and, if you choose, a colander for draining.

    Shelf Life and Flexibility

    Each form needs different space: the pantry for canned, the freezer for frozen, and the fridge or counter for fresh. Check package dates and storage instructions instead of assuming timelines. Canned and frozen items give you a cushion when plans change, while fresh produce asks you to cook on a schedule.

    Best Form for Each Dinner Type

    Stir-Fries

    Fresh vegetables are the best choice when you want crisp textures. Bell peppers, cabbage, and carrots all stay snappy in a hot pan.

    Frozen vegetables also work well. Broccoli, stir-fry blends, and edamame are common options. A few tips:

    • Cook from frozen over high heat.
    • Avoid overcrowding the pan, which causes steaming instead of searing.
    • If the product looks watery, thaw and drain it first.

    Canned vegetables have limited use here. Baby corn, water chestnuts, and bamboo shoots are the usual exceptions, and they add texture without extra prep.

    Example: Sauté fresh cabbage and carrots, add a handful of frozen edamame, and toss in drained canned water chestnuts at the end. Serve over rice with your favorite sauce.

    Soups and Stews

    Canned tomatoes, beans, and corn make an easy base, and long simmering suits their soft texture. Add frozen vegetables near the end of cooking so they do not turn mushy. Keep a few fresh aromatics, such as onion, garlic, and celery, since they build flavor and cost little compared with the whole pot of food.

    Example: Simmer onion and garlic, then add canned tomatoes, canned beans, and broth. Stir in frozen mixed vegetables for the last few minutes.

    Curries

    Curries are forgiving, which makes them ideal for pantry staples. Canned tomatoes, chickpeas, and coconut milk are a common trio. Frozen spinach, cauliflower, peas, and green beans slip easily into the sauce.

    Use fresh where texture matters, such as potatoes and onions. Potatoes hold their shape and soak up flavor, and onions form the foundation of the sauce.

    Sheet-Pan Meals

    Fresh hardy vegetables roast best. Sweet potatoes, carrots, and Brussels sprouts brown well and keep their structure.

    Frozen vegetables can work with care:

    • Roast at high heat.
    • Spread them in a single layer so they do not steam.
    • Pat them dry if they are icy.

    Canned chickpeas are a good add-in once they are drained and dried well, since they can turn crisp at the edges. Avoid canned soft vegetables for roasting, as they tend to fall apart.

    Step-by-Step: Build a Budget-Friendly Produce Plan

    1. Plan 3–4 dinners and note which produce form fits each one. 2. Buy fresh for the first half of the week, and rely on frozen or canned for the second half. 3. Check unit prices and store brands before you commit. 4. Keep a short list of staples: frozen mixed vegetables, frozen greens, canned tomatoes, and canned beans. 5. Cook the most perishable fresh items first. 6. Rotate older pantry and freezer items to the front so they get used.

    If you like working from templates, plant-based meal planning resources can help you organize a weekly plan around this approach.

    Storage Tips for Each Form

    Fresh Produce

    Store produce according to type. Some items belong in the fridge and others on the counter. Keep produce dry and avoid washing until you are ready to use it, since extra moisture can speed spoilage.

    Frozen Produce

    Reseal bags tightly, press out the air, and label them with the date opened. Avoid thaw-and-refreeze cycles, which can hurt texture and quality. If your bags keep ending up half-open, freezer-friendly storage containers are one option for keeping partial portions organized.

    Canned Produce

    Store cans in a cool, dry place. Transfer leftovers from opened cans to a covered container in the fridge instead of storing them in the can. Follow package guidance and safe food handling practices, and do not use cans with severe damage or bulging. For specifics on storage times, check USDA guidance rather than relying on rules of thumb.

    Reducing Food Waste

    • Use "first in, first out" shelving. Put newer items behind older ones.
    • Freeze fresh vegetables you will not use in time. Check guidance on blanching for specific items first, since not every vegetable freezes the same way.
    • Save scraps for homemade broth. Onion ends, carrot peels, and celery trimmings can go in a bag in the freezer until you have enough.
    • Cook in flexible formats. Fried rice, soup, curry, and grain bowls absorb leftovers easily.
    • Portion frozen vegetables. Take only what you need and return the rest to the freezer promptly.
    • Plan one "clean-out-the-fridge" meal each week. It turns odds and ends into dinner.

    How to Read Labels: Sodium, Sauces, and Add-Ins

    Frozen Vegetables

    Check for sauce packets, seasonings, butter, or cream. Plain frozen vegetables usually have a short ingredient list, often just the vegetable itself. Sauced blends can be convenient, but they may cost more per ounce of vegetable and limit how you can season the dish.

    Canned Vegetables and Beans

    If you want more control over seasoning, look for "no salt added," "low sodium," or "reduced sodium" on the label. Draining and rinsing may reduce some surface sodium, but check the label to see what applies to the specific product. Also look at the packing liquid, which may be water, brine, syrup, or sauce.

    General Label Checks

    • Read the ingredient list, serving size, and sodium per serving.
    • Watch for added sugars in canned fruit or sauced products.
    • Confirm the product fits your needs, including vegan preferences and allergen concerns.
    • Verify that "plant-based" items do not contain animal-derived ingredients in their sauces or seasonings.

    Quick checklist for the store:

    • [ ] Is the unit price lower than the alternatives?
    • [ ] Is the ingredient list short?
    • [ ] Are there sauces, butter, or cream I do not want?
    • [ ] Does the label say "no salt added" or similar, if I want that?
    • [ ] Will I realistically use the whole package?

    Common Mistakes to Avoid

    • Buying large bags or cans you will not finish. A bargain only counts if you use it.
    • Overcooking frozen vegetables. They are often partly cooked already, so they need less time than you might expect.
    • Adding salt before tasting canned items. Canned foods may already be seasoned.
    • Skipping unit price comparisons. Package size can hide the real cost.
    • Using the wrong form for the cooking method. Soft canned vegetables will not roast well, and frozen vegetables will not stay crisp in a raw salad.

    FAQs

    Is it better to buy frozen or canned vegetables on a budget?

    It depends on the dish and local prices. Frozen often suits stir-fries, curries, and sheet-pan meals, while canned suits soups, stews, and sauces. Compare unit prices and consider how likely you are to use the whole package.

    How do I keep frozen vegetables from getting soggy?

    Cook them from frozen over high heat, avoid crowding the pan, and pat off excess ice or moisture. For soups and curries, add them near the end of cooking.

    Do I need to rinse canned vegetables and beans?

    Not always. Rinsing can reduce surface salt or remove packing liquid you do not want, but some recipes benefit from the liquid. Check the label and match your choice to the dish.

    Conclusion / Key Takeaways

    Comparing frozen vs canned vegetables for a plant-based budget comes down to matching the form to the meal, not picking a winner.

    • Match the form to the cooking method. Fresh for crisp and roasted dishes, frozen for flexible weeknight meals, canned for simmered ones.
    • Keep a mix of fresh, frozen, and canned on hand so a change of plans does not mean wasted food.
    • Read labels for sauces, added ingredients, and sodium.
    • Store and rotate your food to cut waste.
    • Compare unit prices at your own store, since prices vary by region.

    Start with one week of 3–4 planned dinners, use the table and checklist above, and adjust based on what you actually finish.

  • How to Start a Plant-Based Diet for Beginners (A Simple 7-Day Plan)

    How to Start a Plant-Based Diet for Beginners (A Simple 7-Day Plan)

    This article contains affiliate links. We may earn a commission if you buy through them, at no extra cost to you.

    META DESCRIPTION: Learn how to start a plant-based diet for beginners with a gradual approach, a pantry checklist, common mistakes to avoid, and a simple 7-day meal plan with quick recipes.

    How to Start a Plant-Based Diet for Beginners (A Simple 7-Day Plan)

    Disclosure: This article may contain affiliate links. They don't change our recommendations.

    Busy and unsure where to begin? Start small. If you're wondering how to start a plant based diet for beginners, begin by adding more vegetables, fruits, whole grains, beans, nuts, and seeds to meals you already eat. Then swap animal-based items gradually, stock a simple pantry, and use a basic weekly plan to build routine. Go at a pace that fits your schedule, budget, and preferences.

    What "Plant-Based" Means

    Plant-based vs. vegan vs. vegetarian

    • Plant-based: A flexible term for eating mostly or entirely foods that come from plants. People define it differently.
    • Vegetarian: No meat or fish. Some vegetarians still eat dairy and eggs.
    • Vegan: No animal products at all, including dairy, eggs, and honey. Veganism is often also an ethical or lifestyle choice, not just a way of eating.

    Choose your starting style

    Style What it looks like
    Mostly plants Plants fill most of your plate; some animal foods stay
    One meal a day One plant-based meal daily, such as breakfast
    A few days a week Two or three fully plant-based days
    Fully plant-based No animal products

    Pick the approach that is realistic for you. There is no single "right" version.

    How to Switch Gradually (Step-by-Step)

    Step 1: Set a simple goal

    Choose something small and measurable, like "one plant-based meal a day" or "plant-based lunches on weekdays." A goal you can keep beats an ambitious one you abandon.

    Step 2: Start with meals you already like

    Look at what you already eat that is plant-based or close to it: veggie chili, pasta with vegetables, stir-fries, bean burritos, peanut butter sandwiches. Make those your first rotation.

    Step 3: Swap, don't overhaul

    Make one-for-one changes:

    • Plant milk in place of dairy milk
    • Beans or lentils in place of some or all ground meat
    • Olive oil in place of butter

    Step 4: Build balanced plates

    Aim for each meal to include:

    • Vegetables (fresh or frozen)
    • Whole grains or starches (rice, oats, potatoes, whole-grain bread)
    • A protein source (beans, lentils, tofu, or tempeh)
    • A fat source (nuts, seeds, avocado, olive oil)

    Step 5: Plan ahead for busy days

    Cook a pot of grains and a pot of beans once, then mix and match through the week. Our [Link: Plant-Based Meal Prep Guide] walks through the process. If you'd rather not cook every night, you can also look at plant-based dinner options for evenings when time is short.

    Plant-Based Pantry Starter List

    Start with a handful of items from each group rather than buying everything at once.

    Staples

    • Rice, oats, pasta, quinoa
    • Canned or dried beans and lentils
    • Whole-grain bread or tortillas

    Flavor builders

    • Garlic and onions
    • Spices (cumin, paprika, chili powder, curry powder)
    • Soy sauce, nutritional yeast, vinegar
    • Canned tomatoes

    Frozen and fresh basics

    • Frozen vegetables and fruit
    • Leafy greens
    • Bananas
    • Potatoes

    Nuts, seeds, and spreads

    • Peanut butter
    • Tahini
    • Chia seeds and ground flax

    For a printable version organized by store section, see our [Link: Plant-Based Grocery List for Beginners].

    Common Beginner Mistakes (and Easy Fixes)

    • Changing everything at once. Start with one or two swaps and add more when those feel automatic.
    • Relying only on processed substitutes. Plant-based meats and cheeses can be convenient, but mix them with whole foods like beans, vegetables, and grains.
    • Not eating enough variety or enough food overall. Plant-based meals can feel lighter at first. Build filling plates with starches, protein, and fat.
    • Overlooking nutrients. If you plan to be fully plant-based, ask a doctor or registered dietitian about nutrients such as vitamin B12.
    • Skipping planning. Keep a short list of go-to meals so you aren't deciding from scratch at 6 p.m.
    • Expecting perfection. Progress matters more than rules. An off day doesn't cancel your effort.

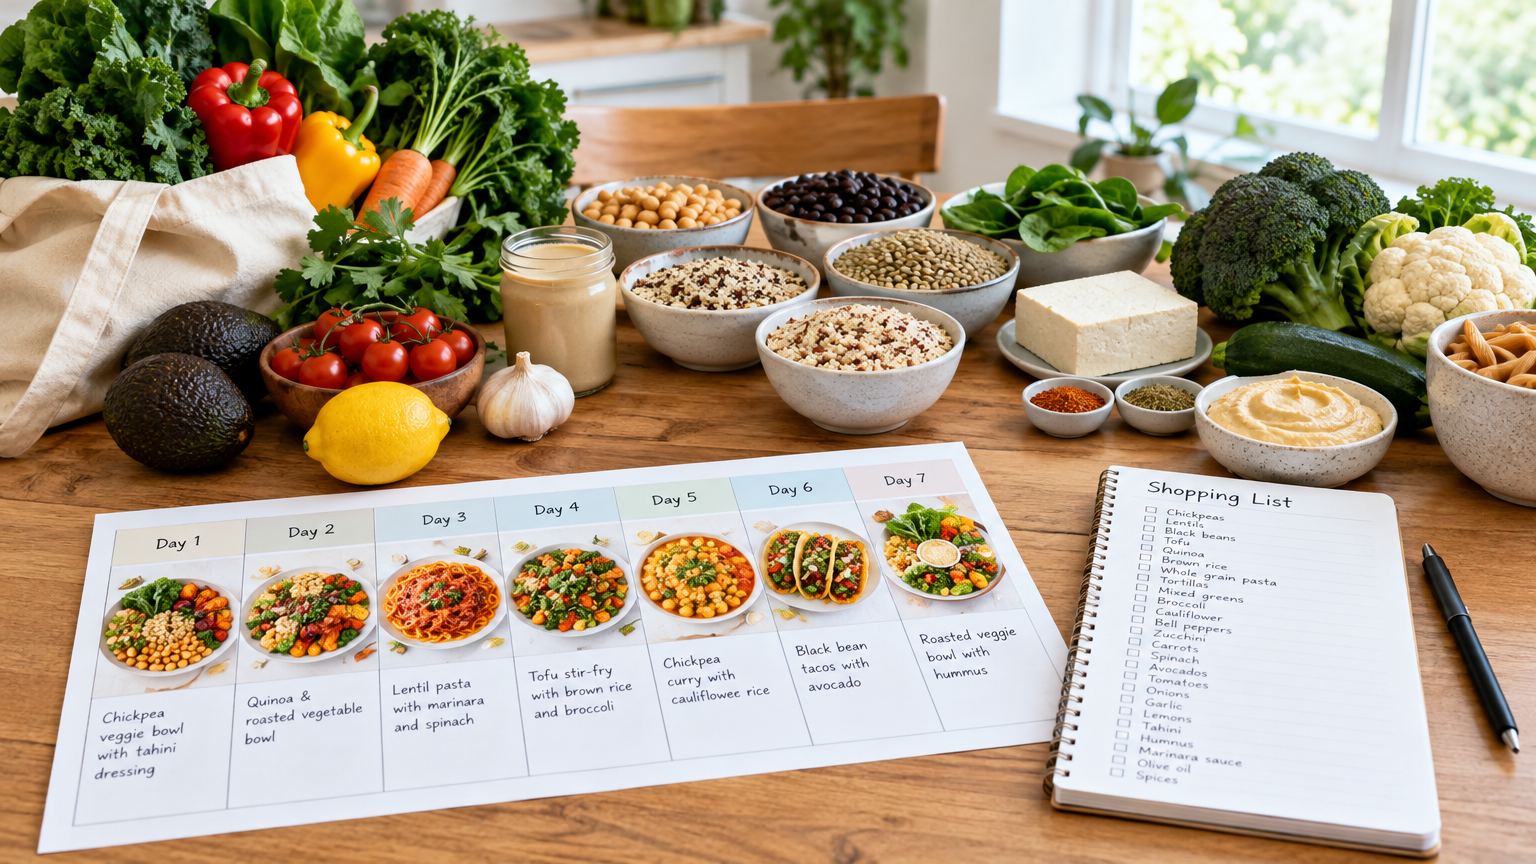
    Simple 7-Day Plant-Based Meal Plan

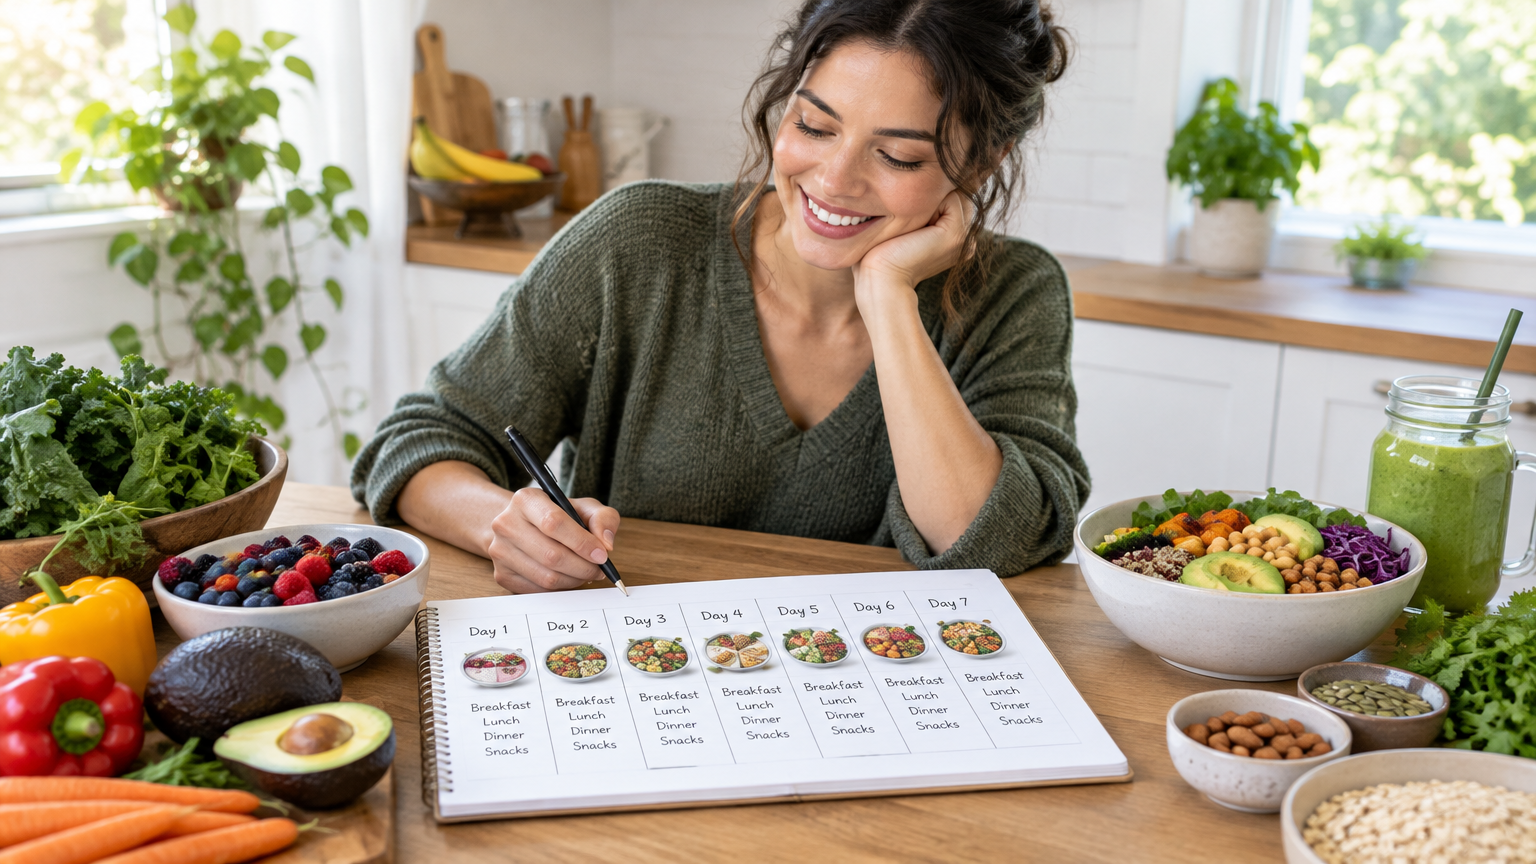
    This is a flexible template. Swap meals freely and adjust portions to your needs. Leftovers are built in to save time.

    Day 1

    • Breakfast: Overnight oats
    • Lunch: Hummus and veggie wrap
    • Dinner: Veggie stir-fry with tofu and rice

    Day 2

    • Breakfast: Peanut butter banana toast
    • Lunch: Leftover stir-fry bowl
    • Dinner: Pasta with marinara and white beans

    Day 3

    • Breakfast: Fruit and oat smoothie
    • Lunch: Lentil soup (canned or batch-cooked)
    • Dinner: Sheet-pan roasted vegetables and chickpeas

    Day 4

    • Breakfast: Tofu scramble
    • Lunch: Grain bowl with beans and greens
    • Dinner: Veggie tacos with black beans

    Day 5

    • Breakfast: Chia pudding
    • Lunch: Leftover taco bowl
    • Dinner: Coconut chickpea curry with rice

    Day 6

    • Breakfast: Oatmeal with fruit and nuts
    • Lunch: Big salad with beans, seeds, and whole-grain bread
    • Dinner: Veggie fried rice

    Day 7

    • Breakfast: Whole-grain pancakes or toast with fruit
    • Lunch: Leftover curry
    • Dinner: Veggie chili with baked potatoes

    Quick recipe notes

    Overnight oats: Stir ½ cup rolled oats, ½ cup plant milk, and 1 tablespoon chia seeds in a jar. Refrigerate overnight and top with fruit.

    Tofu scramble: Crumble firm tofu into an oiled pan with chopped onion and peppers. Season with turmeric, garlic powder, salt, and a splash of soy sauce, and cook until heated through.

    Chickpea curry: Sauté onion and garlic, then stir in curry powder. Add a can of chickpeas, a can of coconut milk, and canned tomatoes. Simmer about 15 minutes and serve over rice.

    Veggie chili: Cook onion, peppers, and garlic with chili powder and cumin. Add canned tomatoes, kidney and black beans, and a cup of water or broth. Simmer 25 to 30 minutes.

    Tips for busy days

    • Batch-cook grains and beans once, then use them all week.
    • Keep frozen vegetables on hand for fast stir-fries, soups, and curries.
    • Repeat meals. Eating the same breakfast most days is a perfectly good strategy.

    For more morning options, see [Link: Plant-Based Breakfast Ideas]. For prep routines, see the [Link: Plant-Based Meal Prep Guide].

    FAQ

    Do I have to give up animal products completely to start a plant-based diet?

    No. Many people start by increasing plant foods and reducing animal products gradually. Choose what suits you.

    How do I get enough protein on a plant-based diet?

    Include foods like beans, lentils, tofu, tempeh, edamame, whole grains, nuts, and seeds across your meals. For individual needs, consult a healthcare professional or registered dietitian.

    Is a plant-based diet expensive for beginners?

    It can be affordable when built around staples like beans, rice, oats, and frozen vegetables. Specialty products usually cost more. Our [Link: Plant-Based Grocery List for Beginners] focuses on basics.

    Key Takeaways / Next Steps

    • Start with one change this week, such as one plant-based meal a day.
    • Build on meals you already enjoy, and swap rather than overhaul.
    • Stock a small pantry of staples, flavor builders, and frozen basics.
    • Use the 7-day plan as a template, and repeat what works.

    Ready for the next step? Grab the [Link: Grocery List], explore [Link: Breakfast Ideas], or set up your week with the [Link: Meal Prep Guide].

    Note: This article is general information only, not medical advice. Consult a healthcare professional before making major dietary changes, especially if you have health conditions, are pregnant, or have special nutrition needs.

  • Rice Cooker vs. Instant Pot vs. Stovetop for Plant-Based Weeknight Dinners

    Rice Cooker vs. Instant Pot vs. Stovetop for Plant-Based Weeknight Dinners

    This article contains affiliate links. We may earn a commission if you buy through them, at no extra cost to you.

    Rice Cooker vs. Instant Pot vs. Stovetop for Plant-Based Weeknight Dinners

    Meta description: Compare a rice cooker, Instant Pot, and stovetop for plant-based weeknight dinners. See how each handles grains, beans, soups, and one-pot meals, and which suits your cooking style.

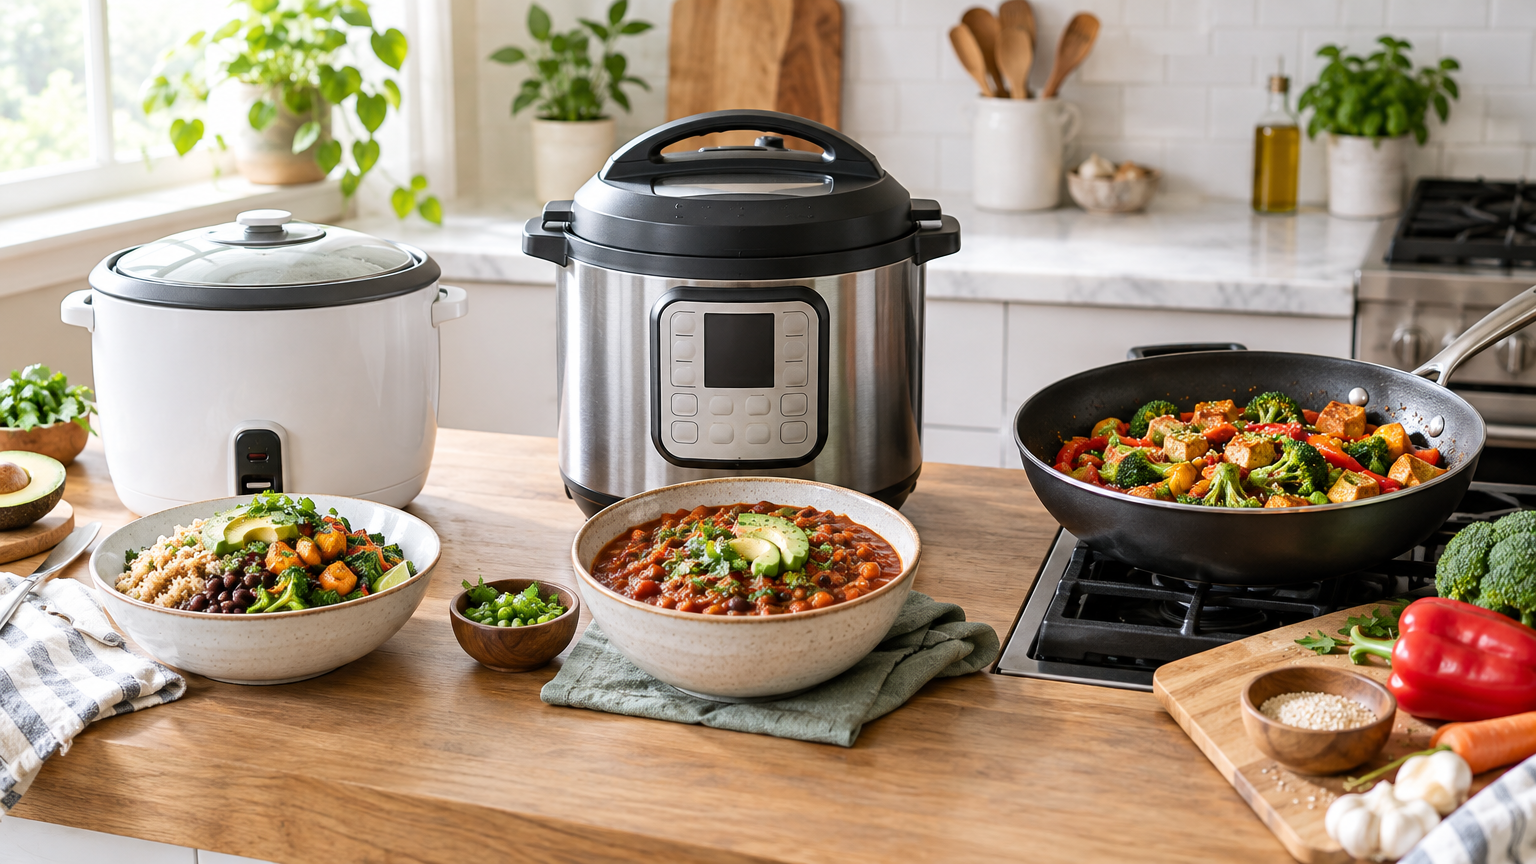
    Weeknight plant-based cooking tends to revolve around grains, beans, soups, and one-pot meals, and each cooking method handles those categories differently. This guide gives you a simple framework for comparing a rice cooker, an Instant Pot (or similar multi-cooker), and a regular stovetop, so you can settle the rice cooker vs instant pot for plant based meals question based on how you actually cook. It's written for people deciding what to buy, or which tool to reach for, before committing counter space and budget.

    Key takeaways

    • A rice cooker is the simplest, most focused option for hands-off grains and easy sides.
    • A multi-cooker like the Instant Pot covers the widest range of plant-based dinners but asks more of you up front.
    • The stovetop offers the most control and costs nothing extra if you already own pots.
    • Many households end up using two methods. Your most-cooked meals should drive the decision.

    Quick Answer: Rice Cooker vs Instant Pot for Plant-Based Meals

    • Rice cooker: Best if you mostly want hands-off grains and simple sides.
    • Instant Pot (multi-cooker): Best if you want one appliance for beans, soups, and one-pot meals and don't mind a learning curve.
    • Stovetop: Best if you want maximum control, already own pots, or have a tight budget and limited storage.

    There's no universal winner. The right choice depends on what you cook most often and what frustrates you most about weeknight cooking.

    How We're Comparing Them

    This is a framework-based comparison built on general feature descriptions, not lab testing or brand-specific performance claims. That keeps it useful across many models.

    The four meal categories

    1. Grains: rice, quinoa, millet, oats 2. Beans and lentils: dried or canned, as a main or a side 3. Soups and stews: brothy, blended, or hearty 4. One-pot meals: grain bowls, curries, chili, pilafs

    The four decision factors

    1. Counter space: where it lives and how much room it takes 2. Learning curve: how quickly you'll feel confident 3. Versatility: how many of your regular meals it can handle 4. Cleanup: how many parts and pans you'll wash

    A note on models: Features, capacity, settings, and safety guidance vary by model. Check the manufacturer's manual before relying on any function described here.

    Side-by-Side Comparison Table

    Counter space Learning curve Versatility Cleanup Best for
    Rice cooker Compact to moderate; single-purpose Low Narrow; focused on grains and simple dishes Typically a removable inner pot and lid Set-and-forget grain eaters
    Instant Pot / multi-cooker Moderate to large; multi-function Moderate; more settings and parts to learn Broad; grains, beans, soups, one-pot meals Inner pot plus lid and sealing ring Batch cooks and one-appliance fans
    Stovetop None extra; uses existing burners and pots Familiar, but most hands-on Broadest in principle, with your own attention Depends on how many pots and pans you use Hands-on cooks and budget-conscious kitchens

    Performance by Meal Type

    Grains (rice, quinoa, millet, oats)

    • Rice cooker: This is the task it was designed for. It's typically a simple, set-and-walk-away process, which frees you up to prep vegetables or tofu while the grain cooks.
    • Instant Pot: Many models include rice or grain settings. It's flexible, but there are more options to learn, and you'll want to follow the manual's liquid and setting guidance.
    • Stovetop: Reliable once you know your pot and burner, though it needs attention to heat and timing.

    Example: If Monday through Thursday looks like "grain plus roasted vegetables plus a sauce," a rice cooker handles the grain while you handle everything else.

    Beans and lentils

    • Instant Pot: Pressure cooking is a main selling point for dried beans. Follow the manual closely, since bean preparation and safety guidance matter here.
    • Stovetop: Familiar and flexible, but it needs monitoring, and you manage the simmer yourself.
    • Rice cooker: Generally not the primary tool for dried beans. Check your model's guidance rather than assuming it can.

    Example: If you like cooking a big pot of chickpeas on Sunday for the week, a pressure-capable multi-cooker or a patient stovetop approach both work. The difference is whether you'd rather stay nearby or press a button.

    Soups and stews

    • Instant Pot: You can sauté aromatics and then cook in the same pot, which cuts down on dishes.
    • Stovetop: It's easy to taste and adjust as you go, which many cooks prefer for seasoning and thickness.
    • Rice cooker: Limited, depending on the model. Some have additional settings, but it's rarely the first choice for soups.

    One-pot meals (grain bowls, curries, chili, pilafs)

    • Instant Pot: Combines sauté and cook functions, so a curry or chili can go from onions to finished dish in one vessel.
    • Stovetop: Offers the most control over texture and layering, such as toasting spices, browning, and adding ingredients at different stages.
    • Rice cooker: Works for simple rice-based dishes with added vegetables or legumes, depending on the model.

    Key Decision Factors

    Counter space and storage

    A rice cooker is usually the smaller appliance, though it still needs a home. Multi-cookers are generally bulkier and may need cabinet storage if you don't want them out all the time. The stovetop wins here because it uses equipment you already have. Measure your space before shopping, and compare the dimensions listed for specific models.

    Learning curve

    The rice cooker is the gentlest: add grain and water, press a button. A multi-cooker has more buttons, modes, and safety features, so expect to read the manual and run a few trial meals. The stovetop has no new gadget to learn, but it asks the most from you in the moment. You'll adjust heat, watch for boiling over, and judge doneness.

    Versatility

    The multi-cooker covers the most categories in one appliance. The stovetop is arguably just as versatile since it can do anything your cookware allows, but it requires your active attention. The rice cooker is the most specialized. It's excellent at its main job but a limited fit for beans, soups, and varied one-pot meals.

    Cleanup

    • Rice cooker: A removable inner pot and lid are often simple to wash, though some models have extra parts.
    • Multi-cooker: The inner pot is usually easy to clean, but the lid and sealing ring need regular attention, since ingredients like curry spices and onions can leave residue.
    • Stovetop: Cleanup depends on how many pots, pans, and utensils you use. A one-pot soup is easy. A three-pan dinner isn't.

    Which Appliance Fits Which Type of Cook?

    • The "set it and forget it" cook: A rice cooker. You get consistent grains without monitoring.
    • The batch-prep and meal-prep cook: A multi-cooker. Beans, soups, and one-pot meals can all come from a single appliance.
    • The hands-on, taste-as-you-go cook: The stovetop, for full control over seasoning, texture, and timing.
    • The small-kitchen or budget-conscious cook: The stovetop, or a single multi-use appliance if you want to consolidate gadgets.
    • The beginner: The stovetop if you already own pots, or a rice cooker for simplicity. A multi-cooker is manageable if you're willing to read the manual first.
    • The household cooking for a crowd: Capacity matters most. Check the stated capacity of any model you're considering [VERIFY per model], and compare it to the largest pot you own.

    If you're leaning toward a multi-cooker, you can browse multi-cooker options and compare capacities and settings before deciding.

    How to Choose: Practical Steps

    1. List your five most-cooked plant-based dinners. 2. Sort them into grains, beans, soups, or one-pot meals. The category that dominates your list points to your best fit. 3. Note your biggest frustration: time, attention, cleanup, or space. 4. Measure your counter and cabinet space. 5. Check the features and capacity of the models you're considering. 6. Read the manufacturer's instructions for beans and other legumes, especially for pressure cooking. 7. Start with one appliance. Add another only if a clear gap remains.

    If your list is mostly rice bowls with simple toppings, a rice cooker designed for everyday grains may be all you need. If you're still building your plant-based basics, our beginner plant-based pantry guide can help you pick which staples to cook first.

    Common Mistakes to Avoid

    • Buying a multi-cooker but using only one function. If you only ever make rice, a simpler appliance may serve you better.
    • Assuming one appliance replaces all others. Even versatile appliances have tradeoffs, and many cooks keep a stovetop in the mix.
    • Skipping the manual. Safety, care, and legume guidance vary by model, and pressure cooking in particular calls for following instructions.
    • Ignoring cleanup differences. A tool you dread washing is a tool you'll stop using. Compare parts, not just features.

    FAQs

    Can a rice cooker replace an Instant Pot for plant-based cooking?

    For grains and simple dishes, possibly. For beans, soups, and varied one-pot meals, a multi-cooker or stovetop is typically more versatile. It depends on your model's features, so check the manual.

    Is an Instant Pot better than the stovetop for beans and lentils?

    It depends on your priorities. A pressure cooker offers hands-off convenience, while the stovetop offers control and needs no extra equipment. Follow manufacturer guidance for either method.

    Which is easiest to clean?

    Appliances with removable inner pots are often simple to wash, but sealing rings and lids need attention in multi-cookers. Stovetop cleanup depends on how many pots you use.

    Final Recommendation

    The rice cooker vs instant pot for plant based meals decision comes down to how you cook:

    • Choose a rice cooker if grains are your foundation and you value simplicity.
    • Choose an Instant Pot or multi-cooker if you want one appliance for beans, soups, and one-pot meals and you're willing to learn it.
    • Choose the stovetop if you want control, already own the cookware, or are working with a limited budget and storage.

    Many cooks end up combining methods, such as a rice cooker for grains with a stovetop for everything else. Start with the one that fits your most common meals, and expand only if you hit a real gap.

    Ready to narrow it down? Use the steps above as a buyer's checklist, and revisit our beginner plant-based pantry guide to plan the first few meals you'll cook.

  • Best Budget Kitchen Tools for Plant-Based Cooking Beginners

    Best Budget Kitchen Tools for Plant-Based Cooking Beginners

    This article contains affiliate links. We may earn a commission if you buy through them, at no extra cost to you.

    Best Budget Kitchen Tools for Plant-Based Cooking Beginners

    Disclosure: This article contains affiliate links. If you buy through them, we may earn a commission at no extra cost to you. Our suggestions are based on the selection criteria stated in each section, not on hands-on testing.

    Plant-based dinners rely on chopping, browning, simmering, and roasting, so a few versatile tools cover most recipes. This guide is based on what each tool does and what to look for, not on hands-on testing or product rankings. It sorts tools into two tiers, must-have and nice-to-have, so you can spend only where it helps.

    The Short Answer: What You Actually Need

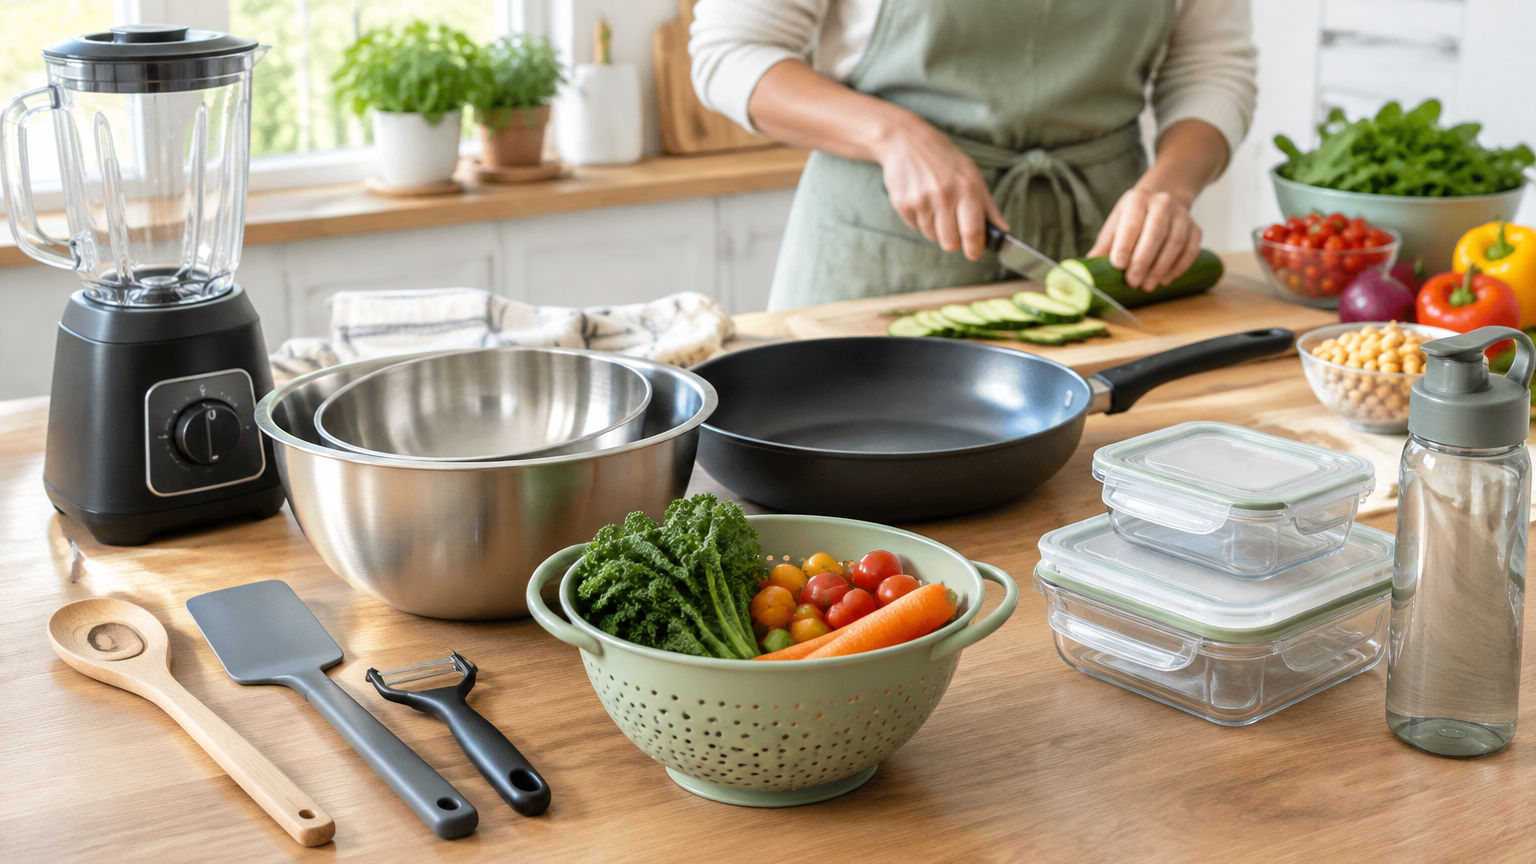
    The best kitchen tools for plant-based cooking on a budget are a good chef's or utility knife, a large skillet, a medium-to-large pot, and a rimmed sheet pan. A rice cooker and a blender are useful extras, not requirements.

    Key Takeaways

    • Four tools (knife, skillet, pot, sheet pan) cover most beginner plant-based dinners.
    • One versatile knife and a cutting board are worth more than a large set.
    • Buy optional items like a rice cooker or blender only after you notice a recurring need.
    • Check what you already own before buying anything.

    Quick-Reference Table

    Tool Role in plant-based dinners Tier
    Chef's or utility knife (plus cutting board) Prep for vegetables, greens, tofu Must-have
    Large skillet Sautéing, searing, stir-fries, one-pan meals Must-have
    Medium-to-large pot Soups, stews, beans, lentils, grains, pasta Must-have
    Rimmed sheet pan Roasting vegetables, chickpeas, tofu, potatoes Must-have
    Rice cooker Hands-off rice and other grains Nice-to-have
    Blender Sauces, soups, dressings, smoothies, nut-based creams Nice-to-have
    Colander, measuring tools, peeler, tofu press Small conveniences Optional

    Must-Have Tools (Start Here)

    These four tools handle the core techniques of vegetable-forward cooking: cutting, browning, simmering, and roasting.

    1. A Good Knife

    What it does: Plant-based cooking involves a lot of prep. Onions, squash, cabbage, carrots, leafy greens, and blocks of tofu all need cutting, and you'll do it often.

    Why it matters: A sharp, comfortable knife makes prep faster and safer than a dull one. A dull blade needs more force and can slip, which makes it harder to control.

    What to look for:

    • A comfortable grip that suits your hand
    • A manageable weight, since a knife that feels too heavy or too light is tiring to use
    • A blade length you can control, typically a chef's knife or a shorter utility knife
    • A blade that is easy to sharpen or maintain

    Budget tip: One versatile knife beats a large set. Many sets include pieces beginners rarely pick up. Pair your knife with a stable cutting board, which is a necessary companion rather than an accessory. A board that slides around makes any knife less safe. If you want to compare options, this chef's knife comparison is a place to start browsing against the criteria above.

    2. A Large Skillet

    What it does: A large skillet is the workhorse for sautéing vegetables, searing tofu or tempeh, toasting whole or ground spices, making stir-fries, and cooking one-pan meals.

    What to look for:

    • A wide cooking surface. Food browns when it has room. Crowded food tends to steam instead.
    • A lid, if possible. It helps with wilting greens or gently cooking denser vegetables.
    • A surface suited to your stove. Check your stove type (gas, electric coil, glass-top, or induction) against the skillet's specifications. [VERIFY compatibility on each product page before buying.]

    Material considerations (general):

    • Nonstick is forgiving for tofu and eggless scrambles, where sticking is a common frustration. Follow the manufacturer's care guidance to protect the coating.
    • Stainless steel or cast iron suit stronger browning but take more technique and care. They can be a good second skillet once you're comfortable.

    If you can buy only one, choose the material that matches how you expect to cook most often and how much upkeep you're willing to do.

    3. A Pot

    What it does: A pot handles soups, stews, chili, curries, beans, lentils, pasta, and grains. Many plant-based staples start in a pot.

    What to look for:

    • Enough capacity for batch cooking. Making a larger quantity gives you leftovers.
    • A lid that fits well. It helps with simmering and keeps liquid from evaporating too quickly.
    • A sturdy base. A solid base makes it easier to cook sauces and thick stews without scorching, though you'll still need to stir.

    Why it matters: Batch-cooked beans and grains support easy weeknight meals. Cook a pot of lentils or a big batch of chili once, and you have the base for several dinners.

    4. A Sheet Pan

    What it does: A sheet pan roasts vegetables, chickpeas, tofu, and potatoes with minimal effort. Toss ingredients with oil and seasoning, spread them out, and let the oven do most of the work.

    What to look for:

    • Rimmed edges to keep juices and small pieces from sliding off
    • Solid construction that resists warping at oven temperatures
    • A size that fits your oven. Measure the interior before you buy.

    Tip: Avoid overcrowding. Vegetables piled on top of each other trap moisture and steam instead of roasting. Use two pans if needed, or roast in batches. If you're shopping, this selection of rimmed sheet pans lets you compare sizes and construction against the checklist above.

    Nice-to-Have Tools (Add When Your Budget Allows)

    These tools add convenience or expand your repertoire, but none is required to cook good plant-based meals.

    Rice Cooker

    Best for: Hands-off rice and other grains, which frees up stove space.

    Who benefits: People who eat grain bowls often or who like to cook a grain while preparing other parts of the meal.

    Who can skip it: Anyone comfortable cooking grains in a pot. A pot with a tight-fitting lid does the same job with a bit more attention.

    Blender

    Best for: Sauces, soups, dressings, smoothies, and nut-based creams.

    Who benefits: People who want creamy sauces without dairy, or who enjoy smooth soups and dressings.

    Who can skip it: Anyone who mostly roasts and sautés. You can mash beans or vegetables by hand, chop ingredients finely, or choose recipes that don't need a smooth texture. If you're curious how a blender fits into plant-based cooking before buying, this guide to blender uses and features can help you decide.

    Other Optional Add-Ons

    Keep these small items in mind, but none is essential at the start:

    • Colander: Handy for draining pasta, rinsing canned beans, or washing produce. A large spoon or the pot lid can work in a pinch for some tasks.
    • Measuring cups and spoons: Useful for following recipes, especially grains, spices, and sauces.
    • Vegetable peeler: Speeds up prep for carrots, potatoes, and squash, though a knife can do the job.
    • Tofu press: Optional for pressing water from firm tofu. Some cooks simply wrap tofu in a clean towel and set something heavy on top.

    How to Choose on a Budget

    Work through these steps before you shop:

    1. List the meals you plan to cook in the next two weeks. Be realistic about how often you'll cook. 2. Match each meal to a tool. For example, roasted vegetables need a sheet pan, and soup needs a pot. 3. Buy the must-haves first, starting with the knife. Prep affects every recipe. 4. Check what you already own. You may have a usable pot, pan, or baking sheet. 5. Add one nice-to-have only after you notice a recurring need. If you keep wishing for smooth sauces, a blender may be worth it. If not, wait. 6. Consider secondhand or basic versions where safe and practical. Inspect items for damage, warping, or worn coatings. Be cautious with used nonstick pans and knives that can't be sharpened.

    Quick Checklist

    • [ ] I've listed my planned meals.
    • [ ] I've checked my kitchen for tools I already have.
    • [ ] I've confirmed my oven size and stove type.
    • [ ] I've chosen a knife that feels comfortable and a stable cutting board.
    • [ ] I'm buying only what my planned meals require.

    Sample Plant-Based Dinners Using Only the Must-Haves

    You don't need extras to get started. These ideas use only the four core tools:

    • Sheet pan roasted vegetables and chickpeas (sheet pan, knife): Chop vegetables, toss with chickpeas, oil, and seasoning, then roast.
    • Tofu and vegetable stir-fry (skillet, knife): Sear tofu, add chopped vegetables, and finish with a sauce.
    • Lentil or bean soup (pot, knife): Sauté onions and aromatics, add lentils or beans and liquid, and simmer.
    • Pasta with sautéed greens (pot, skillet): Boil pasta in the pot while greens wilt in the skillet with garlic and oil.

    Mistakes to Avoid

    • Buying large sets with tools you won't use. Start with individual pieces that match your meals.
    • Skipping knife care. Dull knives are harder to control. Learn how to hone and sharpen, or find a sharpening option you trust.
    • Overcrowding pans. Whether in the skillet or on the sheet pan, give food space to brown and roast.
    • Buying specialty gadgets before learning your cooking habits. Cook for a few weeks first, and let real frustrations guide your next purchase.

    Frequently Asked Questions

    What are the most essential tools for a plant-based kitchen?

    A good knife, a large skillet, a pot, and a sheet pan cover most beginner plant-based dinners. Add a stable cutting board with your knife.

    Do I need a blender or rice cooker to cook plant-based meals?

    No. Both are convenient but optional. A blender helps with smooth sauces and soups, and a rice cooker simplifies grains. Most recipes can be made without them.

    How can I build a plant-based kitchen on a budget?

    Prioritize the four must-have tools, buy only what your planned meals require, and add optional items over time. Check what you already own first.

    Conclusion

    Start with the four must-haves (knife, skillet, pot, and sheet pan), which handle chopping, browning, simmering, and roasting. Treat a rice cooker, blender, and small gadgets as nice-to-haves to add once your cooking habits show a real need.

    Pick the one must-have you're missing and plan a first meal around it. A sheet pan of roasted vegetables or a pot of lentil soup is an easy place to begin.

  • How to Cook Dried Beans and Lentils From Scratch (and When Canned Is Fine)

    How to Cook Dried Beans and Lentils From Scratch (and When Canned Is Fine)

    This article contains affiliate links. We may earn a commission if you buy through them, at no extra cost to you.

    How to Cook Dried Beans and Lentils From Scratch (and When Canned Is Fine)

    Dried beans are inexpensive, flavorful, and simpler to cook than most people expect. All you need is water, a pot, and a little patience. This guide covers soaking, simmering, and storing, compares lentils with beans and stovetop with pressure cooker, and explains when a can of beans is the smarter choice.

    Key takeaways

    • Sort, rinse, soak (optional for most beans), then simmer gently in fresh water.
    • Test for doneness by tasting. Cook times vary by bean type and age.
    • Lentils cook much faster than beans and usually need no soaking.
    • Add acidic ingredients after the beans are tender.
    • Canned beans are a good choice when time is short.

    Quick Answer: How to Cook Dried Beans for Beginners

    Sort and rinse the beans, then soak them for several hours or overnight (optional for most). Cover with fresh water and simmer gently until tender. Season near the end or with a modest amount of salt. Cool the beans and store them in their cooking liquid.

    Note: Cook times vary by bean type and age, so test for doneness rather than relying on the clock.

    What You Need

    Essentials

    • Dried beans or lentils
    • A large pot with a lid
    • A colander
    • Water
    • Salt

    Optional aromatics

    • Bay leaf
    • Garlic
    • Onion
    • Herbs

    Optional equipment

    • A pressure cooker, covered in more detail below

    Step-by-Step: Cooking Dried Beans on the Stovetop

    Step 1: Sort and Rinse

    Spread the beans on a plate or baking sheet and pick out small stones, debris, and shriveled or broken beans. Rinse them in a colander under cold running water.

    Step 2: Soak (Optional but Helpful)

    Overnight soak: Cover the beans with plenty of water, since they will expand. Leave them for 8 to 12 hours, then drain and rinse.

    Quick soak: Put the beans in a pot, cover with water, and boil briefly. Turn off the heat, cover, and let sit about 1 hour. Then drain.

    Why soak? Soaking usually shortens cooking time and can give a more even texture.

    What about no-soak? It works. Just expect a longer cook and check the water level more often.

    Step 3: Simmer

    Put the soaked (or unsoaked) beans in the pot and cover with fresh water by about 2 inches. Add aromatics if you like, such as a bay leaf, a smashed garlic clove, or half an onion. Bring to a boil, then reduce the heat to a gentle simmer.

    Skim off any foam that rises. Top up with hot water if the level drops below the beans. A gentle simmer matters because hard boiling can burst the skins and leave you with mushy, broken beans.

    Step 4: Season

    Add salt in moderation during cooking. A modest amount seasons the beans through, and you can adjust at the end. Wait to add acidic ingredients like tomatoes, vinegar, wine, or citrus until the beans are tender, because acid can slow softening.

    Step 5: Test for Doneness

    Scoop out several beans, since they don't all cook at the same rate, and taste them. Done beans are creamy inside with no chalky or grainy center. If any are still firm, keep simmering and check again in 10 to 15 minutes.

    Safety Note: Kidney Beans

    Raw or undercooked red kidney beans contain a natural toxin. Boil them hard for at least 10 minutes, then simmer until fully tender. Avoid cooking them from raw in a slow cooker, where the temperature may not get high enough.

    Lentils vs. Beans: Key Differences

    Comparison Table (Text Format)

    Factor Lentils Beans
    Soaking Generally not needed Usually beneficial
    Cook time Much faster, often under 30 minutes Longer, depending on type
    Texture Soften or break down Hold their shape better
    Best uses Soups, dals, quick salads Chili, stews, sides, salads

    Lentil Varieties at a Glance

    • Brown or green: Hold their shape moderately well. They are a good all-purpose choice.
    • Red or yellow: Cook quickly and break down, which makes them ideal for dals and thick soups.
    • Black or French green: Firmer, so they work well in salads.

    Basic Lentil Method

    1. Rinse the lentils and pick out any debris. 2. Add them to a pot with water or broth, using enough liquid to cover them by a couple of inches. 3. Bring to a boil, reduce to a simmer, and cook until tender. Start tasting early, since red lentils in particular can go from tender to mush quickly. 4. Drain if needed, or leave the liquid in for soups.

    Practical example: For a weeknight soup, simmer red lentils with diced onion, garlic, and broth, then stir in lemon juice at the end. For a salad, cook French green lentils until just tender, drain, and toss with a vinaigrette while still warm.

    Stovetop vs. Pressure Cooker

    Stovetop

    Pros

    • No special equipment
    • Easy to monitor and taste as you go

    Cons

    • Takes longer
    • Needs occasional attention

    Pressure Cooker (Electric or Stovetop)

    Pros

    • Faster and largely hands-off
    • Works with or without presoaking

    Cons

    • Requires equipment, such as an electric pressure cooker
    • Beans foam as they cook, so don't overfill
    • Times vary by model

    Tip: Follow your manufacturer's bean chart and fill limits. Those guidelines exist because foam can clog the vent.

    Which Should You Choose?

    • Choose stovetop if you cook beans occasionally, make small batches, or like having control over the process.
    • Choose a pressure cooker if you eat beans often or need to cook them at the last minute.

    How to Store Cooked Beans and Lentils

    Refrigerator

    Cool the beans promptly, then store them in an airtight container with some of their cooking liquid. Use them within a few days.

    Freezer

    Portion beans into containers or freezer bags with a little liquid. Leave headspace for expansion and label each container with the date. Freezing in meal-size portions lets you thaw only what you need.

    Reheating

    Warm beans gently on the stovetop or in the microwave. Add a splash of water or broth if they seem dry.

    Storing Dried Beans

    Keep dried beans in a cool, dry, airtight container. Older beans may take longer to soften, so try to use them within a reasonable time after buying.

    Canned vs. Dried: A Practical Decision Guide

    Neither choice is better in every situation. The right one depends on your time, equipment, and how you plan to use the beans.

    Choose Dried When…

    • You have time to plan ahead or can cook a large batch
    • You want to control salt and texture
    • You want the cooking liquid for soups or stews
    • Cost per serving matters to you

    Choose Canned When…

    • You need beans in minutes
    • You're making a weeknight meal with little prep
    • You have limited storage space or equipment
    • You only need a small amount

    Quick Decision Checklist

    • Under 30 minutes available? Use canned lentils or beans, or cook dried red lentils.
    • Have an evening to plan ahead? Soak dried beans overnight.
    • Meal prep day? Cook a big batch and freeze portions.
    • Want to reduce sodium in canned beans? Drain and rinse them, and check labels for "no salt added."

    Canned Beans Tips

    • Drain and rinse for a cleaner flavor.
    • Save the liquid (aquafaba) if a recipe calls for it.
    • Add canned beans near the end of cooking, since they're already tender.

    If you're building a weekly routine around beans and lentils, these plant-based dinner ideas can help you decide what to cook in bulk and what to keep canned.

    Common Mistakes to Avoid

    • Not testing for doneness. Taste several beans rather than trusting the timer.
    • Boiling too aggressively. A hard boil can burst the skins.
    • Adding acid too early. Tomatoes, vinegar, and citrus can slow softening.
    • Using very old beans. They can take much longer to soften and may never become fully creamy.
    • Overfilling a pressure cooker. Foaming can block the vent, so respect the fill limits.

    FAQs

    Do I have to soak dried beans before cooking?

    Not always. Soaking usually shortens cooking time and can help beans cook evenly, but unsoaked beans will cook with more time. Lentils typically don't need soaking.

    Why are my beans still hard after hours of cooking?

    Common causes are old beans, very hard water, acid added too early, or not enough simmering time. Keep simmering, add water as needed, and test regularly.

    How long do cooked beans last in the fridge or freezer?

    Refrigerate them in an airtight container and use within a few days. Freeze for longer storage. Follow food safety guidance and discard beans that smell or look off.

    Conclusion

    Cooking beans comes down to four steps: soak, simmer, season, and store. Start with one easy bean or lentil, such as red lentils or black beans, and get comfortable with the process. Keep a few cans in the pantry for busy days, because both approaches have a place in your kitchen.

  • One-Pot Plant-Based Dinners: Easy Recipes With Few Ingredients

    One-Pot Plant-Based Dinners: Easy Recipes With Few Ingredients

    This article contains affiliate links. We may earn a commission if you buy through them, at no extra cost to you.

    One-Pot Plant-Based Dinners: Easy Recipes With Few Ingredients

    Suggested title tag: One-Pot Plant-Based Dinners: Easy Recipes With Few Ingredients Suggested meta description: Learn four simple one-pot plant-based dinner formats (chili, curry, pasta, and rice-and-bean skillets) with basic methods, shared ingredients, and easy cleanup tips.

    Weeknight dinners get easier when you use one pot, a short ingredient list, and a method you can repeat. This guide covers four flexible formats (chili, curry, pasta, and rice-and-bean skillets), gives a basic method for each, and shows how their ingredients overlap so one shopping trip covers several meals.

    Quick Answer

    One pot plant based dinners are meals cooked in a single pot, pan, or skillet using ingredients like beans, lentils, grains, pasta, vegetables, and spices. Build flavor by sautéing aromatics first, add the main ingredients and liquid, simmer until tender, then season at the end. Chili, curry, pasta, and rice-and-bean skillets are good starting formats.

    Key Takeaways

    • Every format below follows the same six-step method, so you only learn one technique.
    • Onion, garlic, canned tomatoes, beans, broth, and a few spices cover most of the shopping list.
    • A wide, heavy-bottomed pot with a lid makes cooking easier and cleanup lighter.
    • Cooking times here are approximate. Always check package directions for rice, pasta, and lentils.

    What Makes a Good One-Pot Plant-Based Dinner?

    A good one-pot dinner has a few parts that work together. Once you know the parts, you can build meals from whatever is in your pantry.

    Core building blocks

    • Aromatics: onion and garlic (ginger works for curries).
    • Plant protein: canned beans, lentils, chickpeas, or tofu.
    • Starch or grain: rice, pasta, or potatoes.
    • Vegetables: fresh or frozen, whichever you have.
    • Liquid: broth, water, canned tomatoes, or coconut milk.
    • Seasoning: spices, salt, and an acid such as lemon juice or vinegar.

    Why "few ingredients" works

    Pantry staples carry most of the flavor. Canned tomatoes add body and tang, and a spice blend such as chili powder or curry powder replaces a long list of individual jars. Because the same handful of items shows up in several meals, you buy less and waste less.

    Basic One-Pot Method (Works for Every Format)

    Learn this sequence once and you can adapt it to any dish below.

    1. Heat oil in the pot and soften the aromatics (onion first, then garlic). 2. Add spices and stir briefly, just until fragrant, to bring out their flavor. 3. Add the main ingredients and liquid: beans, lentils, grains, pasta, tomatoes, and broth. 4. Bring to a simmer, then cover or partially cover and stir occasionally. 5. Cook until tender: the grain, pasta, or vegetables should be done. 6. Taste, adjust salt and acid, and serve.

    Four One-Pot Dinner Formats

    1. One-Pot Bean Chili

    Core ingredients: onion, garlic, canned beans, canned tomatoes, chili powder, cumin, broth or water.

    Method: Sauté the onion and garlic in oil until soft. Stir in the chili powder and cumin for about a minute. Add the beans, tomatoes, and enough broth or water to keep things loose. Simmer, partially covered, until thickened. This usually takes about 20 to 30 minutes.

    Beginner tip: Mash a few beans against the side of the pot with your spoon to thicken the chili without adding anything extra.

    2. One-Pot Chickpea or Lentil Curry

    Core ingredients: onion, garlic, ginger, chickpeas or lentils, curry powder, canned tomatoes or coconut milk.

    Method: Sauté the onion, garlic, and ginger. Add the curry powder and toast it for a minute. Add the chickpeas or lentils with your liquid (tomatoes, coconut milk, broth, or a mix) and simmer. Stir in a handful of spinach or other greens at the end so they wilt without turning dull.

    Beginner tip: Lentil cooking times vary by type, so check the package. Canned chickpeas only need to heat through and absorb flavor, which makes them the faster choice.

    3. One-Pot Pasta

    Core ingredients: pasta, garlic, canned tomatoes or tomato sauce, vegetables, broth or water.

    Method: Sauté the garlic briefly. Add the liquid and the pasta, then simmer and stir often until the pasta is tender. Stir in spinach or other quick-cooking vegetables near the end, and season once the pasta is done. Many pastas take roughly 10 to 15 minutes, but follow the package for your shape.

    Beginner tip: Stir frequently so the pasta doesn't stick to the bottom. If the pot dries out before the pasta is tender, add a splash more liquid.

    4. Rice-and-Bean Skillet

    Core ingredients: rice, canned beans, onion, spices, salsa or tomatoes, broth or water.

    Method: Sauté the onion. Add the rice and spices and stir for a minute so the grains are coated. Pour in the liquid and salsa, bring to a simmer, then cover and cook on low until the rice is tender. Stir in the beans at the end to heat through.

    Beginner tip: Start with the rice package's liquid ratio, then adjust for the extra moisture from tomatoes or salsa. Resist lifting the lid too often, since steam does much of the cooking.

    Ingredient Overlap: Shop Once, Cook Four Ways

    Many of these meals share the same pantry items, so a single list can cover all four dinners.

    Ingredient Chili Curry Pasta Rice-and-Bean Skillet
    Onion and garlic ✓ ✓ ✓ ✓
    Canned tomatoes ✓ ✓ ✓ ✓
    Beans or chickpeas ✓ ✓ Optional ✓
    Broth or water ✓ ✓ ✓ ✓
    Cumin, chili powder, or curry powder ✓ ✓ – ✓
    Frozen vegetables or leafy greens ✓ ✓ ✓ ✓

    Simple shopping list for a week of one-pot meals

    • Onions and garlic (plus a knob of ginger if making curry)
    • Canned diced or crushed tomatoes
    • Canned beans (such as black or kidney) and canned chickpeas
    • Dried lentils, if you prefer them in curry
    • Long-grain rice
    • One box of pasta
    • Vegetable broth (or just use water)
    • Chili powder, cumin, and curry powder
    • Salsa
    • Frozen vegetables and a bag of spinach
    • Lemon or vinegar for finishing

    If you want more ideas for using the same staples, browse these plant-based one-pot recipe ideas for inspiration on rotating flavors through the week.

    Minimal Cleanup Tips

    One-pot cooking only saves effort if you also keep the rest of the kitchen tidy. These habits help:

    • Choose the right cookware. A wide, heavy-bottomed pot or deep skillet with a lid distributes heat more evenly and helps prevent scorching. If you're shopping for one, a wide, deep pot or skillet with a lid is the type to look for.
    • Prep on one cutting board. Chop everything in order, and open cans before you start cooking.
    • Use a single spoon for stirring and tasting. Rest it on a small plate or the pot lid.
    • Soak the pot right after serving with warm water to loosen stuck-on food.
    • Cook extra. Leftovers mean fewer dishes on a future night.

    Beginner-Friendly Technique Tips

    • Don't skip the aromatics. Softening onion and garlic first builds a flavor base that water and canned goods can't provide on their own.
    • Keep the heat at a gentle simmer. A hard boil makes food stick and scorch, especially rice and pasta.
    • Add delicate vegetables near the end. Spinach, peas, and other quick-cooking vegetables only need a few minutes.
    • Taste before serving. Adjust salt, spice, and acid. A squeeze of lemon or splash of vinegar often brightens a dish that tastes flat.
    • Rinse canned beans if you want to control sodium or remove the canning liquid. Skip rinsing if you want the liquid to help thicken a dish like chili.

    Easy Variations and Substitutions

    Once a format is familiar, swap ingredients freely:

    • Beans: black beans, pinto beans, white beans, or chickpeas all work in chili and skillets.
    • Grains: brown rice or quinoa can replace white rice, but adjust the liquid and time according to the package.
    • Pasta: whole wheat or gluten-free pasta works too. Check the package times, since they can differ from standard pasta.
    • Toppings: avocado, fresh herbs, lime, nutritional yeast, or plant-based yogurt add freshness and texture without extra cooking.

    Storage and Reheating

    • Cool leftovers, then refrigerate them in airtight containers.
    • Reheat thoroughly, adding a splash of water or broth to loosen the texture.
    • Pasta and rice dishes may thicken as they sit, so expect to add a little liquid when you reheat them.

    FAQ

    What are the easiest one pot plant based dinners for beginners?

    Bean chili and rice-and-bean skillets are the simplest. They rely on canned beans and need very little technique beyond sautéing and simmering.

    Can I make one-pot plant-based dinners without a lot of ingredients?

    Yes. Use pantry staples like onion, garlic, canned tomatoes, beans, spices, and broth, and build several meals from the same list.

    How do I keep one-pot pasta or rice from sticking?

    Use a heavy-bottomed pot, keep the heat at a gentle simmer, stir as needed, and make sure there is enough liquid.

    Conclusion

    One pot plant based dinners come down to one method and a handful of staples. Pick a format, follow the six basic steps, and adapt it with whatever beans, vegetables, and spices you already have. Start with the format that best fits your pantry, then rotate in the others during the week. By the third meal, you'll likely be cooking without a recipe.

  • 7-Day Beginner Plant-Based Dinner Plan With a Simple Shopping List

    7-Day Beginner Plant-Based Dinner Plan With a Simple Shopping List

    This article contains affiliate links. We may earn a commission if you buy through them, at no extra cost to you.

    7-Day Beginner Plant-Based Dinner Plan (With One Shopping List)

    If you're new to plant-based cooking and want simple dinners, less food waste, and a lower grocery bill, this plan is for you. It uses one shopping trip, one short Sunday prep session, and seven dinners built from overlapping ingredients.

    Key takeaways

    • Seven dinners share a small set of staples: beans, lentils, tofu, rice, pasta, and a few vegetables.
    • Every fresh item is used in at least two meals.
    • Rice, beans, roasted sweet potatoes, and sauces are prepped once and reused.
    • Swap suggestions cover common allergens and dislikes, so you can adapt any dinner.

    The Short Answer: What a Beginner Plant-Based Dinner Plan Looks Like

    A beginner plant based dinner plan repeats a small set of staples (beans, lentils, tofu, rice, pasta, and a few vegetables) in different flavor styles across the week. Cook grains and beans once, reuse vegetables, and change the sauce or spice so dinners feel varied without a long shopping list.

    Note: Quantities depend on household size, so adjust the amounts as needed.

    How the Plan Cuts Waste and Cost

    Overlapping ingredients

    Each fresh item appears in at least two meals. Cabbage goes into the tacos and the peanut noodles. Spinach shows up in the curry and the lentil pasta. Sweet potatoes are roasted once for Day 1 and Day 7. Broccoli appears in the fried rice and the noodles, and onions run through the curry, pasta, and more. Because you buy fewer unique ingredients, less of the produce drawer goes unused.

    Pantry-first structure

    Dried and canned staples form the base of every dinner: rice, pasta, lentils, canned beans, chickpeas, tomatoes, and coconut milk. Fresh produce fills in around them. Many of these items keep well, so a busy week doesn't put your groceries on a countdown. Frozen peas and corn add flexibility, too.

    Planned leftovers

    Rice is cooked once and used in four dinners (Days 2, 3, 5, and 7). The peanut sauce is mixed once and stretched to a second meal. Leftover roasted sweet potatoes become a bowl topper later in the week. Planning leftovers on purpose turns "what's in the fridge?" into a head start.

    The 7-Day Dinner Plan

    Here's the week at a glance, followed by details for each night.

    Day Dinner Reused from the week
    1 Black Bean and Sweet Potato Tacos Sweet potatoes, cabbage, black beans
    2 Chickpea Coconut Curry Over Rice Chickpeas, spinach, onion, rice
    3 Tofu Veggie Fried Rice Leftover rice, broccoli, carrots
    4 Red Lentil Tomato Pasta Diced tomatoes, onion, spinach
    5 Burrito Bowls Rice, black beans, avocado, lime
    6 Peanut Noodles With Broccoli and Cabbage Broccoli, cabbage, carrots, lime
    7 Sheet-Pan Chickpea and Sweet Potato Bowls Sweet potatoes, rice, peanut sauce

    Day 1 – Black Bean and Sweet Potato Tacos

    Main ingredients: tortillas, black beans, roasted sweet potato, shredded cabbage, lime, avocado. Reuse note: Roast extra sweet potato for Day 7, and set aside half the beans and cabbage for later in the week.

    Day 2 – Chickpea Coconut Curry Over Rice

    Main ingredients: chickpeas, coconut milk, diced tomatoes, onion, spinach, curry powder, rice. Reuse note: Save some chickpeas for Day 7. Freeze any extra curry in portions.

    Day 3 – Tofu Veggie Fried Rice

    Main ingredients: leftover rice, tofu, carrots, broccoli, frozen peas, soy sauce. Reuse note: Cold, day-old rice works well here, which is why this dinner follows the curry. Use up the prepped carrots and broccoli.

    Day 4 – Red Lentil Tomato Pasta

    Main ingredients: pasta, red lentils, diced tomatoes, onion, garlic, spinach. Reuse note: This is a pantry-heavy night. It uses up the rest of the spinach and the second can of tomatoes.

    Day 5 – Burrito Bowls

    Main ingredients: rice, black beans, corn, bell pepper, avocado, salsa, lime. Reuse note: Reuse the taco spice mix and leftover beans, and use frozen corn straight from the bag.

    Day 6 – Peanut Noodles With Broccoli and Cabbage

    Main ingredients: noodles or pasta, peanut butter, soy sauce, broccoli, cabbage, carrots, lime. Reuse note: Make extra peanut sauce so Day 7 is easier.

    Day 7 – Sheet-Pan Chickpea and Sweet Potato Bowls

    Main ingredients: roasted chickpeas, sweet potato, bell pepper, rice, leftover peanut sauce or lemon dressing. Reuse note: This is the "clean out the fridge" dinner. Roast the chickpeas and bell pepper on one pan, and add the prepped sweet potato and rice.

    Consolidated Shopping List

    Quantities depend on your household size, so scale the list up or down. Before you shop, see the notes at the end of this section.

    Pantry and Canned Goods

    • Brown or white rice
    • Pasta
    • Rice noodles or spaghetti
    • Red lentils
    • Canned black beans, chickpeas, diced tomatoes, and coconut milk
    • Peanut butter, soy sauce, olive oil, and salsa
    • Spices: curry powder, cumin, chili powder, salt, pepper

    Fresh Produce

    • Sweet potatoes
    • Yellow onions
    • Garlic
    • Carrots
    • Broccoli
    • Bell peppers
    • Green cabbage
    • Spinach
    • Avocados
    • Limes
    • Cilantro (optional)

    Refrigerated and Frozen

    • Firm tofu
    • Corn tortillas or flour tortillas
    • Frozen peas
    • Frozen corn

    Before You Shop

    • Check what you already own and cross off pantry duplicates. Spices and oils are the usual repeats.
    • Buy store-brand canned goods where possible. Frozen vegetables are a fine substitute for fresh.
    • If you want a place to start with recipes and technique, a beginner-friendly plant-based cookbook can help you build confidence beyond this one week.

    Sunday Prep Checklist

    Plan on about 60–90 minutes. Work in this order so the rice cools while you do everything else.

    • [ ] Cook a large pot of rice; cool and refrigerate
    • [ ] Rinse and drain canned beans and chickpeas
    • [ ] Roast sweet potatoes (enough for Days 1 and 7)
    • [ ] Shred cabbage; chop onions, carrots, bell peppers, and broccoli
    • [ ] Press and cube tofu
    • [ ] Mix peanut sauce (peanut butter, soy sauce, lime, water) for Day 6 plus extra for Day 7
    • [ ] Make a simple spice mix for tacos and bowls
    • [ ] Label containers by day; store cut vegetables airtight

    Practical example of a spice mix: combine cumin, chili powder, salt, and pepper in a small jar. Use it on the taco beans on Day 1, in the burrito bowls on Day 5, and on the roasted chickpeas on Day 7.

    Clear, stackable airtight food storage containers make labeling by day easier, though any containers you already own will work.

    Note: Store and reheat leftovers following standard food-safety guidance.

    Swaps for Common Dislikes and Allergens

    Allergen Swaps (always check labels)

    • Soy: Swap tofu for extra chickpeas or white beans, and use a soy-free seasoning sauce in place of soy sauce.
    • Peanut: Use sunflower seed butter, or another seed butter if tolerated, in the Day 6 sauce.
    • Gluten: Use rice noodles, gluten-free pasta, corn tortillas, and tamari labeled gluten-free.
    • Coconut: Use a different creamy base, such as blended white beans with vegetable broth, in the curry.

    Packaged foods vary by brand, so read ingredient and allergen labels every time, even for items you've bought before.

    Dislike Swaps

    • Beans (texture): Mash them lightly, or use lentils.
    • Cilantro: Use parsley, or skip it.
    • Spicy food: Reduce the chili powder and add heat at the table.
    • Avocado: Use hummus or a spoonful of salsa.
    • Cabbage: Use lettuce or extra carrots.
    • Broccoli: Use green beans or zucchini.

    When you swap, keep the ingredient's job in mind. Cabbage adds crunch, avocado adds creaminess, and tofu adds protein-style bulk, so choose a replacement that fills the same role in the dish.

    Tips for Making the Plan Work

    • Start small. If a full week feels like too much, swap in only a few of these dinners and keep your usual meals for the rest.
    • Season at the end. Taste and adjust salt, acid (lime or lemon), and spice just before serving. A squeeze of lime often does more than extra salt.
    • Freeze extras. Freeze extra cooked rice and curry in portions so a future night is already handled.
    • Keep the order. The plan puts the most perishable items (spinach, avocado, broccoli) in the first half of the week and sturdier ones (cabbage, carrots, sweet potatoes) later. If you rearrange days, keep that logic.
    • Use the frozen aisle. Frozen peas and corn cost little effort and rarely go to waste.

    FAQs

    Can I make this plan for one person?

    Yes. Scale recipes down, freeze extra portions, and buy smaller produce amounts or frozen vegetables. Canned beans and cooked rice freeze or store well, so you won't need to eat the same dinner several nights in a row.

    Can I prep ahead for more than one week?

    Cooked rice, beans, and sauces can be frozen. Keep fresh vegetables for the week you will use them, and chop them close to the day you need them.

    What if I do not have time to cook every night?

    Use the Sunday prep, cook double batches on busy nights, and use leftovers for lunch or another dinner. Even a partial prep of rice and beans makes weeknight cooking quicker.

    Conclusion

    A beginner plant based dinner plan works best when it stays simple: a short list of staples, a single prep session, and flavor changes that keep dinners from feeling repetitive. This week of tacos, curry, fried rice, pasta, bowls, noodles, and sheet-pan dinners gets there with overlapping ingredients and planned leftovers.

    To get started, print the shopping list, choose a prep time, and swap in any dinner that fits your household. If you'd like more ideas once this week is done, a collection of plant-based dinner recipes for beginners is a natural next step.